Workflow Overview
- Print
- DarkLight
- PDF
Workflow Overview
- Print
- DarkLight
- PDF
Article summary
Did you find this summary helpful?
Thank you for your feedback!
Report Writer Overview
Report Writer consists of three major components:
- Report Writer Database: Report Writer is accessed with your browser at reportwriter.lightboxre.com. You will use the property database to manage your comparable & subject properties, and view jobs and contacts. It also includes download links for the current versions of the LightBox Excel and LightBox Word templates.
- Excel: Excel is where you will conduct your analysis work, using comps from the property database.
- Word: Once you've completed your analysis in Excel, you will import your data into a narrative report document using Word.
Installation and Updater
Begin by installing and then updating Report Writer. Once installed, you will have access to Excel and Word on your computer. Instructions for installing Report Writer and running the Updater are available on the Installation page.
Accessing the Report Writer Database
The Report Writer database is where you will manage your comparables, Jobs, and Contacts. To access, open reportwriter.lightboxre.com in any contemporary web browser (we suggest Chrome, for the best experience) and click on the Report Writer application.
There are also shortcut buttons for accessing the database in the Valuation Excel template; these are simply a convenience and are not required to access the database.
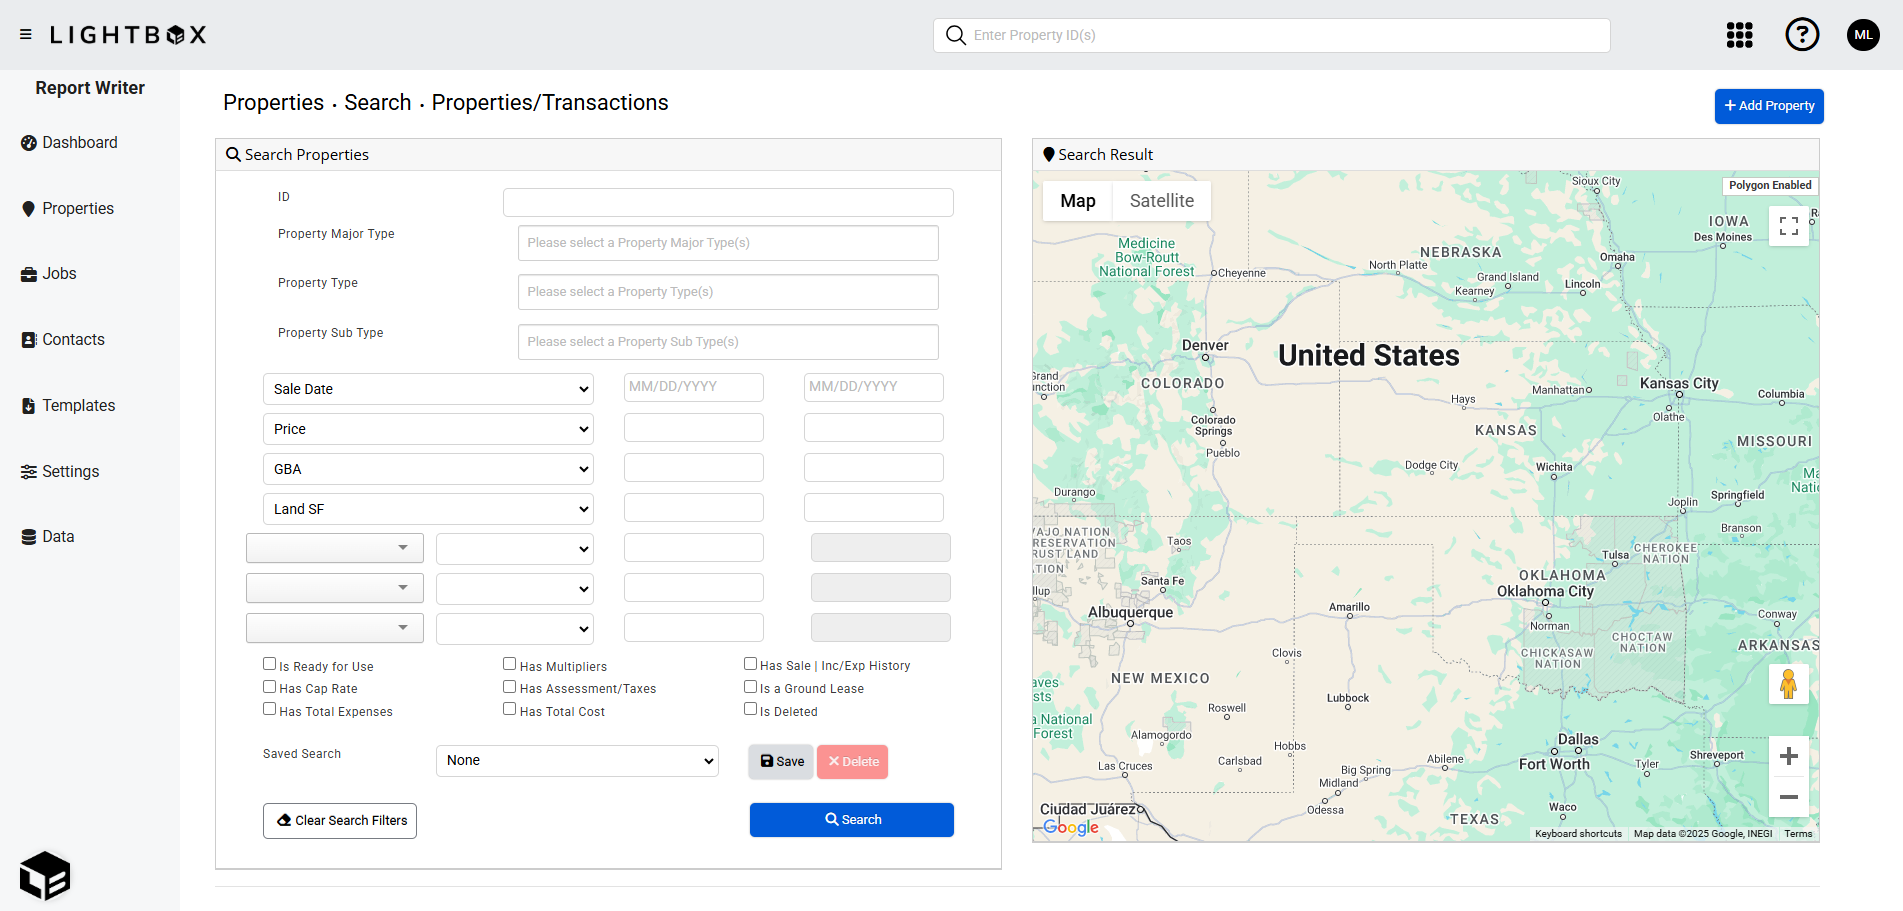
Inserting Initial Comparables
You will most likely want to start by inserting data for properties, which can later be imported into your Excel workbook as your subject property or as comparables. You can find a description of this process on the Quick Start: Creating a Comp page.
For instructions on how to view comparables, visit Quick Start: Viewing Comps.
For more detailed information on the individual pages that appear when editing a comparable, read the information on Data Pages.
Data Import and Merge Duplicates
Data Import is a helpful module that allows you to easily import a spreadsheet of comps into your database and resolve duplicates. Read the documentation on Data Import.
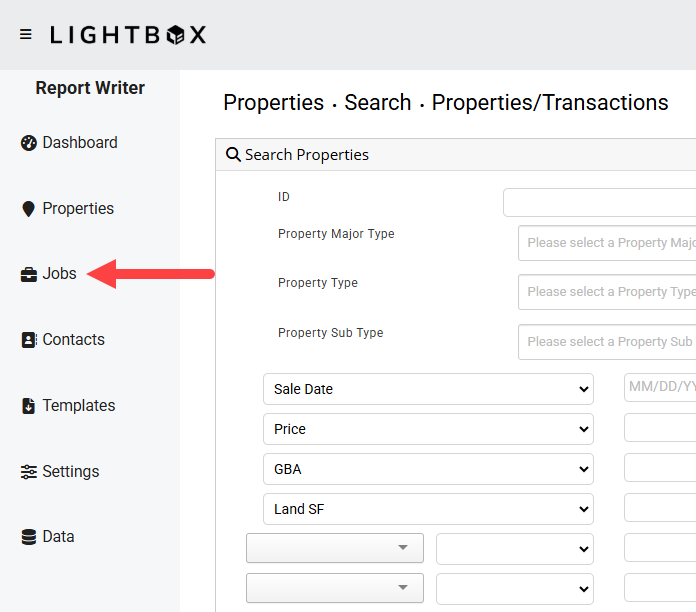
Jobs Manager
The Report Writer Jobs Manager helps track and manage historical Job information. Information that can be associated with a Job includes client and property contact info, fees and invoices, Job locations, comparables, and more.
To create a new Job record, click Jobs in the navigation bar on the left.
On the Jobs page, click Add New Job.

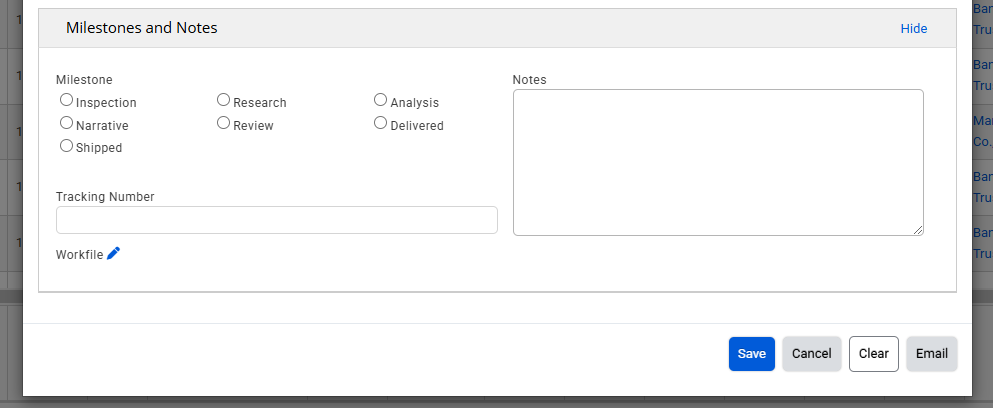
The Jobs Detail modal will open. The modal is broken up into eight sections: Subject Property, Job Details, Contact Information, Scope of Work, Fees, Job Dates, Comps Used, and Milestones and Notes.
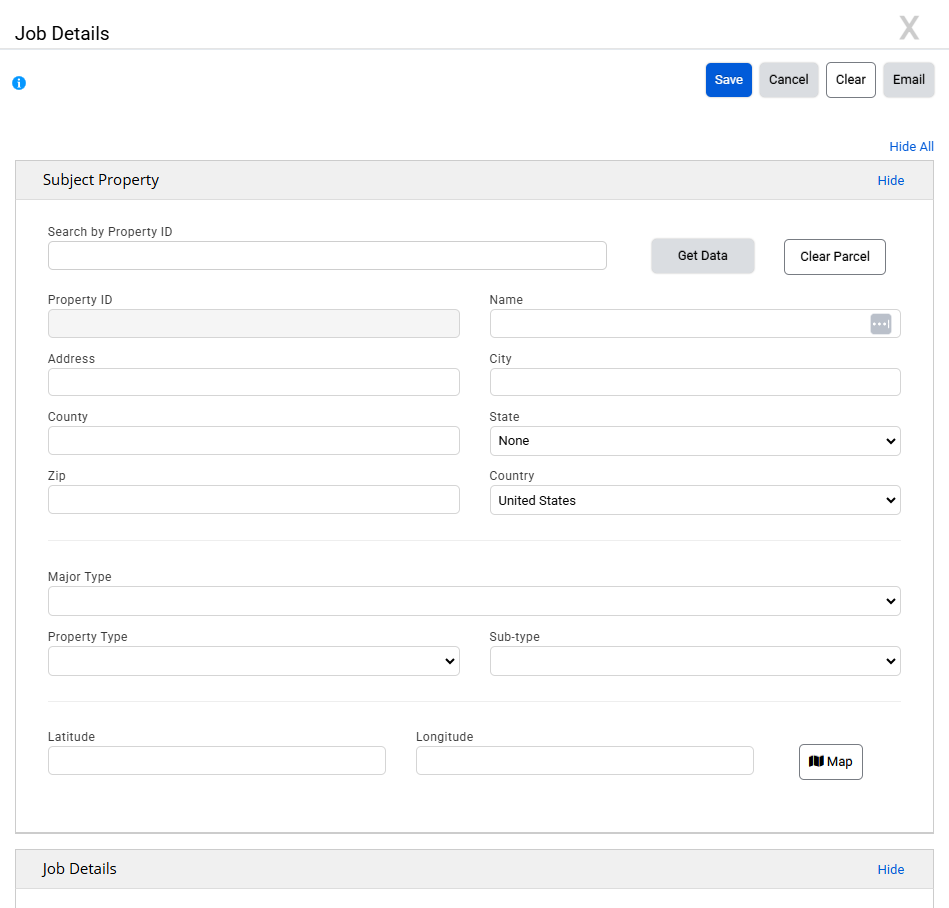
If your subject property already exists in your property database as a property record, simply type or paste the Property ID into the Search by Property ID field and click Get Data. If the subject is not already in the database, simply fill out the fields and a new property record will be created for you.
Complete the Job Details fields manually. Fields with a red asterisk are required. Click Save at the bottom of the modal to create the Job.
Getting Started with the Valuation Excel Model
Updating and Managing the Report Writer Default Templates
After the Updater has been run for the first time, the default Valuation Word and Valuation Excel templates are created in Documents\Narrative1\Narrative1 Templates. Within that folder, the files in \Default Templates\General Use are re-updated every time the Updater is run.
If you want to customize a default template, it's best to edit it in any folder other than\Default Templates\General Use; that will ensure the Updater does not overwrite your custom template files.
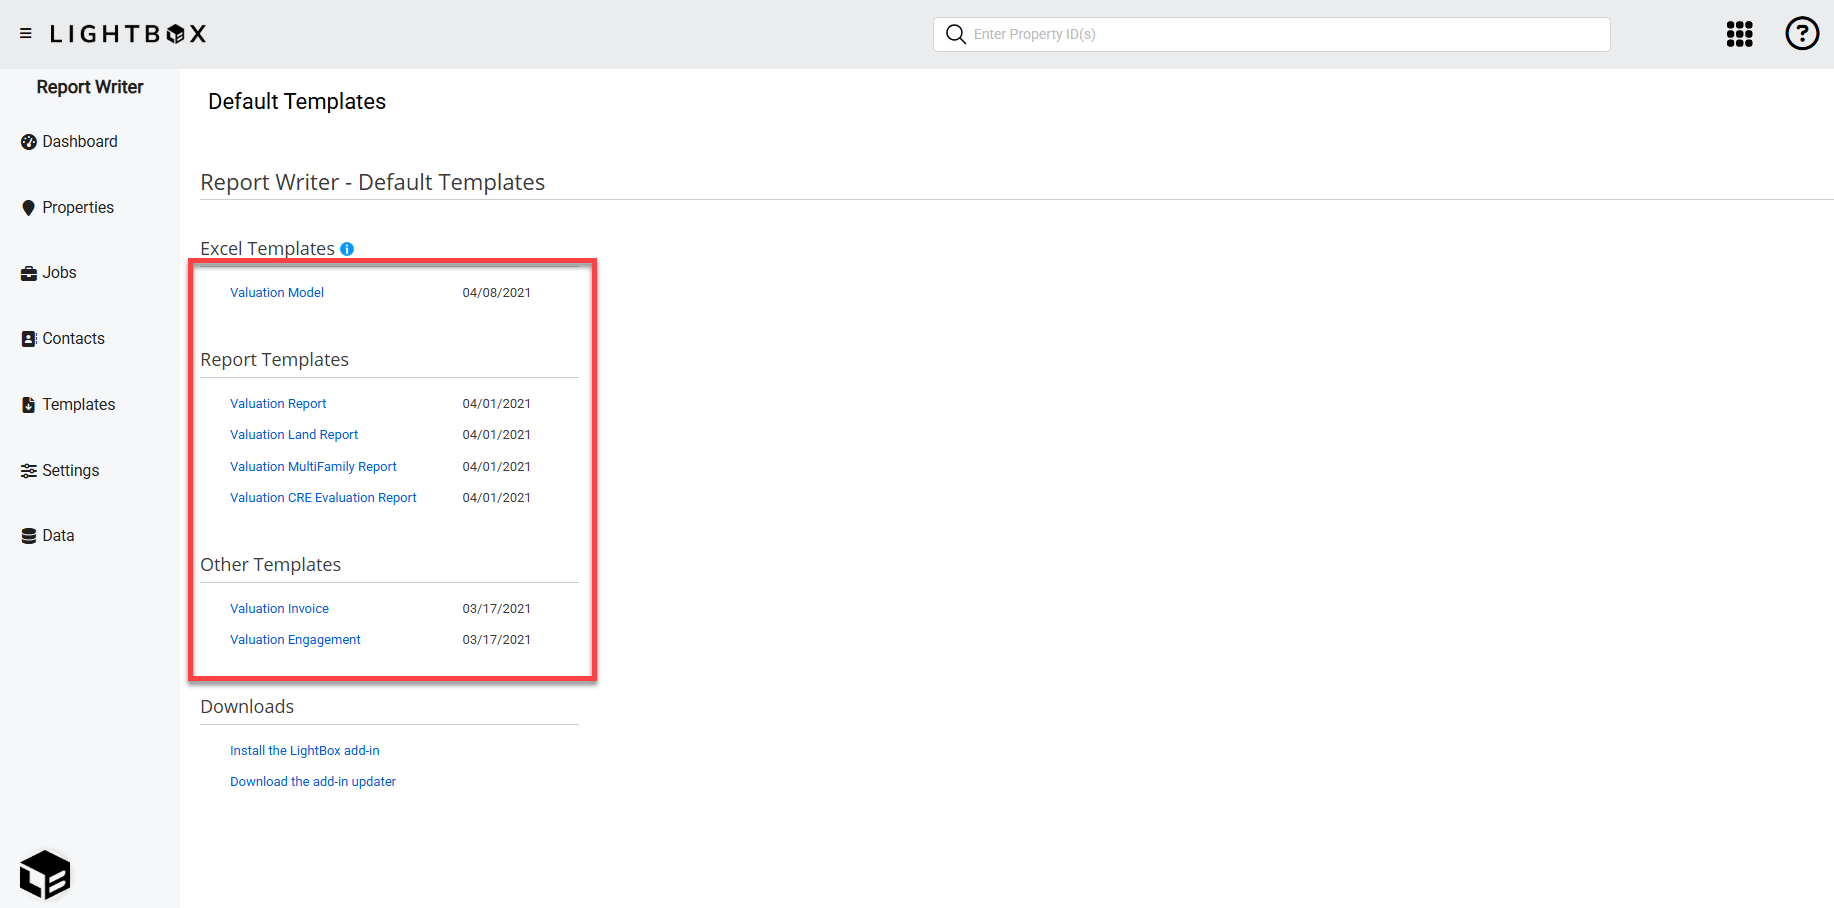
The easiest way to acquire the newest default templates is to download them directly from the Report Writer Property Database. Navigate to the Templates page and download the newest version of the default templates. These files download to the Downloads folder on your computer by default. From there, you can move them to any folder on your computer and open them as you would any other Word or Excel file.
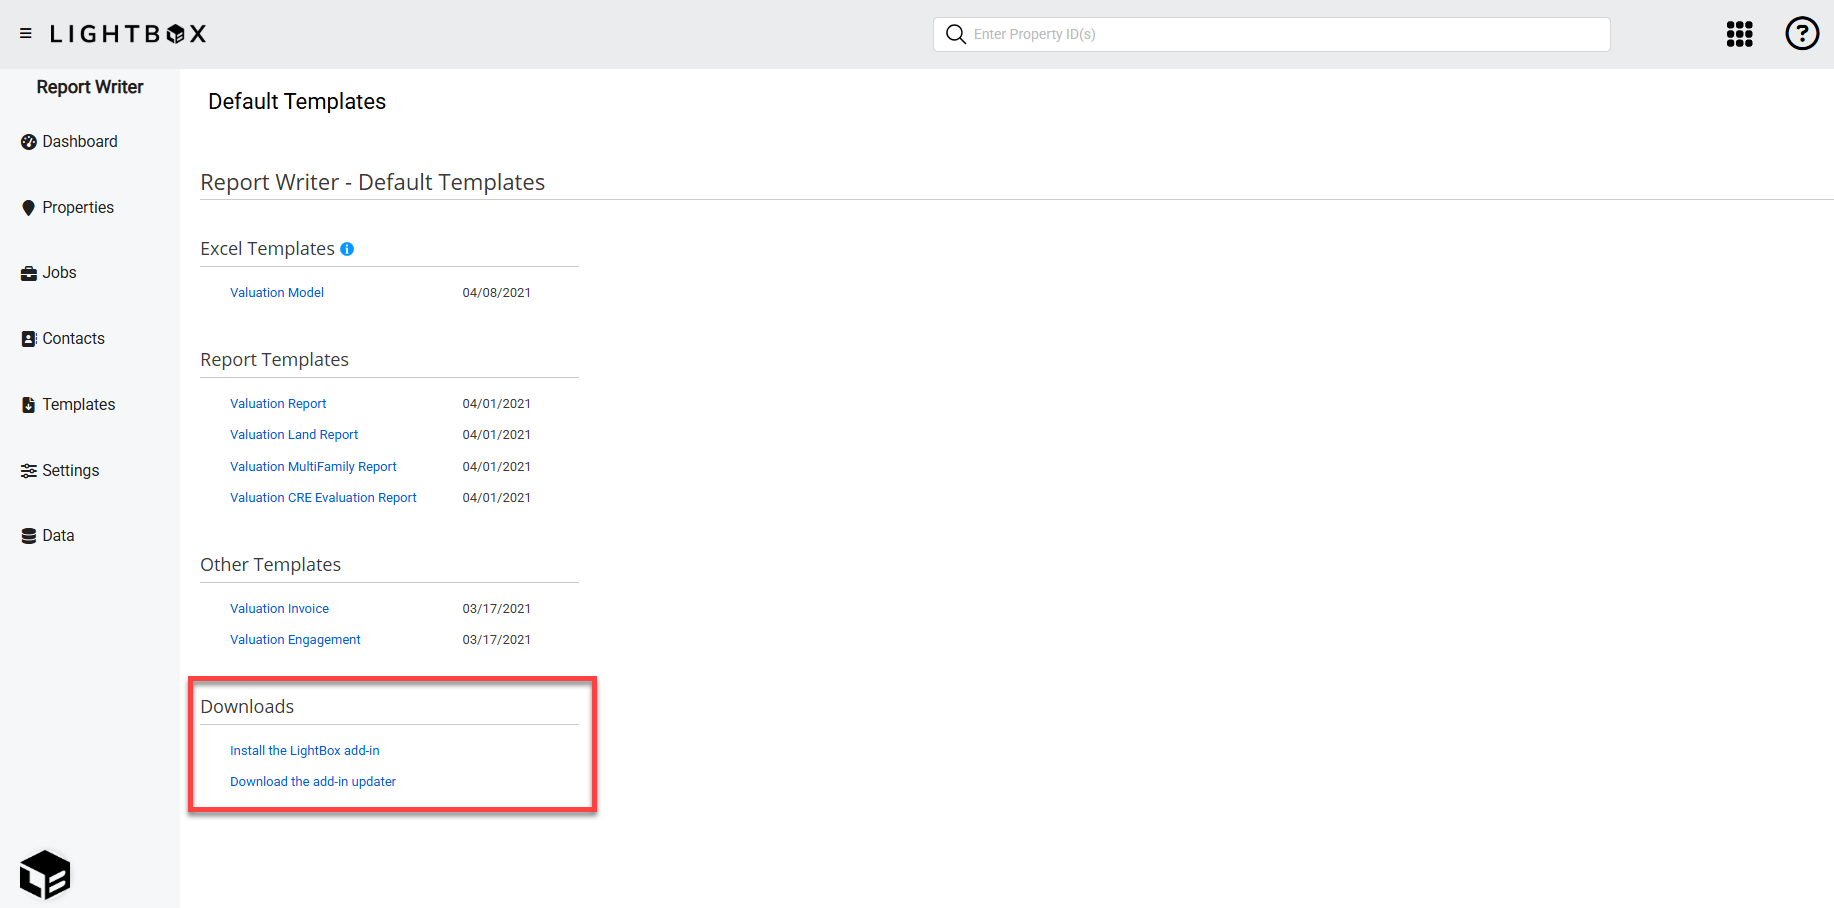
The LightBox add-in and the Updater can also be downloaded on this page.
Creating Custom Templates and Project Workbooks
As a new Report Writer user, you will want to create an Excel template that meets your specific business needs. Each time you begin a new appraisal project, you will create a copy of this template to work with. Though it is possible to re-use old projects, it is ideal to use a fresh template as often as possible, to avoid potential problems with accumulating errors.
Download the default template(s) from the Templates page of the Report Writer Property Database. They can then be moved to any folder on your computer.
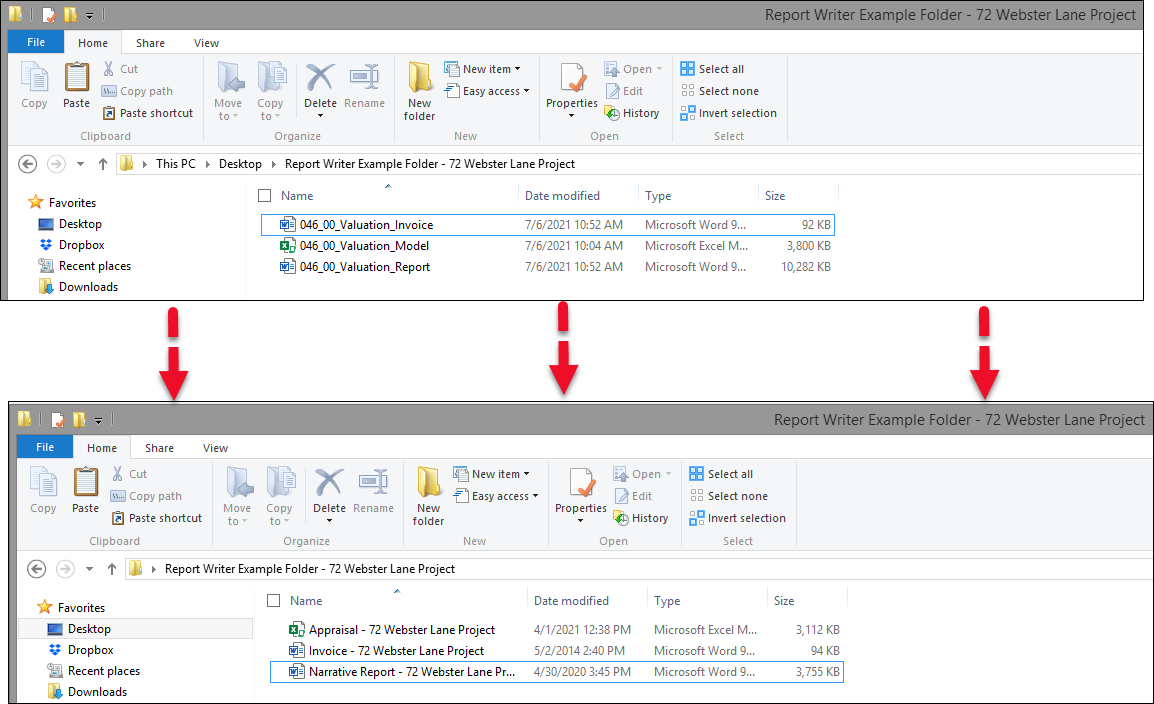
- You can copy multiple files at once by holding the ctrl button on your keyboard, left-clicking on the files you wish to copy, then right-clicking on one of the selected files. Click Copy.
.png)
- Create a folder for the new project. Project folders can be created anywhere on your computer; it is not necessary to create them in the Report Writer folder hierarchy.
- Right-click anywhere in the new folder and then click Paste to paste the copied template files into the new folder.
.png)
Note the address bar at the top of the page - this folder was created on the Desktop. - The files will be available in the new folder. The file names can be changed if desired.
Note: If multiple users in your company use the same templates, a file-sharing service like Box, Dropbox, or Google Drive is a convenient way to make the same set of templates accessible to all.
For more information about customizing an Excel template, refer to Customization.
Overview of the LightBox Ribbon
When Report Writer was installed on your computer, it added the LightBox Ribbon to the menu at the top of Excel.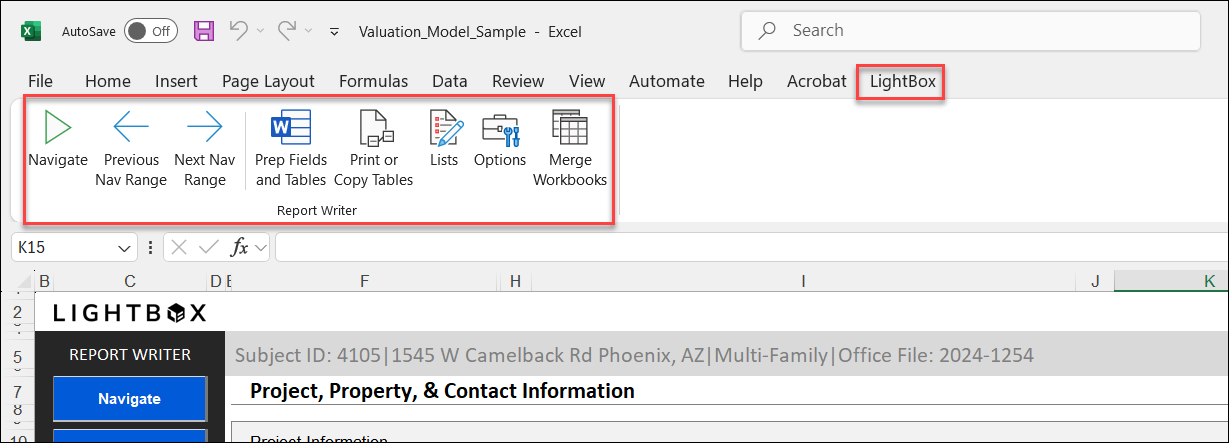
Learn more about the tools on the Ribbon in the LightBox Ribbon section. When you are getting started, the most important Ribbon tool is Prep Fields and Tables, which will be covered in more detail below.
Importing a Subject from the Database
If you have imported your subject property to the Report Writer database, you can get started by importing it into Excel.
- Click on the File Info worksheet.
- Enter the subject property ID# in the first field to the left of the button titled, "Import Subject Data".
- Click the Import Subject Data button.
The subject data will populate throughout the workbook.
For more information about the File Info sheet, refer to File Info - Overview.
Importing Job Data
When the Subject ID is entered on the File Infotab of the Excel workbook, the corresponding Job information will be imported from the Report Writer database. The following sections on the File Info tab will populated with the Job information, when applicable:
- First Client Information
- Second Client Information
- Property Contact Information
- First Appraiser Information
- Appraisal Firm
- Second Appraiser
- Third Appraiser
- Fourth Appraiser
Click Show to display hidden sections.

Working through the Workbook
You will typically progress through the individual worksheets from left to right, starting at the File Info worksheet.
The Valuation Excel Model section contains documentation for all of the Valuation worksheets. Three worksheets bear special mention:
Land Grid: used for comparing unimproved land
Sales Grid: used for comparing improved property sales
Lease Grid: used for comparing commercial/multifamily leases
Some projects might use only one or two of these, based on the subject property being evaluated.
Finalizing the Workbook
Once your Excel data entry is complete, or at least in a solid draft form, click the Prep Fields and Tables button in the LightBox Ribbon to prepare the data to be merged into Word.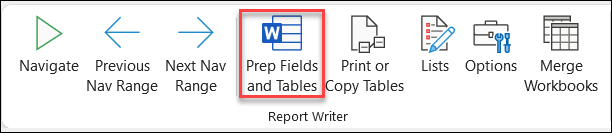
Let the process fully complete. The Map Exhibits from the Research application will download into your project. Once it is done, a brief pop-up will list the total number of prepped fields and tables. Make sure to close the pop-up.
Please note the Prep Fields and Tables function does not replace the need to save changes made within Excel through the normal Excel save process. Any work you do not want to lose should be saved through Excel's save options before you close an Excel file, as you would for any non-Report Writer Excel workbook.
Now that the Excel workbook has been filled out, the next step is to merge the content into Word.
Getting Started with the Word Report
If you have not already created a separate copy of your Word report template, per the instructions on starting the Excel workbook and creating a separate project workbook, now would be the time to do so.
Double-click on the Word file you wish to open.
Customizing the Report
As with the Excel file, you will likely want to customize the Word Report file to create a template that meets your specific business needs. For information about working with the fields and tables in Word, refer to Updating and Editing Fields and Tables. The Word templates are much more freely customized than the Excel templates, and can, for the most part, just be edited (or even created from scratch) like any other Word document. The only real difference between this and any other Word document is the use of the Fields and Tables tool on the LightBox Ribbon to create placeholders for data to come in from Excel.
It is also possible to convert your existing appraisal report file to Word template by following the instructions found at Convert Your Appraisal Report to a Report Writer Template.
Turning on Field Shading
To make it clear what is normal text vs. a field, you may want to turn on the Field Shading option in Word. This will not affect printouts. It only changes how the document looks while you are viewing it. Instructions can be found at Enabling Field Shading. You will only need to do this once per computer, at least as long as Office remains installed.
Merging Fields and Tables
Just as the Prep Fields and Tables tool is found in the LightBox Excel Ribbon, the Merge Fields and Tables tool can be found on the LightBox Word Ribbon. This tool merges in all of the data from the prepped Excel file.
Click on the LightBox Word Ribbon.
Click Merge Fields and Tables.
Click to select the Excel file containing the data you'd like to merge.
Click OK to begin merging the data.
It will automatically search the data of your Excel file and begin updating all fields and tables in your Word file, as long as they have matching data in the Excel file. Once the process has been completed, you will have an appraisal report file containing all of the data merged in from the Excel file.
Other Ribbon Items
You can learn more about the LightBox Ribbon in the following video: In-Depth Training on the LightBox Ribbon
There is also documentation for individual components of the LightBox Excel Ribbon and the LightBox Word Ribbon.
Was this article helpful?