Time of Bid Module
- Print
- DarkLight
- PDF
Time of Bid Module
- Print
- DarkLight
- PDF
Article summary
Did you find this summary helpful?
Thank you for your feedback!
The Time of Bid module provides users with key information that supports quicker, more effective bidding on assignment opportunities.
Defining Filters and Generating a Report
To access the Time of Bid module, click on Time of Bid in the left-hand navigation bar. When you first open the Time of Bid module, the LightBox TOB Default filter will be selected. You will have two different options to generate a new report: selecting from your previously saved reports or creating a new report.
Click Select Saved Report and then select a saved report to apply that set of saved filter criteria.
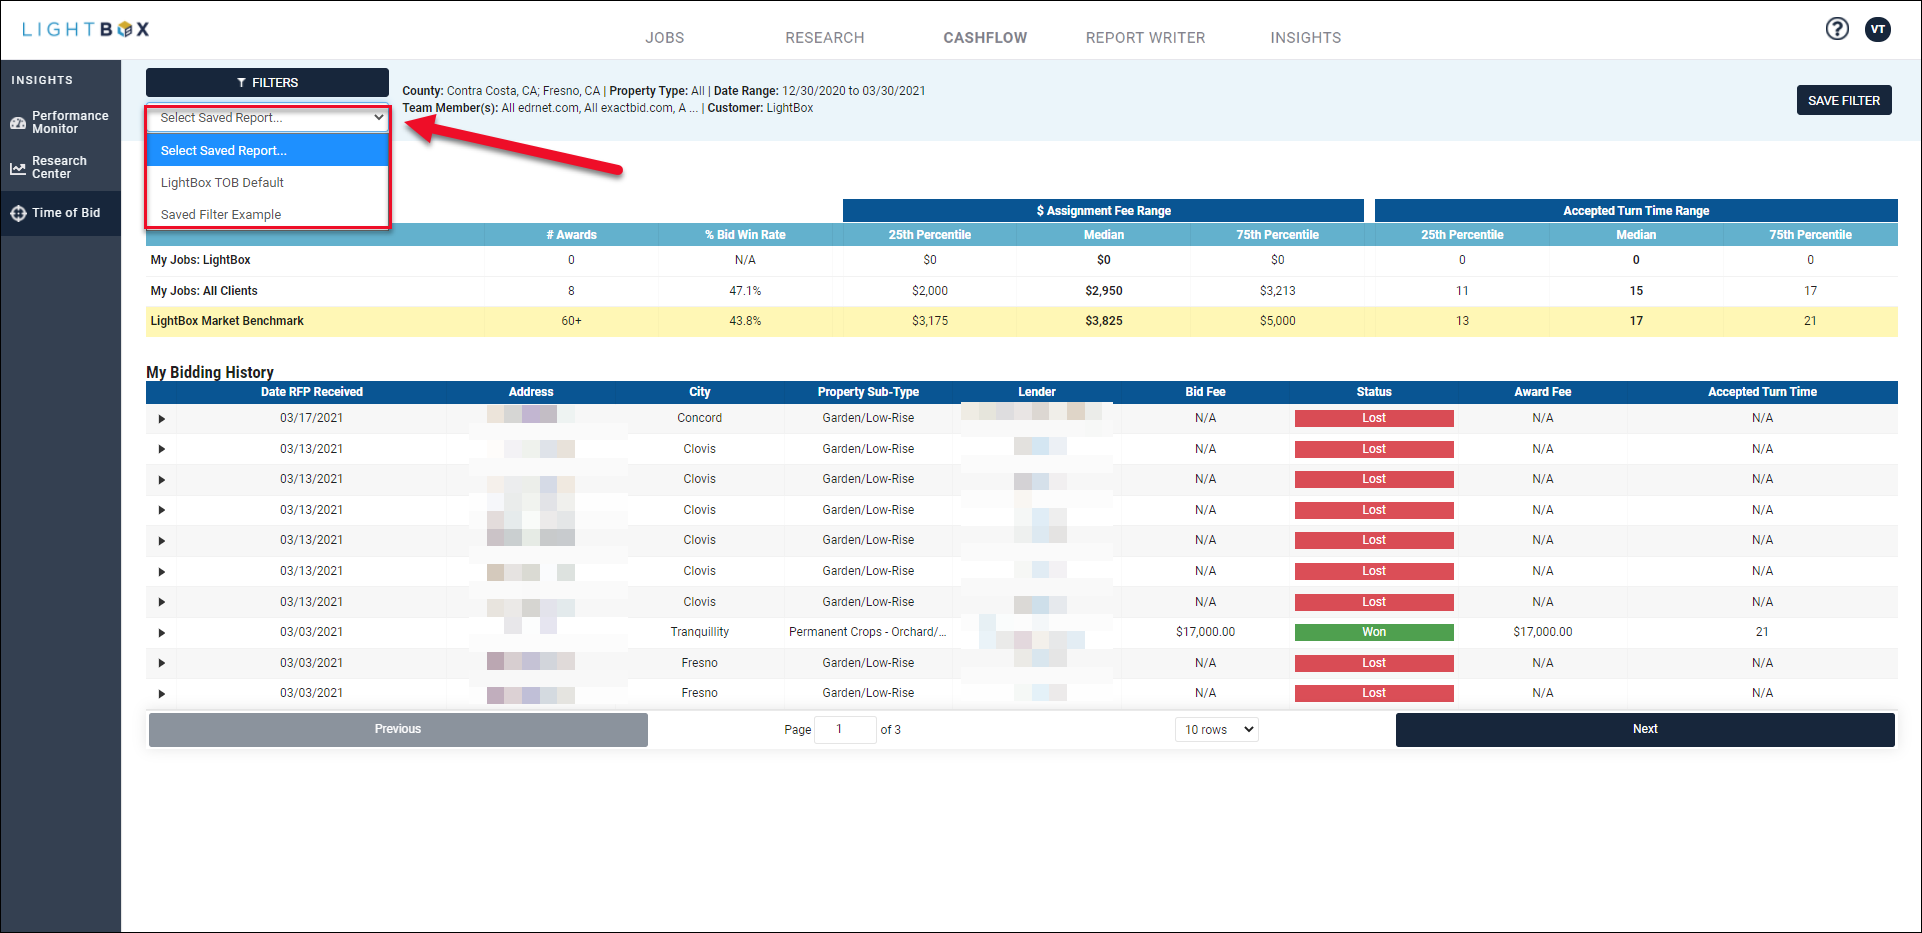
In the example above, there are two saved reports--LightBox TOB Default and the user-created “Saved Filter Example.”
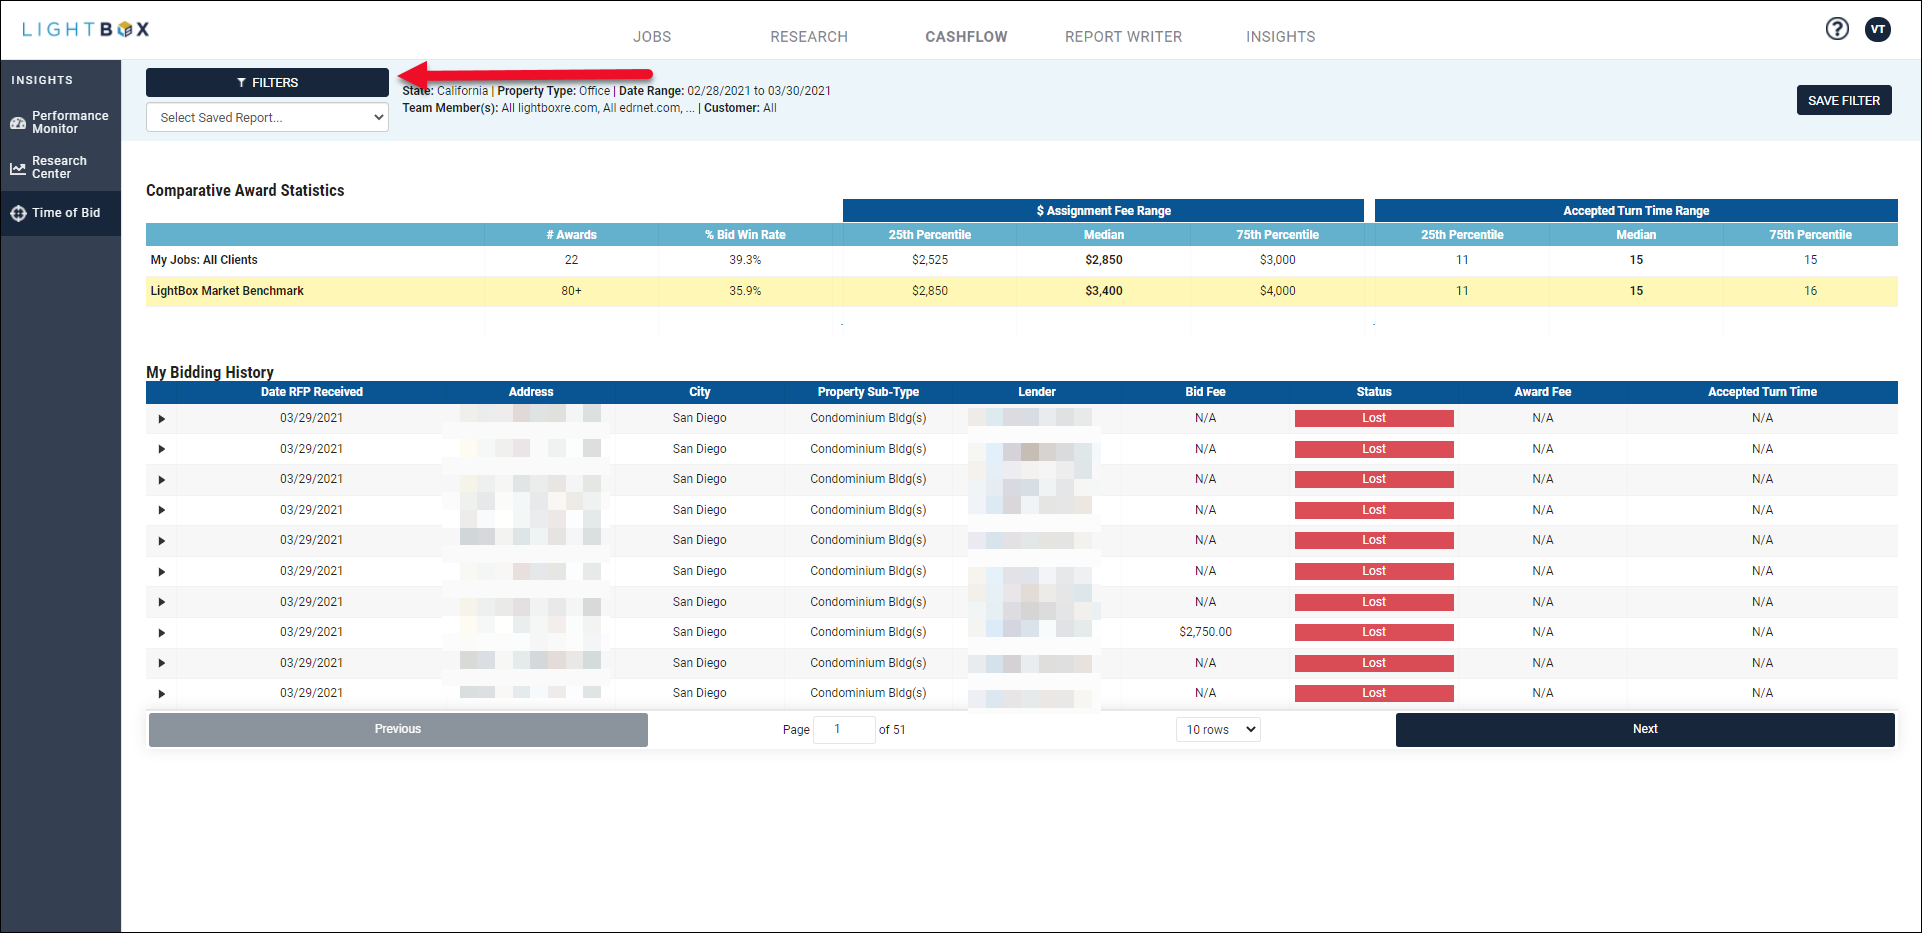
Click Filters to define a new set of filter criteria.
The Filter Controls modal will open.
.png)
A. Define Filters: Locations, Property Types, Date Range, Team Members (email addresses), and Customer.
Refer to the Filter Details section below for additional information.
B. Optionally, click Reset Form in the upper right corner of the modal to reset all filters to their default settings.
C. Click Cancel in the lower right corner to close the Filter Controls modal. If a report was generated previously, the output from that report will be displayed when the Filter Controls modal closes.
D. Click Generate Report after the filters have been defined. The Filter Controls modal will close and the report data will be presented.
Click Save Filter to save the set of filter criteria.

A pop-up will appear in the upper left corner of the page.
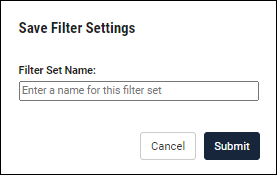
Enter a Filter Set Name and click Submit to create a new Saved Report. Saved Reports that you create are not visible to other LightBox Valuation users. Note: Filter Set Names must be unique; attempting to create a new Saved Report with a Filter Set Name that already exists will return an error message.
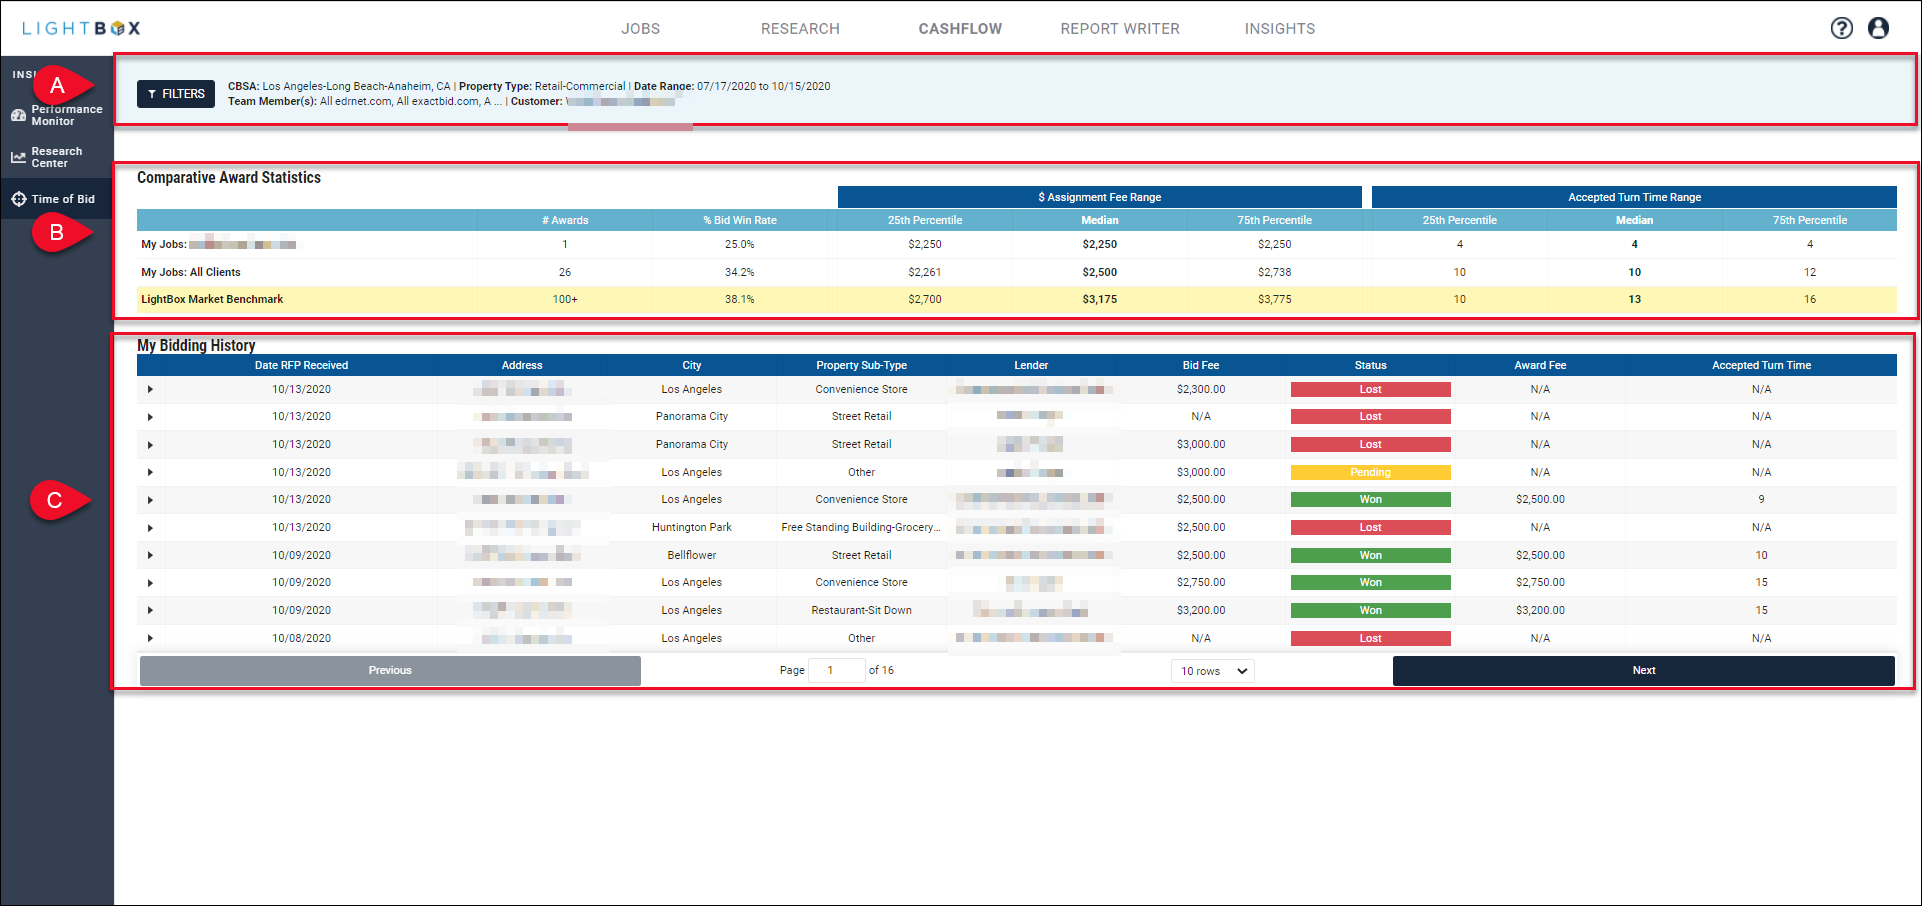
A. Filters
The top of the output screen presents the user with summary information and a button.

B. Comparative Award Statistics
This section displays your Jobs and compares them to historical data provided by LightBox.
- My Jobs: CLIENT NAME: Summary award and bidding statistics calculated from your historical records of assignment opportunities for a specific client, along with a list of those individual records. Note: This row only appears when you select a client in the Customer filter.
- My Jobs: All Clients: Summary award and bidding statistics calculated from your historical records of assignment opportunities for all clients, along with a list of those individual records.
- LightBox Market Benchmark: Summary award and bidding statistics calculated from an aggregated set of historical records sourced from LightBox’s broader customer network.

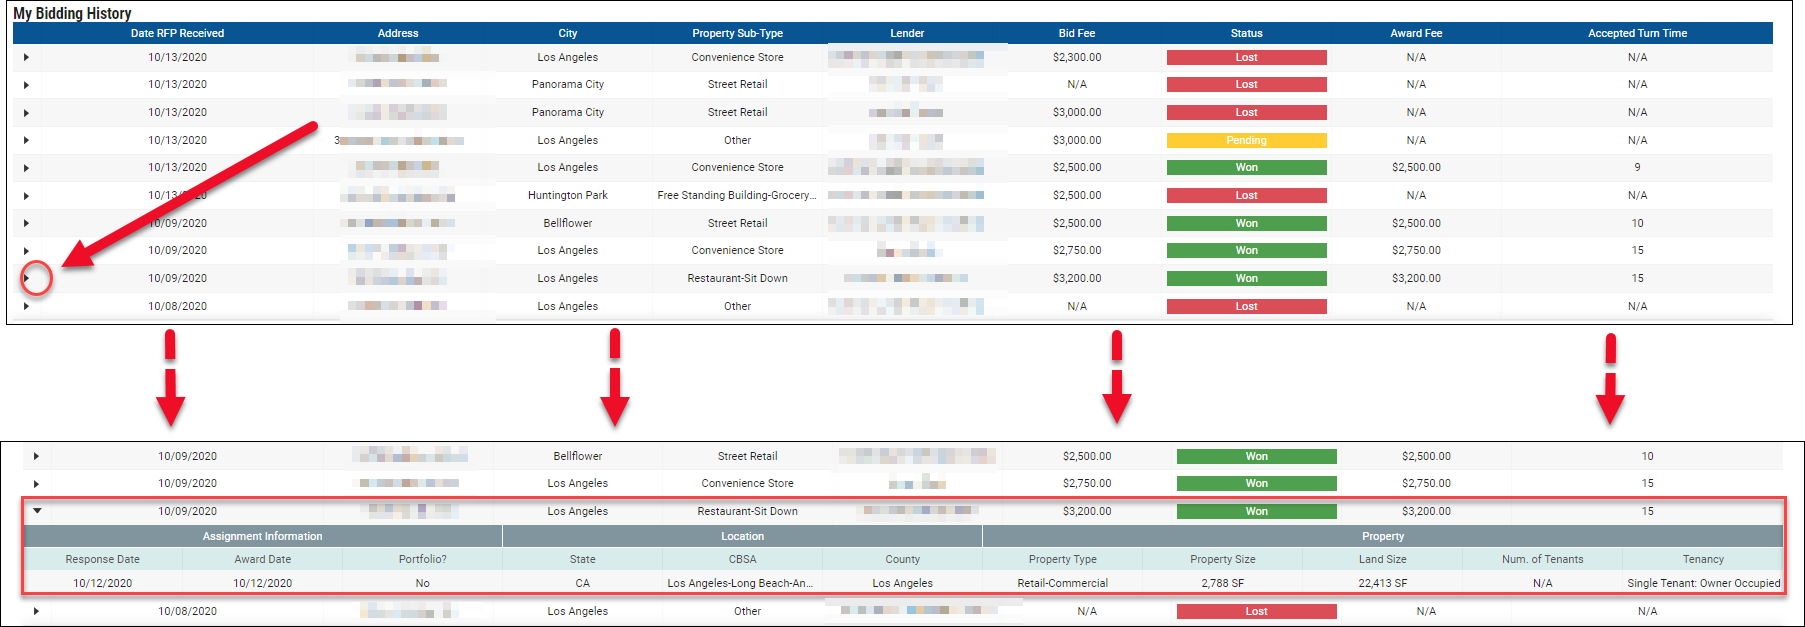
C. My Bidding History
The My Bidding History table displays your bidding history.
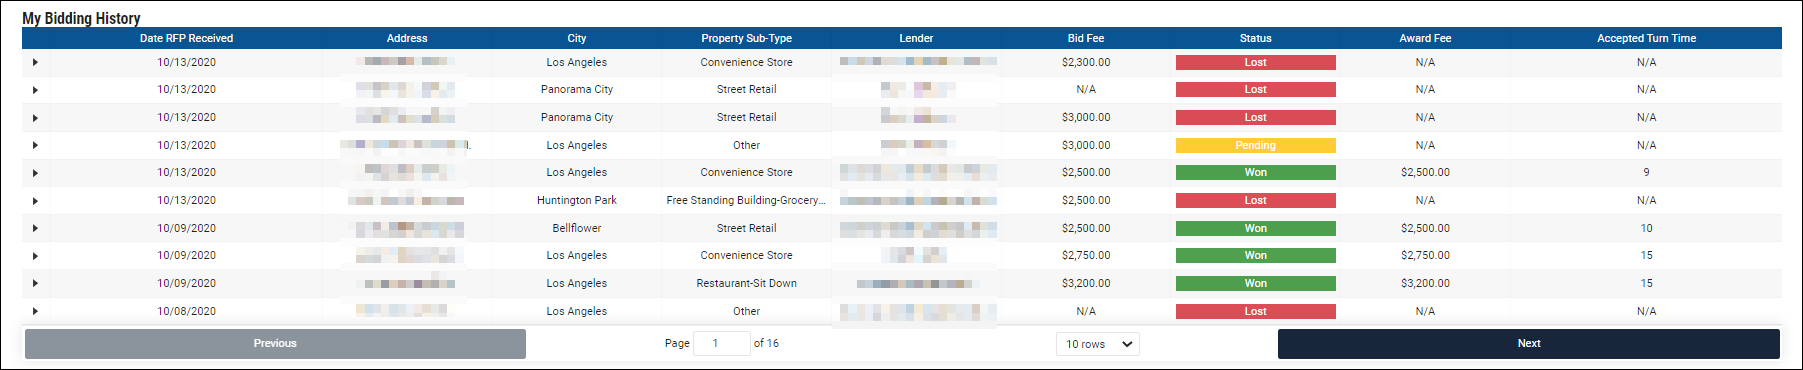
Click the arrow next to a record to expand a panel that displays additional information about the record.
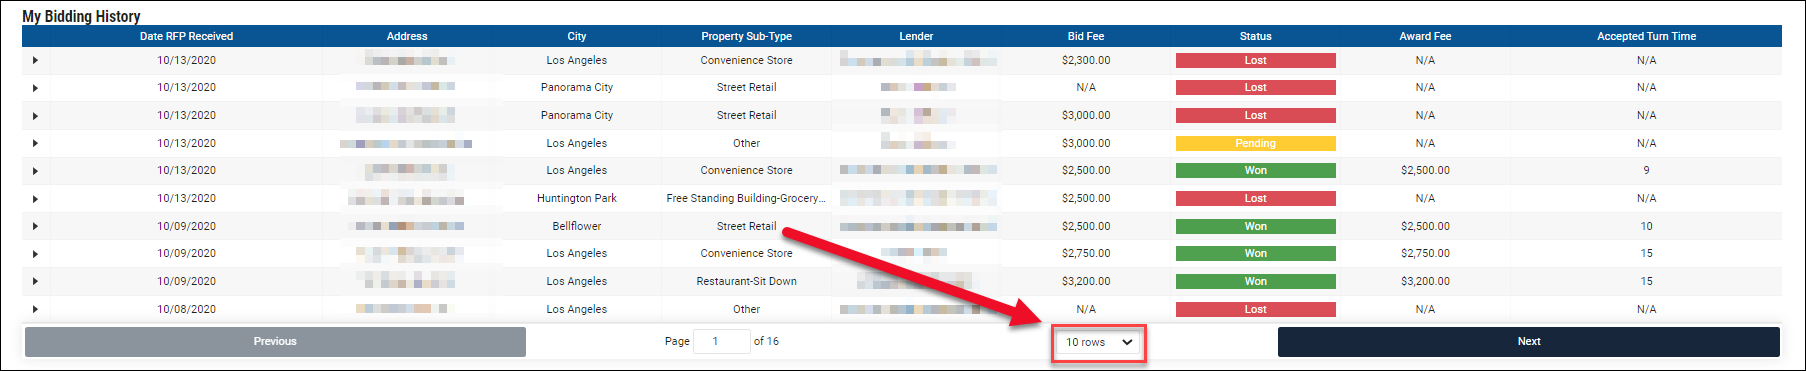
Ten rows are displayed by default. To change the number of rows displayed, click the drop-down menu below the table and make a selection.
Click the Next and Previous buttons to navigate between pages.
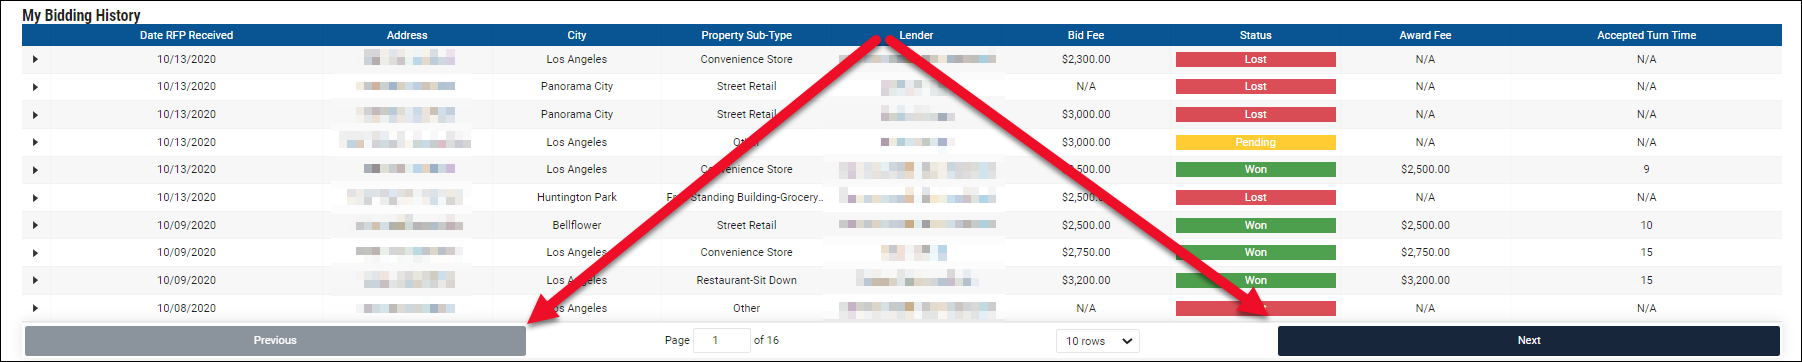
You can also jump to a specific page by entering a page number. Click the up/down arrows or simply input a number and press Enter on your keyboard.
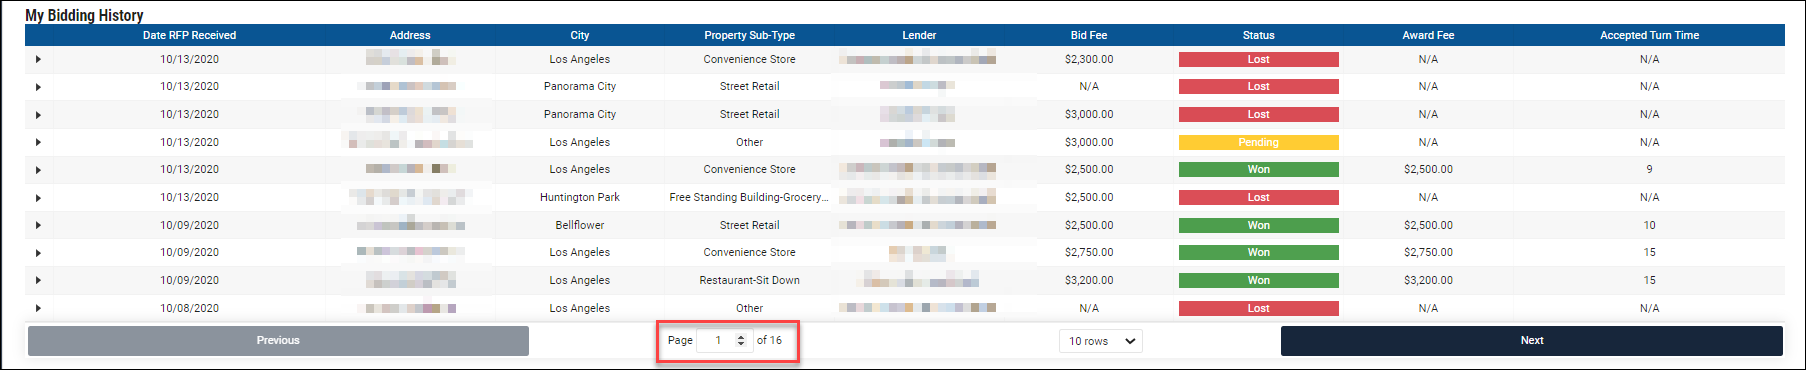
Click on a column heading to sort the table by that column in ascending or descending alphabetical order. By default, the table is sorted in ascending order by the Date RFP Received column.

Filter Details
Queries can be made with five filters:
- Locations
- Property Type
- Date Range
- Team Members
- Customer
Each filter has a default setting and hierarchy of additional selections that can be made. Individual filter details are provided below.
Locations
Select the geographic area on which to query.

A. Locations: Select all locations (default setting). This is equivalent to a national query.
B. State: Select one or more states.
- To enable state-level selection functionality, you must first uncheck the default Select all State and Locations filter selection. Until that box is unchecked, the state-level selection area will remain grayed out and you will not be allowed to click on it, see drop-down lists, etc.
C. Location Type: Select one or more of EITHER CBSAs (CBSA = “Core Based Statistical Area”, parallel to a metro area) OR counties WITHIN the selected state(s). You cannot include a combination of CBSAs and Counties in a single report.
- To enable the Location Type functionality, select at least one state from the State selection box.
- Select either CBSA or County from the Location Type drop-down menu.
- Once a location type has been selected, a CBSA or County drop-down menu will appear to the right of Location Type.

- Select one or more CBSAs or Counties. Available selections are determined by the CBSAs/counties associated with the selected state(s).
Property Types
Select the classification of the underlying property on which to query. Insights uses a list of Property Types and Sub Types sourced from RIMS, which based its classification on the Appraisal Institute’s taxonomy. We have not updated our classification for the 2019 changes to the AI taxonomy.
A. Select All Property Types to select all property types (default setting).
B. Property Type: Select an individual Property Type.
- To enable Property Type-level selection functionality, you must first uncheck the default Select all Property Types filter selection. Until that box is unchecked, the Property Type-level selection area will remain grayed out and you will not be allowed to click on it, see drop-down lists, etc.
C. Property Sub-Type: Select one or more Property Sub-Types.
Date Range
Select the time period to query on.

- Select 30 Days, 90 Days, or 180 Days in the Date Range Menu. Alternatively, click Custom to unlock the From/To fields and then enter the desired dates in the From and To boxes (either keying in dates or choosing dates from the calendar drop-downs).
- Select 30 Days, 90 Days, or 180 Days in the Date Range Menu. Alternatively, click Custom to unlock the From/To fields and then enter the desired dates in the From and To boxes (either keying in dates or choosing dates from the calendar drop-downs).
- Once a location type has been selected, a CBSA or County drop-down menu will appear to the right of Location Type.
Team Members
Select one or more team members within your organization to query on. “Team Member” is defined as an email address attached to an account within RIMSCentral and/or PARCEL that has been associated with a user’s organization in the Insights user administration site.

A. Team Members: Select all team members in your organization (default setting).
B. Team Member Email Patterns: Select one or more email domains belonging to vendors within your organization. Example: all @appraisalcorp.com
C. Team Member Email Addresses: Select one or more email addresses belonging to vendors within your organization. Example: john_doe@yourcompany.com
- To enable Team Member Email Patterns and Team Member Email Address selection functionality, you must first uncheck the default Select All X Team Member Patterns and All X Addresses filter selection. Until that box is unchecked, the other Team Member filters will remain grayed out and a user will not be allowed to click on them, see drop-down lists, etc.

Customer
Click the Select a customer box to expose a drop-down menu listing your customers. Click on one or more customers to add them as filter criteria. This selection will guide statistics provided in the first row of the Comparative Award Statistics (“My Jobs: [Client Name Selected]”.
Note: The rest of the stats - “My Company: All Clients”; LightBox market data; records in bidding history table - are NOT affected by this selection.

Was this article helpful?