- Print
- DarkLight
- PDF
Table Capabilities
- Print
- DarkLight
- PDF
For a video review of this topic, please refer to Tables Overview.
The Jobs and RFPs pages in the Jobs app each feature a table listing Jobs/RFP.
Jobs Table
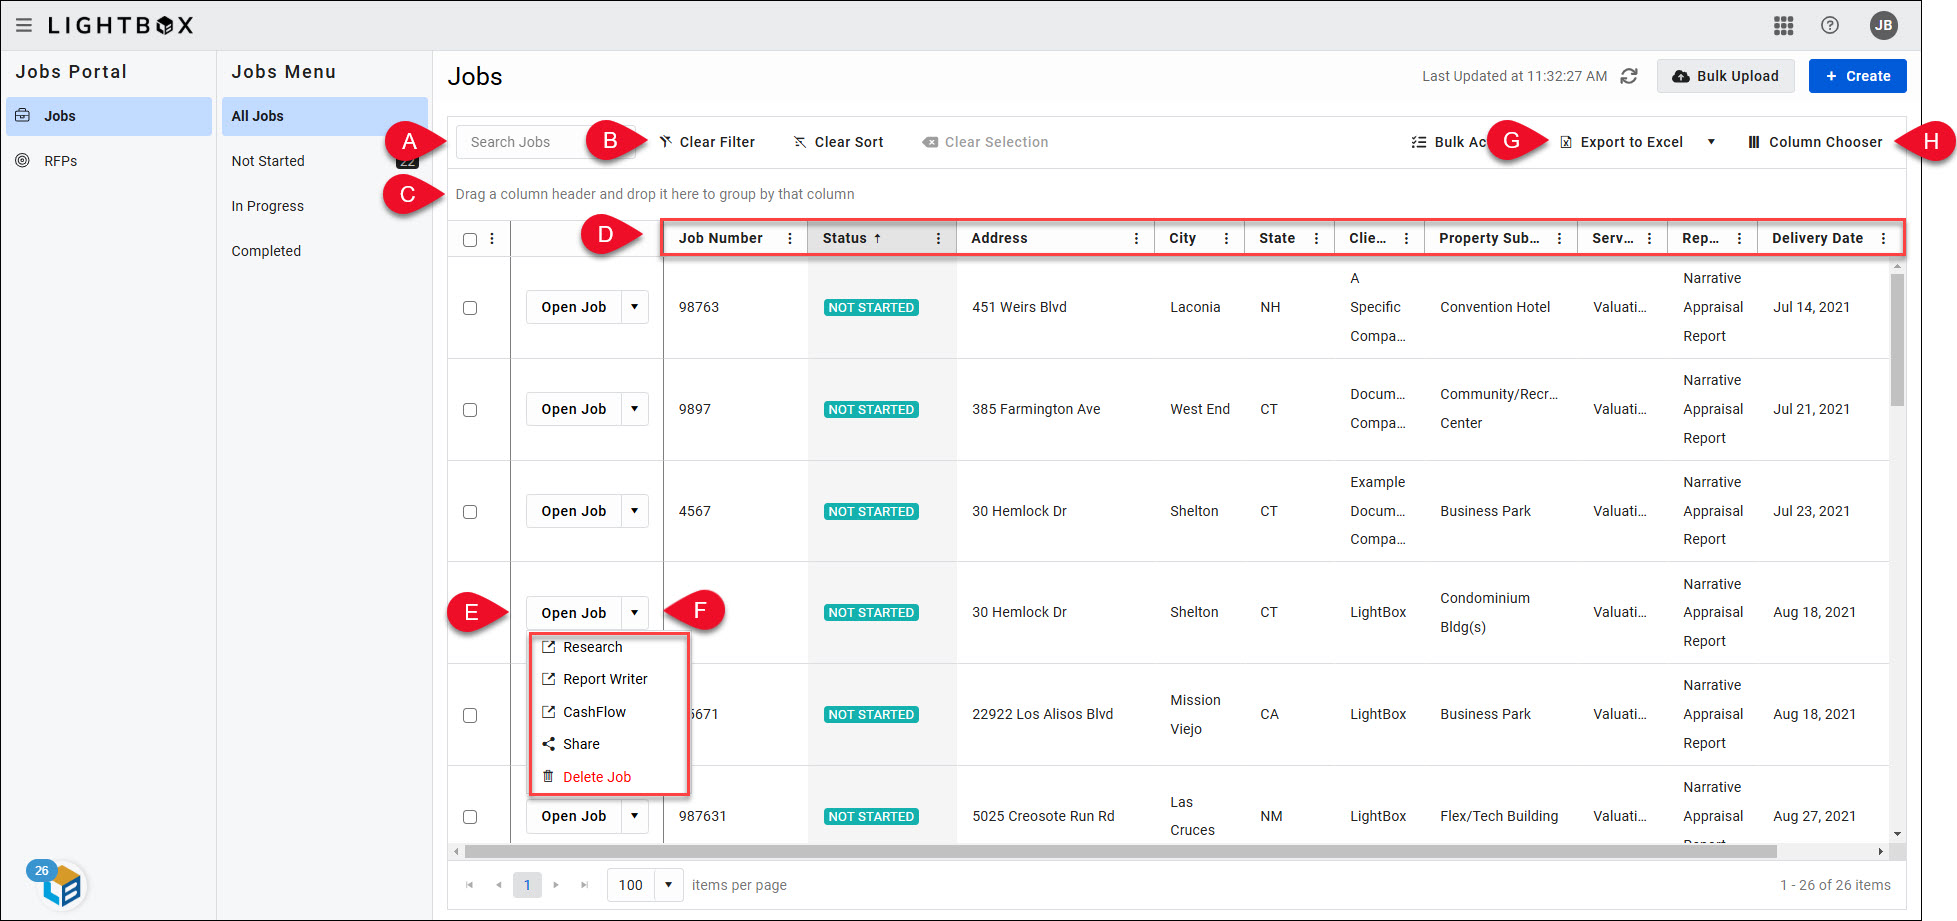
| A. | Enter one or more characters in the Search Jobs search bar to filter the table by that search phrase. All columns except Status and Dates are searchable. |
| B. | Click Clear Filter to clear the Search Jobs box and remove the applied filter. This button is grayed out when no filter is applied. Click Clear Sort to remove any user-defined sorting applied to the Jobs table. This button is grayed out when no user-defined sorting is applied. |
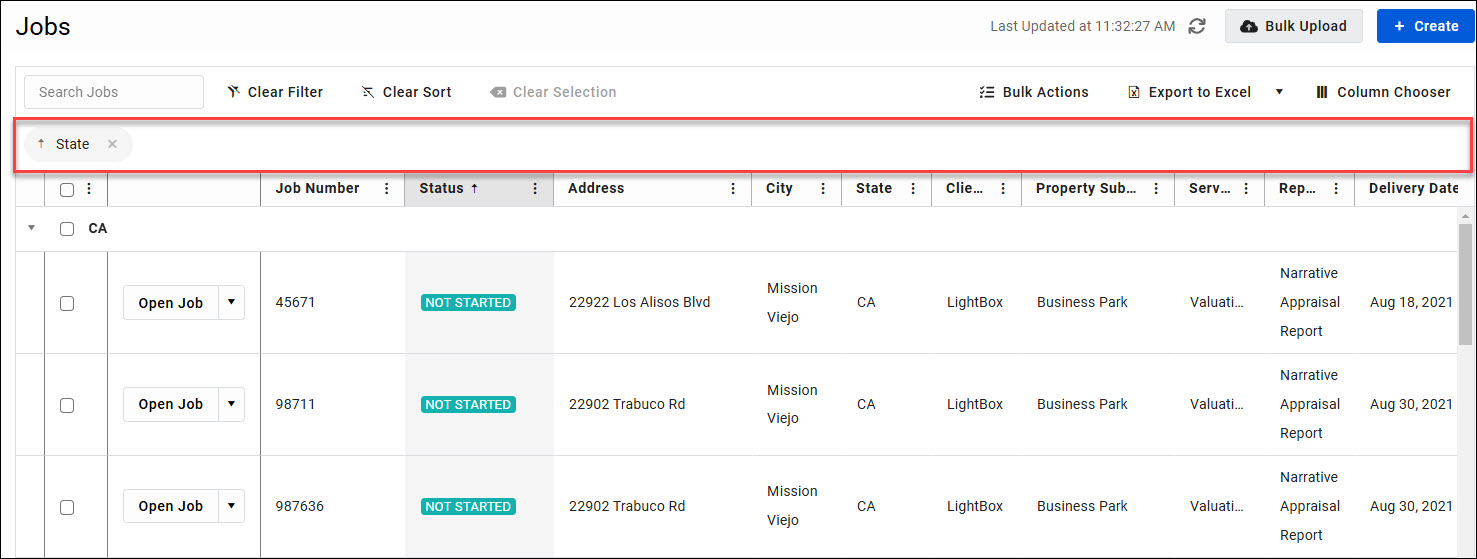
| C. | Click and drag a column header into the space above the header bar to group the table rows by the column selected. Click the X in the grouped column icon to undo the grouping.
In the example above, the rows have been grouped by the State column. |
| D. | Click on a column header to sort the table results by that column in ascending alphabetical or numerical order. Click on the same column header again to change the sort order to descending alphabetical/numerical order. |
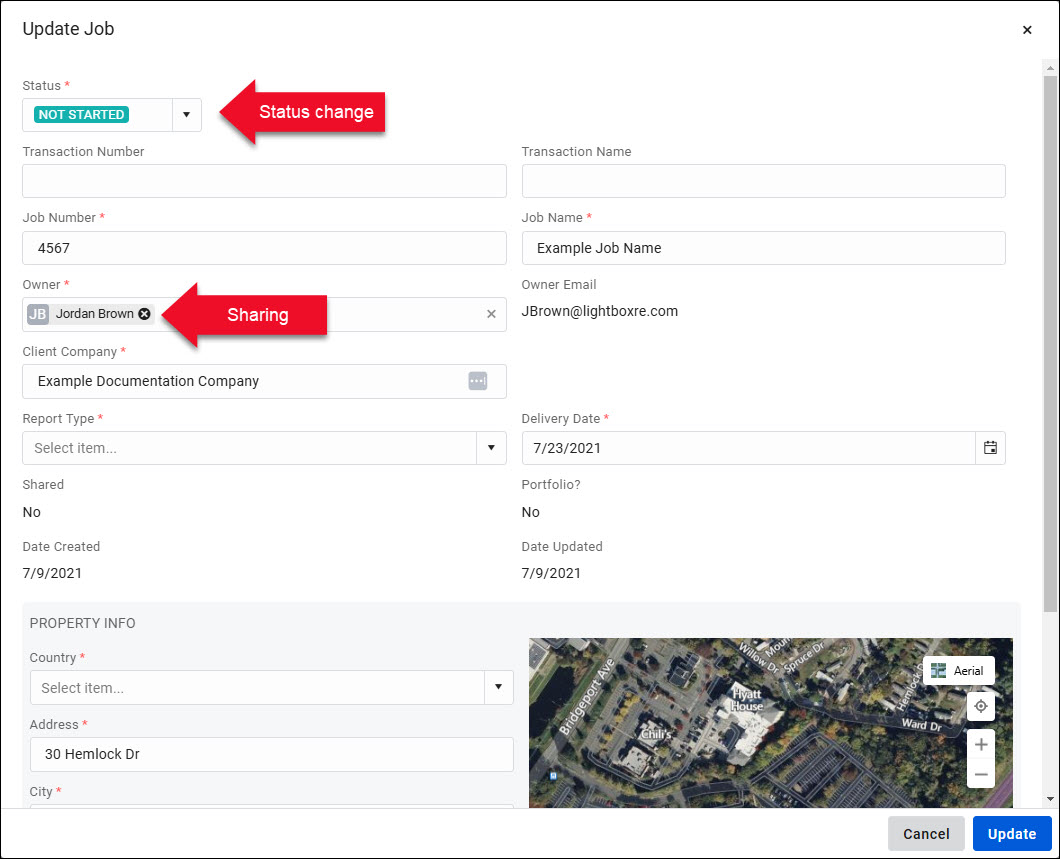
| E. | Click Open Job to open a pop-up that allows you to view and edit information about the Job and associated property.
The pop-up lists Job and property information, as well as a menu for changing Status and managing sharing.
Status: Click the drop-down menu at the top of the page and select a command to change the status. After selecting the desired status, click Save to apply. When changing the status of a Job that originated in PARCEL or RIMSCentral, changing the status will open the source website and allow you to change the status there. When changing the status of a Job created in LightBox Valuation, clicking Save completes the process. Owner: Manage with whom the Job is shared. For more information about sharing, refer to RFP/Jobs Sharing Rules. Other fields on the pop-up can also be edited if the Job was created in LightBox Valuation. Make the desired edits then click Update. A pop-up displays the following warning: Other parts of your workflow, such as Research and Report Writing, will be unaware of this action.
Click Update to proceed with the update. |
| F. | Click the down arrow next to a Job to display a menu.
If a Job was created by the user an additional menu command is available: Delete. This button is not available for Jobs that originated in RIMSCentral or PARCEL. Click Delete to delete the Job. A prompt will require confirmation. Click Delete to permanently delete the Job.
|
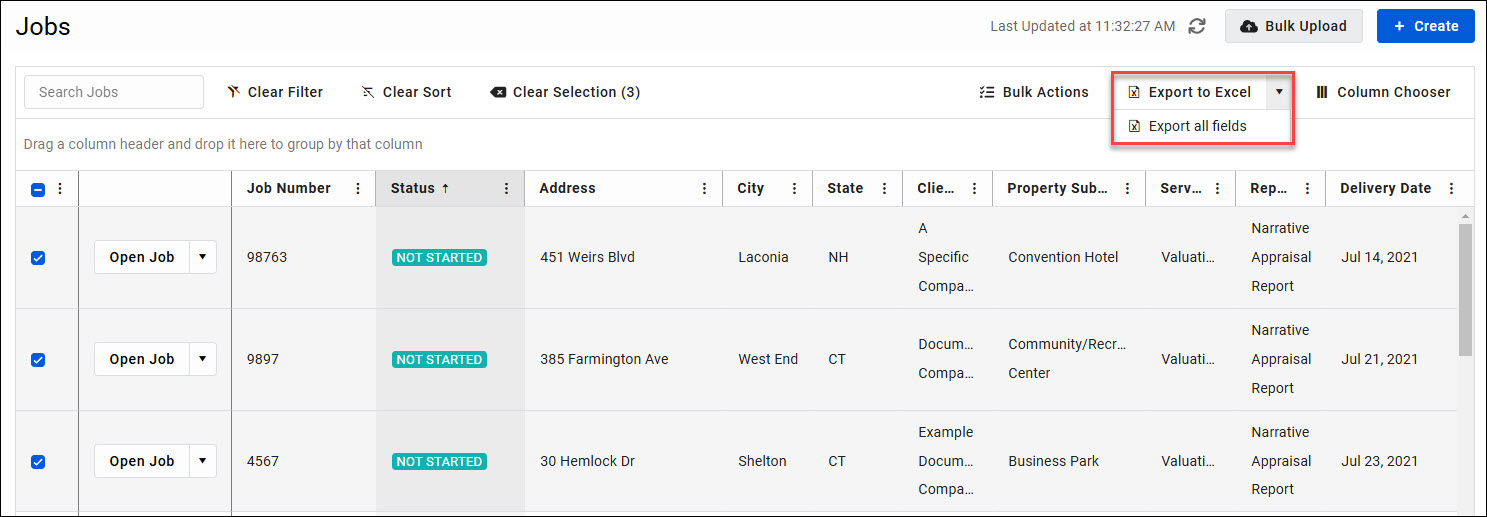
| G. | Click Export to Excel to download an Excel file containing all Jobs on the currently selected Jobs tab. For example, all Jobs on the Not Started tab, or the In Progress tab. Only the columns visible in the table are downloaded, e.g., if the Status column has been unchecked in the Column Chooser and does not appear in the table, the Status fields will not be included in the Excel file.
Click the arrow next to Export to Excel, then click Export all fields to download an Excel file containing ALL table fields on the currently selected Jobs tab, including columns not currently visible.
|
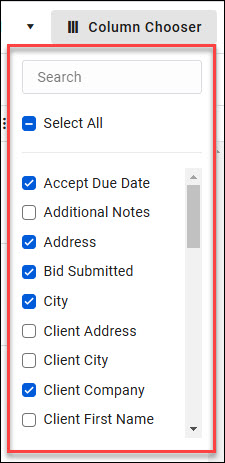
| H. | Check/uncheck boxes to add/remove columns from the table. Click Select All to add all columns to the table. To search for a column from the list, begin typing that column name in the Search box. |
Bulk Actions
The Bulk Actions tool provides the ability to interact with multiple Jobs simultaneously:
- Open the Jobs in the Research, Report Writer, or CashFlow application.
- Modify the status of Jobs created in LightBox Valuation (not those that originated in RIMSCentral or PARCEL). Also provides the ability to modify Delivery Date, Client Company Name, Report Type, Project Owner, Property Type, and Property Sub-Type.
- Delete Jobs created in LightBox Valuation.
Select one or more Jobs. Jobs can be selected from all pages in the Jobs table, not just the page currently displayed.
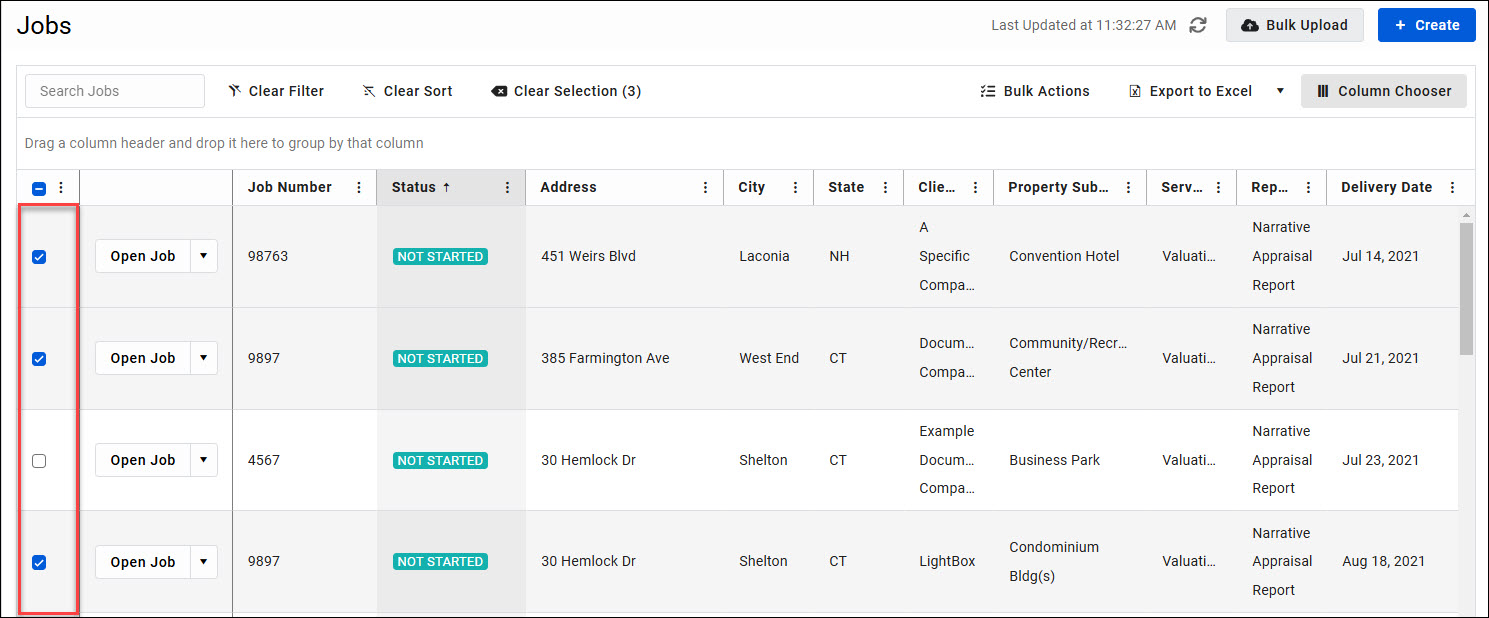
Click the Bulk Actions button.
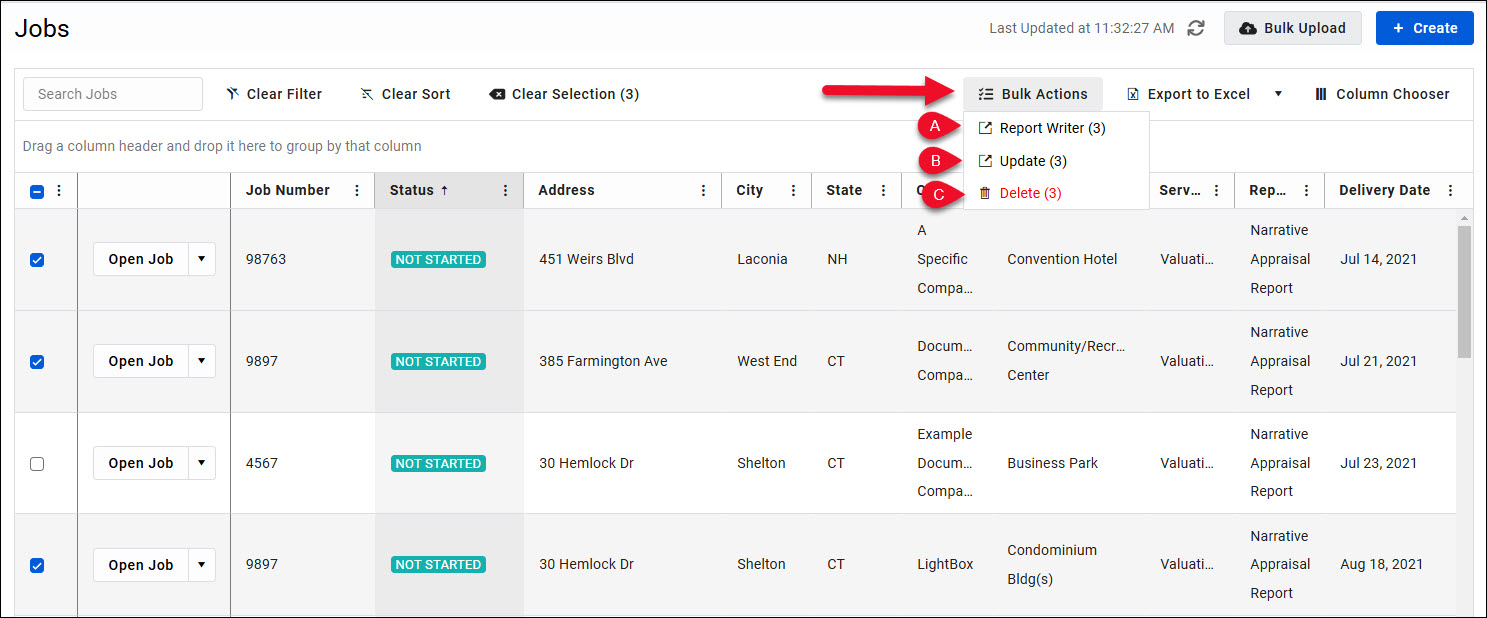
A. Click the Report Writer button. A popup will appear and ask if you wish to export the Jobs to Report Writer. For more information, refer to Bulk Job Import.
B. Click Update to update the Jobs' status and/or property details. The Bulk Update Jobs modal opens.
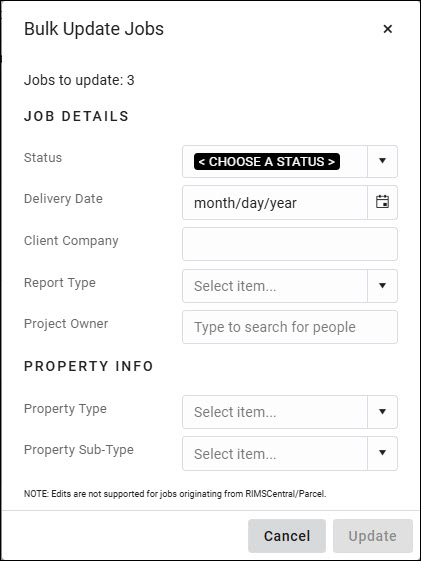
Select a new status from the dropdown menu and edit other fields as desired. Click Update at the bottom of the modal to apply the change(s). Note that only Jobs created in the LightBox Valuation Jobs application, and which do not have a Status of “Incomplete Data,” can have their status updated with the Bulk Actions tool.
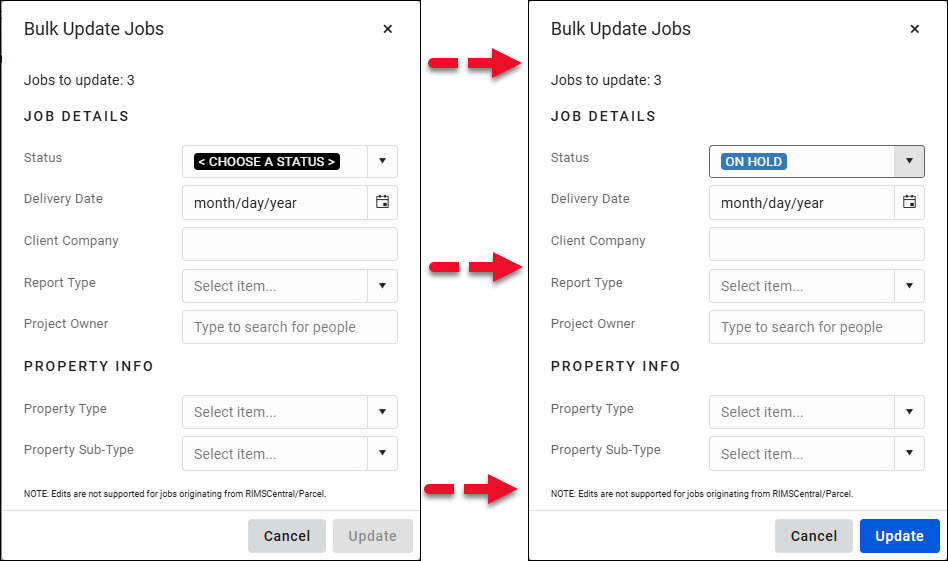
The table refreshes to reflect the new status.
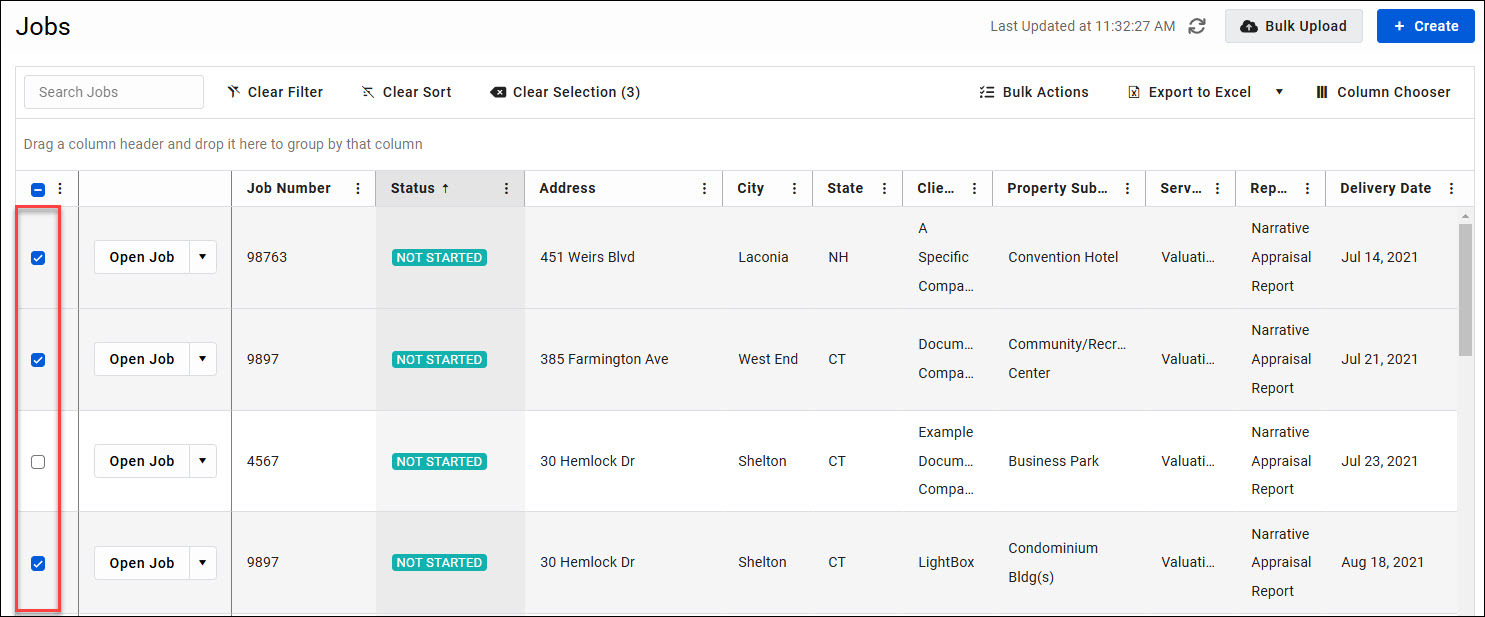
C. Click Delete to delete the selected Jobs. Note that only Jobs created in the LightBox Valuation Jobs application, not those that originated in PARCEL or RIMSCentral, can be deleted. The number of Jobs that can be deleted is displayed in the parenthesis to the right of the Delete button. In the example below, three Jobs have been selected in the table, but only two can be deleted.
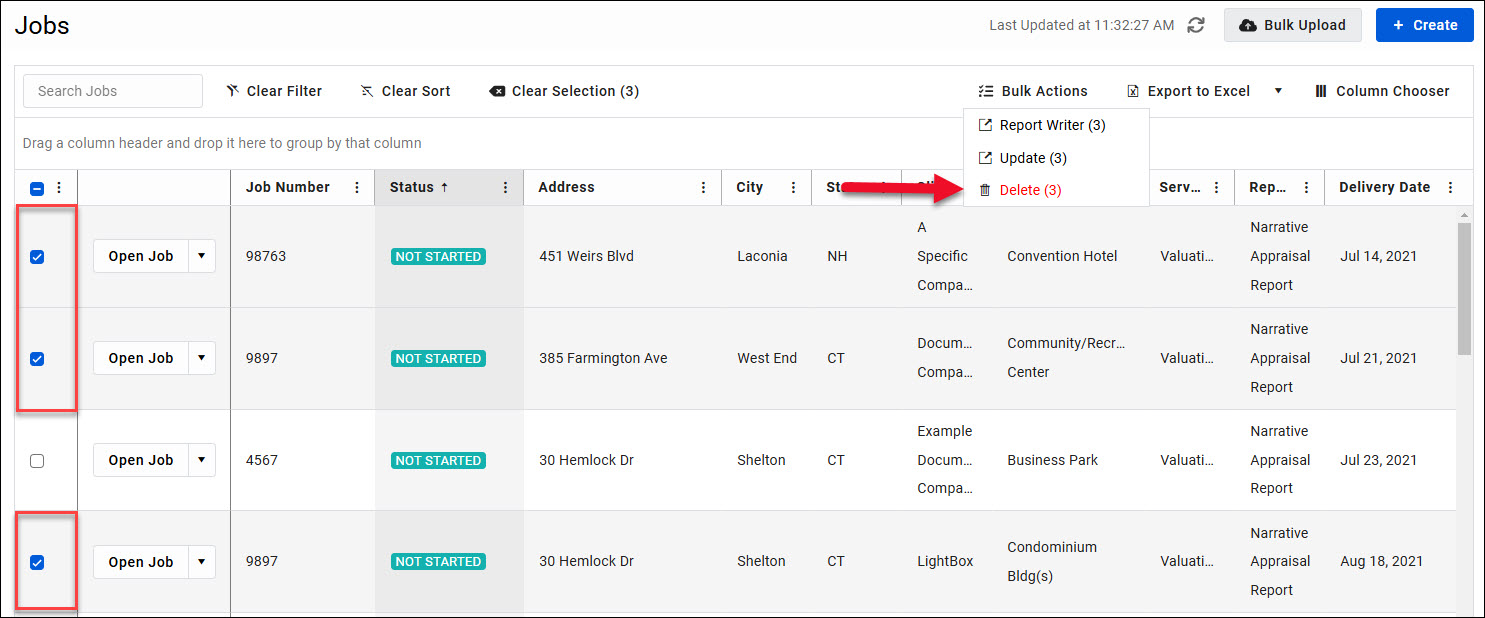
A pop-up will request confirmation. Click Delete to delete the selected Job(s).

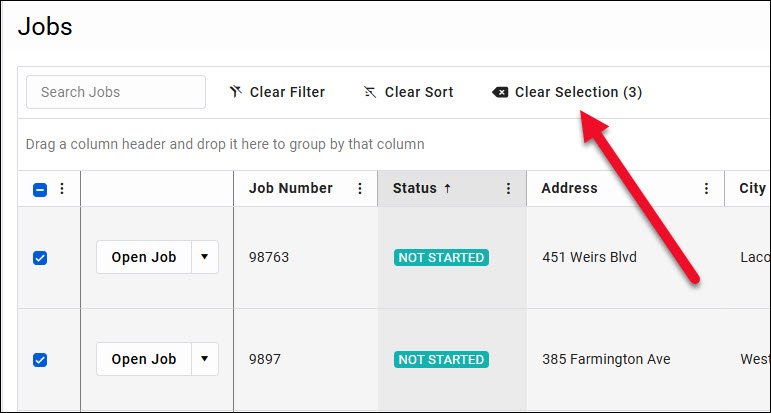
To clear Job selections, click Clear Selection above the table.
RFPs Table
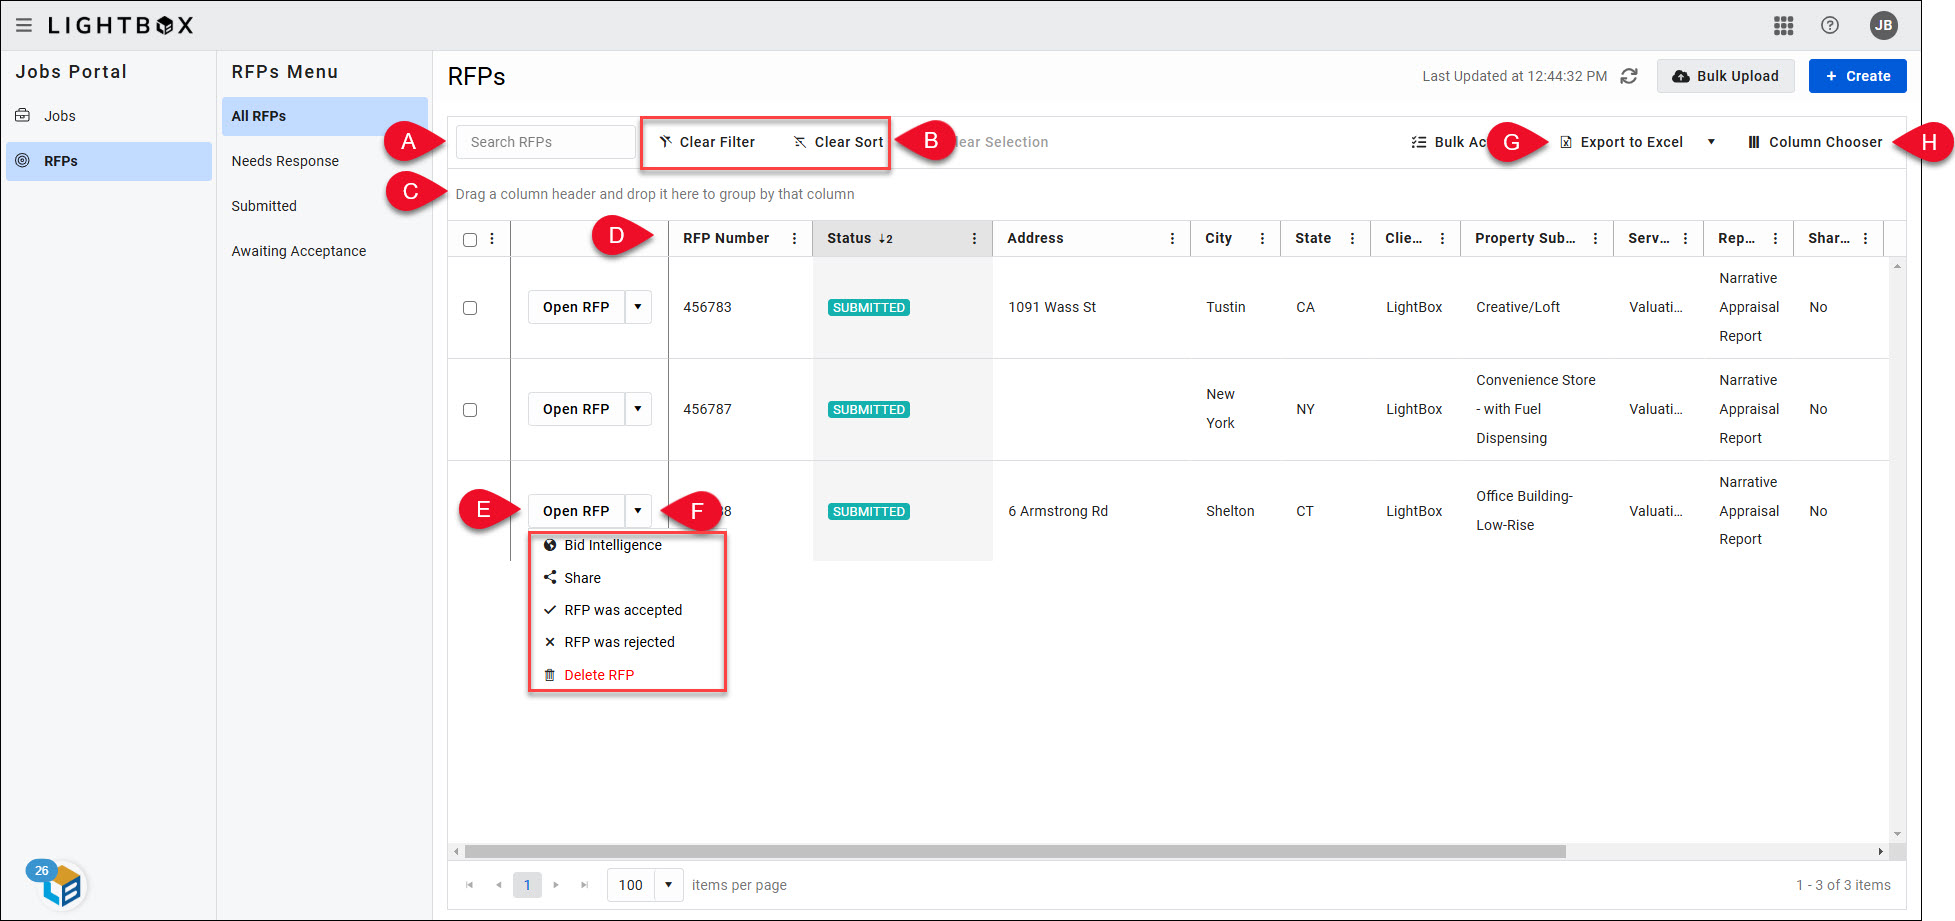
| A. | Enter one or more characters in the Search RFPs search bar to filter the table by that search phrase. All columns except Status and Dates are searchable. |
| B. | Click Clear Filter to clear the Search RFPs box and remove the applied filter. This button is grayed out when no filter is applied. Click Clear Sort to remove any user-defined sorting applied to the RFPs table. This button is grayed out when no user-defined sorting is applied. |
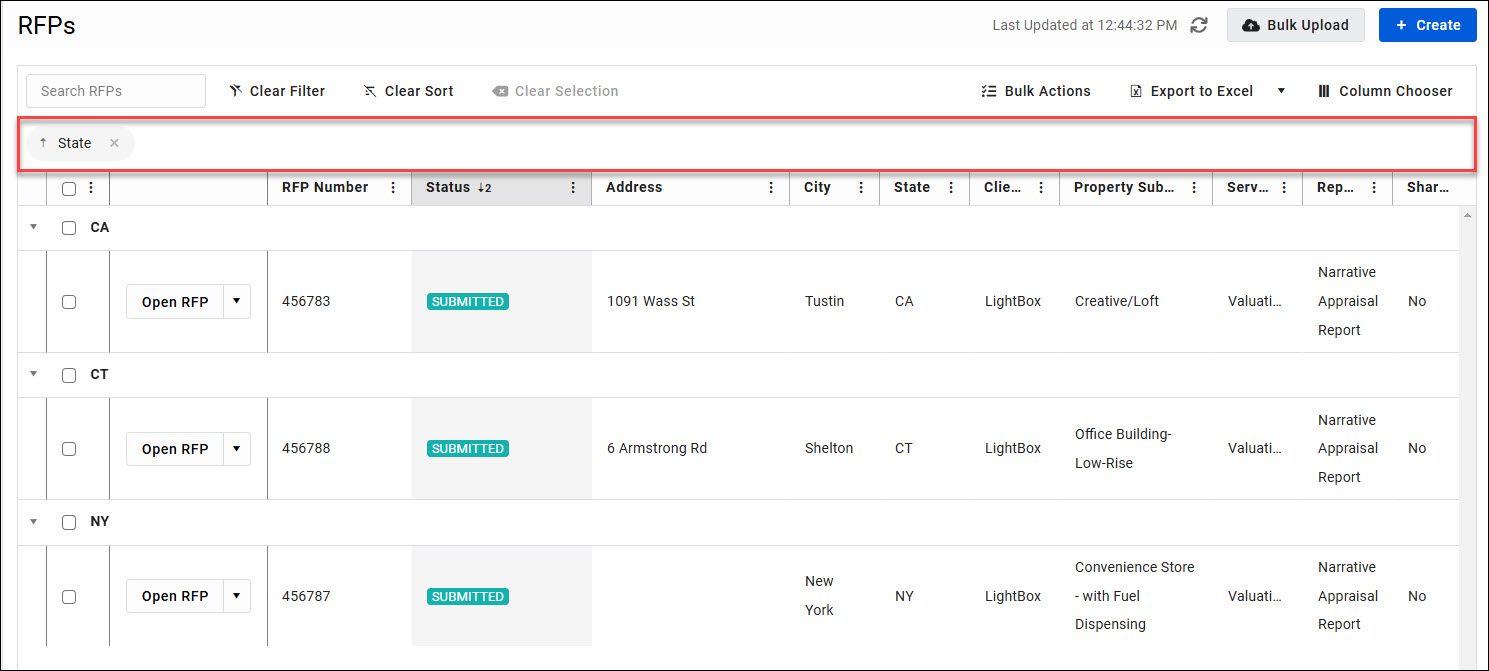
| C. | Click and drag a column header into the space above the header bar to group the table rows by the column selected. Click the X in the grouped column icon to undo the grouping.
In the example above, the rows have been grouped by the State column. |
| D. | Click on a column header to sort the table results by that column in ascending alphabetical or numerical order. Click on the same column header again to change the sort order to descending alphabetical/numerical order. |
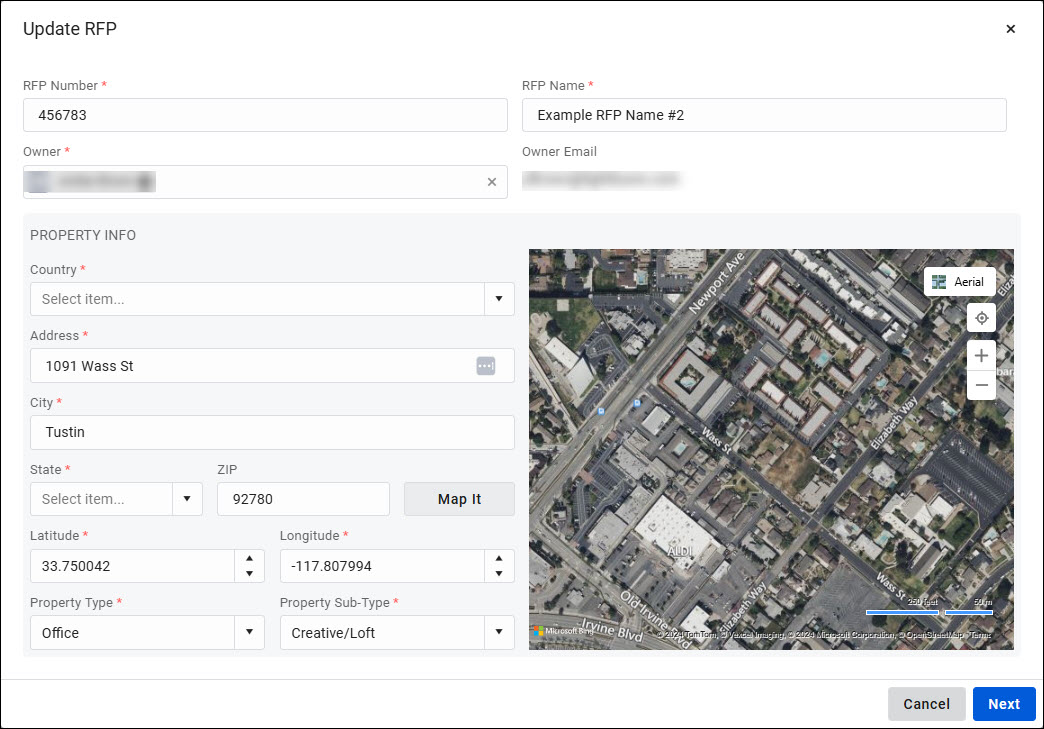
| E. | Click Open RFP to open a pop-up containing information about that RFP.
|
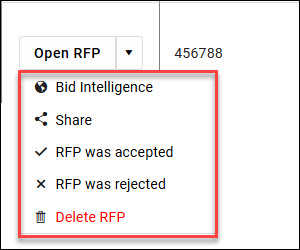
| F. | Click the down arrow next to an RFP to display a menu.
|
| G. | Click Export to Excel to download an Excel file containing all RFPs on the currently selected RFPs tab. For example, all RFPs on the Awaiting Acceptance tab, or the Needs Response tab. Only the columns visible in the table are downloaded, e.g., if the Status column has been unchecked in the Column Chooser and does not appear in the table, the Status fields will not be included in the Excel file. 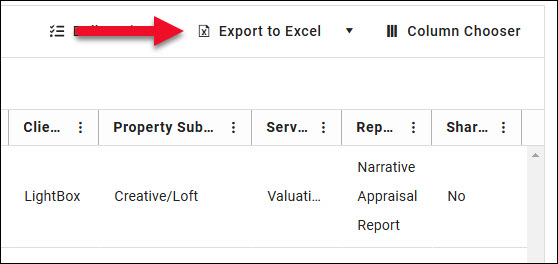  Click the arrow next to Export to Excel, then click Export all fields to download an Excel file containing ALL table fields on the currently selected RFPs tab, including columns not currently visible. 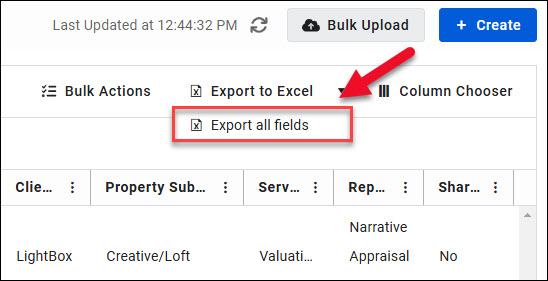 |
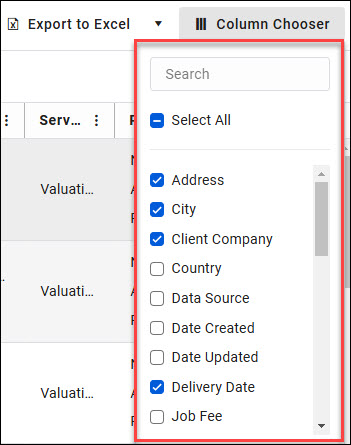
| H. | Check/uncheck boxes to add/remove columns from the table. Click Select All to add all columns to the table. To search for a column from the list, begin typing that column name in the Search box.
|
Bulk Actions
The Bulk Actions tool provides the ability to interact with multiple RFPs simultaneously:
- Mark RFPs created in LightBox Valuation (not those that originated in RIMSCentral or PARCEL) as 'Accepted' or 'Rejected.'
- Edit multiple RFPs created in LightBox Valuation at once.
- Delete RFPs created in LightBox Valuation.
Select one or more RFPs. RFPs can be selected from all pages in the RFPs table, not just the page currently displayed. Click the Bulk Actions button.
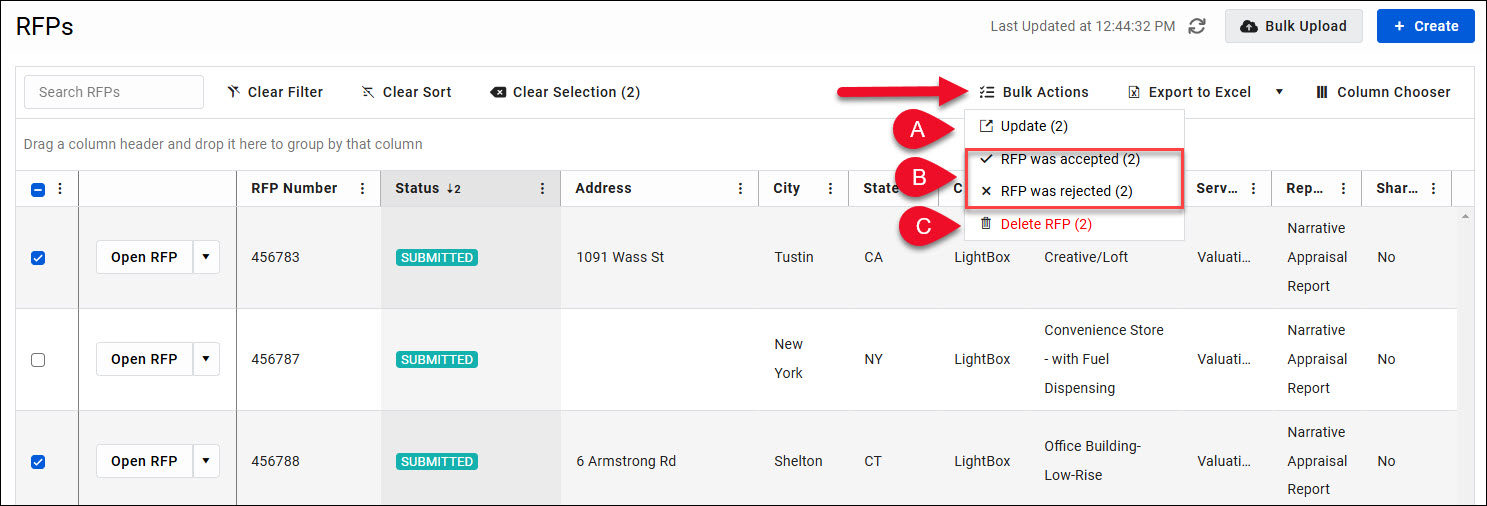
Note: The number in parenthesis indicates how many of the selected RFPs can be modified or deleted by Bulk Actions tool. In the example above, three RFPs were selected but only two can be manipulated by Bulk Actions, as the third originated in PARCEL.
A. Click Update to open a modal that allows you to bulk update. Make the desired changes to the RFP Details and/or Property Info fields, then click Update at the bottom of the modal to apply the changes. 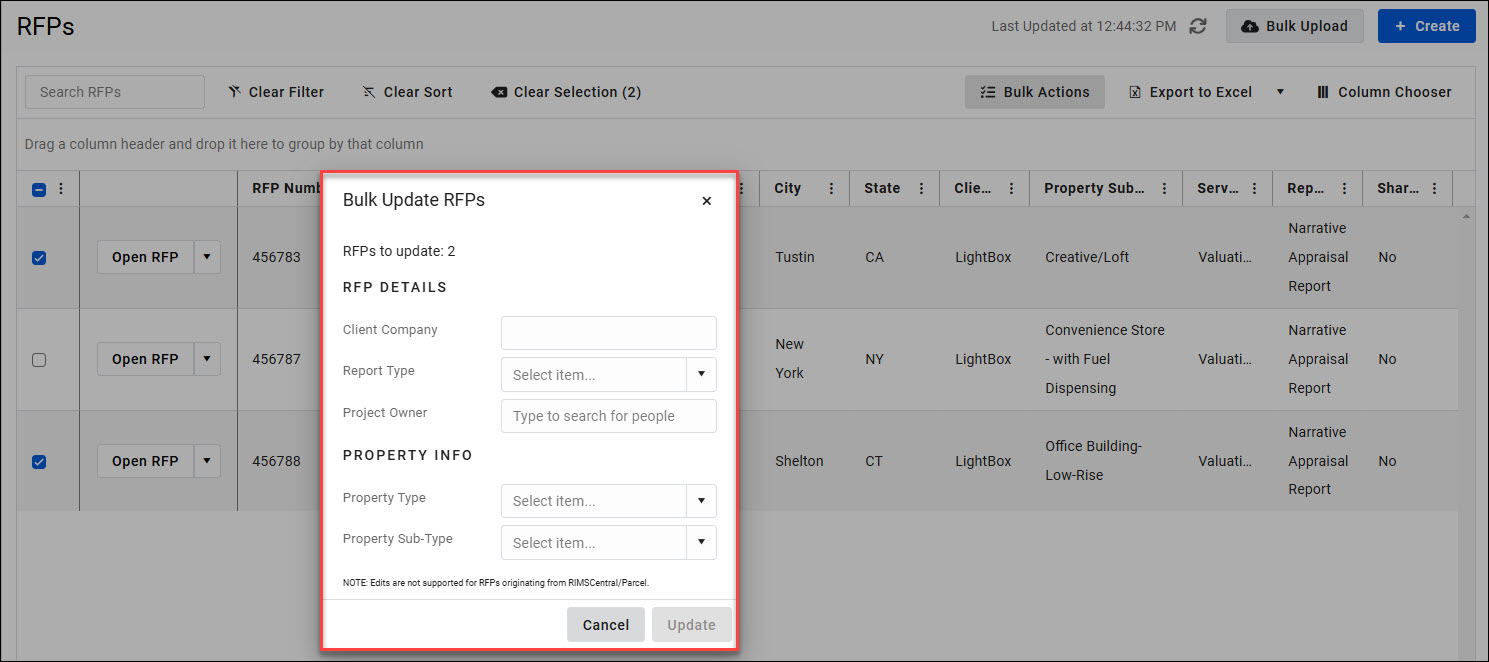
B. Click RFP was accepted or RFP was rejected 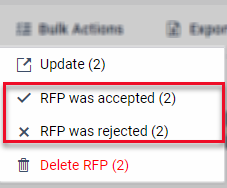
| RFP was accepted Click Accept to accept the RFPs, which automatically convert them to Jobs. | RFP was rejected Click Reject to reject the RFPs. |
 |  |
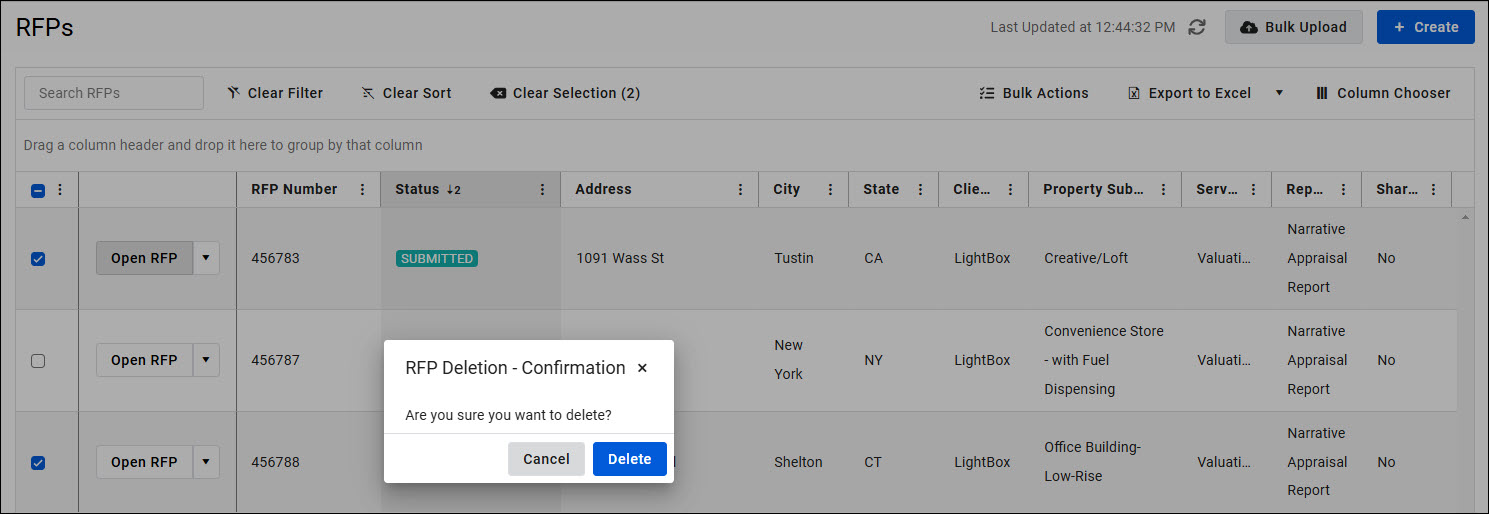
C. Click Delete to delete the selected RFP(s). Note that only RFPs created in the LightBox Valuation Jobs application, not those that originated in PARCEL or RIMSCentral, can be deleted.
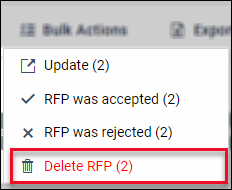
A pop-up will request confirmation. Click Delete to delete the selected RFP(s).
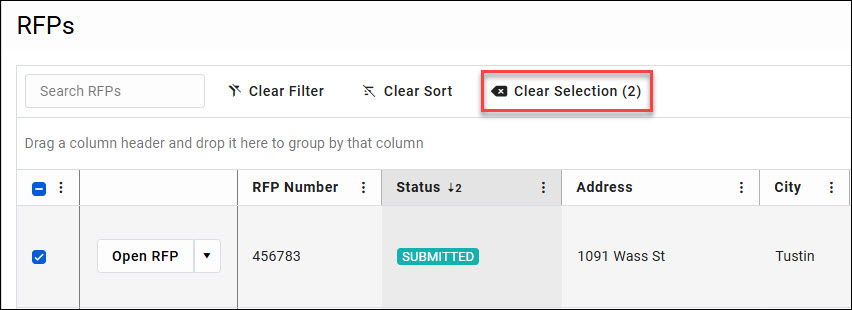
To clear RFP selections, click Clear Selection.
.png)



.jpg)

.png)