- Print
- DarkLight
- PDF
Report Writer - Integration With Jobs
- Print
- DarkLight
- PDF
Description
The Report Writer application can be reached from two locations within LightBox Valuation: in the Jobs app and in the Research app.
Access Report Writer from Jobs
To open a Job in Report Writer from the Jobs app, click the down arrow next to a Job to expose a menu, then click Report Writer.

If a corresponding Job does not yet exist in Report Writer, you will be prompted to enter details to create one.
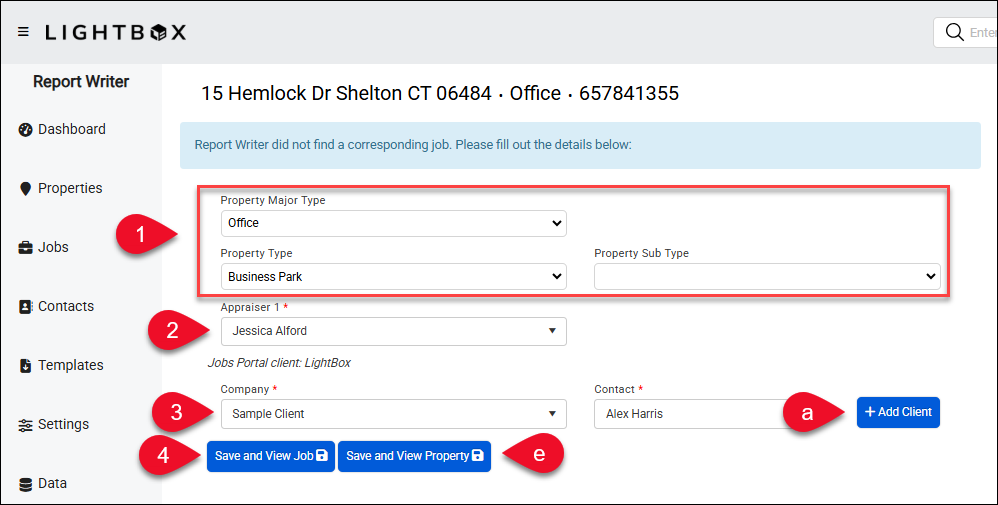
- The Property Major Type, Property Type, and Property Sub Type are populated with the selections made in the Jobs application but can be modified by the user.
- Select an appraiser from the Appraiser 1 drop-down menu. Begin typing the name of an appraiser to filter the list of appraisers by that name.
- <>Select a Company and Contact. Begin typing the name of a contact to filter the list of contacts by that name.
a. If the desired Company or Contact is not listed, click Add Client. The Add Client modal will open.
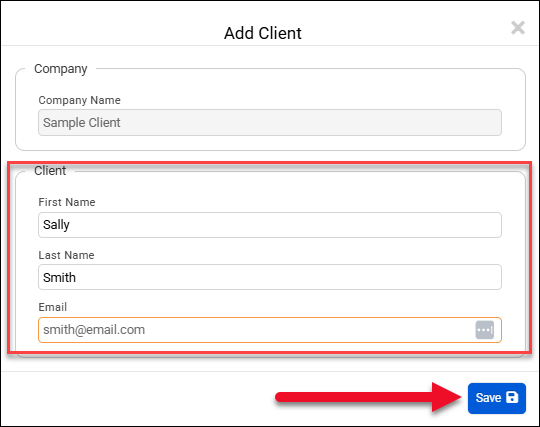
The Company field is populated with the Company from the Jobs application; this field is editable. Fill out the fields and then click Save to add the new Company and/or Client.
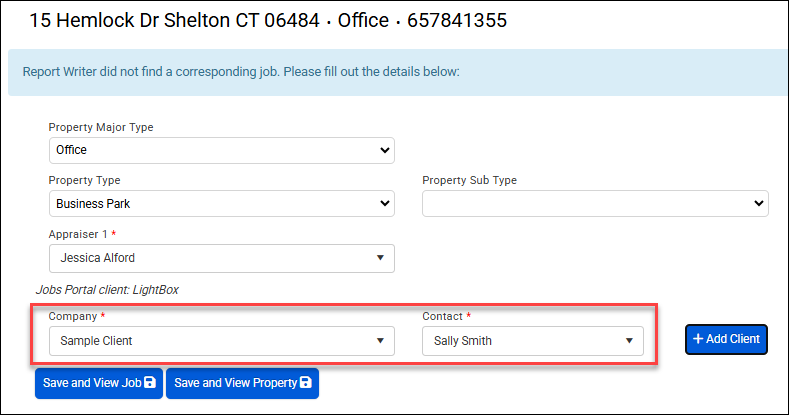
4. The Add Client modal will close and the Company and Contact from the form will be selected.
5. Click Save and View Job to open the Job in the Report Writer Jobs feature.
Alternatively, click Save and View Property to open the property page in Report Writer.
- Job Name.
- Job Number becomes Client File Number.
- Property Types are re-translated within Report Writer.
- Property Location information.
- Client info is re-translated in Report Writer
- Fee from RFP dashboard or from RIMSCentral/Parcel
- Delivery Date -> Due Date
- The originator in Report Writer Web is auto populated from the Jobs application in the following three scenarios:
- RIMSCentral/PARCEL- owner of the account will be named originator
- Direct Award- originator will default to user who set up the job
- Bulk Upload- originator will default to the user identified under “Owner Email”
All jobs, regardless of scenario, can have the originator updated in Report Writer Web by editing the job under the ‘Jobs’ category.
Duplicate Property Resolution
After clicking Save and View Job or Save and View Property, a new page may appear if one or more properties are within 100 meters of the imported property. This is based on the latitude/longitude values of the properties, not on the address(es). Any properties that fall within the 100-meter radius are listed in a table.

Along with the address, the table lists the data associated with each entry. This assists with informing the decision with which property to select as the target.
.png)
Two entries are highlighted in the example above. The first entry (Property ID 871) has Sales Data, Lease Data, MF Data, and Inc/Exp Data associated with it. The second entry (Property ID 5172) only has Sales Data associated with it.
To ignore the duplicates and continue creating a new record, click Create New Property. The new record will open on that property’s General tab.
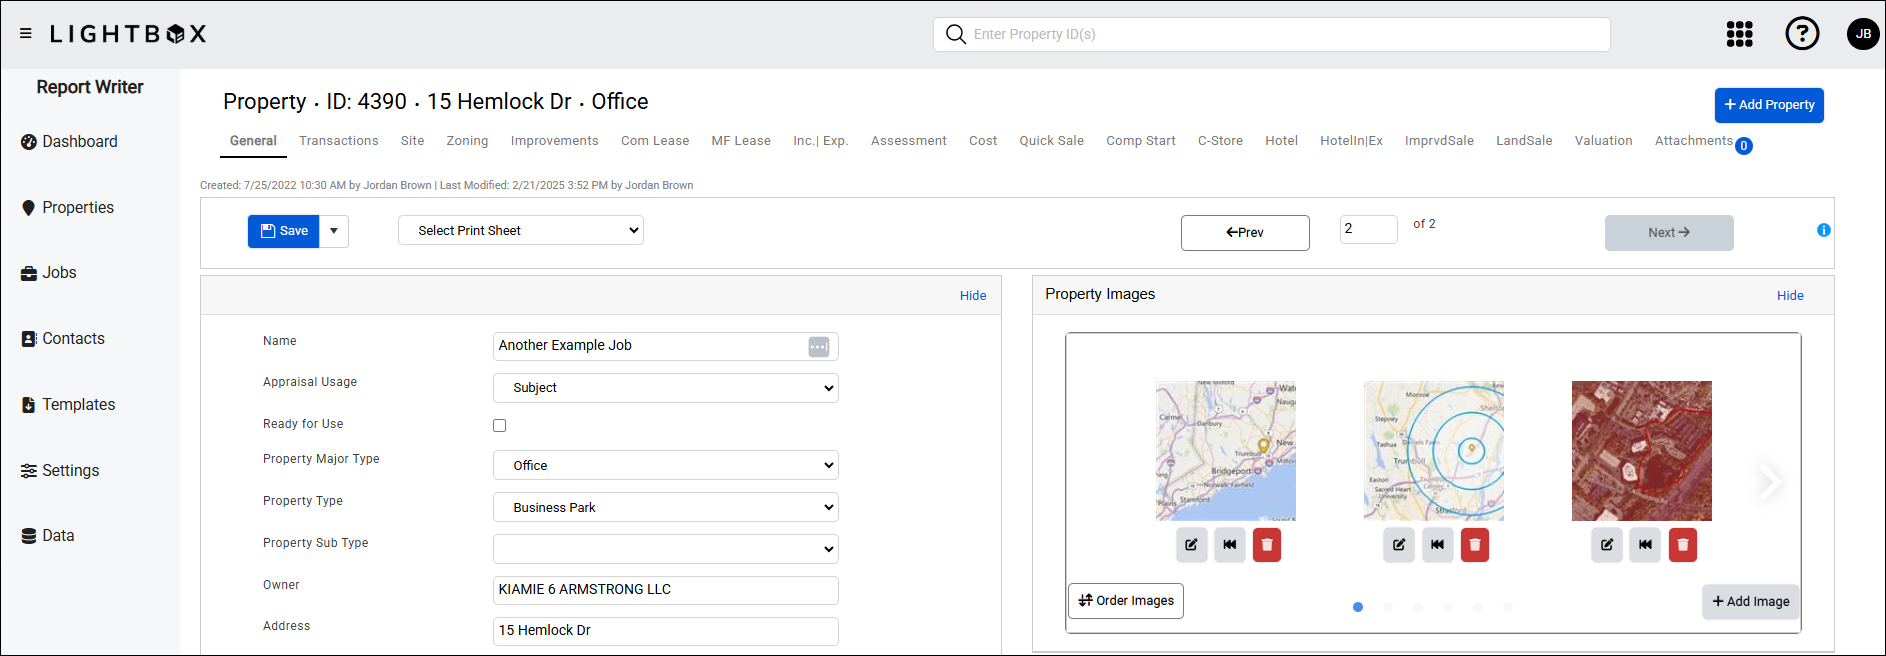
To use one of the existing properties, click on that property’s row and then click Use Selected Property.

The Data Resolution panel will open below. This panel lists the selected property record and the property record being imported, along with any differences between the two.
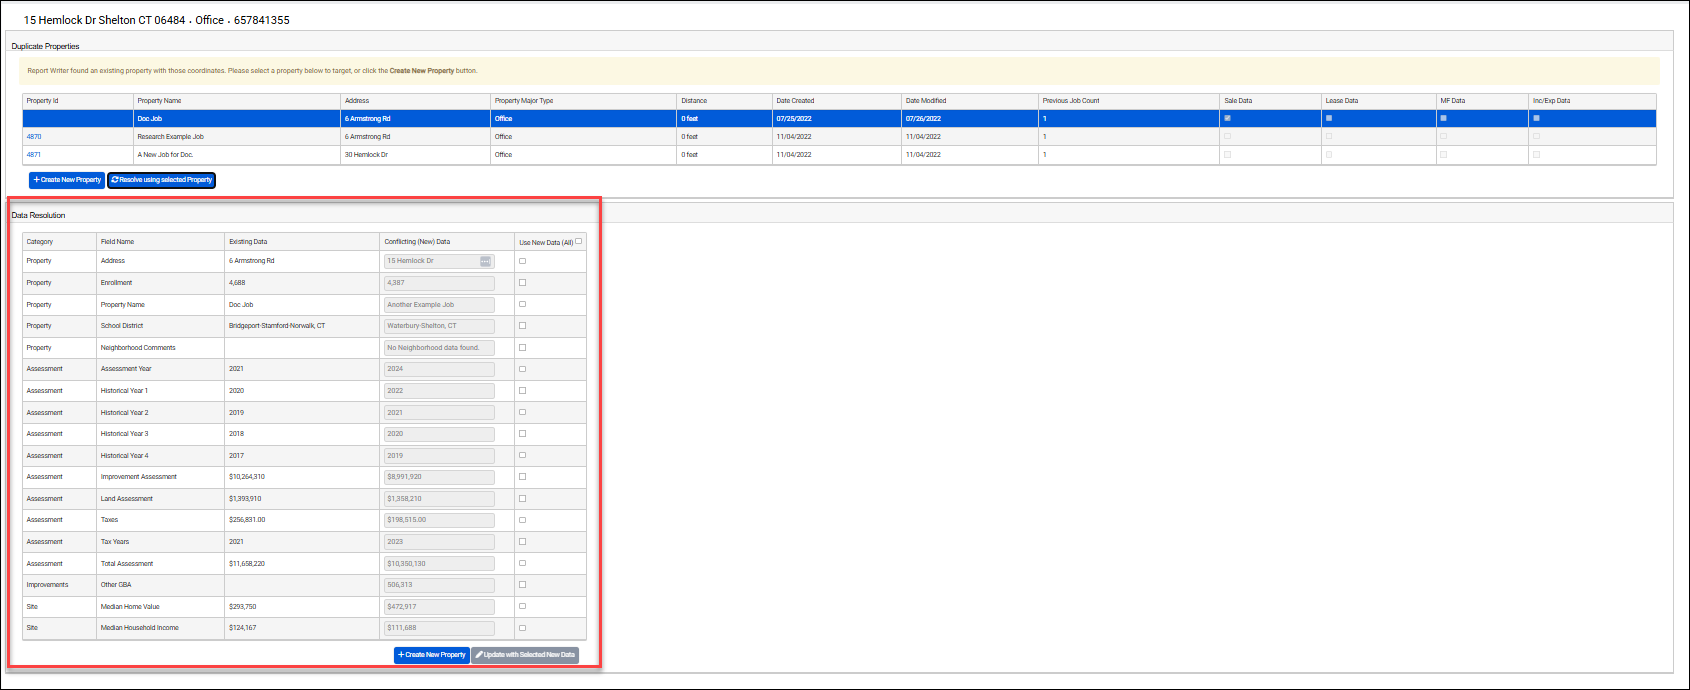
In the example below, the two ways in which the new record differs from the existing record are highlighted: Enrollment and Property Name. The existing record has the address Enrollment value of 4,688 and the new record has a conflicting value of 4,387. The existing record has a Property Name of 'Doc Job' and a new Property Name value of 'Another Example Job.'

To select all new data, click the Use New Data (All) checkbox in the upper right corner of the table. After selecting the Use New Data checkbox, the data can continue to be edited to match.

You can also create a brand new property if that is appropriate.
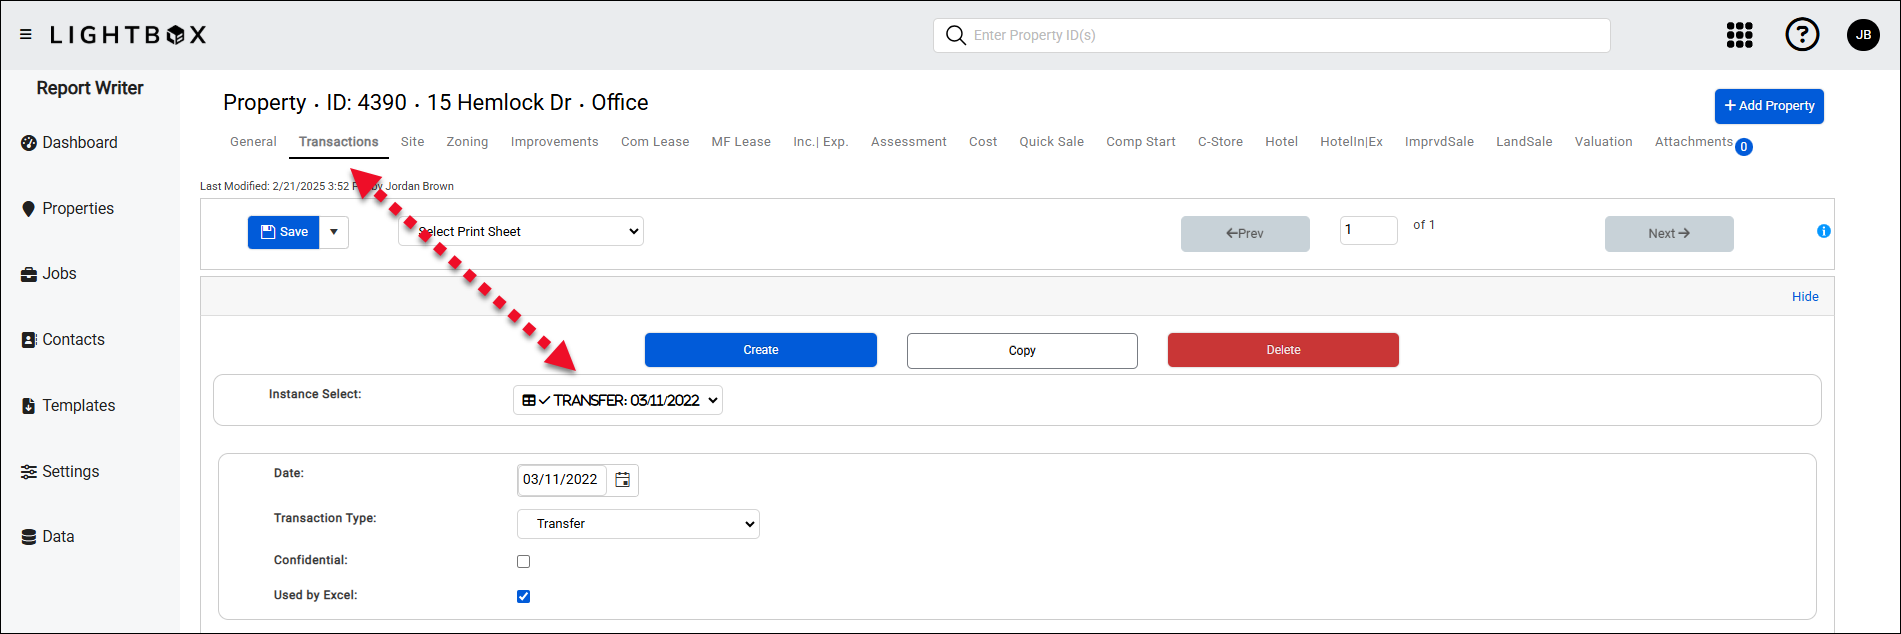
Click Update with Selected New Data to complete the import process. Note: Transaction/Sale data will automatically create new instances. Navigate to the Transactions page and choose the appropriate instance to use in Excel.
.png)

.png)