- Print
- DarkLight
- PDF
Project Search Page
- Print
- DarkLight
- PDF
Description
The Project Search page allows you to view and filter your Projects quickly and efficiently.
Project Search Page
Project information is presented in a table on the Project Search page. Each row is a unique Project.
Click on Open Project to open that Project’s Overview page. You can start or continue research for that Project on the Overview page.

If you are a Report Writer user, click the arrow to the right of Open Project to expose a menu with a link to Report Writer. Click the link to open Report Writer.
 The specific page opened in Report Writer depends on what steps have been completed so far:
- If the Job has not yet been imported into Report Writer, you will be taken to the Job integration page to enter the Job details, etc.
- If the Job has been imported but the Research Project has not yet been completed, you will be taken directly to the Property in Report Writer.
- If the Research Project has been completed but the data has not yet been imported into Report Writer, you will be navigated to the Property where a modal will prompt you to import the Research data.
Click the blue back button in the upper left corner of the Project Overview page to return to the Project Search page.

The Projects table includes a variety of tools for searching, sorting, and managing Projects.
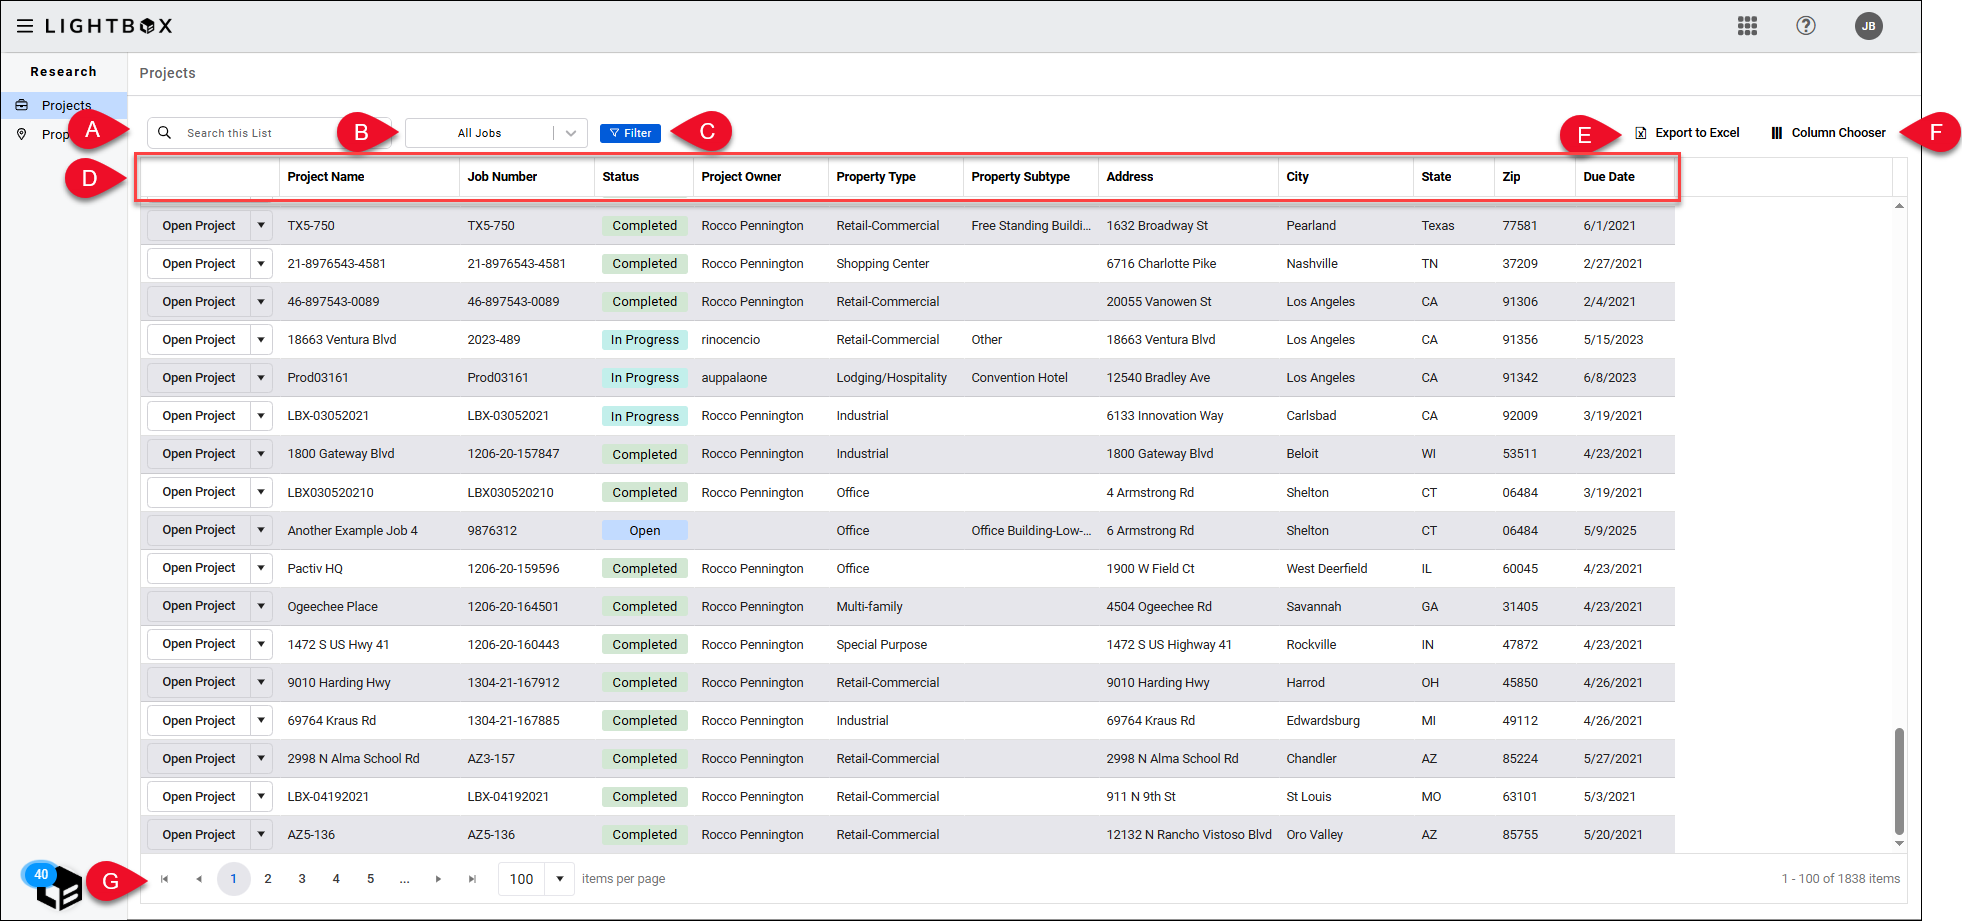
A. Search
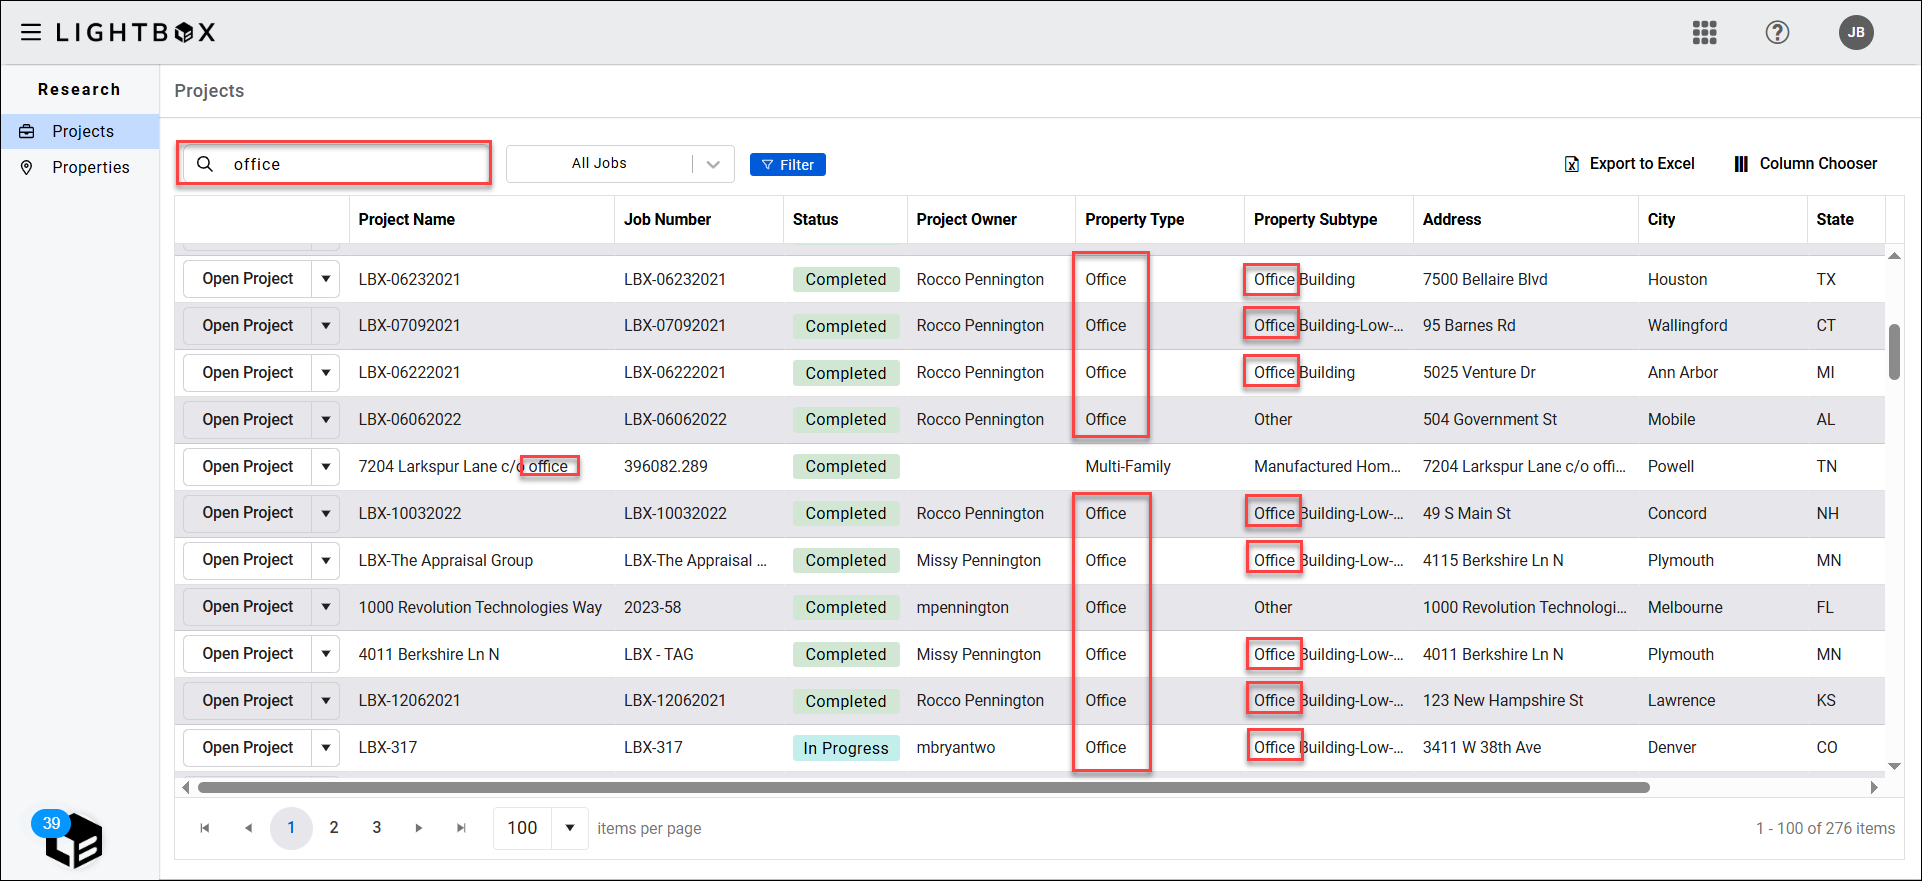
Enter one or more characters in the search bar and click the magnifying glass to filter the table by that search phrase. All columns (Job Number, Address, Due Date, etc.) are searchable.
B. Filter by Status and Ownership
Click the dropdown menu and select a status and Project ownership to filter the table.

C. Filter
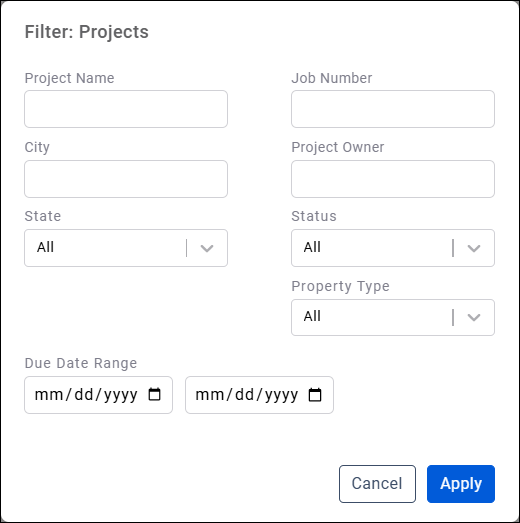
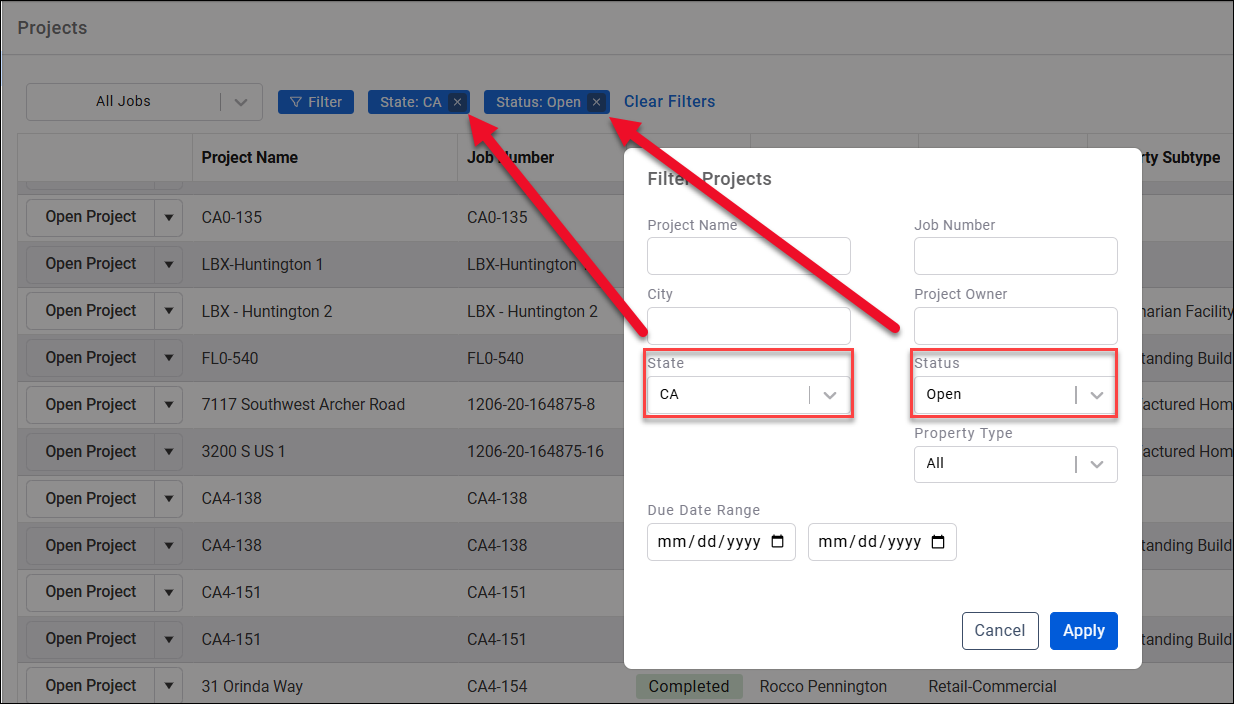
Click the Filter button to open the Filter: Projects modal. This modal includes fields and dropdown menus for filtering the table by one or more criteria simultaneously.
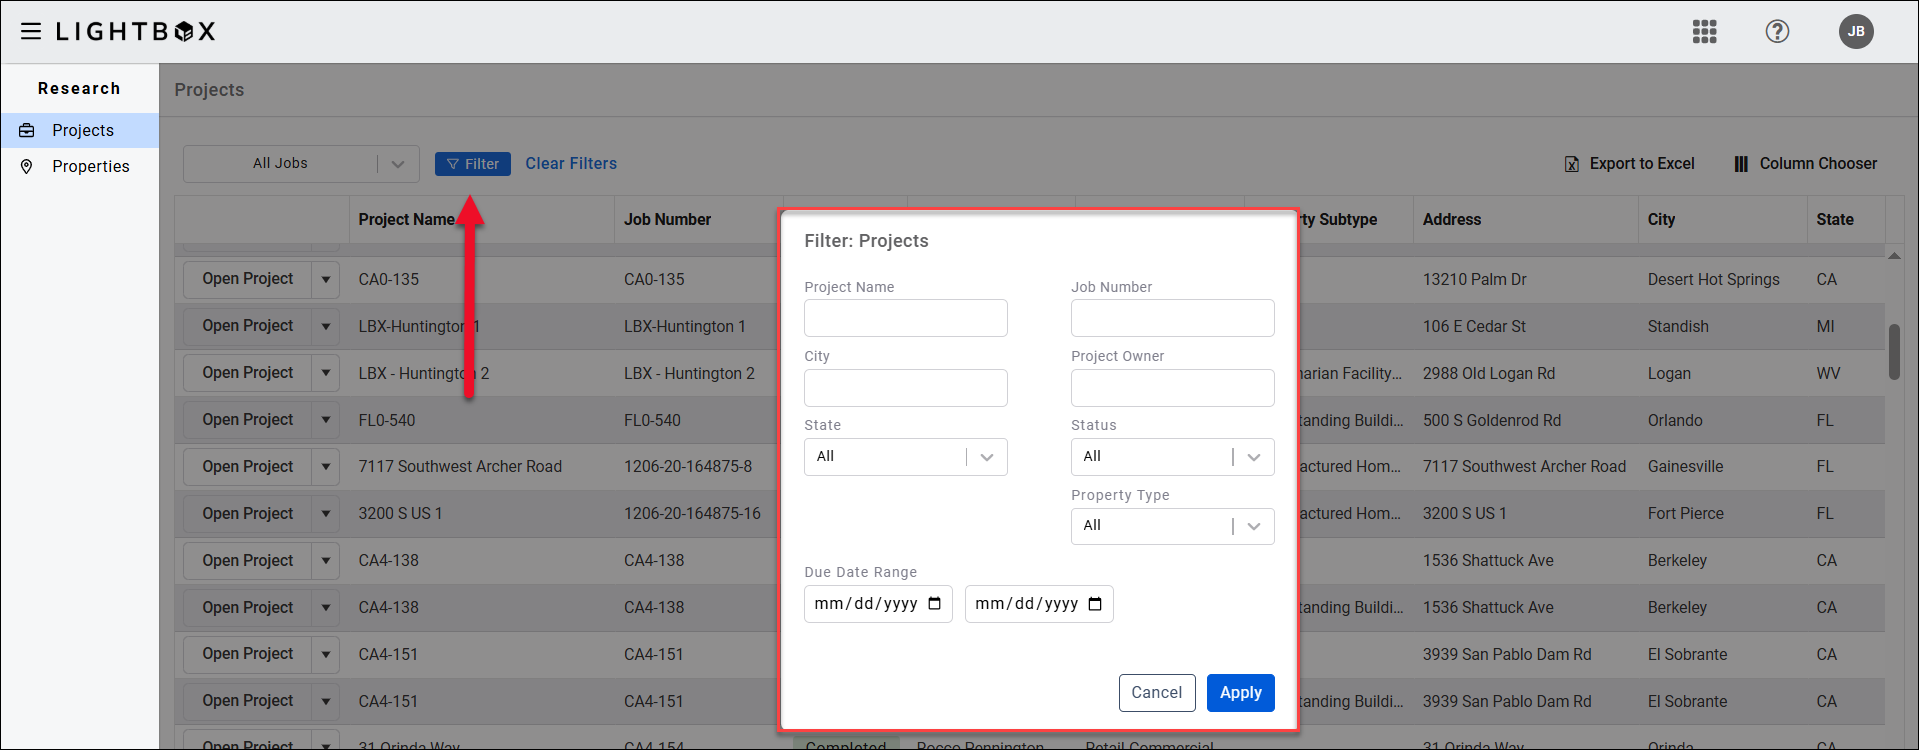
In the example below, State and Status filters have been applied. Only Open Projects in the state of CA will appear in the filtered table.
The active filters appear above the table. Click the x in a filter to remove that filter. Click Clear Filters to remove all active filters.
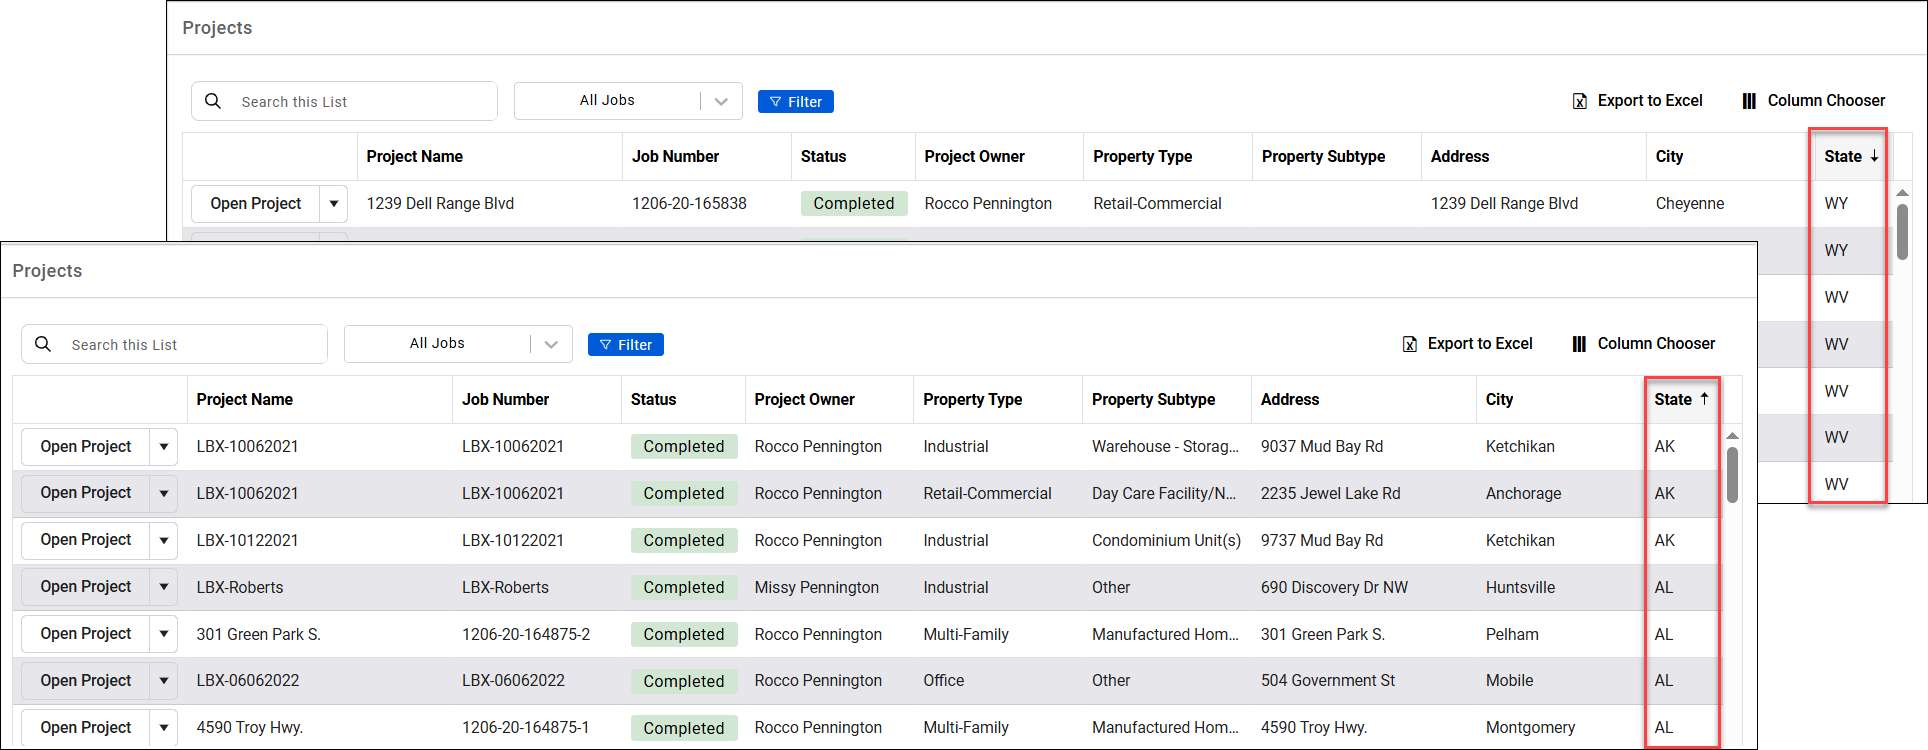
D. By default, the table results are sorted by the Due Date column in descending order. To sort by another column, click on the column header of the column you wish to sort by. A small upward-facing arrow will appear in the column header indicating the table is sorted in ascending alphabetical or numerical order (depending on the data type). Click a third time to remove the sorting.
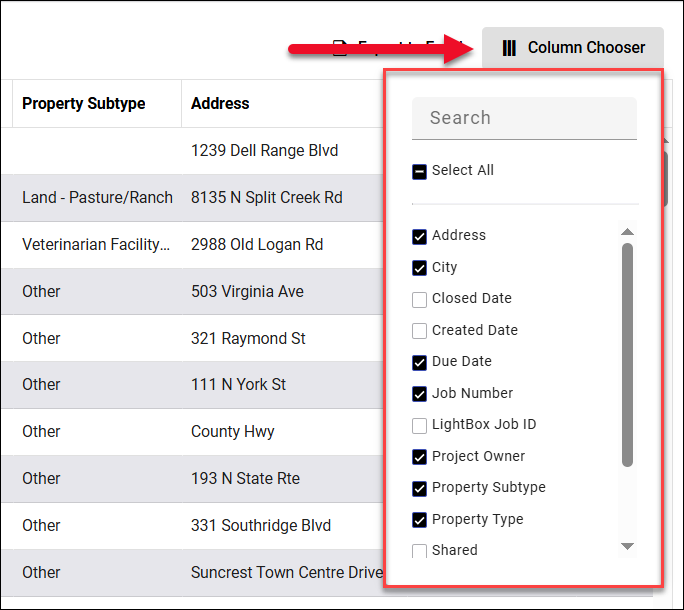
E. Click Export to Excel to download an .xlsx copy of the contents of the table. This includes all table data, including rows on subsequent pages and columns that have been unchecked in the Column Chooser. F. Click Column Chooser to open the Column Chooser modal. Click the checkbox next to a column title to show/hide that column in the table. Columns with a blue checkmark are displayed in the table.
Enter a complete or partial column title to filter the Column Chooser by that title, making it easier to find the column you are seeking.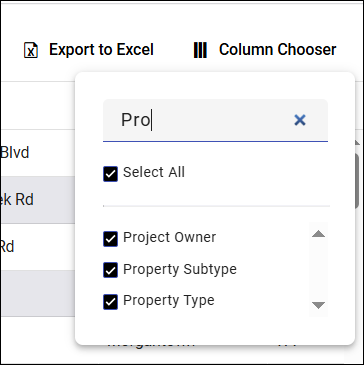
G. Use the buttons in the bottom left to navigate the table and define how many items are on each page.

- Click the outermost arrows to jump to the first page (left arrow) and last page (right arrow).
- Click the inner arrows to navigate to the page immediately preceding the one you are currently on (left) and following the page you are currently on (right).
- Click the dropdown menu and select whether 100, 500, or 1000 items should be displayed on each page.
.png)

.png)