- Print
- DarkLight
- PDF
Overview
- Print
- DarkLight
- PDF
Description
The Project Overview page provides Property and Project summary information for the selected Project. It provides reference and context for completing subject research.
Project Overview
You can access the Project Overview page using one of two methods:
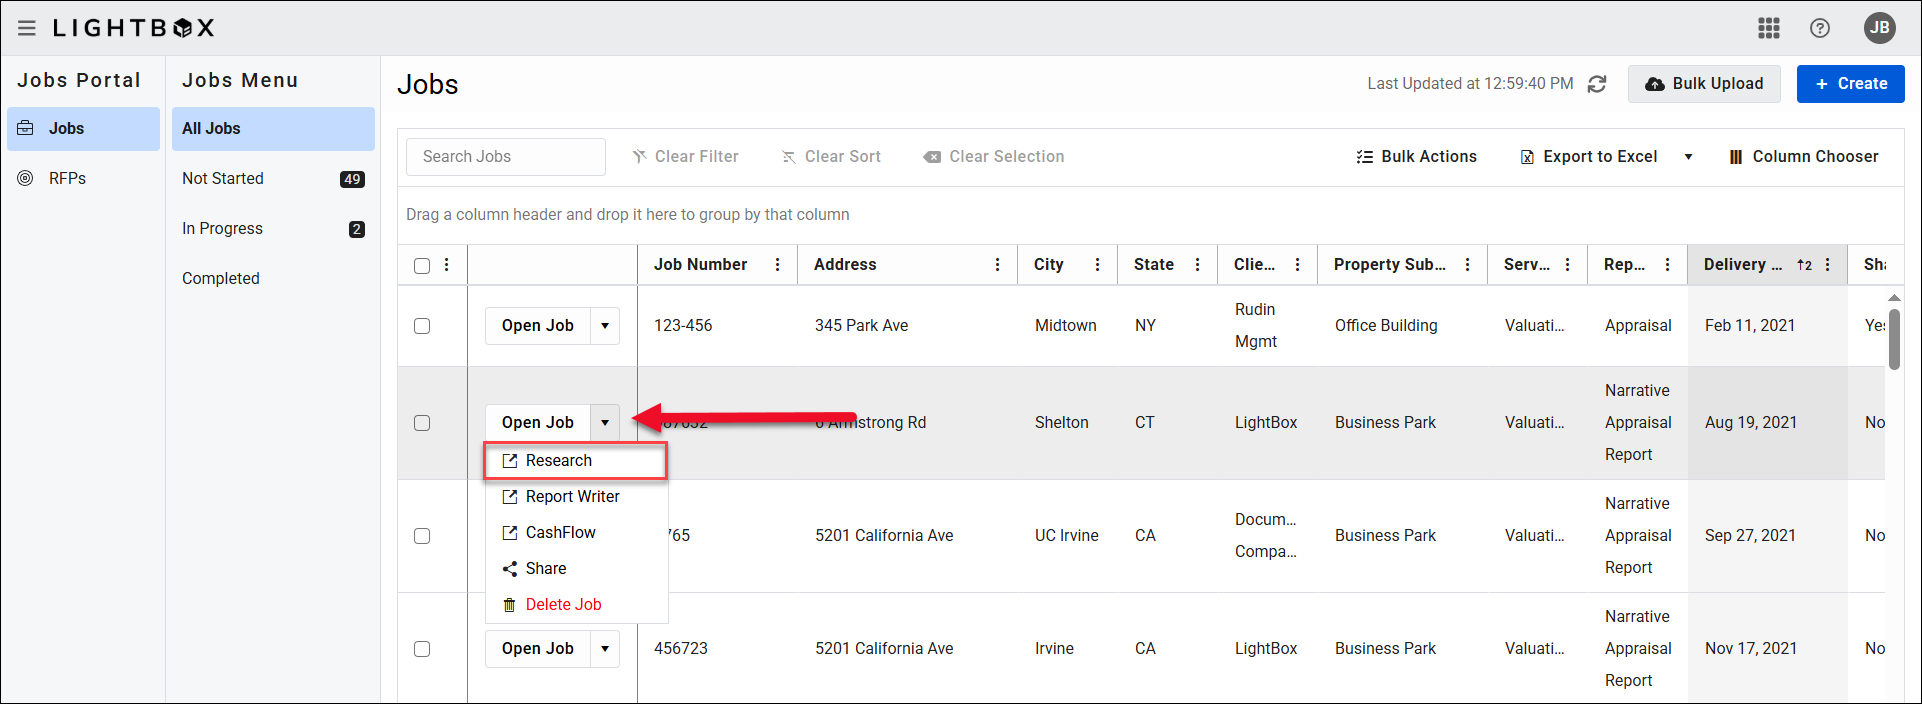
Method 1: Within the Jobs Portal, click the down arrow next to a Job and then click the Research button in the drop-down menu.
Method 2: The Project Overview page can also be reached from the Project Search page. Click on Open Project.

The Project Overview page will open.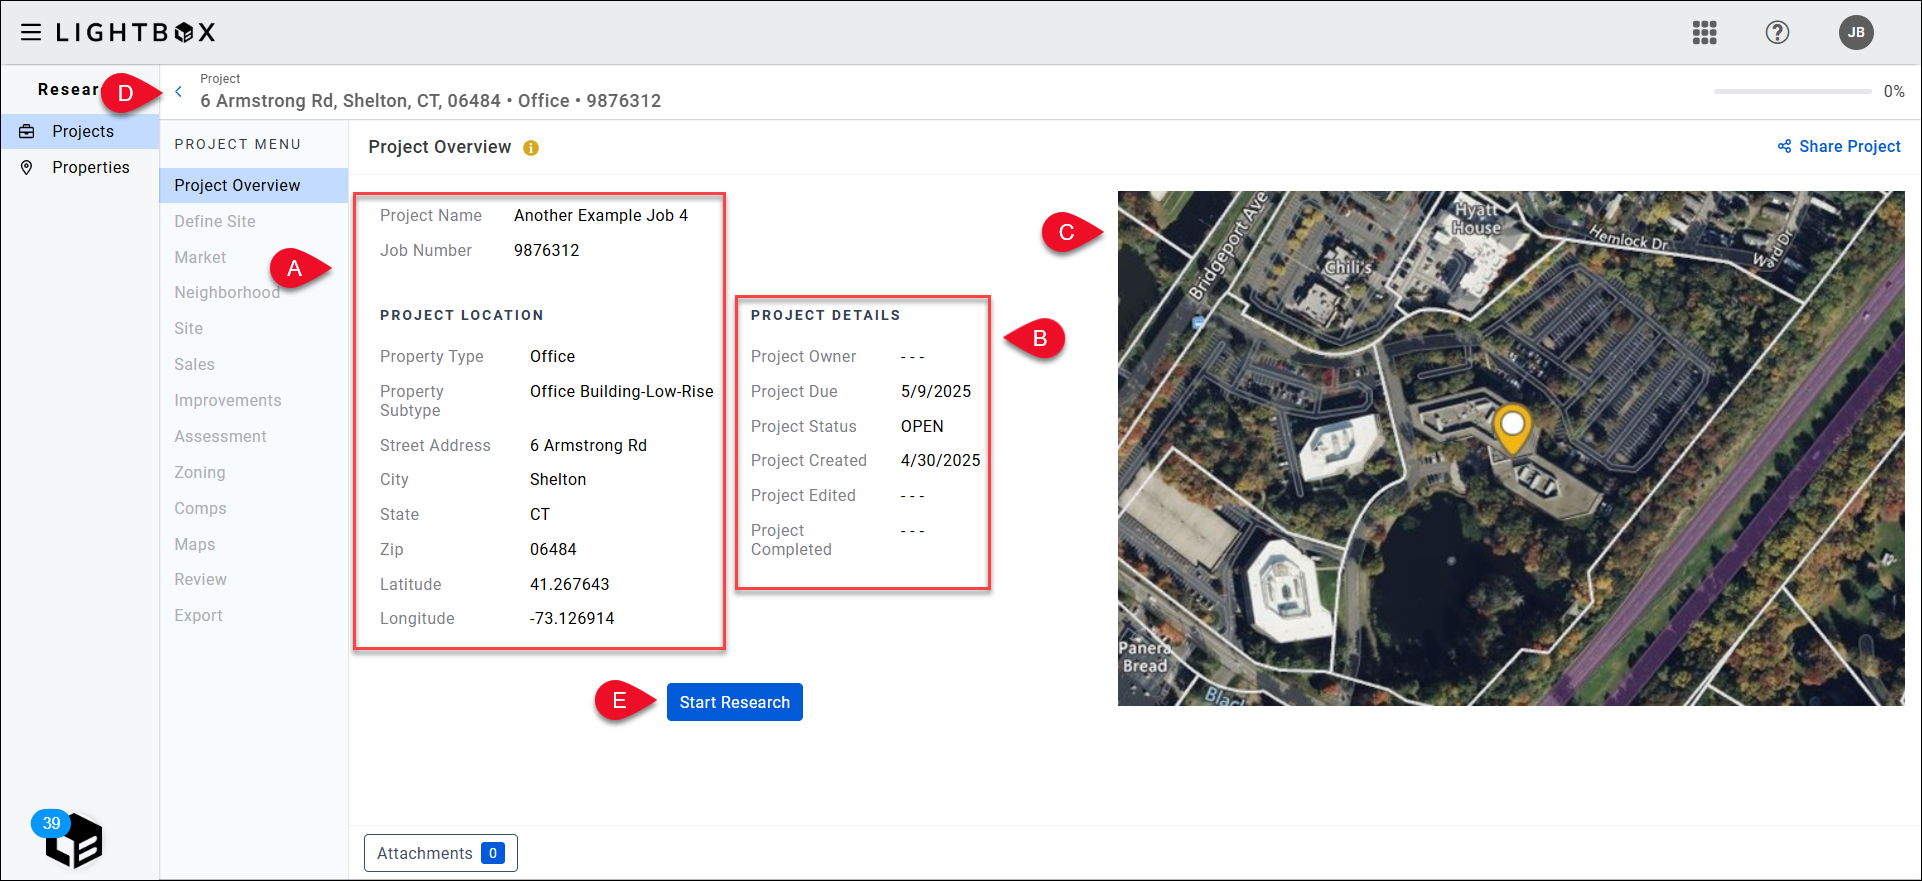
A. Review Property summary information.
C. Review subject property map. Note: The map pin is derived from the Job Manager’s Lat/Long.
D. Click the blue, back arrow to return to the Project Search page.
E. Click Start Research to begin the research process. Note: Starting a Project will set the Project Owner name and put the Project “In Progress.” Once the research process has been started, the "Start Research" button label changes to "Continue Research." This change will not be visible until you refresh the page or navigate back to the page from elsewhere on the Valuation platform.
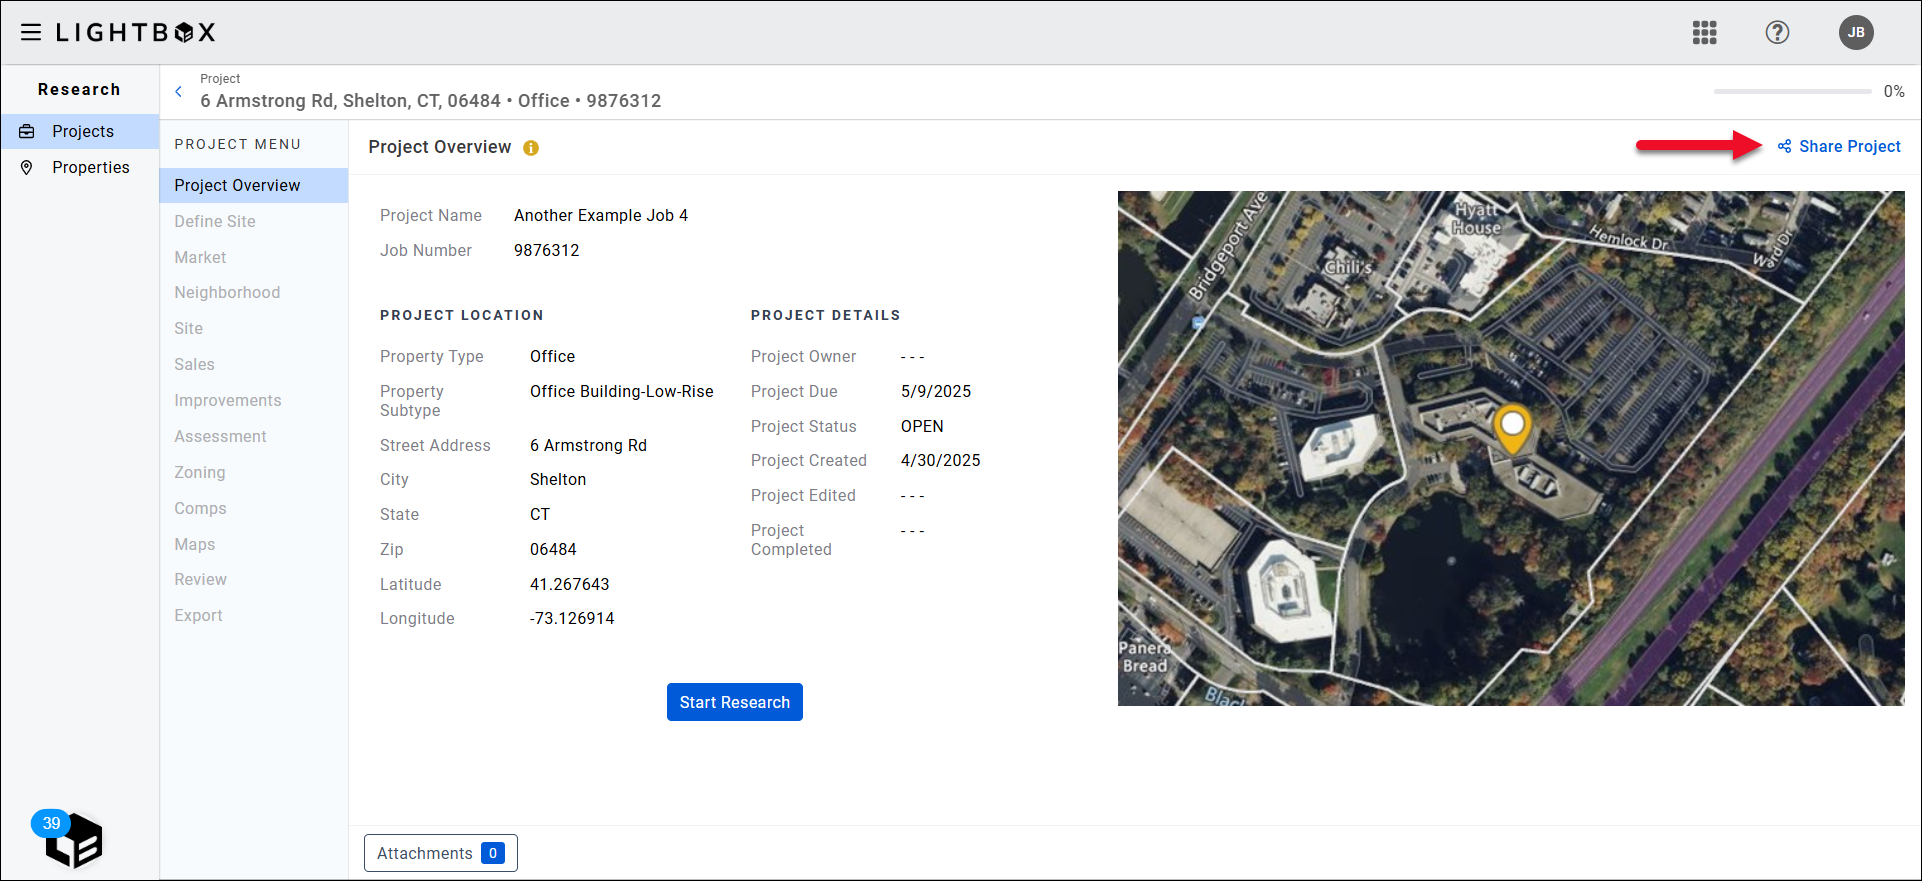
To share a Project with a team member, click the Share Project button in the upper right corner of the screen.
The Share Project modal opens. If the Project has already been shared, a list of the users it has been shared with will be displayed. Click the X next to a user’s name to remove that user’s access.
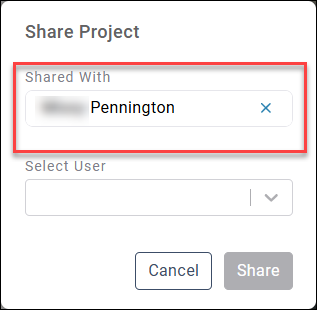
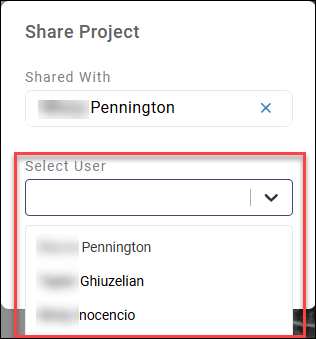
When a user is selected, their name will be added to the Shared With list. They will receive an email notification.

- Moody's Analytics: This optional data offering is available on the Analytics tab in the Market section.
- If REIS data has been retrieved, a green checkmark icon will be displayed along with the following message: “REIS data has been successfully retrieved and will be included in output.”
- If there is an issue with REIS data retrieval, a red X icon will be displayed along with the following message: “There is an issue with the REIS data for this project, please contact support.”
- If you have opted not to use REIS data, a red X icon will be displayed along with the following message: “You have not requested REIS data for this project.”
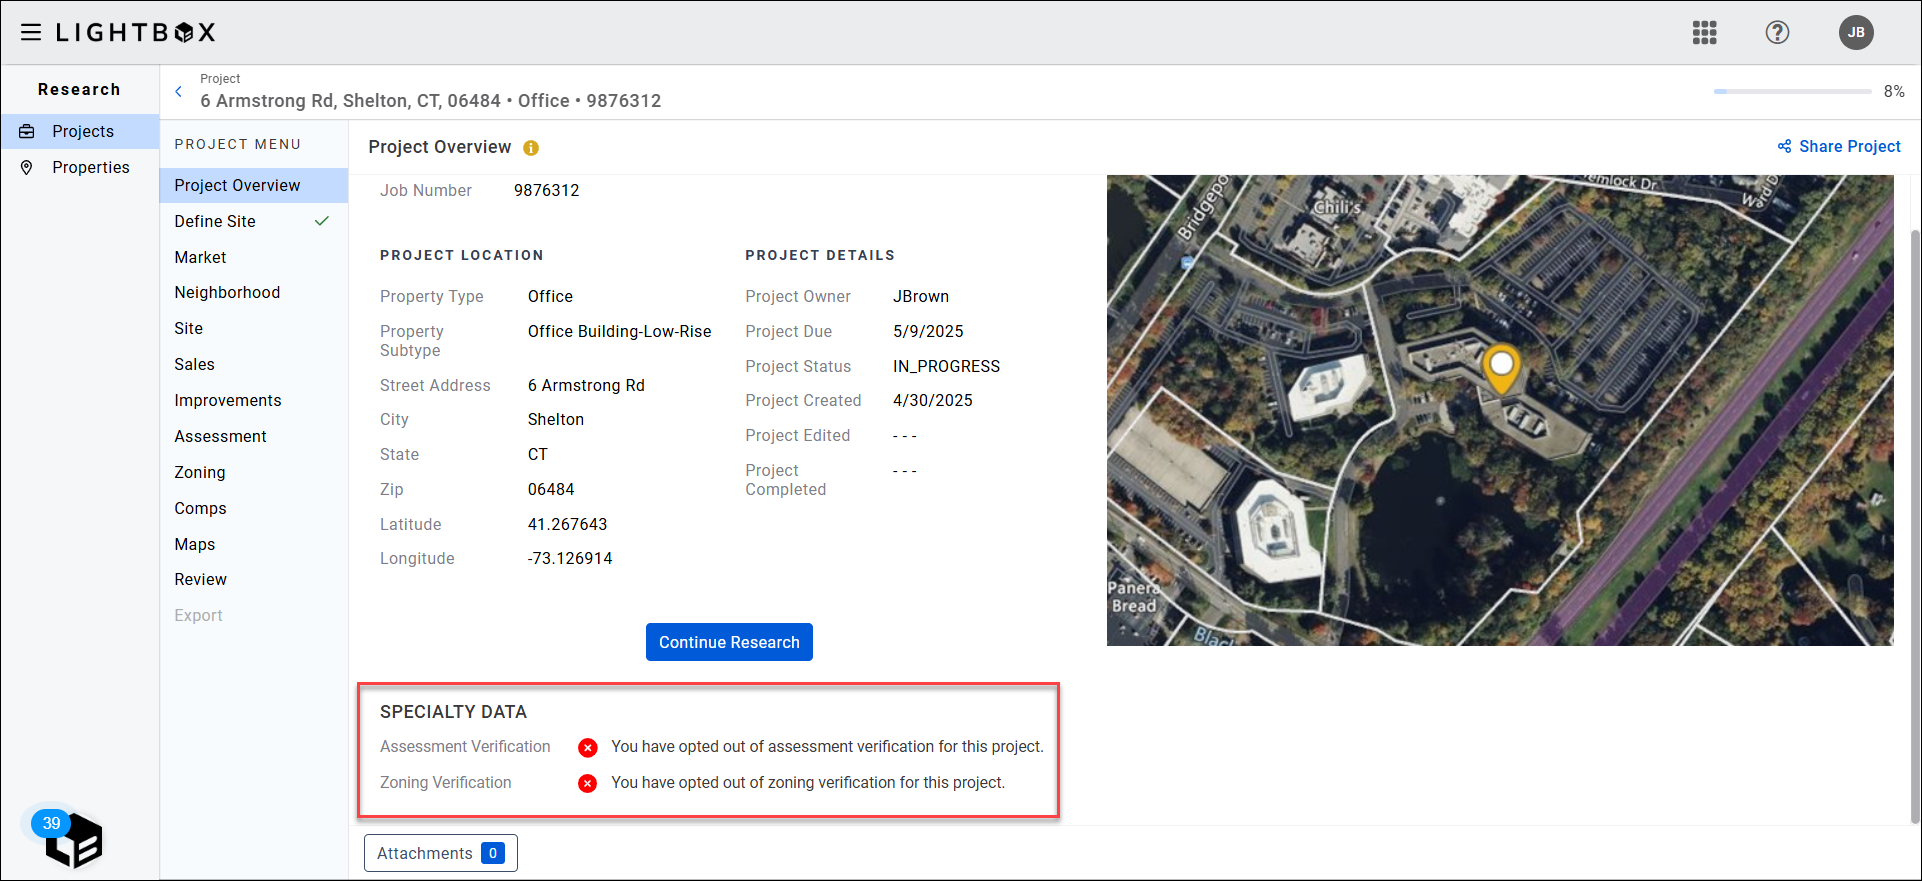
- Assessment Verification: The LightBox fulfillment team can verify assessment data for your project. This optional service is selected on Define Site.
- If Assessment fulfillment is open, or in progress, a blue hourglass icon will be displayed along with the following message: “LightBox researchers are in the process of verifying assessment and tax data.”
- If Assessment fulfillment is complete, a green checkmark icon will be displayed along with the following message: “Assessment data has been verified by LightBox.”
- If you have skipped or cancelled assessment fulfillment, a red x icon will be displayed along with the following message: “You have opted out of assessment verification for this project.”
- Zoning Verification: The LightBox fulfillment team can verify zoning data for your project. This optional service is selected on Define Site.
- If Zoning fulfillment is open, or in progress, a blue hourglass icon will be displayed along with the following message: “LightBox researchers are in the process of verifying zoning data.”
- If Zoning fulfillment is complete, a green checkmark icon will be displayed along with the following message: “Zoning data has been verified by LightBox.”
- If you have skipped or cancelled Zoning fulfillment, a red x icon will be displayed along with the following message: “You have opted out of zoning verification for this project.”
.png)

.png)