- Print
- DarkLight
- PDF
Options
- Print
- DarkLight
- PDF
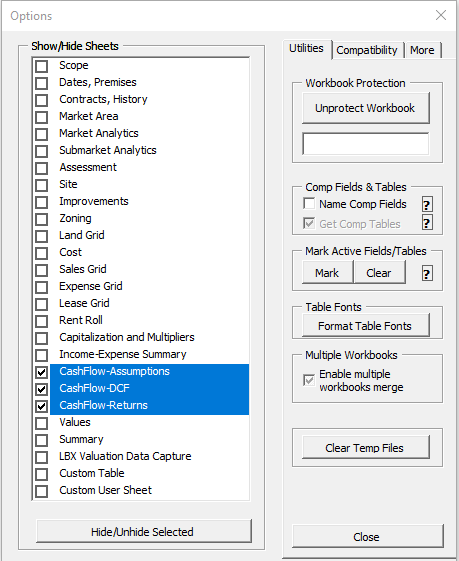
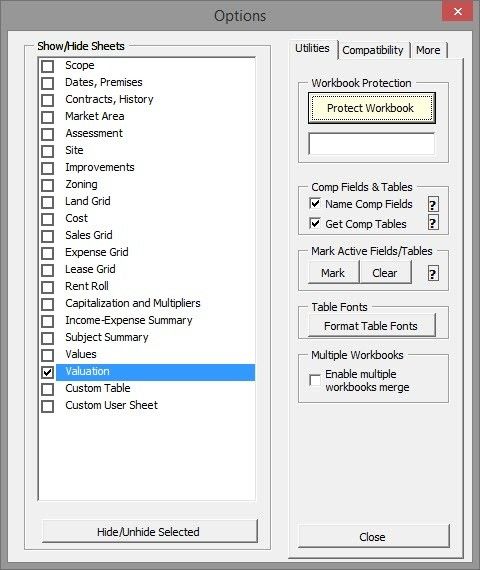
The Options menu on the LightBox Ribbon contains several key configuration settings. Some features that are available elsewhere, such as Show/Hide Worksheets, are located here for convenience. Others, such as updating your table font styles, are exclusive to this section.
The function can be accessed from the LightBox Ribbon in Excel, or by right-clicking in a cell and selecting Options.

Utilities
Show/Hide Worksheets
If you do not wish to use a specific worksheet, you can use the Show/Hide Worksheets function to hide it from the worksheet tab. Worksheets that have been hidden will not be imported into your report document upon being merged. You will, however, need to manually erase those sections from your report.
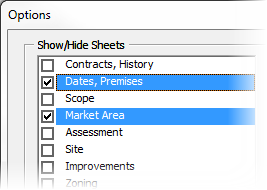
1. Select the worksheet(s) you wish to hide, ensuring they are checked.
2. Click Hide/Unhide Selected.
Clicking Show/Hide Selected again will result in the currently checked worksheets to be revealed.
Workbook Protection
By default, a Report Writer Excel file is protected (locked) to reduce user error. For example, many cells contain formulas that allow automation to occur.
If you were to unprotect your worksheet, and click into the First Name cell under First Contact on the File Info page, and delete the contents, that field would no longer update from the Contact Management feature.
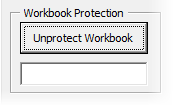
There may be situations you wish to unprotect a worksheet temporarily. For example, if you wanted to hide a row for organizational purposes, you would need to unprotect your worksheet. Creating a custom table on certain worksheets might also require this.
To unprotect a worksheet, simply click Unprotect Worksheet. Click Protect Worksheet to reverse the effect.
Comp Fields & Tables
When you merge your Report Writer Excel workbook into your Report Writer Word report, all of the tables are imported as images: in particular, this includes the Comp Summary tables on each of the analysis grid worksheets. While you can customize these tables after you've imported them, it's possible to take the individual header fields (ID, Address, City, Prices Per Acre, etc) and import them as text-based fields.
This would allow you to make a completely customized comp summary table in your report document. However, this method is not performant for prepping or merging.
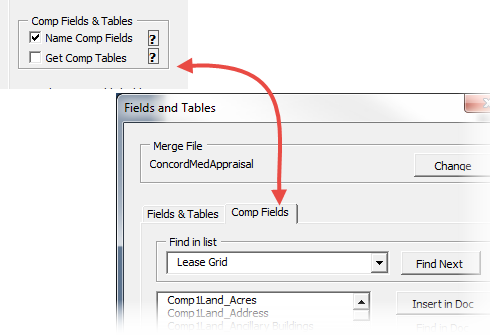
Checking Name Comp Fields will cause the above to come into effect. By checking this field, Get Comp Tables also becomes editable. By default, your comp summary tables are imported as images into your report; unchecking Get Comp Tables would negate this effect.
To Import and Access Comp Fields:
Ensure Name Comp Fields is checked.
Optional: Uncheck Get Comp Tables if you do not want your comp summary tables to be imported as images.
From the LightBox Ribbon in Excel, click Prep Fields and Tables.
Open your desired Report Writer document, and Merge the prepped file.
Click Fields and Tables from the Report Writer Ribbon.
Locate the tab titled Comp Fields and click it.
Add your fields using the Fields and Tables functionality, format as desired.
Mark Active Fields/Tables
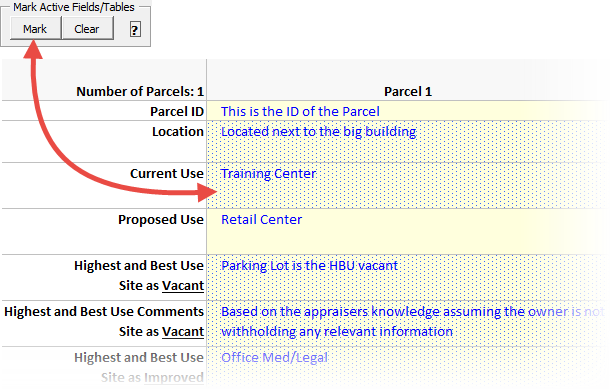
This feature highlights the fields and tables that are in the active Word document. For example, if the Word document contains only fields and tables for a short land analysis, only those fields and tables will be highlighted in Excel. Thus, the analyst can quickly identify the pertinent fields that need to be completed in Excel.
To Activate Mark Fields & Tables:
Click Mark from Report Writer Options.
Click Merge Fields and Tables from the Report Writer Ribbon report document.
Click Mark from Report Writer Options again.
Cells that are not shaded signify that they are not featured in the Report Writer report document, while shaded cells are present. Clicking Clear will disable the function.
Holding CTRL+SHIFT+F will cause you to select the next highlighted field available, and CTRL+SHIFT+B will select the previous.
Table Fonts
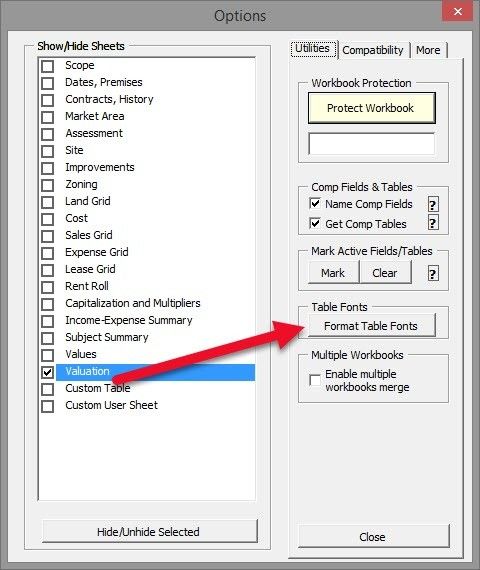
For every table featured in a default Report Writer Excel file, the standard font styling is Times New Roman at 10 font size. Format Table Fonts allows you to change the style for every table in your Excel file.
By clicking Format Table Fonts, a window will open that mirrors a standard Microsoft font formatting menu. Any changes made within this window will be enacted across all of your tables; changing Times New Roman to Arial, for example, will cause all of your tables to follow that new style guideline.
It is not possible to change individual tables from this menu.
Formatting table fonts with sizing requirements that are above the default size could result in disproportionate table cells.
For example, a value might not be represented fully in a cell because the font is too large, and the cell too small.
In these instances, please consider the following solution:
Unprotect the worksheet.
Click into the cell that is displaying incorrectly.
From the Home ribbon in Excel, click Format > AutoFit Column Width.
Repeat steps 2 + 3 as necessary.
Protect the worksheet.
Clear Temp Files
Presently, if a map already exists in the temp files for an Excel file (*%temp%(name of Excel file)\exceltables*), it is skipped and not re-prepped when running *Prep Fields and Tables*. Another case where maps might not reflect the most recent information is if the user changes the subject's latitude/longitude after the map is generated (since that can be done without *Add/Arrange Comps*>*Apply*).
Compatibility
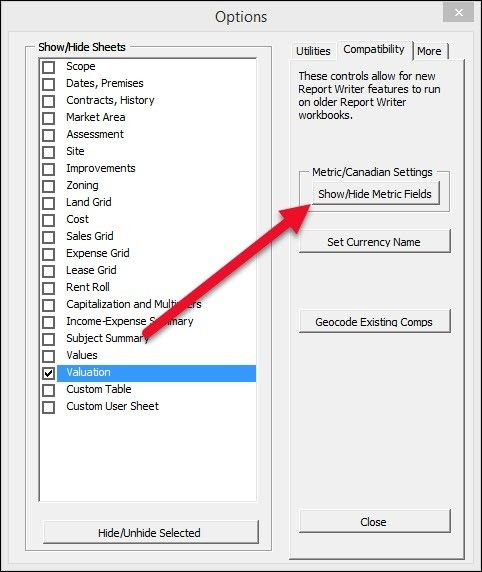
Show/Hide Metric/Canadian Fields
By default, all the fields within Report Writer Excel display the Imperial, or United States Standard, unit type for values. By clicking Show Metric Fields, every field that has an Imperial unit type will display a Metric variant. These fields are displayed in addition to the existing Imperial unit type.
For example, by default, on the Site worksheet, Gross Land Acres is represented in Acres and Square Footage. By clicking Show Metric Fields, fields will appear that display Gross Land Acres in Hectares and Square Meters below.
Set Currency Name
Set the currency name for the spelltext function.
Geocode Existing Comps
This code will run in the backend and attempt to add Lat/Long to comparables in your database. Depending on the normalization of addresses in your database, the derived Lat/Long can be very incorrect and this function should be used with extreme caution.
More
These functions are for in-depth support and troubleshooting.
Range Names
Clean Names - Removes range names with errors. Range Name errors can occur if a sheet is deleted or if a sheet is imported without utilizing the merge workbooks tool.
List Names - Creates a worksheet and lists all names within the workbook. Helpful for troubleshooting external and bad references or missing name ranges.
Excel Tables
Mark Excel Tables - This will mark tables with a red dot pattern, so that merging to word can verified.
Clear Excel Tables - This will clear the red dot pattern.
Spell Currency
Fix Formulas - updates an older workbook with the supported spell function
Other
Distance - Recalculates subject/comparable distances
.png)

.png)