Merge Workbooks
- Print
- DarkLight
- PDF
Merge Workbooks
- Print
- DarkLight
- PDF
Article summary
Did you find this summary helpful?
Thank you for your feedback!
Merge Workbooks is a utility that allows you to merge a worksheet that exists within one Excel file and insert it into a Report Writer file, either as a worksheet replacement or an addition. This is useful if you need to repair a worksheet, or add worksheets you created in one workbook into a new project file.
The Merge Workbooks function should always be used if the worksheet:
Contains user customization (range names).
Is a default Report Writer worksheet.
The function can be accessed from the LightBox Ribbon in Excel.

How to Merge Worksheets from One Excel File to Another
| 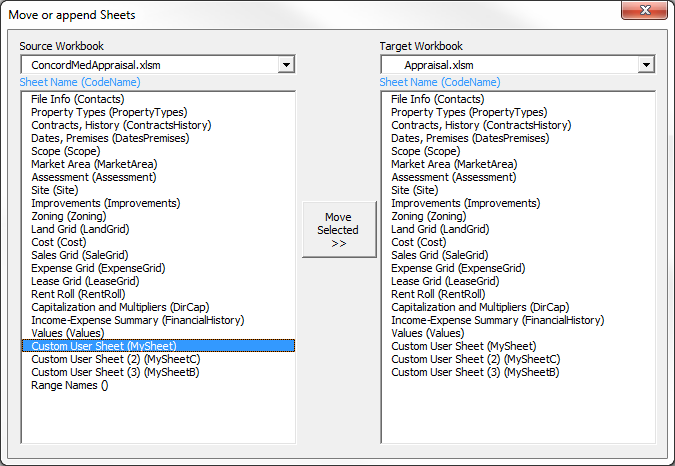 |
If a copy of the to-be-transferred worksheet exists in the Target Workbook, a dialog box will appear.
| 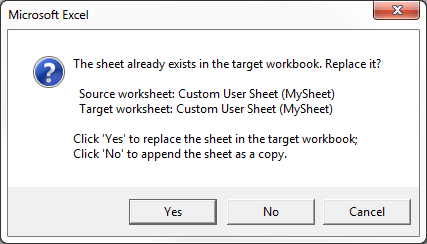 |
How to Prepare a Non-Report Writer Worksheet to Merge
User-created worksheets must be assigned an ‘internal' name in order to be transferred between workbooks using the Merge Workbooks function. If the worksheet was created in a Report Writer workbook, users cannot do this themselves, as access to Report Writer’s VBA code is password-locked. In these cases, the workbook must be sent to reportwritersupport@lightboxre.com for support to set it up. Because of this, it might be a good idea to create new worksheets in a non-Report Writer workbook, name it using the instructions below, and then use Merge Workbooks to insert it.
After creating a custom worksheet in a non-Report Writer workbook to import into Report Writer, you’ll need to assign it an "internal” name.
| 1. If you haven’t already done so, you will need to enable the Developer ribbon. To do this, right-click the grey, unused space in any ribbon in Excel and select Customize the Ribbon. 2. On the resulting screen, in the list of ribbons on the right, click Developer. | 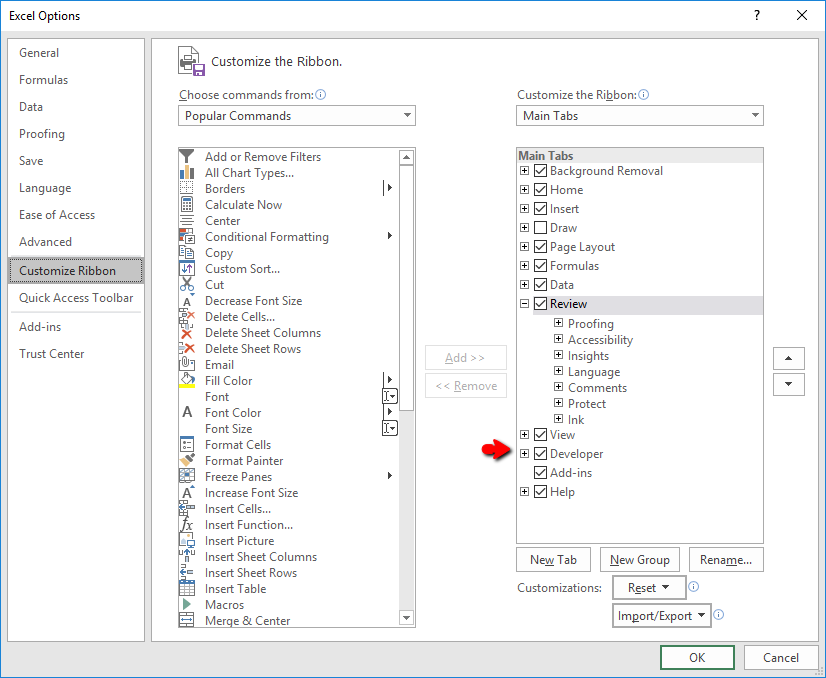 |
| 3. Once this is done, click OK, click the Developer ribbon, and click Visual Basic on the left. |  |
| 4. You will be taken to a screen like the one below. Click the + sign beside your workbook on the left, then click the + sign beside Microsoft Excel Objects. | 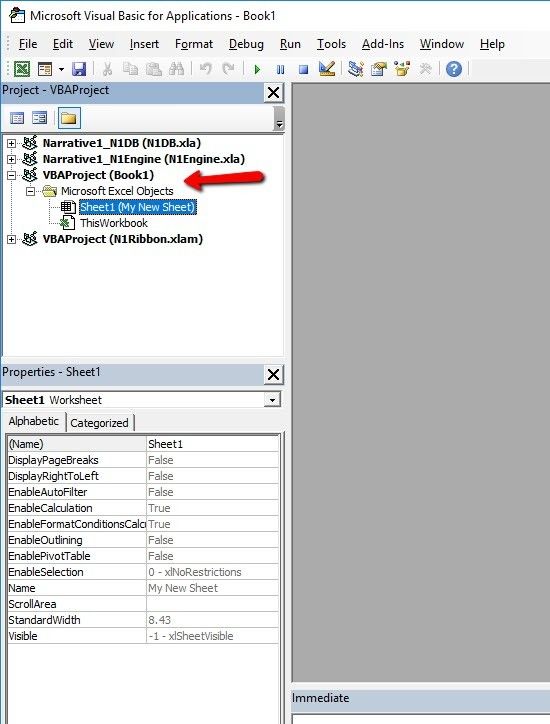 |
| 5. Your sheet should be visible with its name in parentheses. The first name shown will be a default name, like “Sheet1” or “Sheet2.” To assign the internal name, just click the worksheet. Then in the Name field below, change the name given to the internal name you wish to assign. Press Enter to confirm the change.Note: This field does not accept spaces or special characters. It is a good practice to simply duplicate the “display” version of the sheet Name with no spaces. For example, if the display name is "My New Sheet," enter "MyNewSheet" in the Name field. | 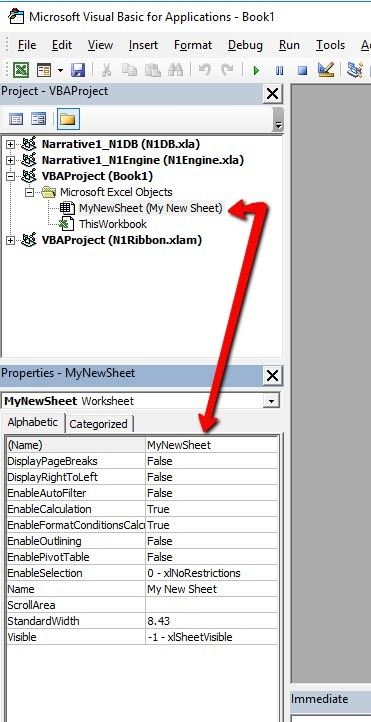 |
| 6. Once the name has been entered, click the Save button in the upper left or press CTRL-S on your keyboard. After this, your custom sheet can be merged into a Report Writer workbook using the Merge Workbooks tool. | |
For assistance with this process, contact Report Writer Support at reportwritersupport@lightboxre.com
Was this article helpful?