- Print
- DarkLight
- PDF
Location Map Settings
- Print
- DarkLight
- PDF
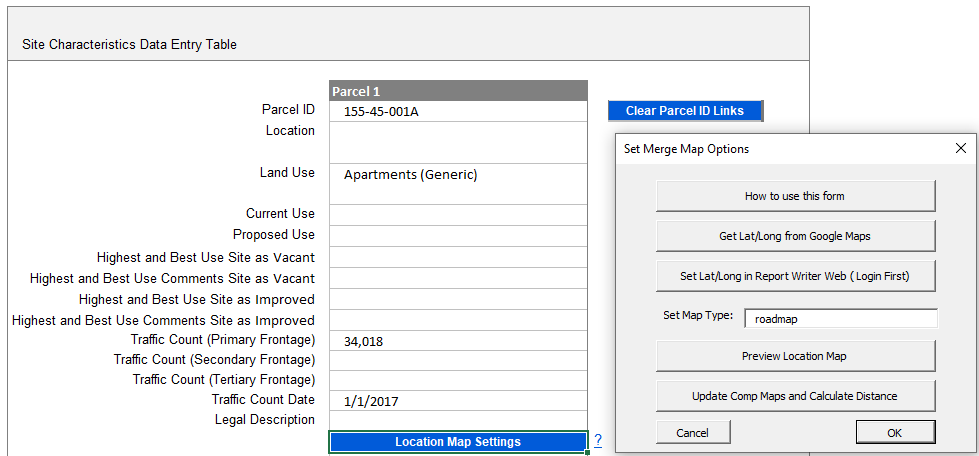
The Location Map Settings form assists in previewing the subject location map.

Setting Lat/Long
If the Latitude/Longitude for the subject has not been set, there are three options for populating the fields.
- If the subject has been imported, navigate to the General page of the property and set the Latitude/Longitude. You can choose to re-import the subject, which may overwrite data in the Excel, or you can individually copy and paste the Latitude and Longitude into the appropriate Excel fields.
- Newer versions of the engine provide a button for a direct link to the property. Make sure to login first.
- If the subject has not been imported, you can click the Subject Export Data button in the LightBox ribbon to create the record in web, navigate to the General page of the property and set the Latitude/Longitude. You can choose to import the subject, which may overwrite data in the Excel, or you can individually copy and paste the Latitude and Longitude into the appropriate Excel fields.
- You can utilize Google Maps or another map service.
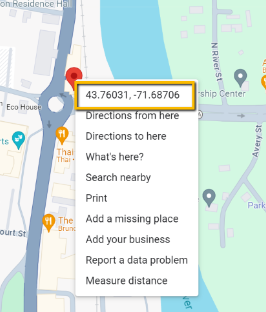
- Clicking Get Lat/Long from Google Maps will open a Google Maps page in your browser with the address of your subject already entered. Confirm the red pin on the map shows the correct location for the subject. If not, you can left-click anywhere on the map to relocate it. Once the pin is in the correct location, right-click on it. At the top of the menu that appears, the subject's latitude and longitude are shown. Click on these to copy them. You can then paste these anywhere that's convenient for you, such as a NotePad window, with Ctrl+V or right-click>Paste. These values can be copied and pasted into the Latitude and Longitude cells for the appropriate parcel on the Site worksheet.
Example: You can also retrieve the latitude/longitude from any other source and enter them into these cells instead. Please note the latitude and longitude must be entered in decimal format, not degrees/minutes/seconds (ex: 38.97128, not 38° 58' 16.608").
- Clicking Get Lat/Long from Google Maps will open a Google Maps page in your browser with the address of your subject already entered. Confirm the red pin on the map shows the correct location for the subject. If not, you can left-click anywhere on the map to relocate it. Once the pin is in the correct location, right-click on it. At the top of the menu that appears, the subject's latitude and longitude are shown. Click on these to copy them. You can then paste these anywhere that's convenient for you, such as a NotePad window, with Ctrl+V or right-click>Paste. These values can be copied and pasted into the Latitude and Longitude cells for the appropriate parcel on the Site worksheet.
If the subject has multiple parcels that require separate pins, repeat the steps above for each parcel.
Updating Lat/Long
If the subject Lat/Long requires an update, use the steps above to derive the correct Lat/Long and click the Location Map Settings button. Click the Update Comp Maps and Calculate Distance button.
Set Map Type
Depending on your organization's preference, the base map type for the Subject Location Map, may differ. Most organization's prefer the default roadmap, but some may choose a terrain view.
Preview Location Map
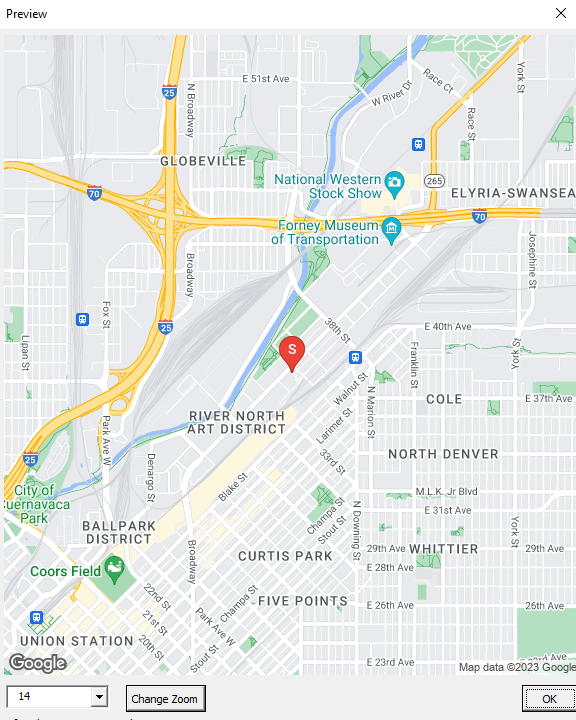
Click the Preview Location Map to set the preferred zoom level for your subject map. You can also use a screen capture to create a copy of the map.

.png)

.png)