- Print
- DarkLight
- PDF
Lists
- Print
- DarkLight
- PDF
Lists are a database function users can employ to access values, statements or phrases in a specific cell across all of their worksheets. If there are multiple users connected to the same database, they will be able to view, add, edit, and delete statements others have created.
The function can be accessed from the LightBox Ribbon in Excel, or by right-clicking in a cell and selecting Lists.

1. Select ListThe Select List drop-down displays the currently selected list option; the phrases and statements stored within that list will then be displayed in the List Item field. If you right-click on an existing list cell, and select Lists, that particular List will automatically be loaded into the List Manager. Selecting the arrow drop-down will display every list featured in every worksheet; selecting a certain list will display its contents in the List Item field. You can change the name of a certain list from the adjacent Change Name button, which is helpful for identifying a custom list entry. 2. List ItemEach phrase that is to be associated with a particular list will be featured in this section. Database users can add, edit, and remove these entries: this will enact changes for all connected users. Clicking on a phrase line will cause the full contents of the statement to be entered into the Edit List Item box. From there, users can make their edits: clicking Close will automatically save the entry. In order to create a new phrase altogether, a user need only click on an empty line in the ListItem section and type into the Edit List Item field. 3. Edit List ItemWhen you select a list from the List Item field, its contents will automatically be entered into the Edit List Item section. From there, edits are saved as you type and are viewable once you close out of the window. Clicking on the Clear Item List button will cause your entry to be erased. 4. Place and Remove List From Selected CellThere might be an instance where you want to transform a regular, manual entry cell, into a drop-down list cell. By clicking Place List in Selected Cell, you can take the list that currently being displayed in the Select List field, and inject it into a cell you've selected on your worksheet. If you wish to remove it from the cell, clicking Remove List From Selected Cell will cause it to be erased, while preserving the list entries. | 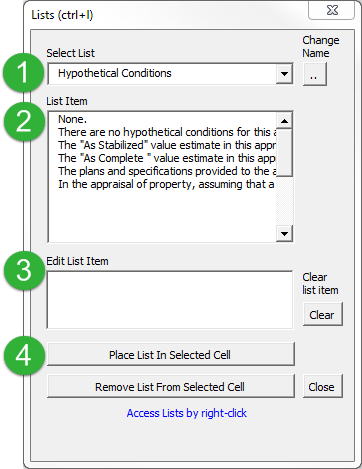 |
How to Create a New Drop-Down List
1. Begin by clicking into a particular cell you wish to designate as a drop-down list. 2. Right-click into the cell, and select Lists. | 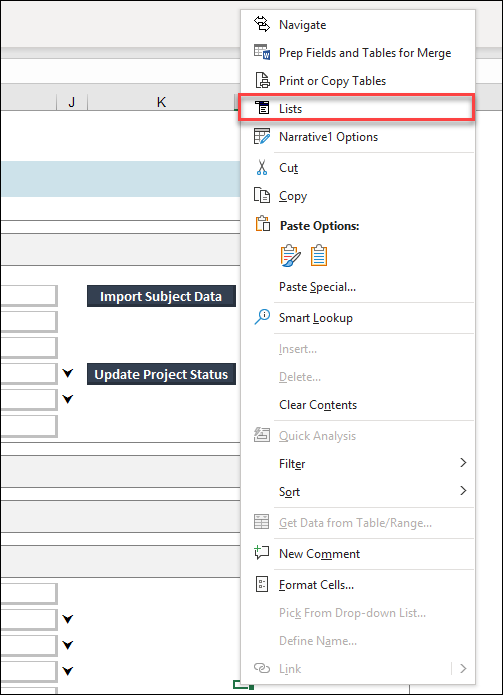 |
| 3. On the Select List drop-down, scroll down until you find List 130, or any empty list. | 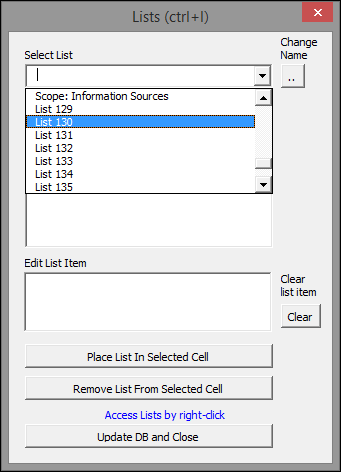 |
| 4. Click into the List Item section and edit any existing Items with your own desired entries. Optional: Click into an empty line in the List Item section, and type in the Edit List Item field to create a new entry. | 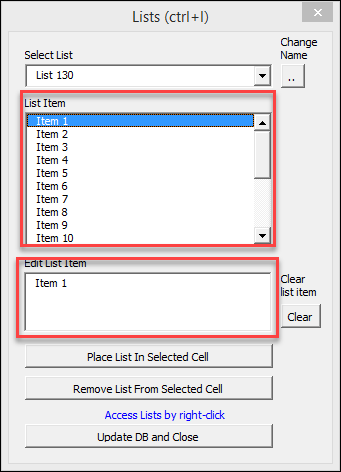 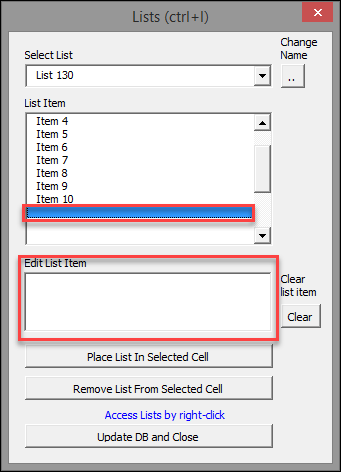 |
| 5. Click Change Name to designate a referenceable name for your list. | 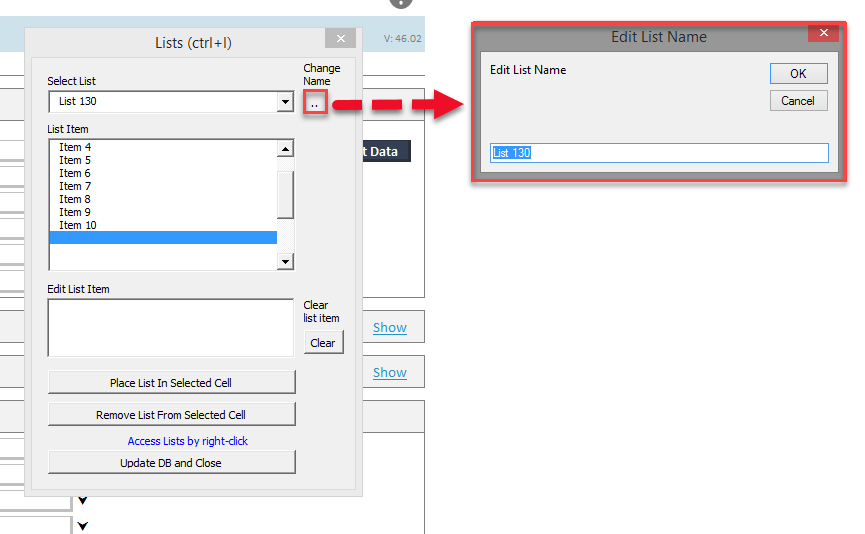 |
| 6. Click Place List in Selected Cell. | 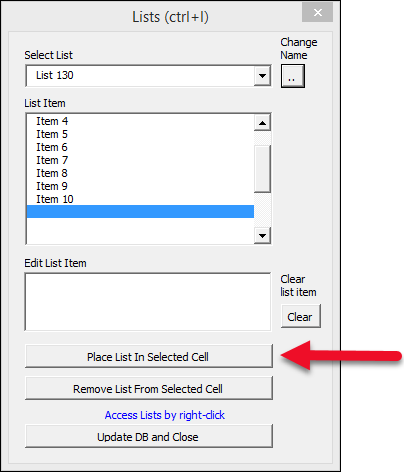 |
| 7. Click Update DB and Close. You should now be able to click on the cell that you have formatted and find your list options available. It is not possible to create additional lists beyond the ones provided in the Select List drop-down. | 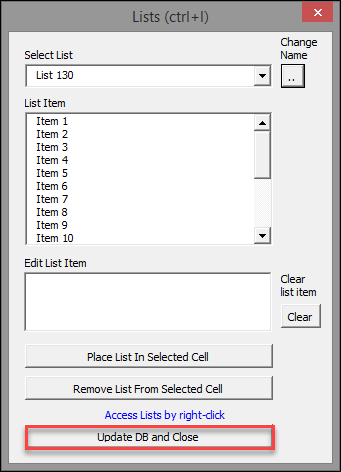 |
.png)

.png)