LightBox Valuation Workflow Overview
- Print
- DarkLight
- PDF
LightBox Valuation Workflow Overview
- Print
- DarkLight
- PDF
Article summary
Did you find this summary helpful?
Thank you for your feedback!
The LightBox Valuation platform will guide you through the entire appraisal process, from bidding on an RFP up to submitting the completed appraisal report. The process is composed of six steps:
- Step One: Place a Bid or Create an RFP
- Step Two: Accept an Award or Create a Job
- Step Three: Research the Subject Property and Complete a DCF in CashFlow As Necessary
- Step Four: Import the Project Into Report Writer
- Step Five: Search for Comps in Research - Properties
- Step Six: Complete and Upload the Report File


Step One: Place a Bid or Create an RFP
The Jobs application receives RFPs from the RIMSCentral and PARCEL platforms. The application also allows the user to create RFPs, making it possible to track Jobs and RFPs that originated outside the LightBox ecosystem.
To view, manage, and create RFPs, log in to LightBox Valuation and click on Jobs.

Note:
To access other applications within Valuation, click the drop-down menu to select the app.
Only applications that you (or your organization) have access to will be visible.
Only applications that you (or your organization) have access to will be visible.

In the left navigation bar, click RFPs, then click Needs Response to view the RFPs which have not yet been responded to. Then click Open RFP next to an RFP to open it in the originating service—RIMSCentral or PARCEL.
.png)

- Refer to Jobs - Responding to an RFP in RIMSCentral for detailed instructions about responding to RFPs in RIMSCentral.
- Refer to Jobs - Responding to an RFP in PARCEL for detailed instructions about responding to RFPs in PARCEL
Note:
You will also receive a notification email along with every RFP. Click the blue link at the bottom of the email to proceed directly to RIMSCentral or PARCEL.
To create an RFP, click the Create button in the upper right corner of the RFPs page.

The Create RFP modal opens and defaults to the RFP Details tab.

Proceed through the RFP creation process. For detailed instructions, refer to Create Jobs/RFPs.
Step Two: Accept an Award or Create a Job
Awards are accepted in the application in which they originated—PARCEL or RIMSCentral. To accept an award, click Awaiting Acceptance in the left navigation menu, then click Open RFP.

The application from which the RFP originated, PARCEL or RIMSCentral, opens.
PARCEL
To accept an award that originated in PARCEL, click Accept RFP.

The Awaiting Acceptance tab of the PARCEL dashboard will load once the award acceptance has been submitted.

RIMSCentral
To accept an award that originated in RIMSCentral, click Accept.

A Completed! Move to History button appears in the upper right corner of the page.

Once an award has been accepted, a corresponding Job will automatically be created in the Jobs tab of Valuation.
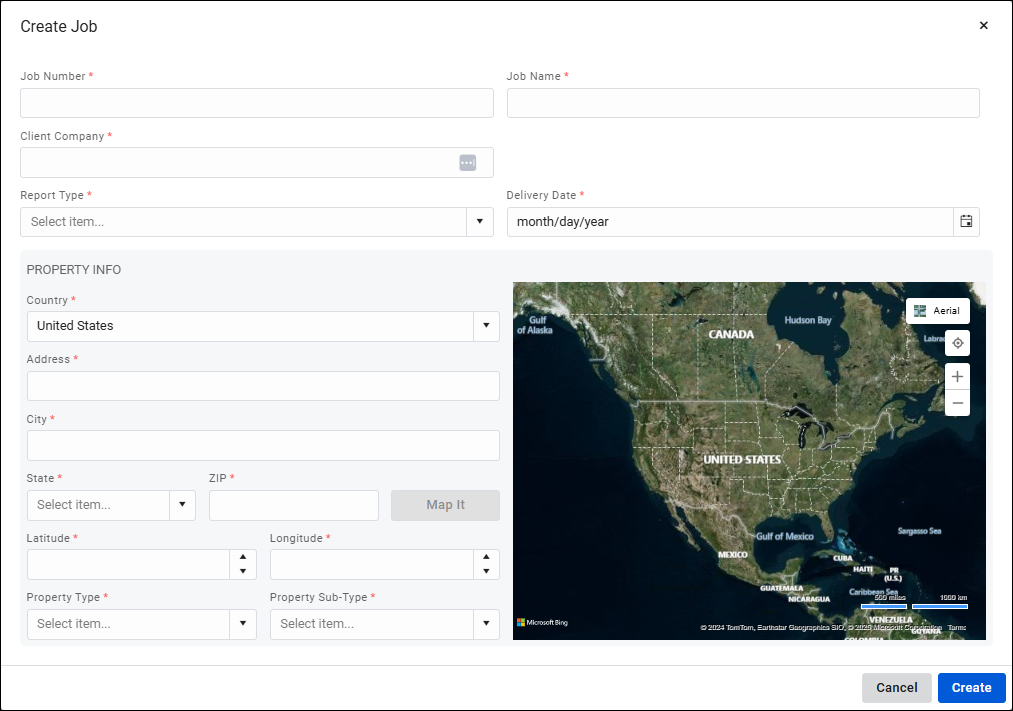
You can also create Jobs for RFPs that originated from platforms other than RIMSCentral and PARCEL. This allows you to view all your Jobs within the Valuation platform, regardless of their origin. To create a Job, click Create in the upper right corner of the page.


Complete the fields in the Create Job modal, then click Create to create the Job.
Note:
The next two steps can be completed in either order. The typical workflow is to complete the Research process first, then import the Job into Report Writer, but that can be reversed.
It is possible to create the Job in Report Writer, then complete the research process in the Research application and then import the data into Report Writer.
It is possible to create the Job in Report Writer, then complete the research process in the Research application and then import the data into Report Writer.
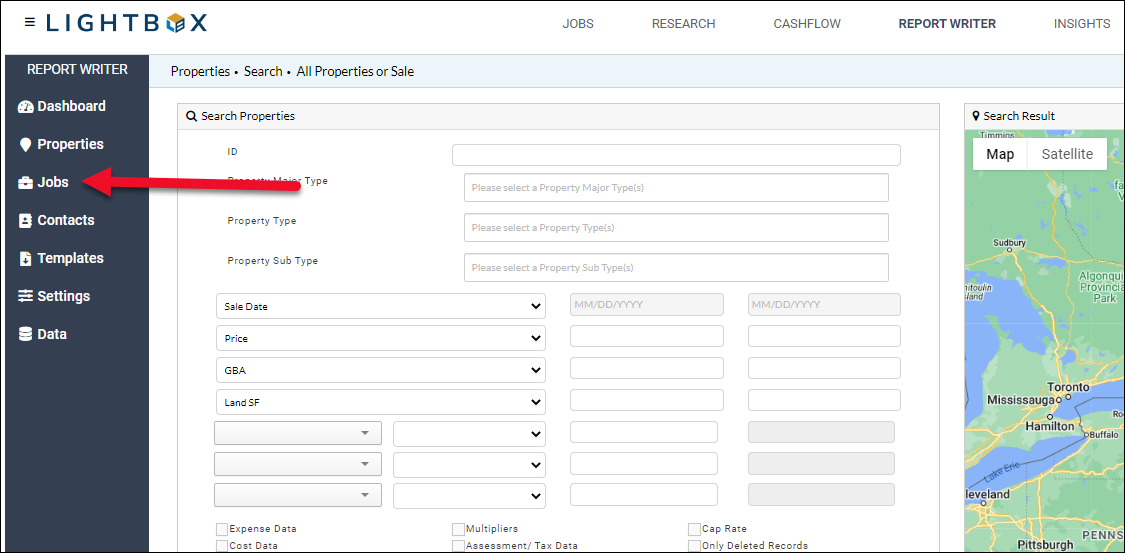
Step Three: Research the Subject Property and Complete a DCF in CashFlow As Necessary
Click the Jobs button in the left navigation bar within the Jobs application. Click the arrow next to the Job you want to research, then click Research.
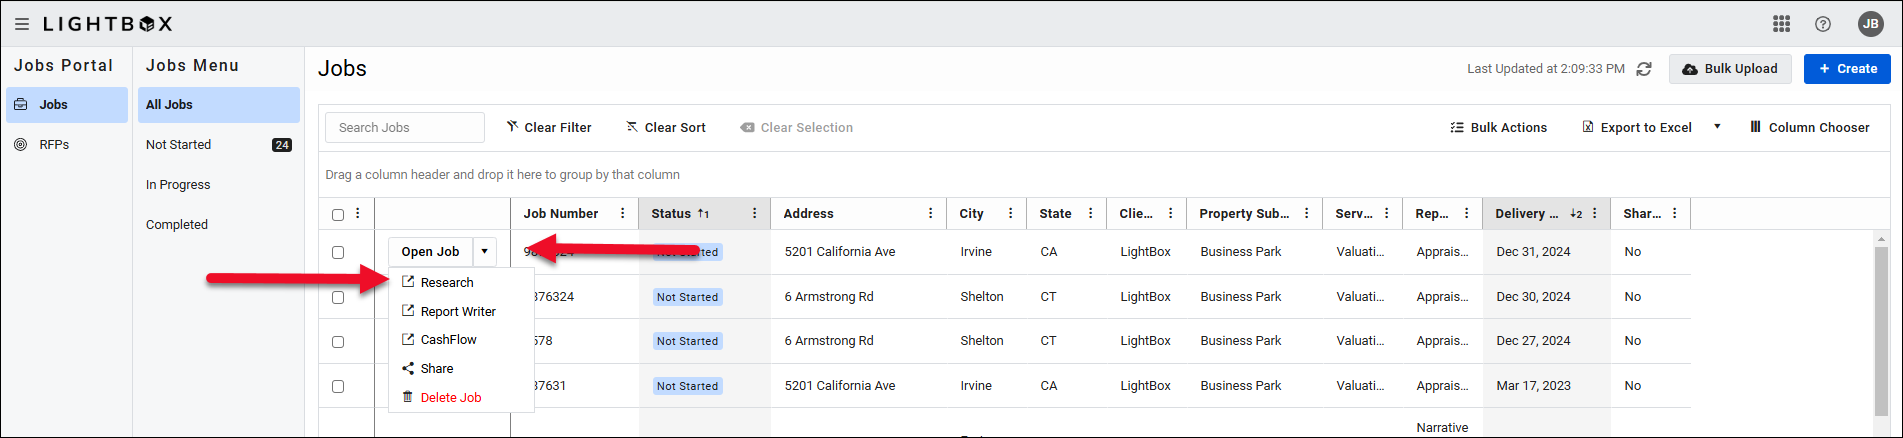

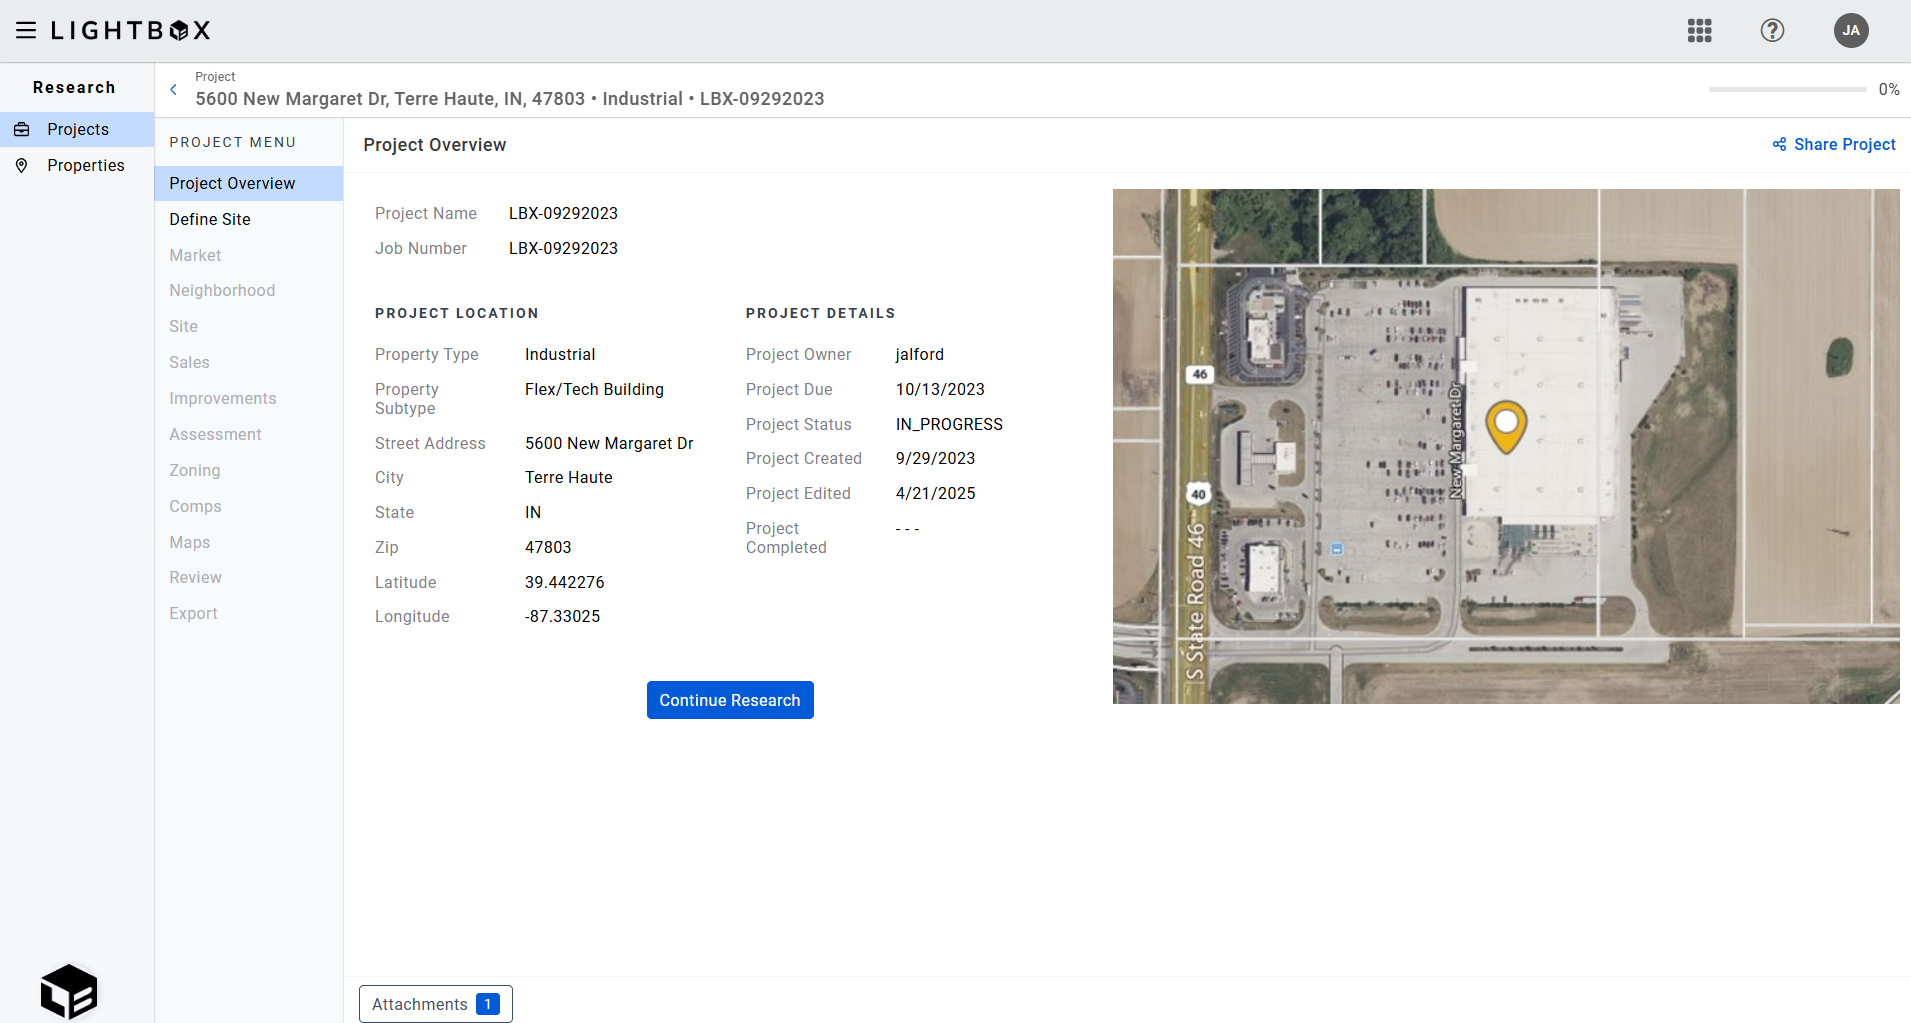
The Research application will open the Project Overview module for that Project.
Proceed with the Research process. For detailed instructions, refer to the articles in the Research - Projects area of the knowledge base.
Step Four: Import the Project Into Report Writer
The final module in the Research - Projects application is Export. Once the research process has been completed, click the Download button for All Files, then click Complete Project and Publish.
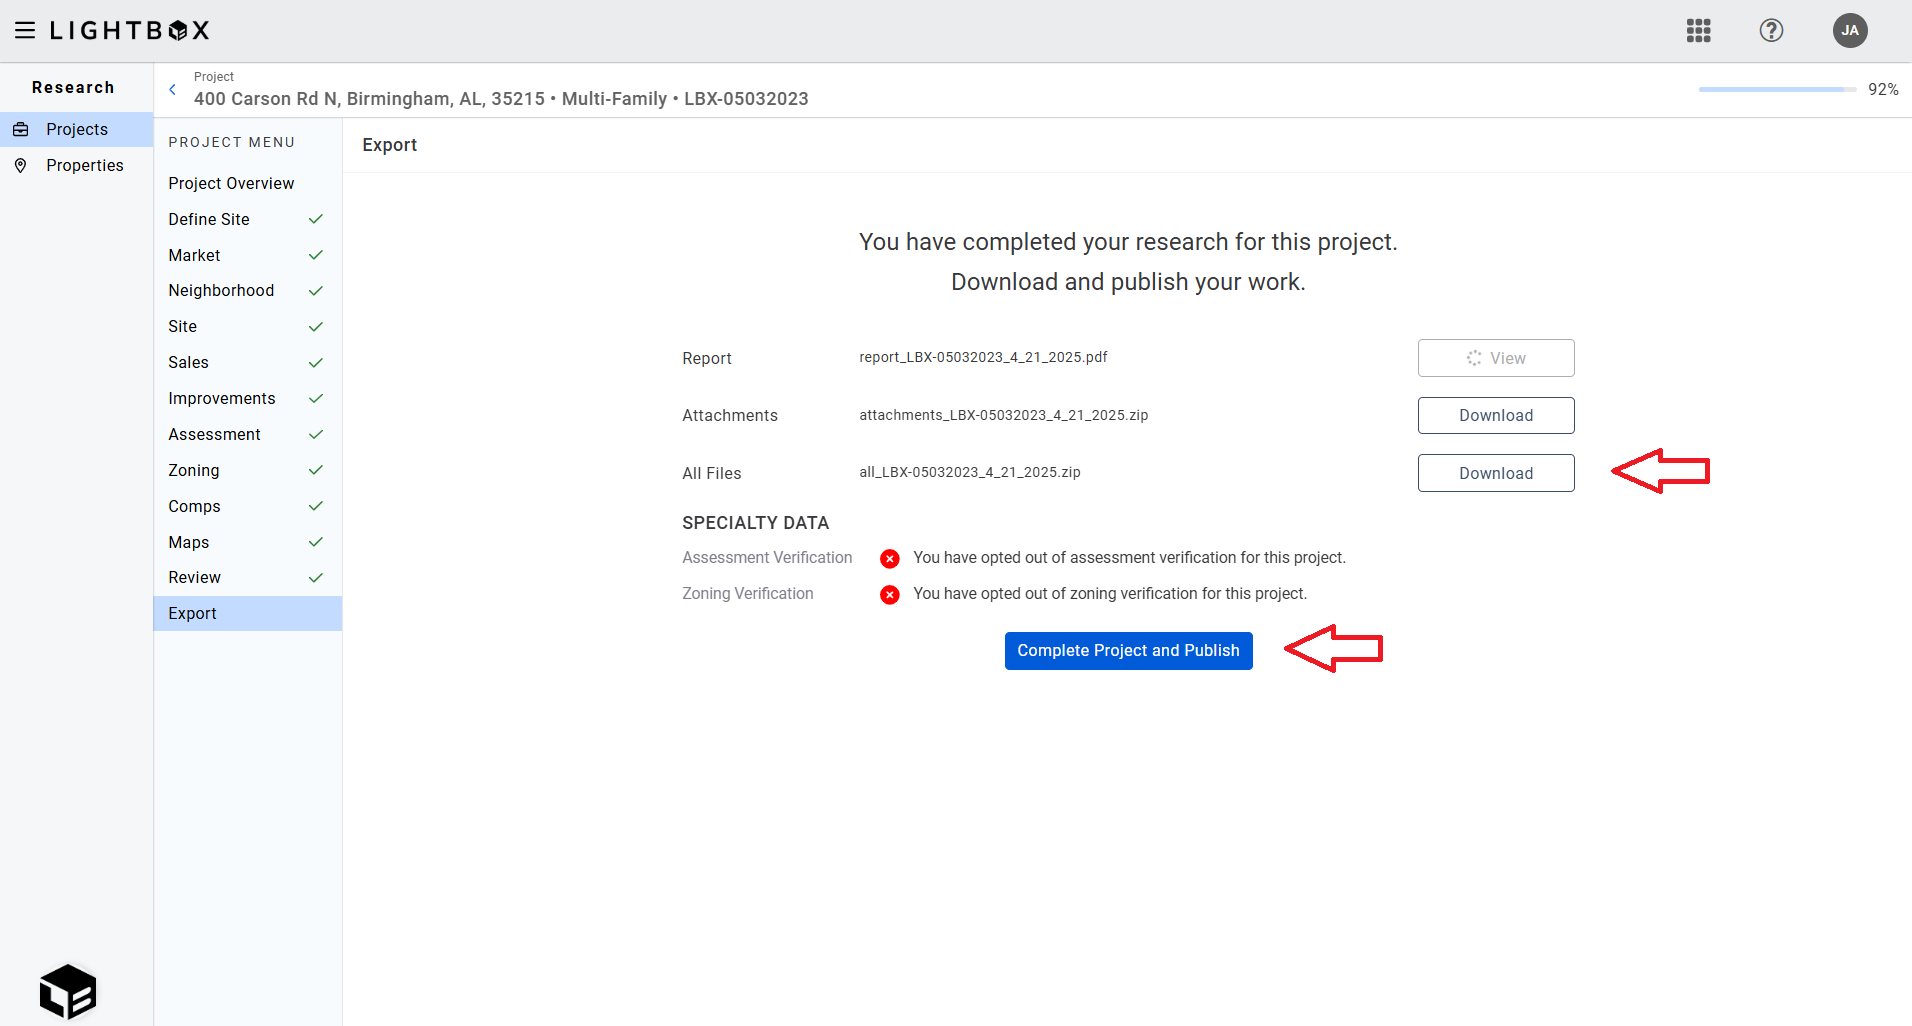
- If the Job information has not been imported into Report Writer, you will be asked to create the Job. Refer here for more information. After saving the Job details, you will be navigated to the general page of the new property.
- If the Job has already been created, you will be navigated directly to the general page so you can curate the property data before importing it into your Excel template.
- Report Writer will provide a warning noting that the data will be overwritten.
Step Five: Add Comps to the Job and Valuation Worksheet
In the Report Writer web database, navigate to the Jobs page.
On the Jobs page, click Edit next to the Job you wish to open.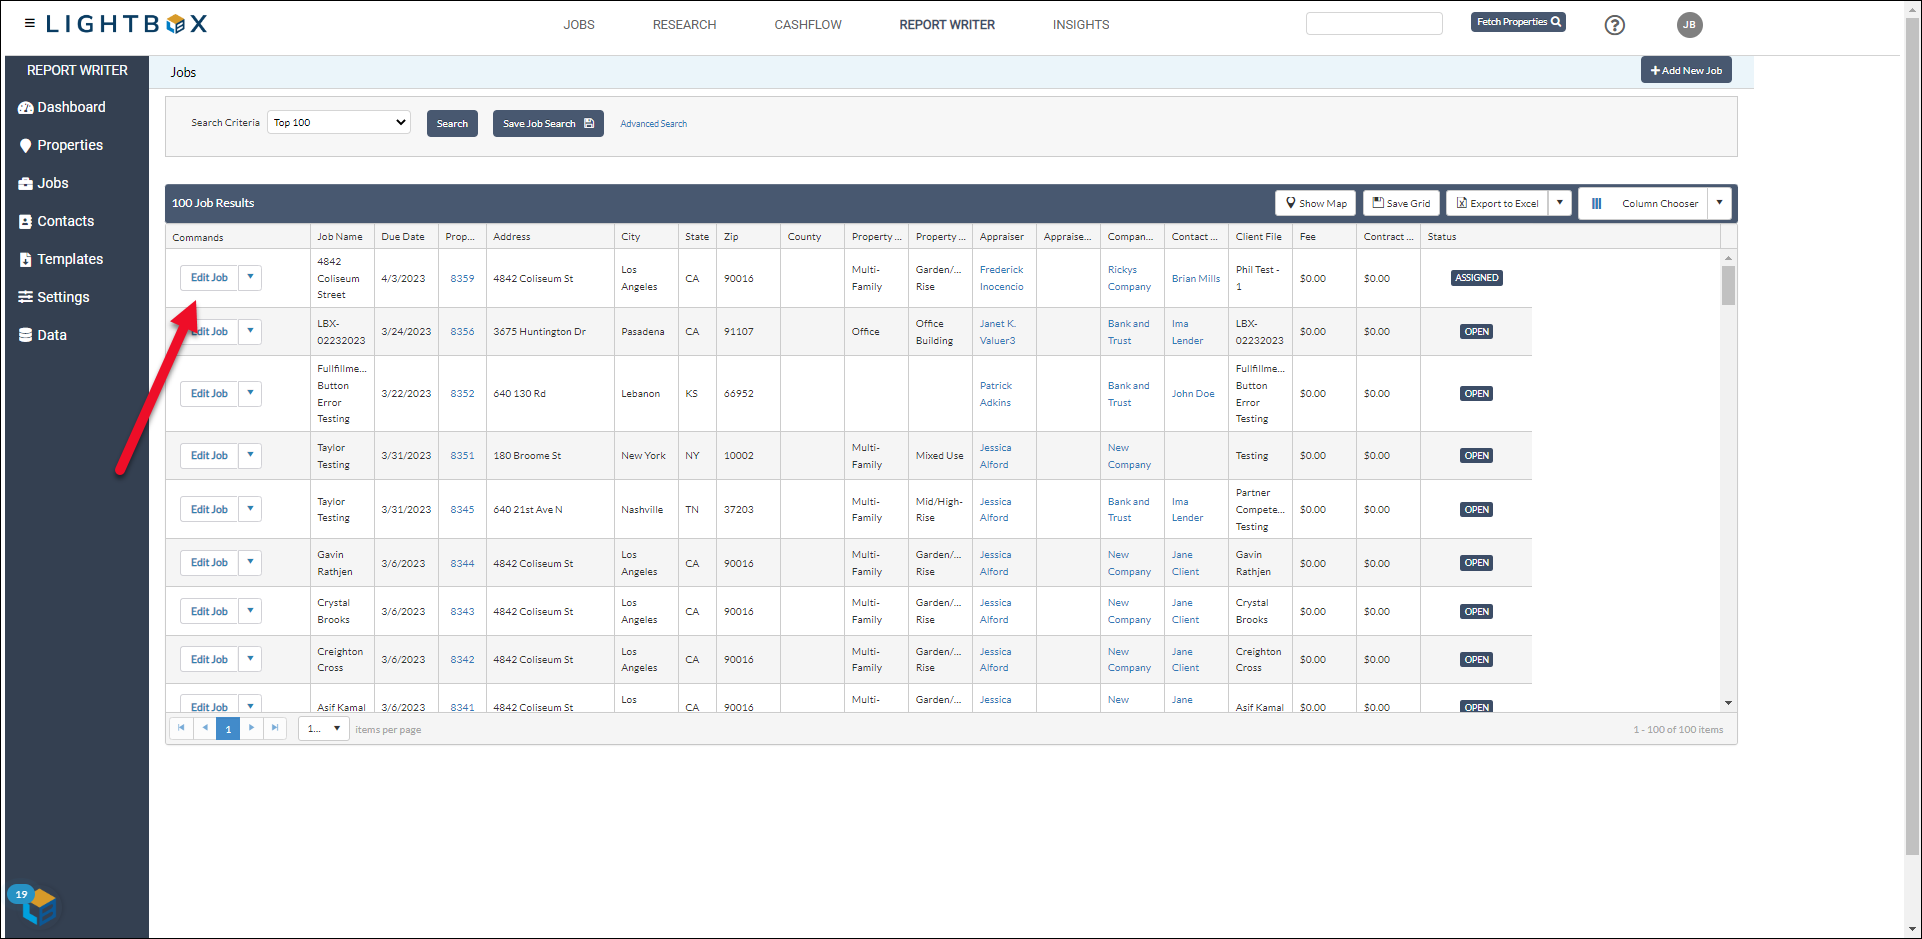
The Job Details modal will open. Scroll down to the Comps Used section.
The Comps Used section of the Job Details modal allows you to track the comparables used for a specific Job.
.png)
a. Enter one or more Property IDs, separated by commas, in the Tax Comps, Land Analysis, Improved Sales, Lease Analysis, Expense Analysis, and Custom fields.
.png)
b. To find comps using Report Writer’s map and search tools, click the map icon next to the type of comparable you wish to find.
.png)
The Report Writer All Properties search will open. Note that the Property Major Type is filled in automatically with the Subject Property’s type. Optionally, add other search criteria and then click Search.
.png)
The search results table will be populated with the results. At the top of the table, the Subject Property will be frozen in place.
.png)
With the subject property row frozen, the column filters and sorting capabilities apply only to the other search results (the prospective comparables). This makes it easy to find comparables that meet your criteria. Note: The Column Chooser functionality is disabled while in this view.
Click the checkbox next to a property to highlight it on the map.
.png)
Conversely, you may click on a map icon to select the corresponding property record in the search results table.
The radius search also works in this view:
.png)
1. Click Radius.
3. Enter a radius value (in miles) in the Radius Search popup.
3. Click Filter in the Radius Search popup.
.png)
In the example above, the subject property is denoted with a red pin and the two comparable properties within the specified radius are also represented by pins.
Once the desired properties have been selected, scroll to the bottom of the page. Click Add Selected Comps to Job to add the properties to the Job record.
Note: The Subject Property map icon is red.
.png)
The dropdown menu to the left of the Add Selected Comps to Job button defines the type of comps and/or where they will be utilized. The selection defaults to the specific map icon that you clicked on the Job page, i.e., clicking the map icon next to Tax Comps defaults to Tax Comps, clicking Improved Sales defaults to Improved Comps, etc.
.png)
After clicking Add Selected Comps to Job, a confirmation message will appear in the upper right corner of the screen and the property records will be added to the Job.
.png)
Repeating the process appends any new comp property records selected; it does not overwrite existing selections.
c. Click View/Edit Comps to open up the property records.
.png)
The Property ID entered first in the field will open in a new browser tab. To view the other records, click the Prev and Next buttons at the top of the page.
.png)
d. Click Copy Comp IDs to copy the Property IDs in that field.
.png)
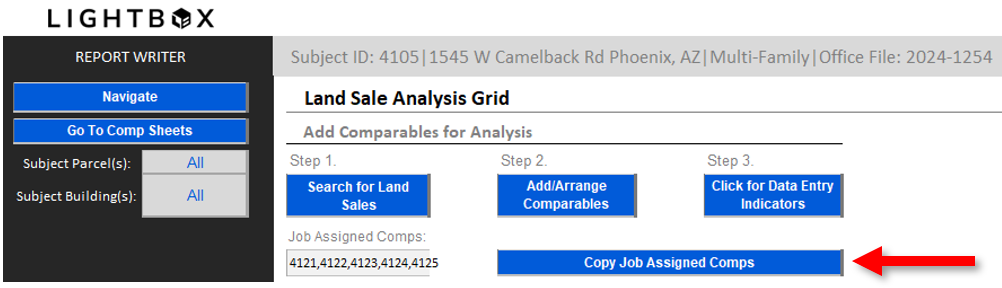
Upon importing subject property data into an Excel Model file, the associated comparables are added to the corresponding analysis grid tabs, i.e., the Land Sales comps are made available in the Land Grid tab.
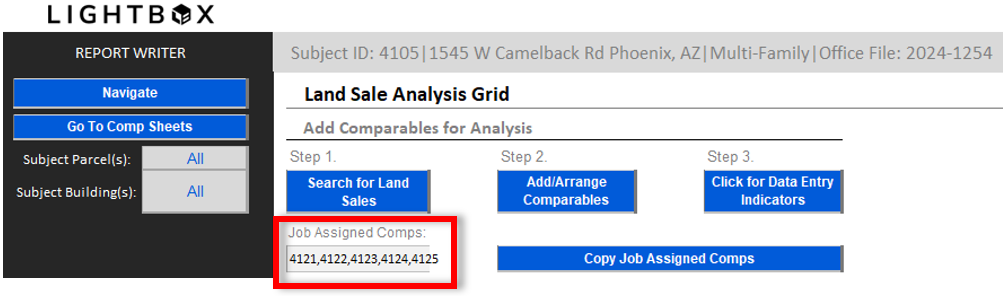
Click Copy Job Assigned Comps to add the comps listed in the Job Assigned Comps field to the analysis grid.
Step Six: Complete and Upload the Report File
The report-creation process in Report Writer involves four primary steps:
- Pull the subject property and comparables data into the Report Writer Excel file, following Step 5 above. For more information about importing subject property data into your Excel file, refer to the “Import and Export Subject Data to DB” section here.
- Complete the Report Writer Excel process. Refer here for more information.
- Merge the Excel data into your narrative Word file. Refer here for more information.
- Verify that the information is correct, then save the Word file as a PDF file.
Once that process has been completed, navigate to the Jobs application in LightBox Valuation, find the appropriate Job, then click Open Job. The Job will open in RIMSCentral or PARCEL.
- Refer to Jobs - Uploading the Final Report in RIMSCentral for detailed instructions about uploading the report in RIMSCentral.
- Refer to Jobs - Uploading the Final Report in PARCEL for detailed instructions about uploading the report in PARCEL.
Congratulations! You have successfully completed the process.
Was this article helpful?