Job Manager
- Print
- DarkLight
- PDF
Job Manager
- Print
- DarkLight
- PDF
Article summary
Did you find this summary helpful?
Thank you for your feedback!
Whether adding appraisals to your portfolio manually or importing assignment data from the Valuation - Jobs application, you can manage and keep track of historical Job information.
- Assign up to 4 appraisers to a Job
- Track the status of a Job
- Apply a Client, 2nd Client and Property contact to a Job
- Track Fees for a Job and create an invoice from the Excel/Word template
- Assign comparables to a Job
- Search for Jobs and view the Job locations via a map
- Save common search queries
- Export company-wide appraisal metadata to Excel for analysis
Jobs Manager Table
The Jobs Manager table makes it easy to view, sort, edit and export your Jobs.
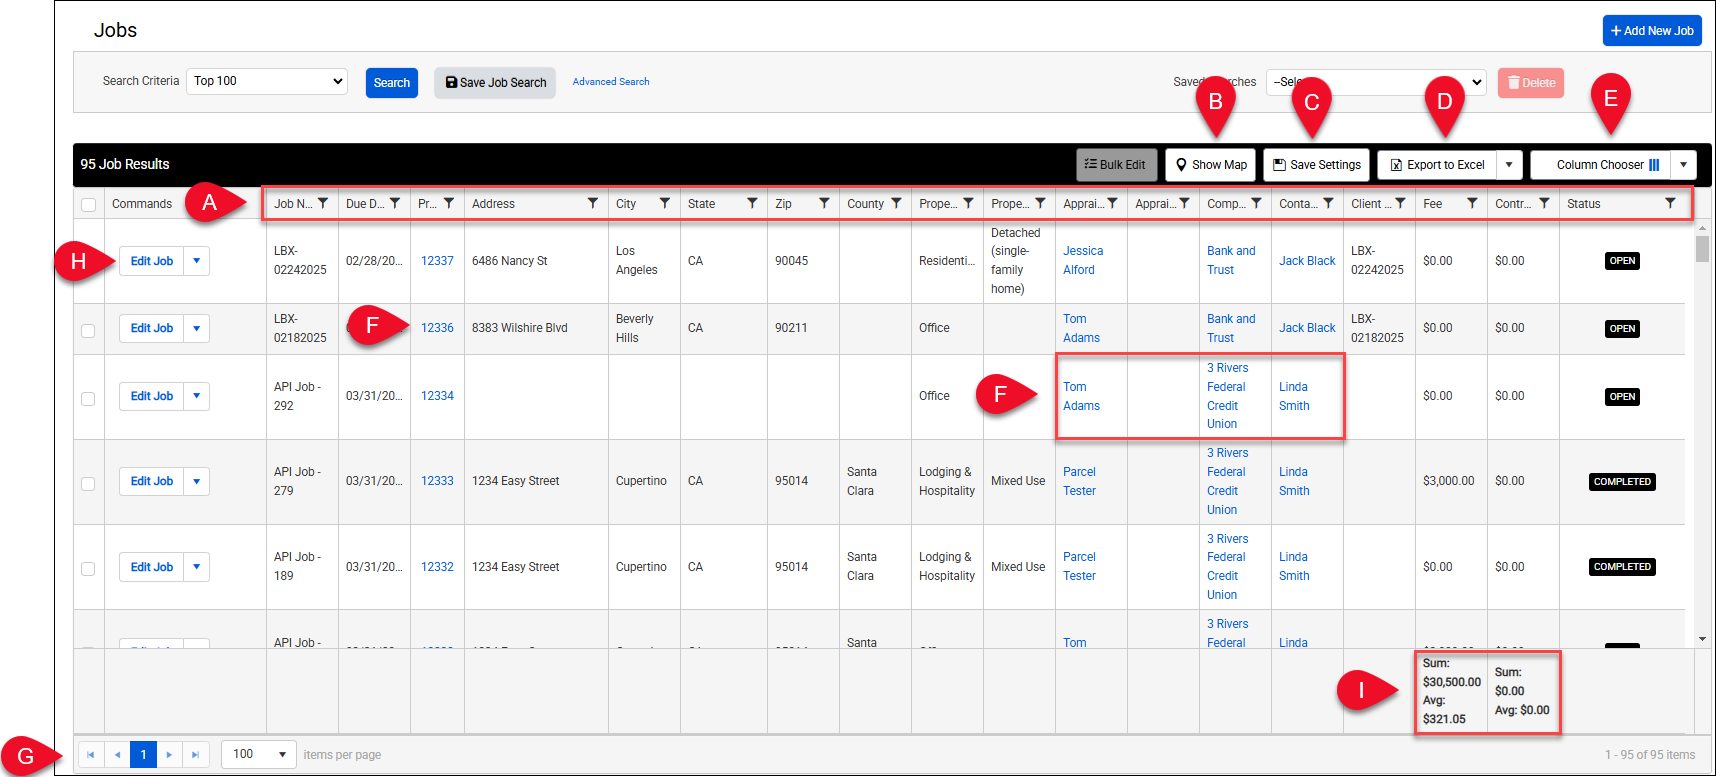
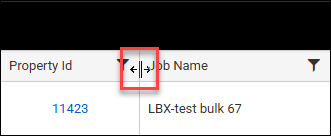
| A. | Click on any column header, except Commands, to sort the table by that column, in ascending order. Click on the column again to change the sort order to descending. Click a third time to remove that column sort setting entirely. The table can be sorted by multiple columns simultaneously. Click on additional columns to sort by those columns. Each subsequent column sort will be assigned a number, and that column’s sort priority will be lower than the previous column(s) (e.g., the column with a sort order of “3” will be of lower priority than the columns with sort orders of “2” and “1”) To change a column width, hover over one of the column borders in the column header and drag the cursor to increase or decrease the width.
Column sort settings are maintained when you refresh the page or log out of the Report Writer web database. | 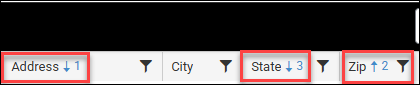 |
| Columns can be reordered. Click on a column header and drag it to the desired location among the other column headers. | 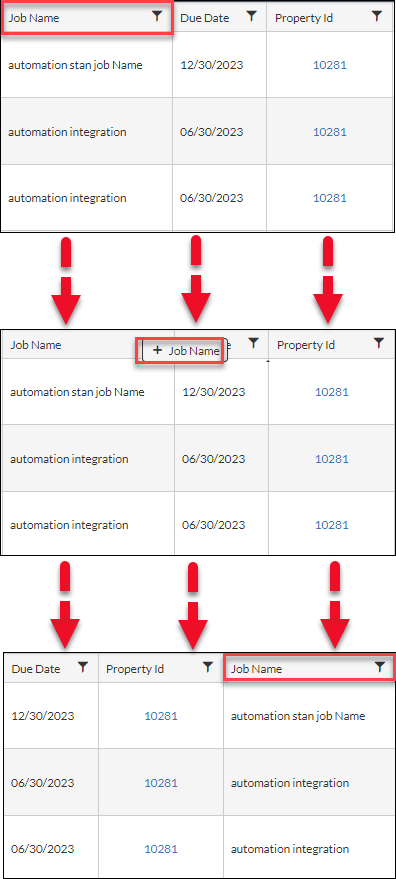 | |
| All columns except Commands have filtering. Click the filtering icon in a column header to display the filter menu. Apply the desired filters, and then click Filter to apply it. | 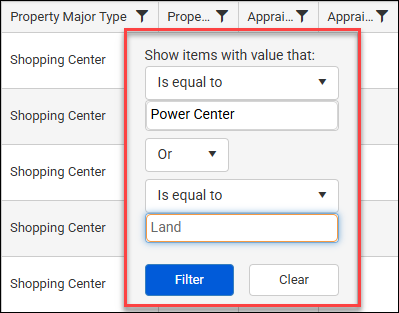 In the example above, the Property Major column is filtered to show results that are equal to Residential OR Land In the example above, the Property Major column is filtered to show results that are equal to Residential OR Land | |
| Click the Clear button to remove the filters on a column. | 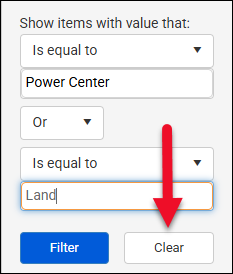 | |
| B. | Click Show Map to expose the map. Click Hide Map to hide the map. Map displays icons indicate Job locations. Hover over an icon to display information about the Job and corresponding property. To zoom in or zoom out on the map, hold the Ctrl key on your keyboard and use the mouse scroll wheel to adjust the zoom level. | 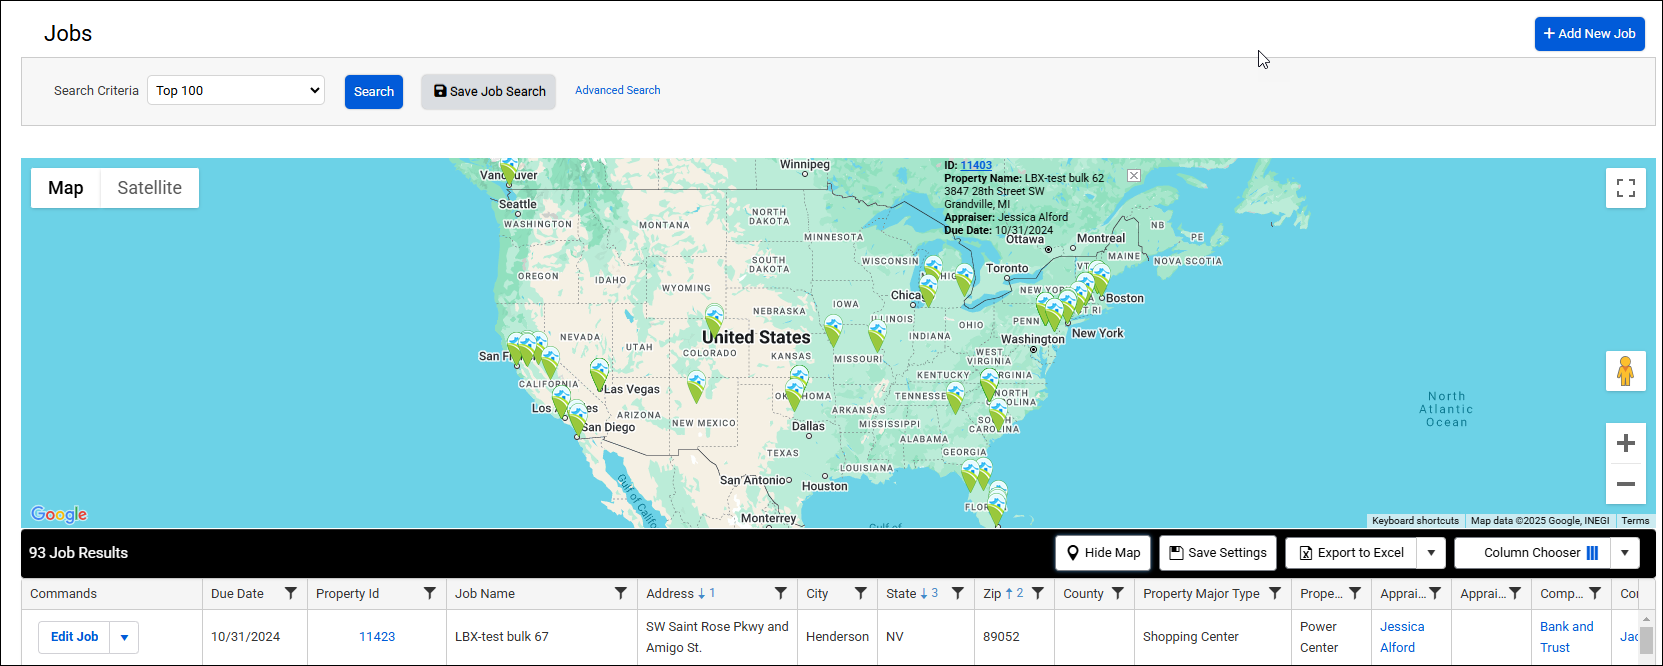 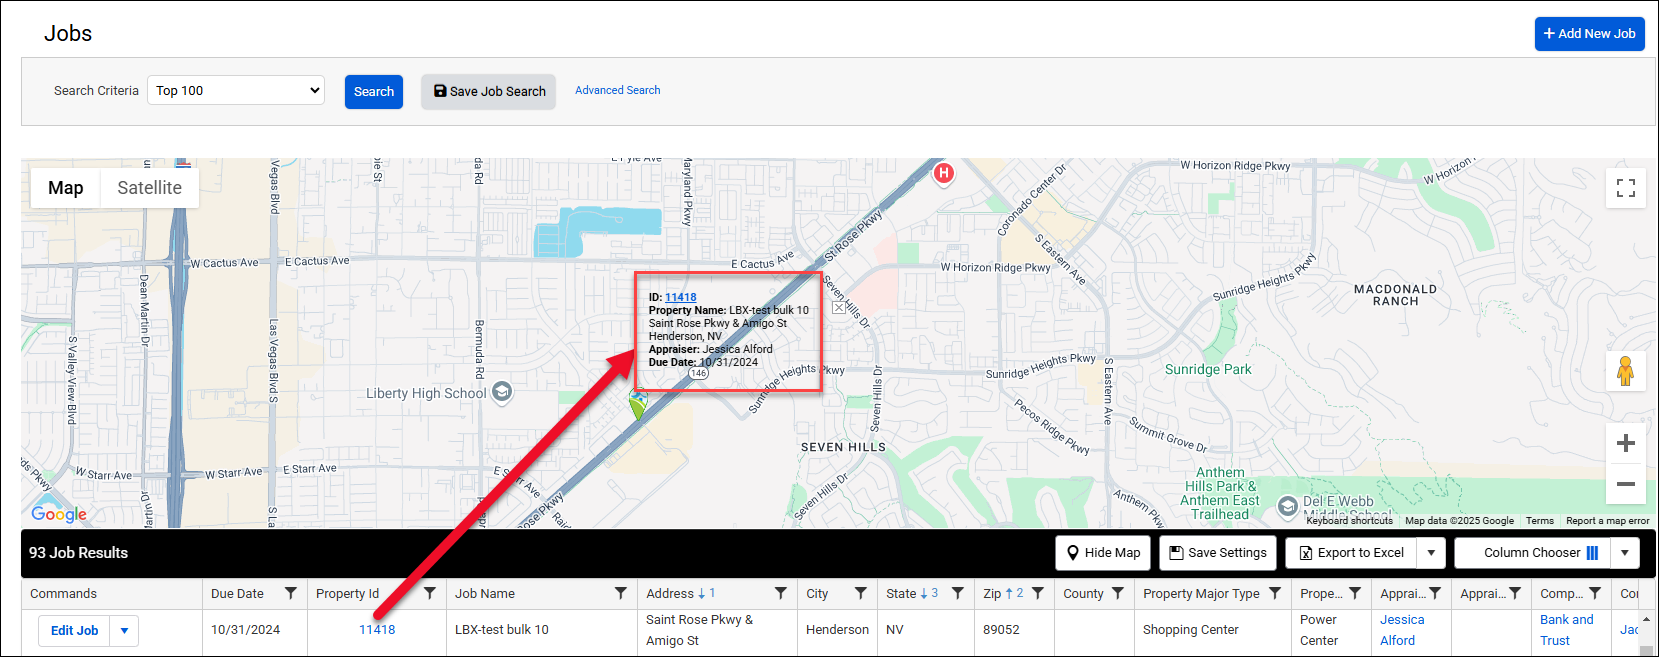 |
| C. | Click Save Settings to save the current column order and filter settings. | 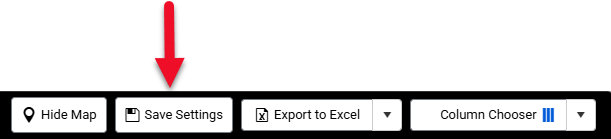 |
| D. | Click Export to Excel to export a .xlsx file containing all Job records. Only the columns that are set to be displayed will be exported; columns deselected in the Column Chooser will not be included in the file. Click the arrow to the right of the Export to Excel button and then click Export all fields to export ALL columns, including those that are deselected in the Column Chooser. | 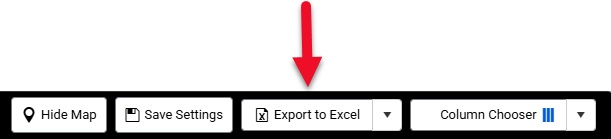 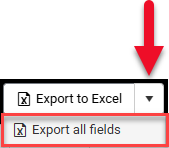 |
| E. | Click Column Chooser to open a menu listing all available columns. Click the checkbox next to a column to add it to the table view. Uncheck to remove a column. Type all or part of a column name in the Search bar at the top of the menu to filter the list of columns. Click Done to save the Column Chooser settings and apply them to the table. | 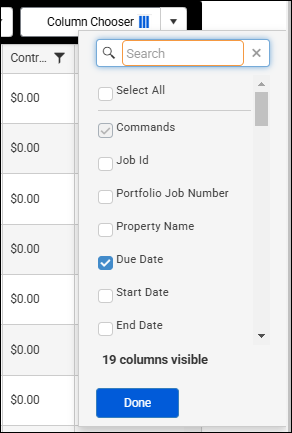 |
| F. | The following fields have blue, clickable link text.
|  |
| G. | Click the arrows at the bottom of the page to navigate among the Jobs table records. The outermost arrows, which have a vertical line, skip to the first (left arrow) and last (right arrow) page of records. The inner arrows navigate forward/backward a single page. Click a number to navigate to that page of records. Click the Items per page dropdown menu to change the number of rows displayed on a single Jobs table page. |  |
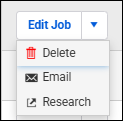
| H. | Click Edit Job to open that Job record for editing. Click the arrow to the right of the Edit Job button to display three buttons:
|  |
| I. | The following columns have a sum and average at the bottom of the table:
| 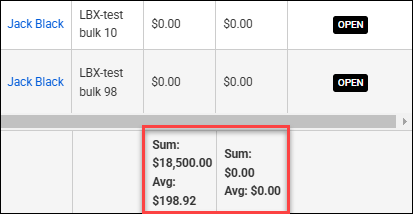 |
Manually Adding/Editing a Job
| To add or edit a new Appraisal job, click the Jobs menu to go to the Jobs page, then click the Add New Job button in the upper right corner of the page to open the Job Details popup. | 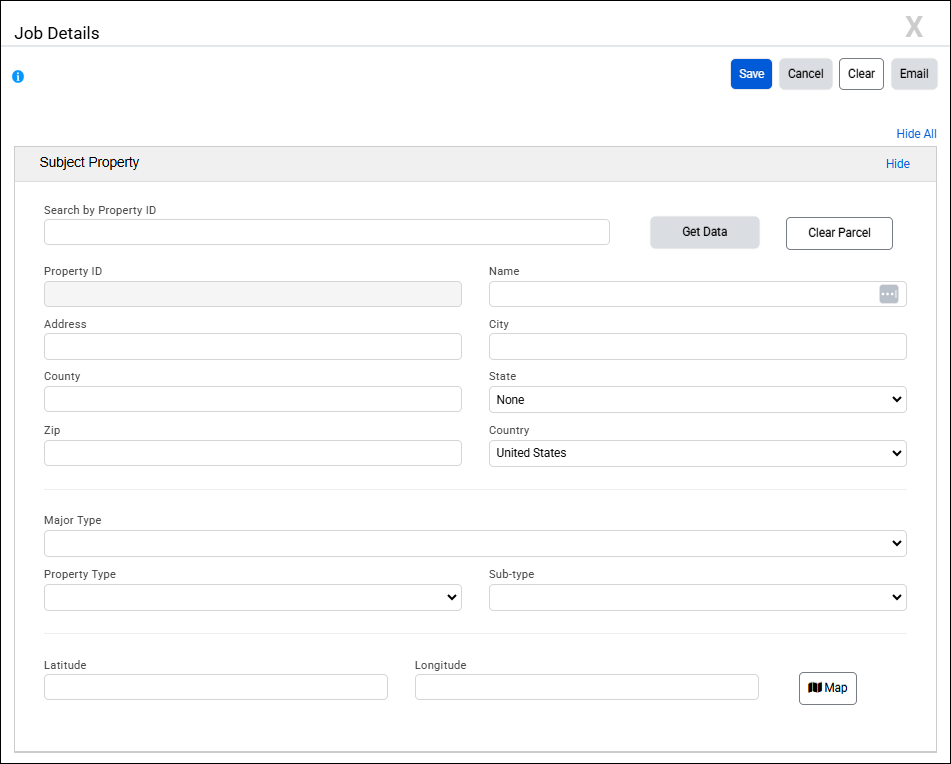 |
| If your subject property already exists in your Report Writer database as a property record, simply type or paste the Property ID into the Search by Property ID field and click Get Data. If the subject is not already in the database, simply fill out the fields and a new property record will be created for you. Complete the Job Details fields manually. Fields with a red asterisk are required. Notes: The Office File number can be auto-generated. Contact support to turn on a YY-Jobid template or a YYYY-Jobid template. The Originator drop-down menu has type-ahead functionality. Begin typing to filer the list of Originators. | 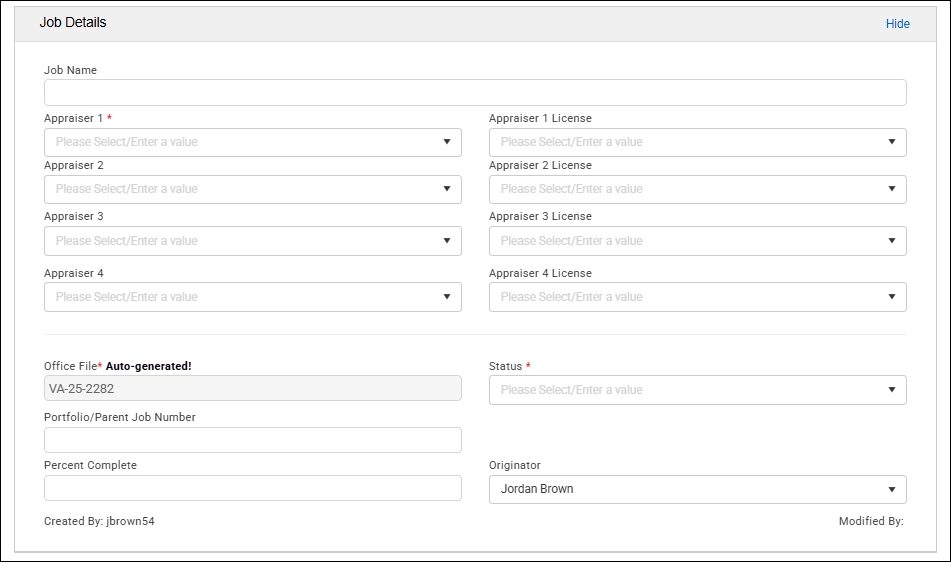 |
Contact Information
| You can choose an existing Client or quickly create a new company and/or contact by clicking the Add Client button. |  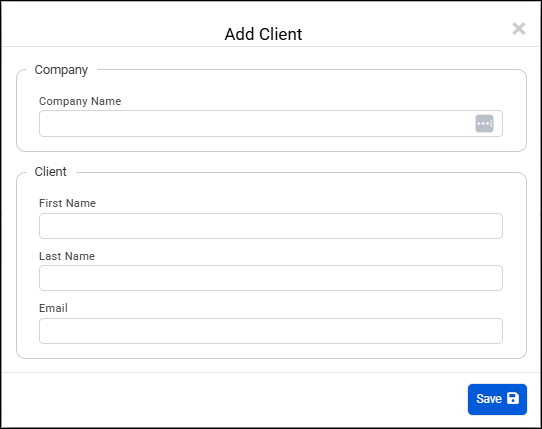 |
| You may add Client 2 and Property Contact Information. These fields have type-ahead functionality: begin typing the name of a Company or Contact in the drop-down menu to filter the menu to easily find the desired Company or Contact. Click the Company drop-down menu and select a Company. Then click the Contact drop-down menu and select a Contact from that Company. | 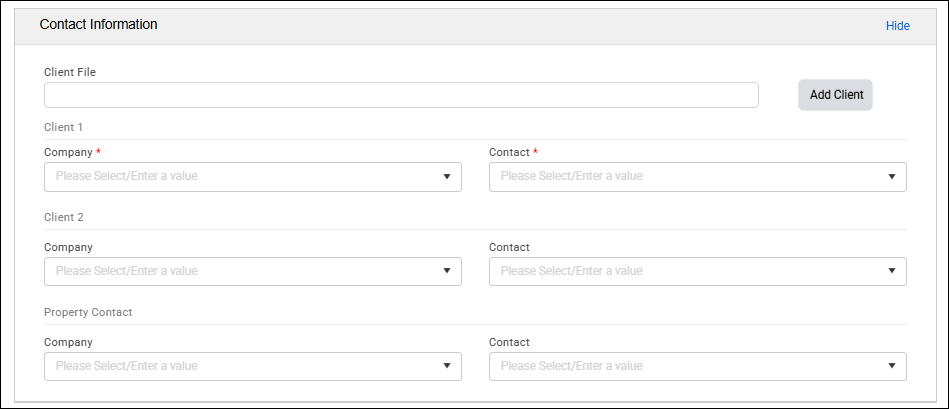 |
Fees
Fee information can be entered manually. Contract Total is a calculated field. Hover over the field to see a tooltip describing how the field is calculated. | 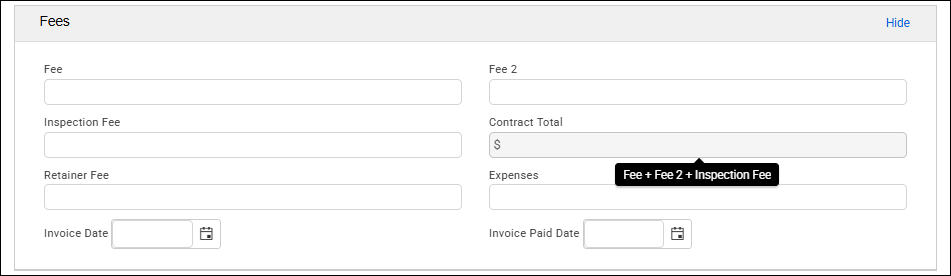 |
Job Dates
| The required Job Dates are denoted with red asterisks. | 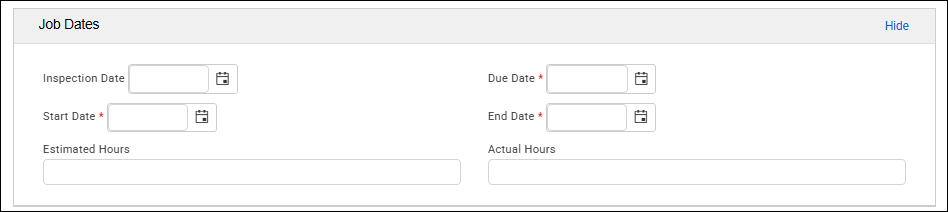 |
Comps Used
The Comps Used section of the Job Details modal allows you to track the comparables used for a specific Job.
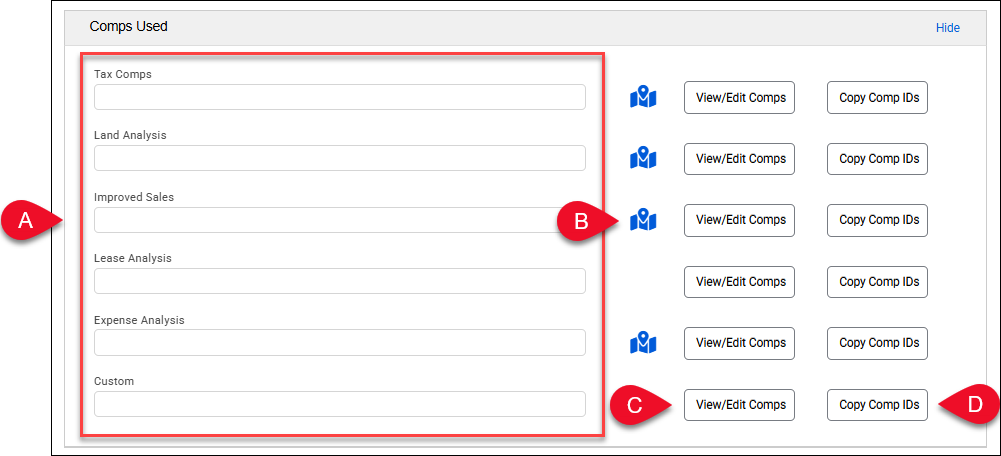
| a. | Enter one or more Property IDs, separated by commas, in the Tax Comps, Land Analysis, Improved Sales, Lease Analysis, Expense Analysis, and Custom fields. |  |
| b. | To find comps using Report Writer’s map and search tools, click the map icon next to the type of comparable you wish to find. Note: A popup may appear and require saving the Job before opening the map and search tools. | 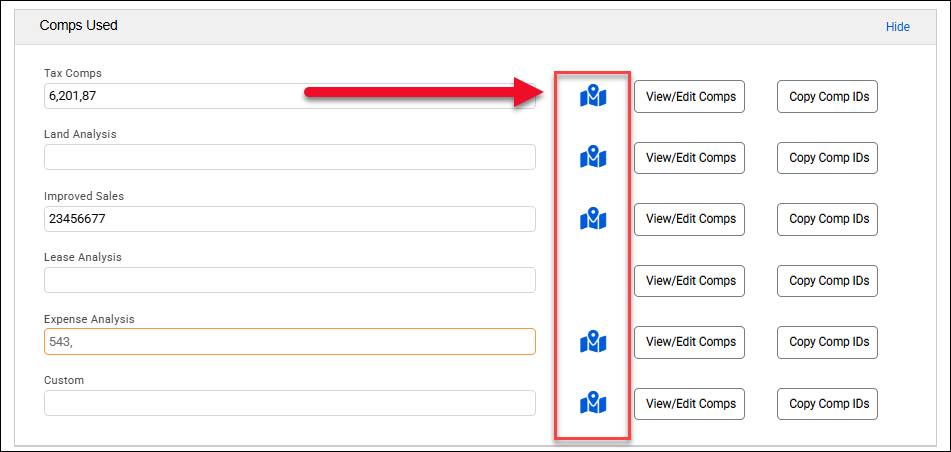 |
The Report Writer All Properties search will open. Note that the Property Major Type is filled in automatically with the Subject Property’s type. Optionally, add other search criteria and then click Search. | 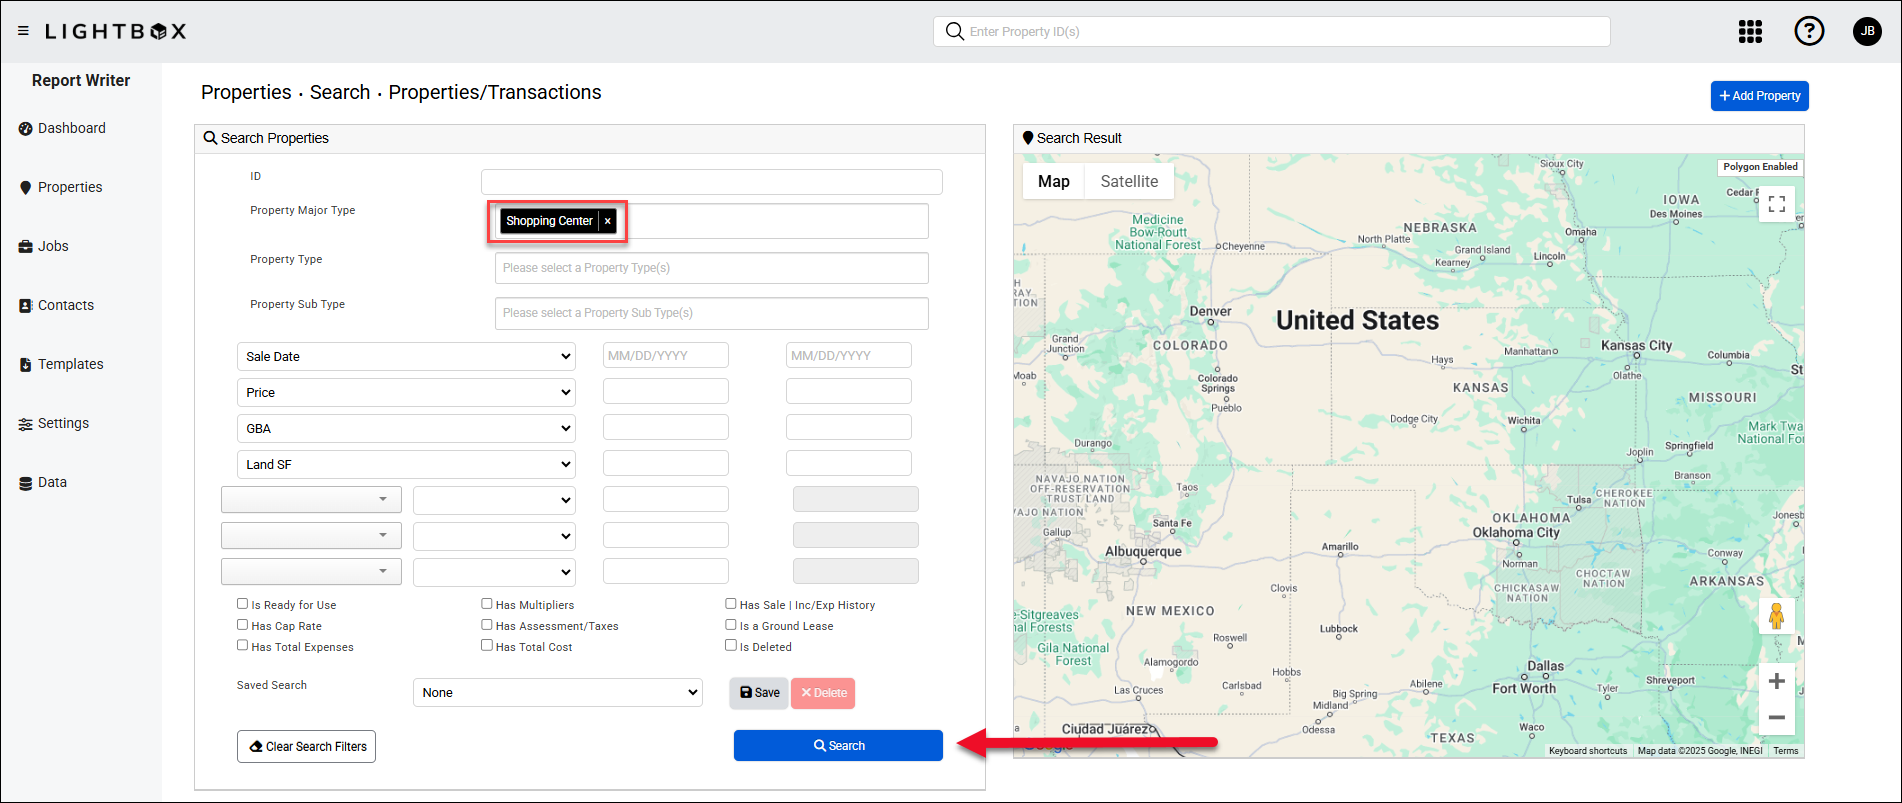 | |
The search results table will be populated with the results. At the top of the table, the Subject Property will be frozen in place. | 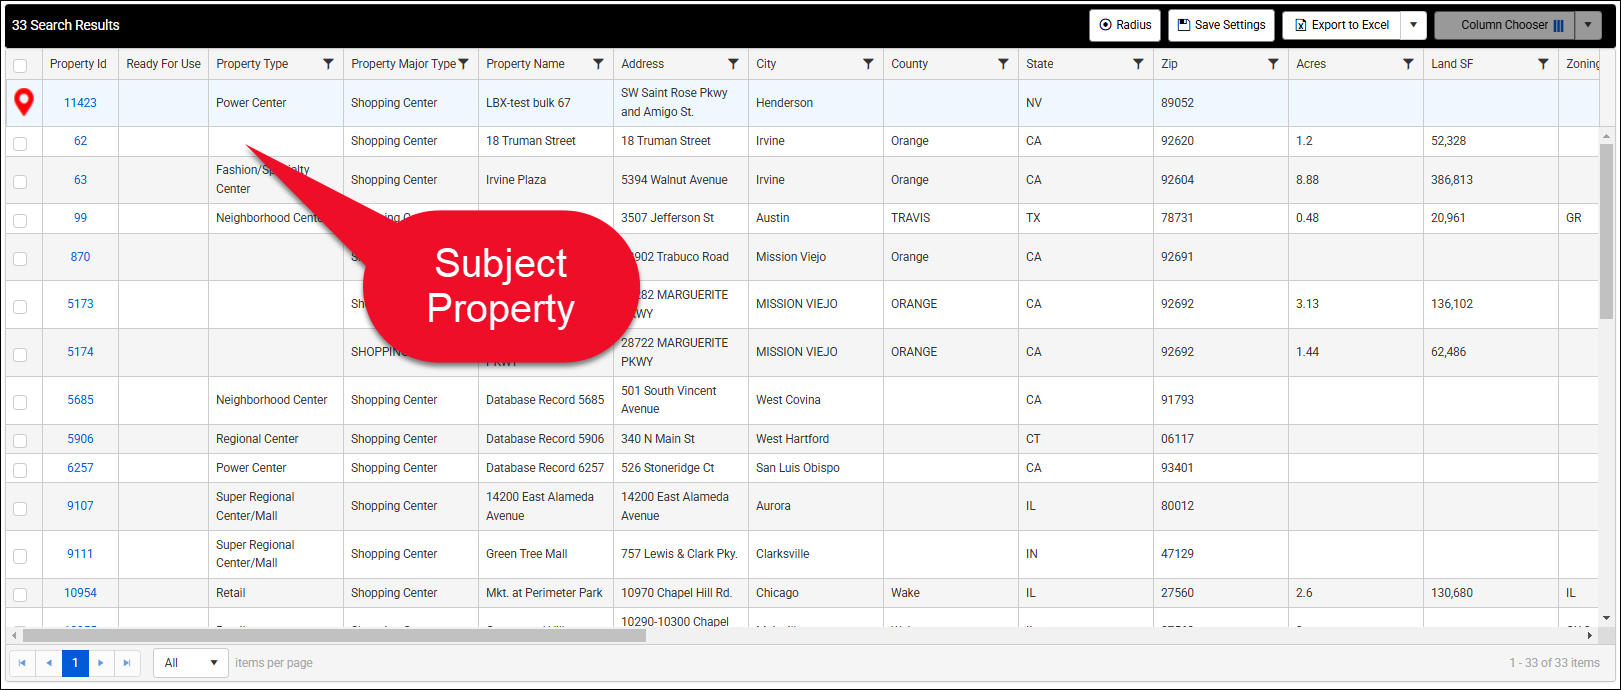 | |
With the subject property row frozen, the column filters and sorting capabilities apply only to the other search results (the prospective comparables). This makes it easy to find comparables that meet your criteria. Note: The Column Chooser functionality is disabled while in this view. Click the checkbox next to a property to highlight it on the map. | 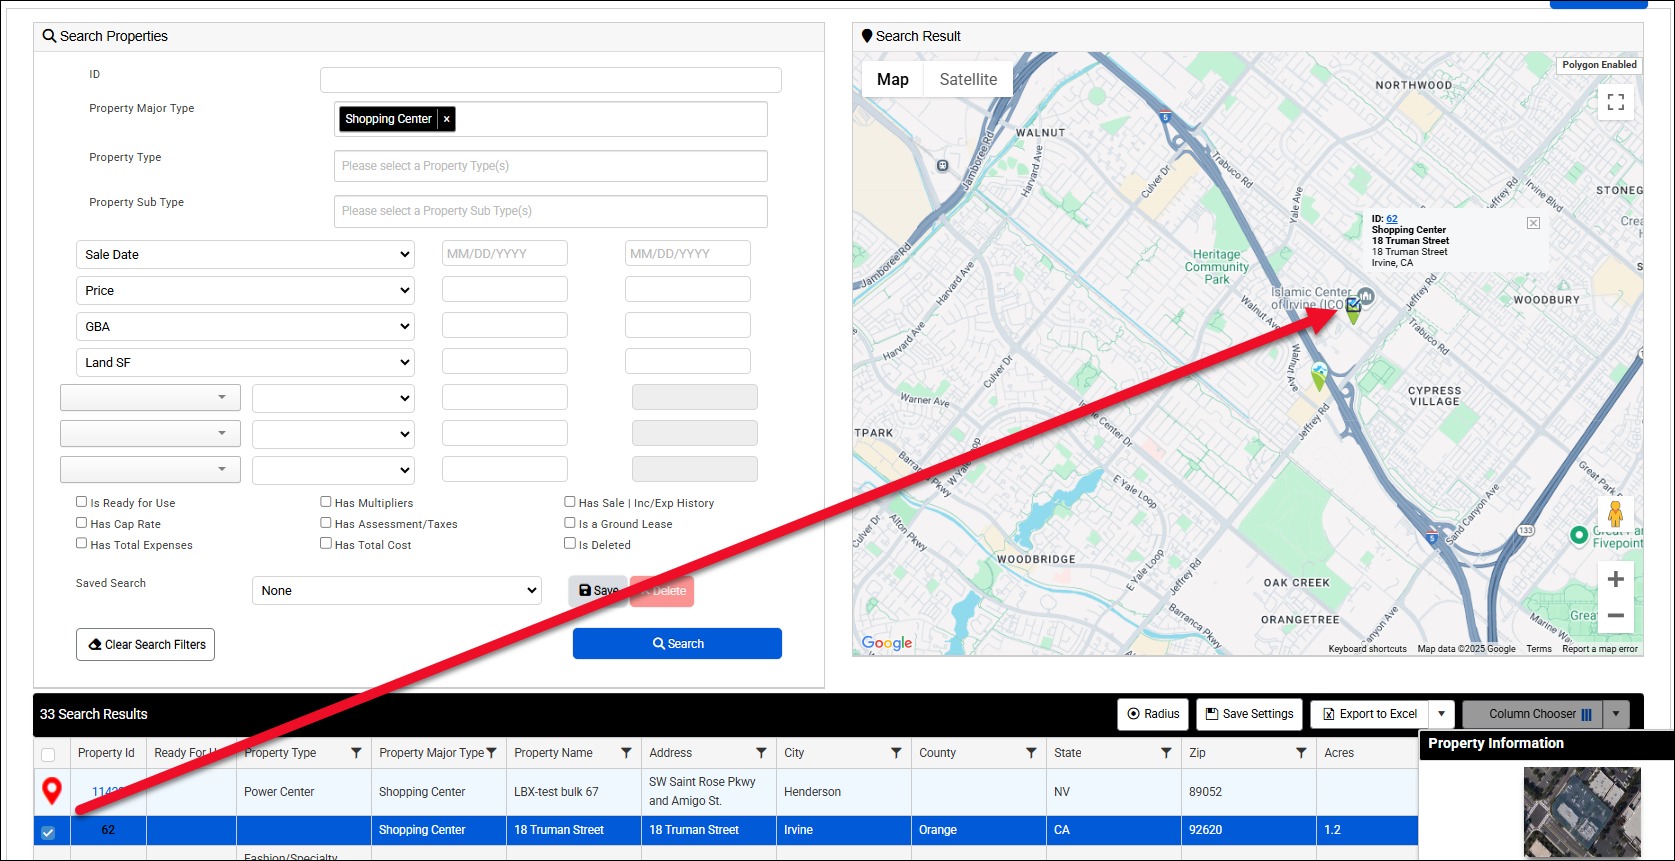 | |
Conversely, you may click on a map icon to select the corresponding property record in the search results table. The radius search also works in this view: 1. Click Radius. 3. Enter a radius value (in miles) in the Radius Search popup. 3. Click Filter in the Radius Search popup. | 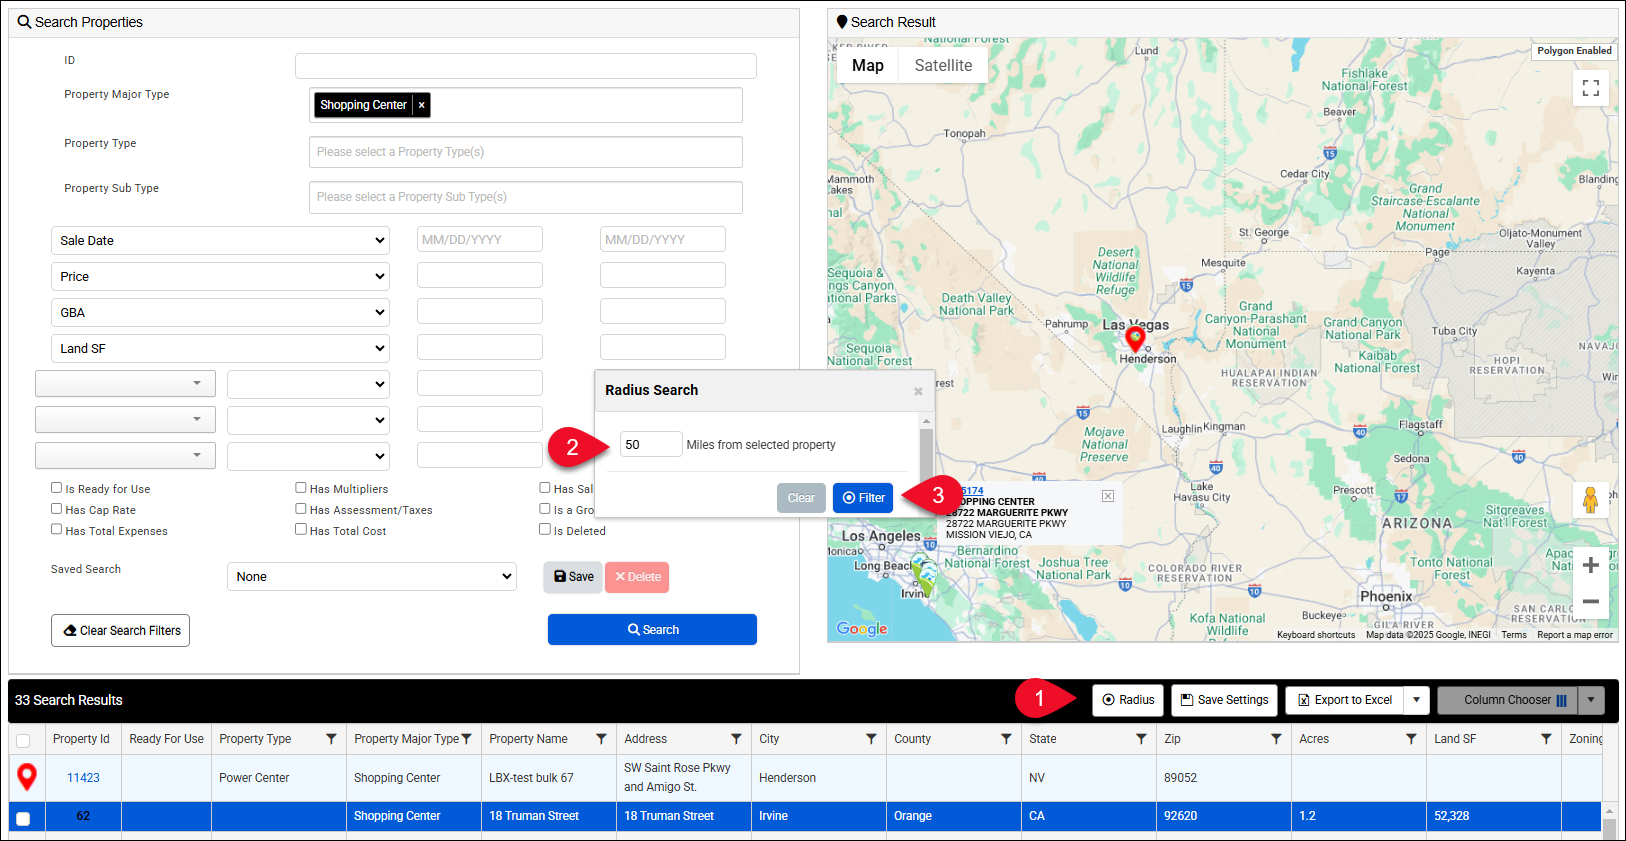 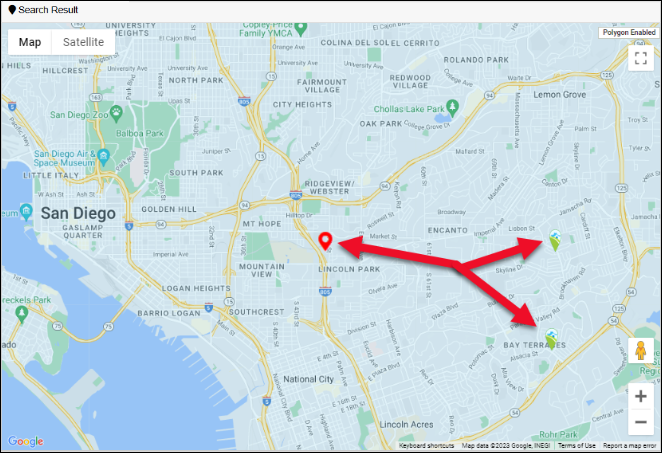 In the example above, the subject property is denoted with a red pin and the two comparable properties within the specified radius are also represented by pins. In the example above, the subject property is denoted with a red pin and the two comparable properties within the specified radius are also represented by pins. | |
Once the desired properties have been selected, scroll to the bottom of the page. Click Add Selected Comps to Job to add the properties to the Job record. |
| |
The dropdown menu to the left of the Add Selected Comps to Job button defines the type of comps and/or where they will be utilized. The selection defaults to the specific map icon that you clicked on the Job page, i.e., clicking the map icon next to Tax Comps defaults to Tax Comps, clicking Improved Sales defaults to Improved Comps, etc. | 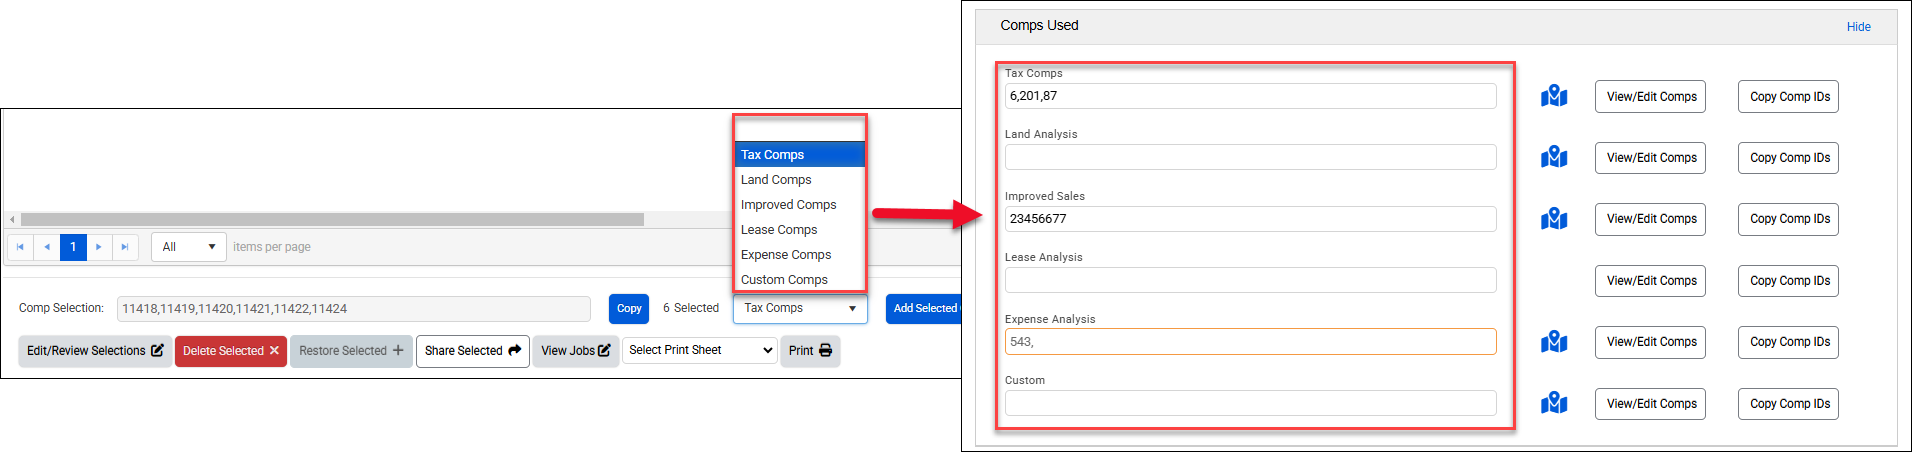 | |
After clicking Add Selected Comps to Job, a confirmation message will appear in the upper right corner of the screen and the property records will be added to the Job. Repeating the process appends any new comp property records selected; it does not overwrite existing selections. | 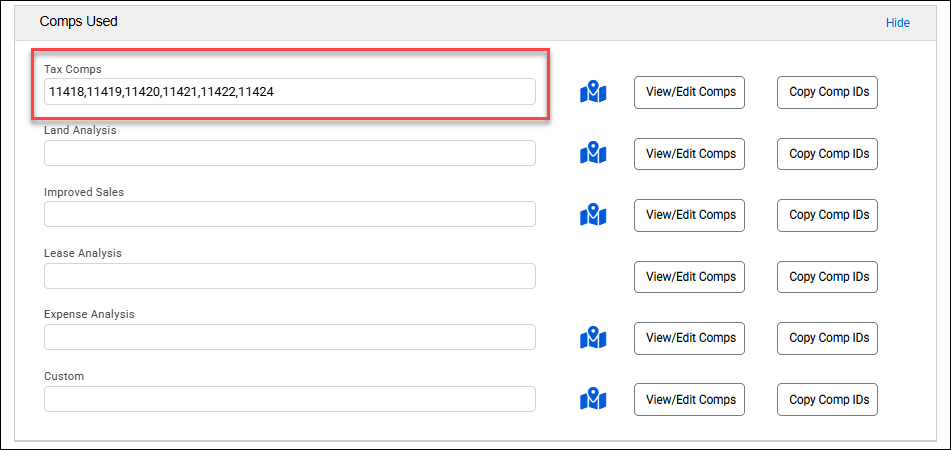 | |
| c. | Click View/Edit Comps to open up the property records. | 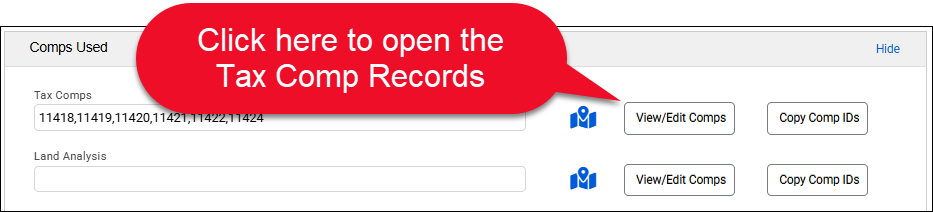 |
| The Property ID entered first in the field will open in a new browser tab. To view the other records, click the Prev and Next buttons at the top of the page. |  | |
| d. | Click Copy Comp IDs to copy the Property IDs in that field. | 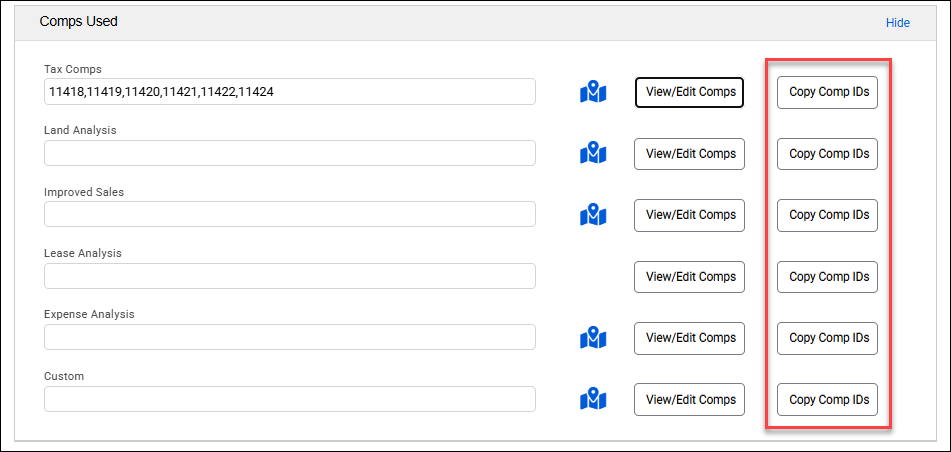 |
Upon importing subject property data into an Excel Model file, the associated comparables are added to the corresponding analysis grid tabs, i.e., the Improved Sales comps are made available in the Sales Grid tab. | 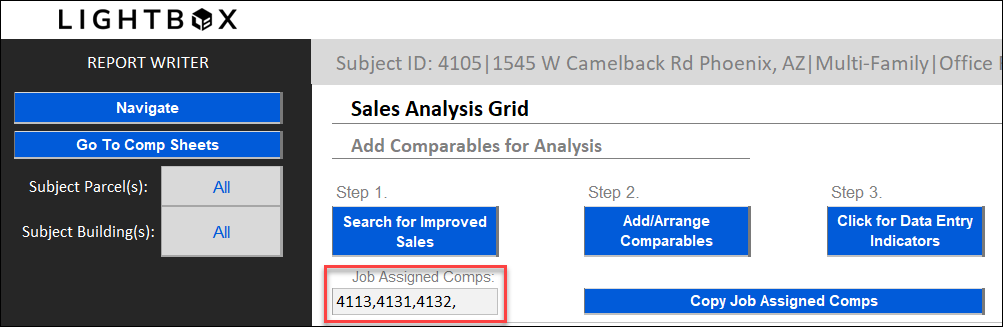 | |
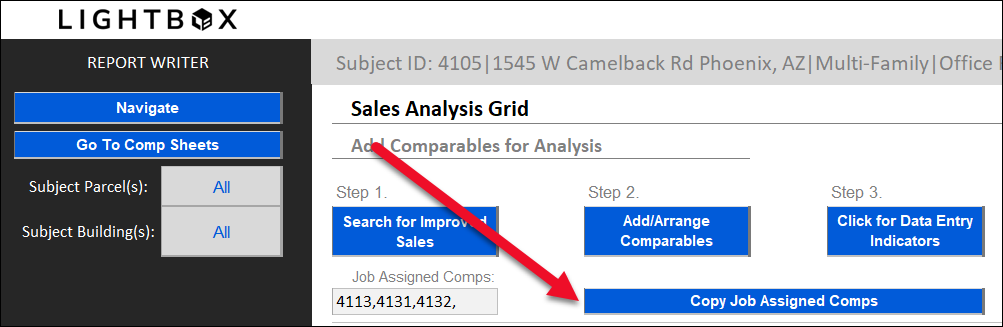
| Click Copy Job Assigned Comps to add the comps listed in the Job Assigned Comps field to the analysis grid. |
|

Milestones and Notes
| Milestones and Notes allows you to manually track the Job’s progress. If work product was sent via the mail or another shipping service the Tracking Number can be recorded here. | 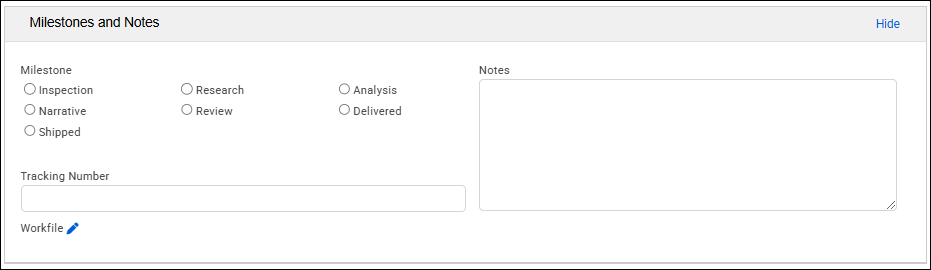 |
Bulk Edit
The Bulk Actions tool provides admin users with the ability to edit multiple Jobs simultaneously, modifying fields such as Status, Due Date, and Property Type. Select one or more Jobs by clicking the checkboxes on the left side of the page, or click the checkbox at the top of the table to select all Jobs on the page, then click Bulk Edit. Note: The number of Jobs selected appears in parenthesis (three, in the example below). | .png) |
| The Bulk Update Jobs modal opens. The Portfolio Job Number field is a text field. The Due Date field can be entered manually, or selected from the date-picker. All other fields are dropdowns. Make the desired changes, then click Update. Any fields that were not changed in the modal will remain unchanged in the selected Jobs. | 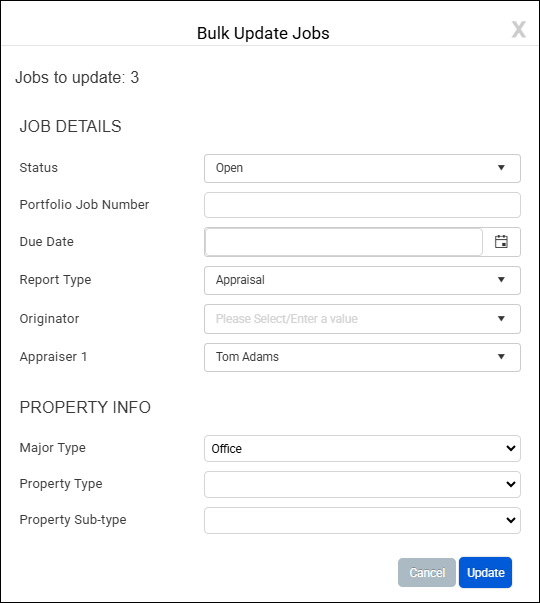 In the example above, the Status, Report Type, Appraiser 1, and Major Type fields will be modified. In the example above, the Status, Report Type, Appraiser 1, and Major Type fields will be modified. |
| The modal closes and a notification appears in the upper right corner of the page stating the changes were applied. |  |
Searching for Jobs
| To search for a specific Appraisal Job, select a search field from the drop-down in the menu of the Job Search page. Select Search Criteria from the drop-down menu and then click Search. |  |
Click on the Advanced Search command in the center of the search bar to execute a search with multiple search criteria. To use the Advanced search:
To remove a search item, click the red X in the upper right-hand corner of the item box. To delete all the filter items, click Clear Filters. | 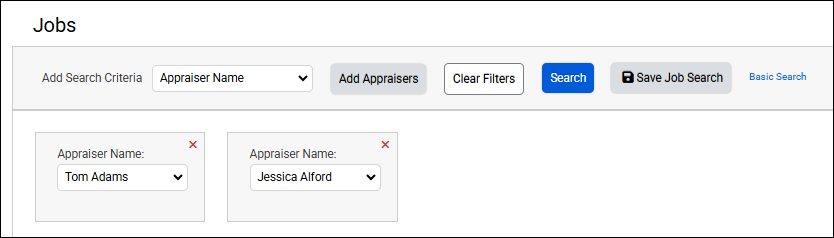 |
Save Job Searches
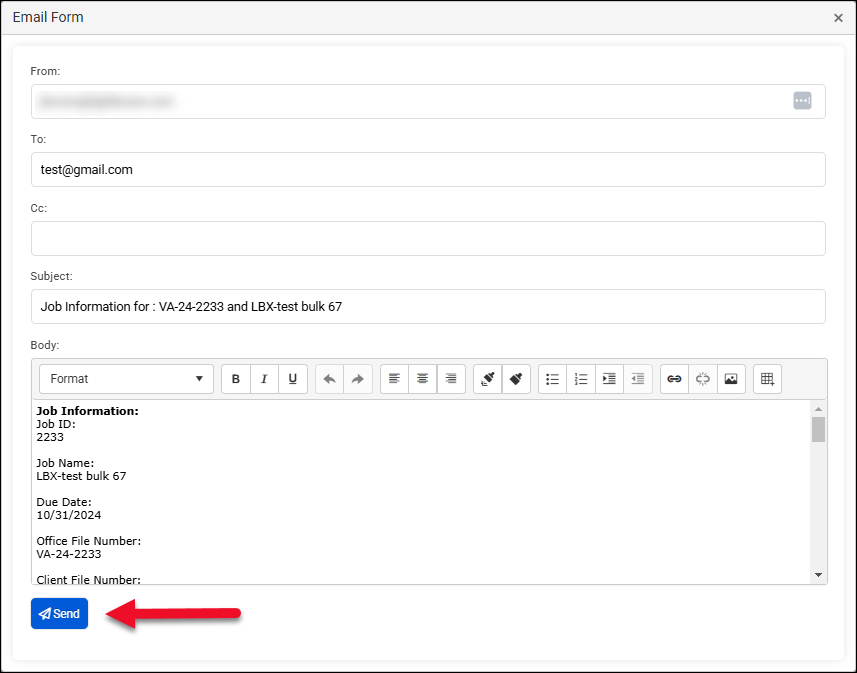
| After running a successful search, save the query for future use by clicking the Save Job Search button. |  |
| Saved Searches are stored as Basic or Advanced and can be deleted as necessary. | 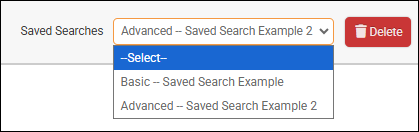 |
Was this article helpful?