Job Editor
- Print
- DarkLight
- PDF
Job Editor
- Print
- DarkLight
- PDF
Article summary
Did you find this summary helpful?
Thank you for your feedback!
Editing a Job
Job and Property data is automatically imported from the LightBox Valuation platform. When a Job is sent to Report Writer an integration modal allows for minimal Job details to be added. You may wish to further edit the Job as necessary.
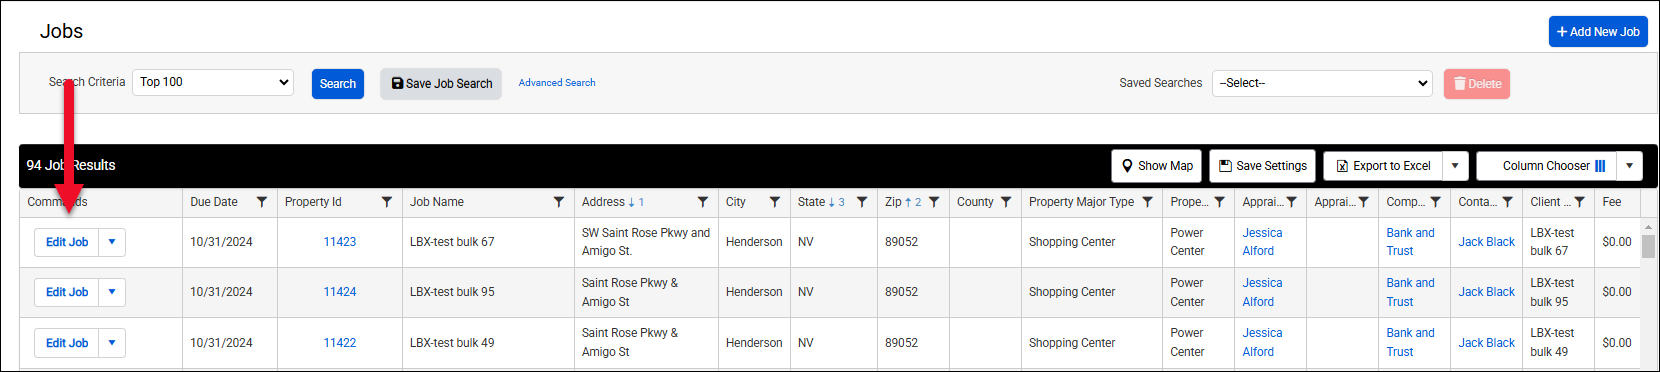
To edit a Job, click the Jobs menu to go to the Jobs page, and click the Edit button next to the Job you wish to edit.
The Job Details page opens. The top of the page has five tabs: Job Overview (the first tab to load), Report Details, Project Management, Fees, and Comp Assignments.
Each tab has one or more sections which to pertain to various aspects of a Job. Fields with a red asterisk are required.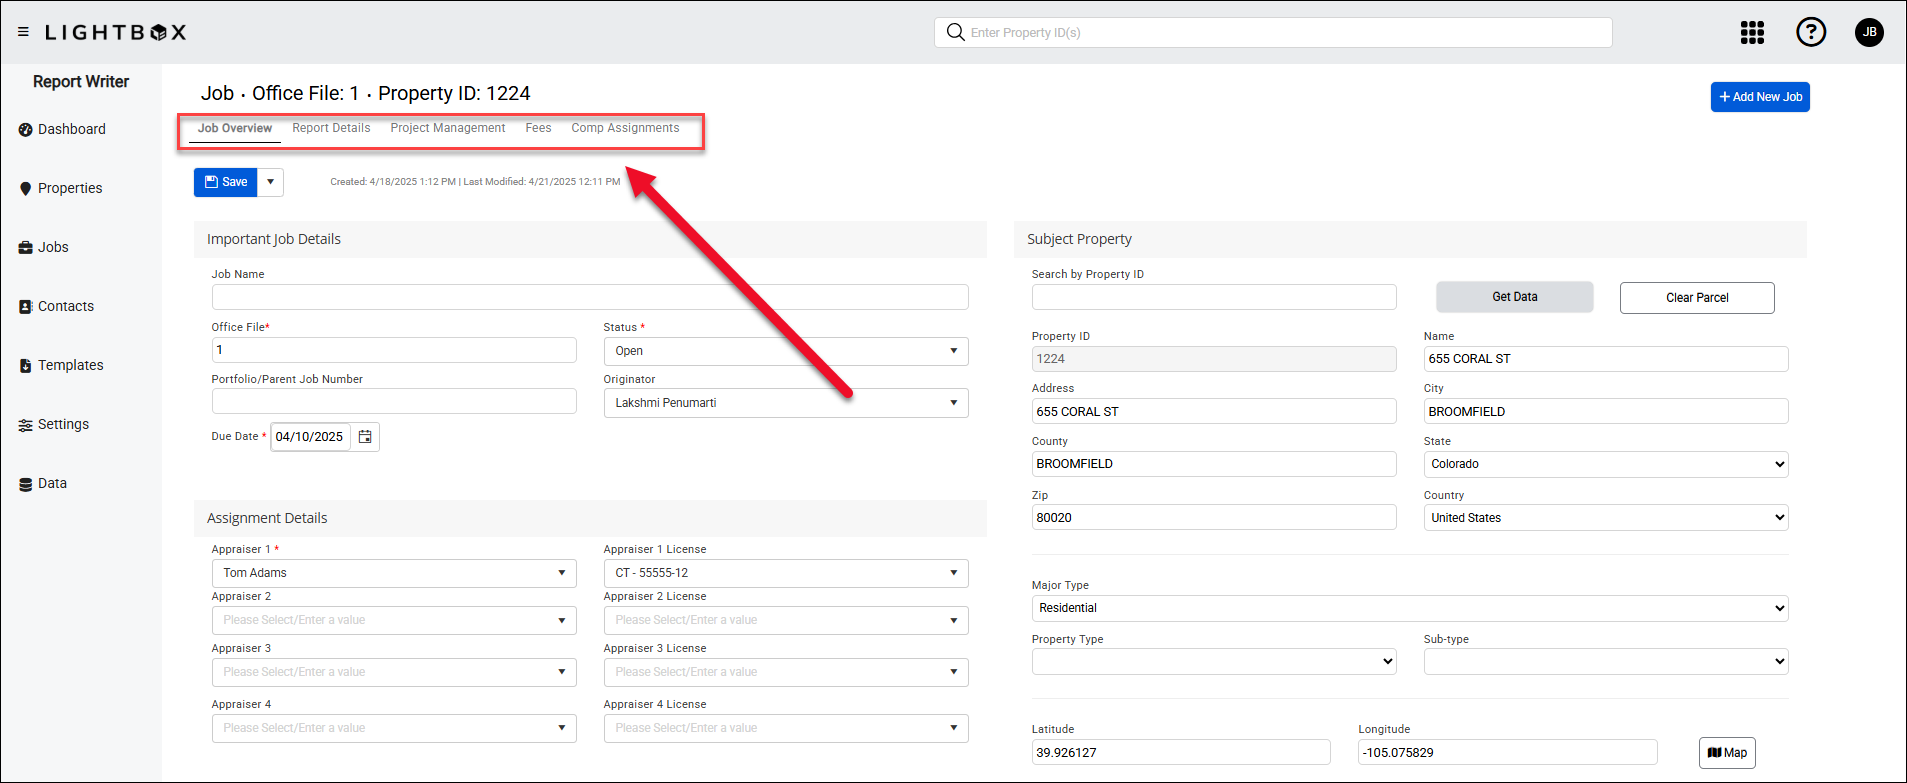
Required fields are marked with a red asterisk.
When you make a change on a tab (e.g., make a selection from a dropdown menu, enter a date, etc.) and then navigate to a new tab, a popup will ask if you want to save changes. If you click Cancel, any changes made to that tab will be lost upon navigating to the new tab.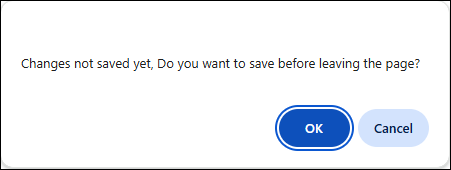
You may also save manually at any point by clicking the Save button in the upper-left corner of the tab.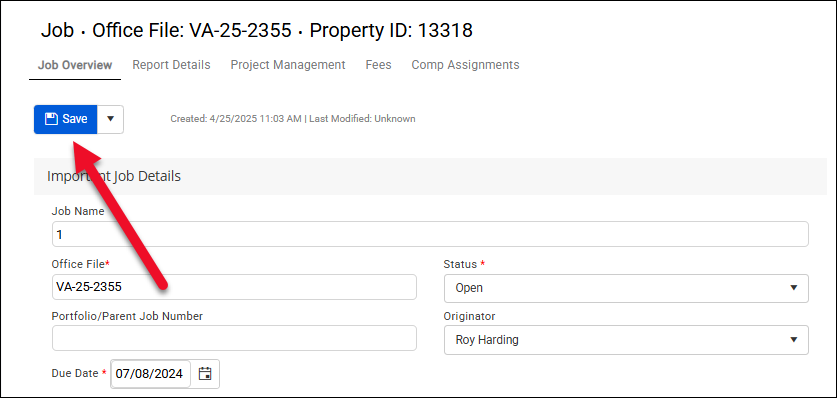
Click the arrow next to the Save button to expose additional options:
- Delete: (Admin only feature) Click to delete the Job. A prompt will request confirmation.
- Email: Open an email modal with important Job details already contained in the email body. Further editing and additional recipients can be added at any time.
- Research: (Valuation Subscriber feature) Open the Subject Property in the Valuation - Research application.
Job Overview Tab
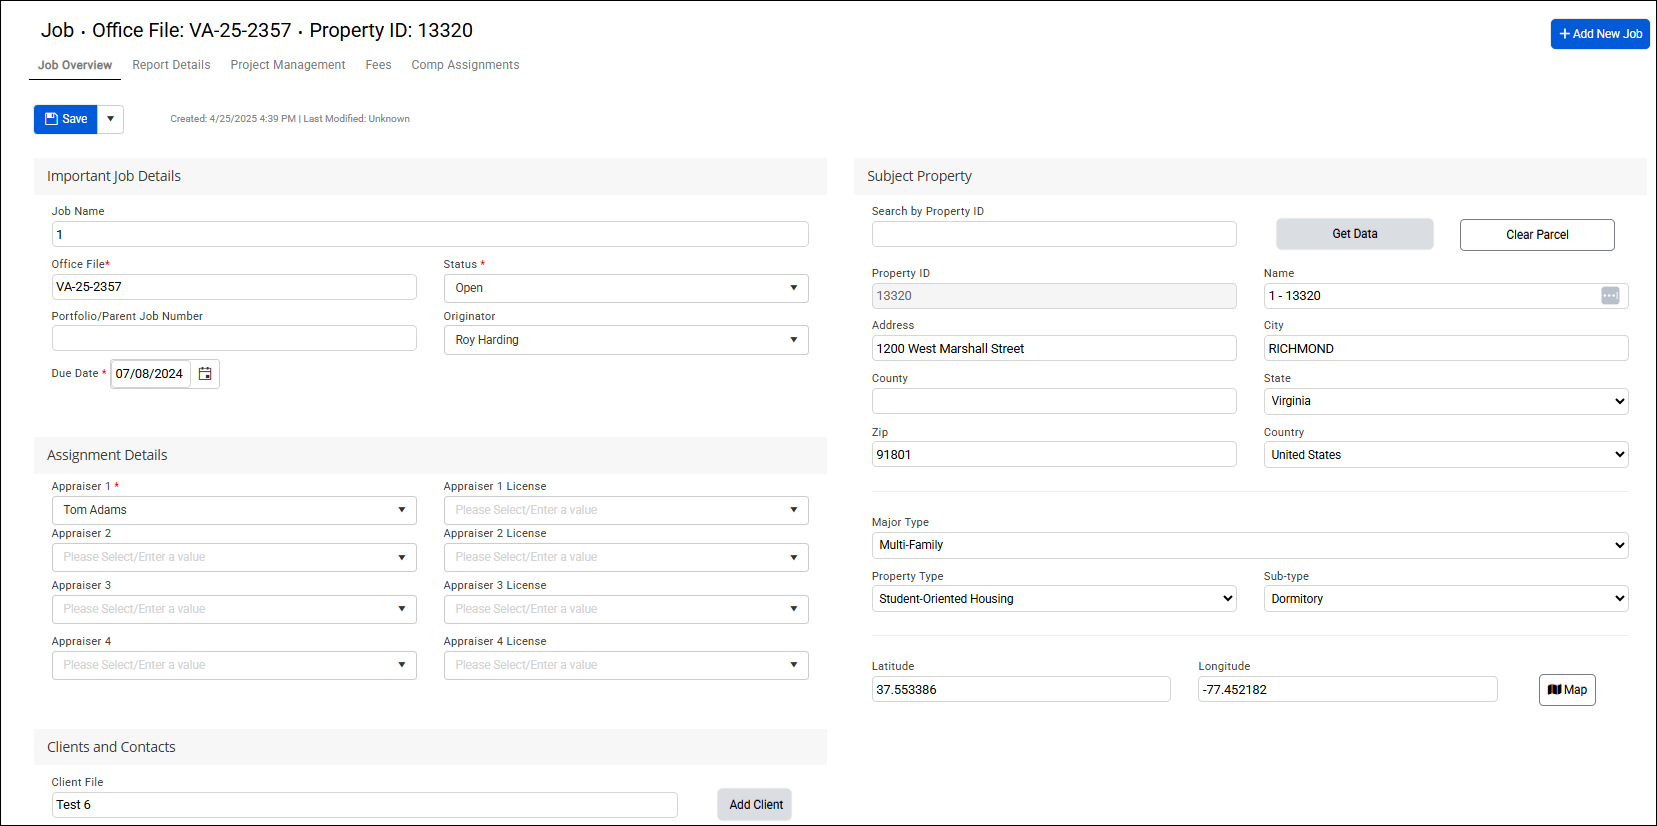
The Job Overview tab contains the following sections:
- Important Job Details
- Subject Property
- Assignment Details
- Clients and Contacts
Important Job Details
| Display Name | Description |
| Job Name | The Name or description of the Job, often the Property name |
| Office File Number | The Internal office file number or job number |
| Job Status | Open, Assigned, Closed, etc. |
| Portfolio Job Number | The Parent job number for a portfolio |
| Due Date | The date the job is due to the client. |
Valuation Subscribers
The Job Name, Portfolio Job Number, Originator and the Due Date are imported from the Valuation - Jobs application.
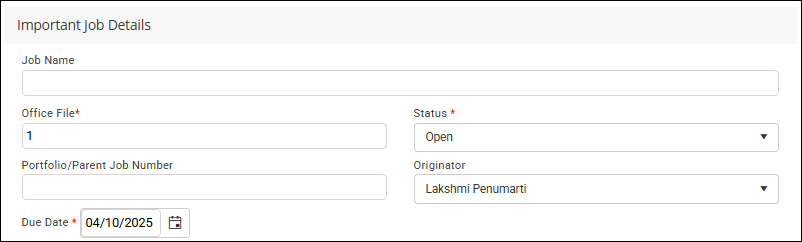
Subject Property
Enter a new Subject Property in the available fields or enter a Property ID in the Search by Property ID field and click Get Data to auto-populate the Subject Property fields with available data. Re-using properties for Jobs assists with identifying prior Jobs for reporting compliance.
Click Clear Parcel to clear all data in the Subject Property section.
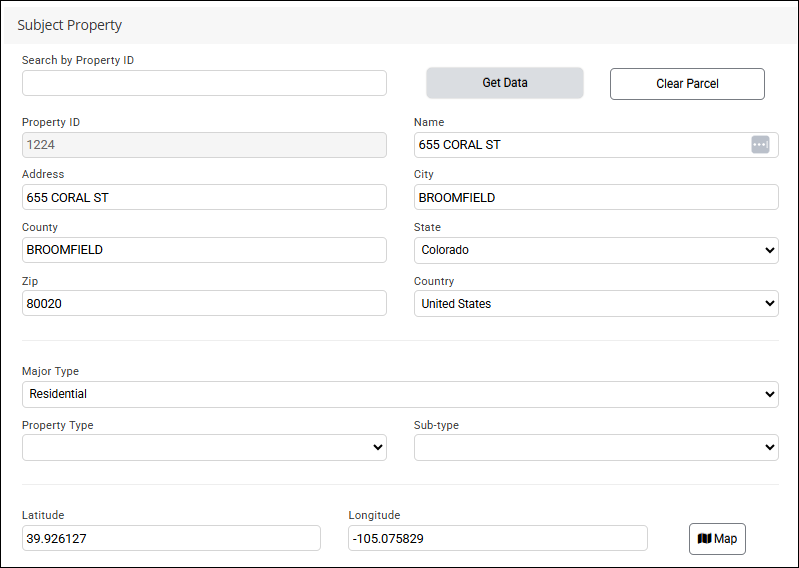
If the Latitude/Longitude has not already been added to the property, click the Map button in the bottom right corner of the section to open the Parcel Location modal.
If an address is entered in the Subject Property section it will automatically appear in the address box in the bottom right of the modal. You may also enter an address there or modify the one that was provided, then click Go to to navigate to the location on the map.
If lat/long values were already entered in the Subject Property section the Lat/Long button will be grayed out. If values have not been entered there, you may click the Apply Lat/Long button to enter the lat/long values corresponding with the address in the Parcel Location modal in the Lat/Long fields of the Subject Property section.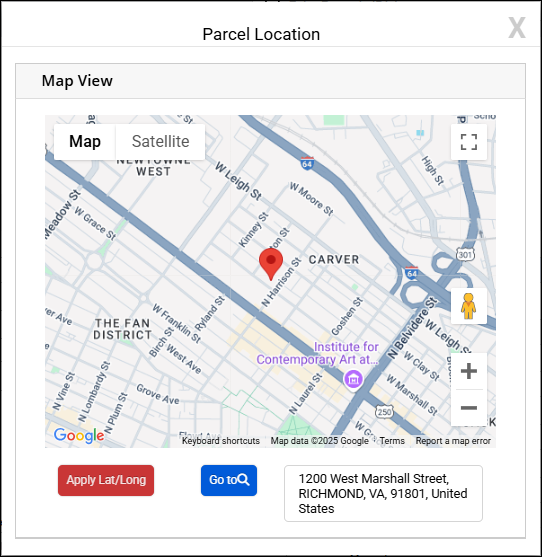
Assignment Details
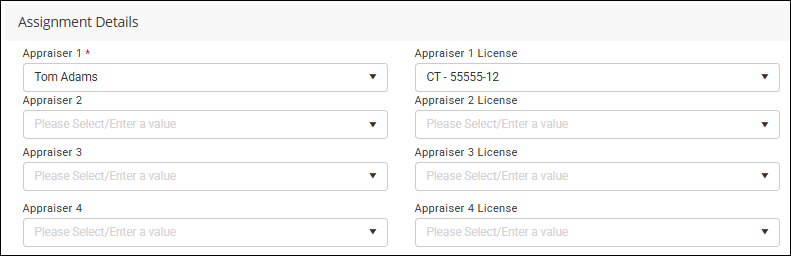
Although the labels are "Appraiser 1, 2, 3 and 4", utilize these positions for a review, a site inspector, an analyst, etc. Chosen assignments and license data will automatically import with the Job information.
Clients and Contacts

The Client 1 field is a required field. Valuation Subscribers The Client File Number, Company and Contact information is imported from the Valuation - Jobs application. | 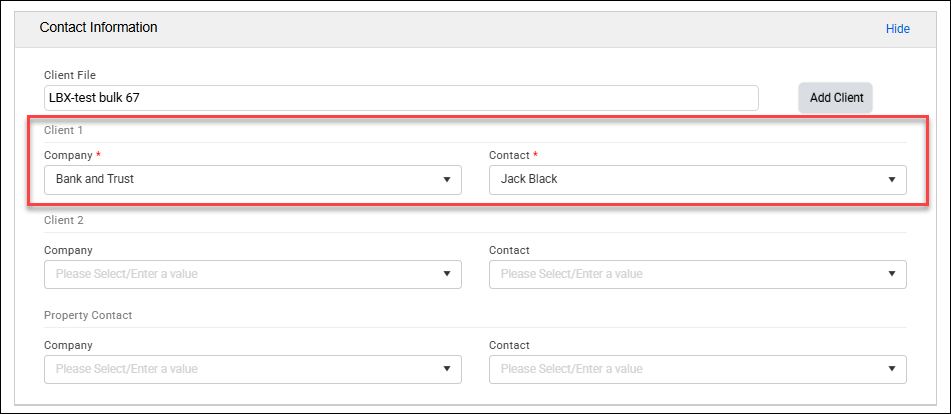 |
To manually enter this information, click Add Client. | 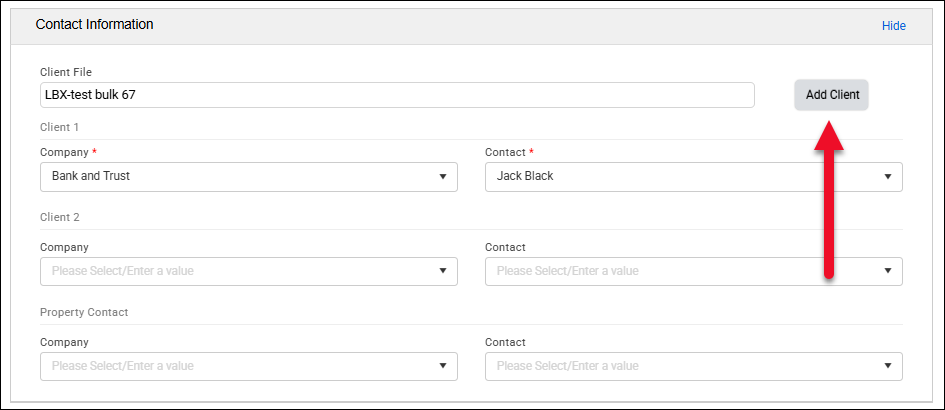 |
Enter the information in the Add Client modal and then click Save. | 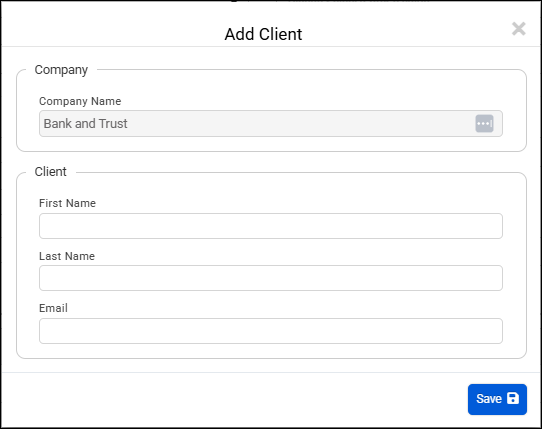 |
You may add Client 2 and Property Contact Information manually. These fields have type-ahead functionality: begin typing the name of a Company or Contact in the drop-down menu to filter the menu and more easily find the desired Company or Contact. | 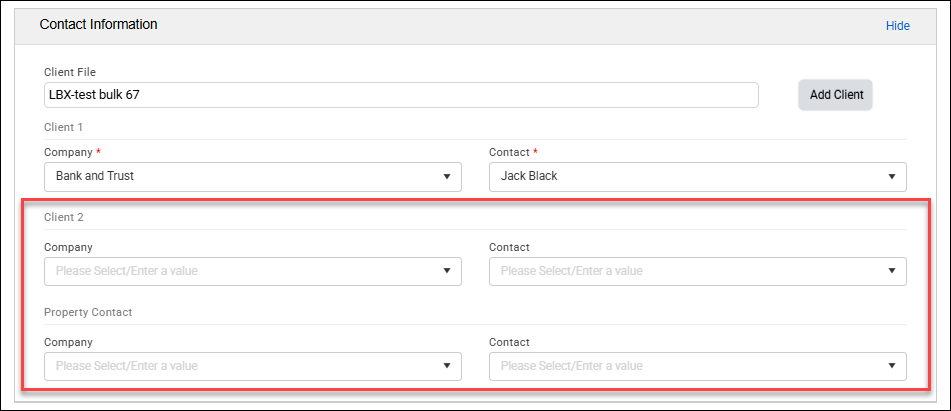 |
Click the Company drop-down menu and select a Company. Then click the Contact drop-down menu and select a Contact from that Company. |  In the above example, Client 2 information has been added to the Contact Information section. In the above example, Client 2 information has been added to the Contact Information section. |
Report Details
Inspection
Select an Inspection Date using the date-picker or enter one manually following the dd/mm/yyyy format.

Scope of Work
Make selections from the dropdown menus and enter comments in the Scope of Work Comments field.

| Report Type | Appraisal, Market Study, etc. |
| Interest Appraised | An enforceable, legal claim to title of or interest in property. |
| Intended Use | Mortgage Refinancing, Litigation, etc. |
| Value Type | Market Value, Liquidation Value, etc. |
| Intended User | The client, the client and Property owner, etc. |
| SoW Comments | Comments regarding the scope of work (special requests from client, etc.) |
NOTE
The Report Type field value is included when importing a Job from the Jobs application in LightBox Valuation. It can be updated manually by clicking the drop-down menu and typing ahead to return the preferred result.
Project Management
Job Dates
Job Dates allows you to manually track the Job’s progress.
The Start Date and End Date information is imported from LightBox Valuation.
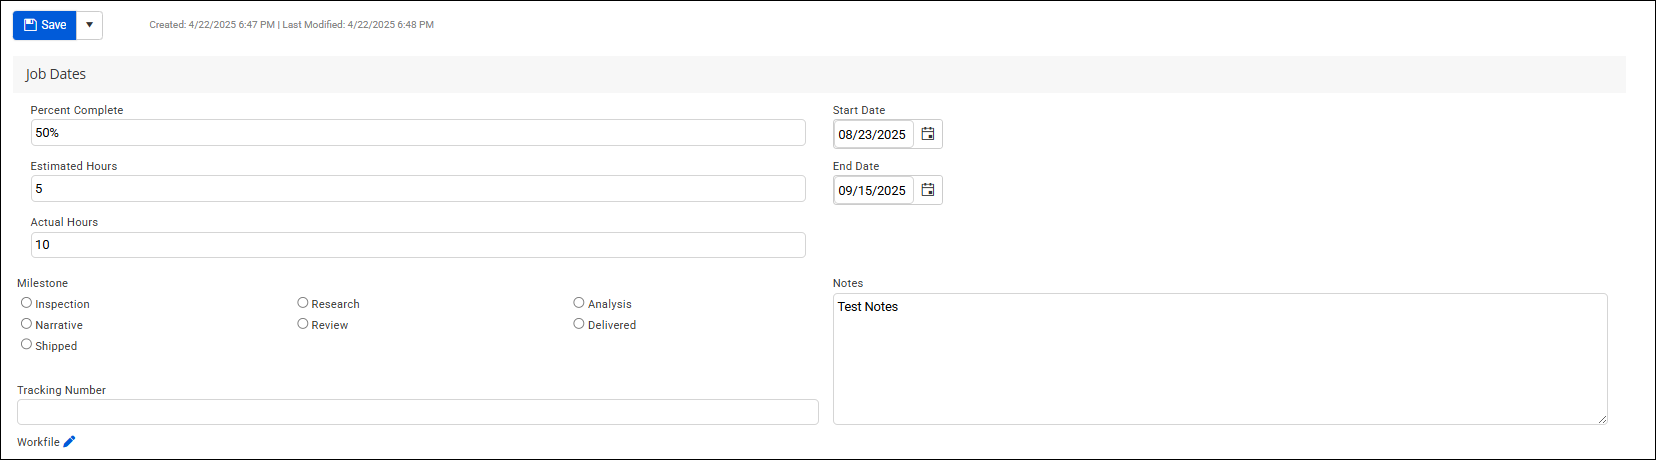
| Job Start Date | The date the Job is expected to start. |
| Job End Date | The date the Job is expected to end. |
| Job Estimated Hours | The number of estimated hours it will take to complete the Job. |
| Job Actual Hours | The number of actual hours it took to complete the Job. |
| Tracking Number | The tracking number used to ship the hard copies of the report. |
| Percent Complete | Job % completion. |
| Notes | Comments regarding the Job (special requests from client, etc.) |
| Report Milestone | The milestone for project management purposes. |
| Workfile Link | The URL associated with the workfile. |
Valuation Subscribers
The Job Start and End Date is imported from the Valuation - Jobs application.
Fees
Fees
Contract Total is a calculated field. Hover over the field to see a tooltip describing how the field is calculated. 
Valuation Subscribers
The 'Fee' field is imported from the Valuation - Jobs application.
Comp Assignments
Refer to the Comp Assignments documentation for more information about this tab.
Add New Job
To create a new Job, click the Add New Job button to create a new, blank Job.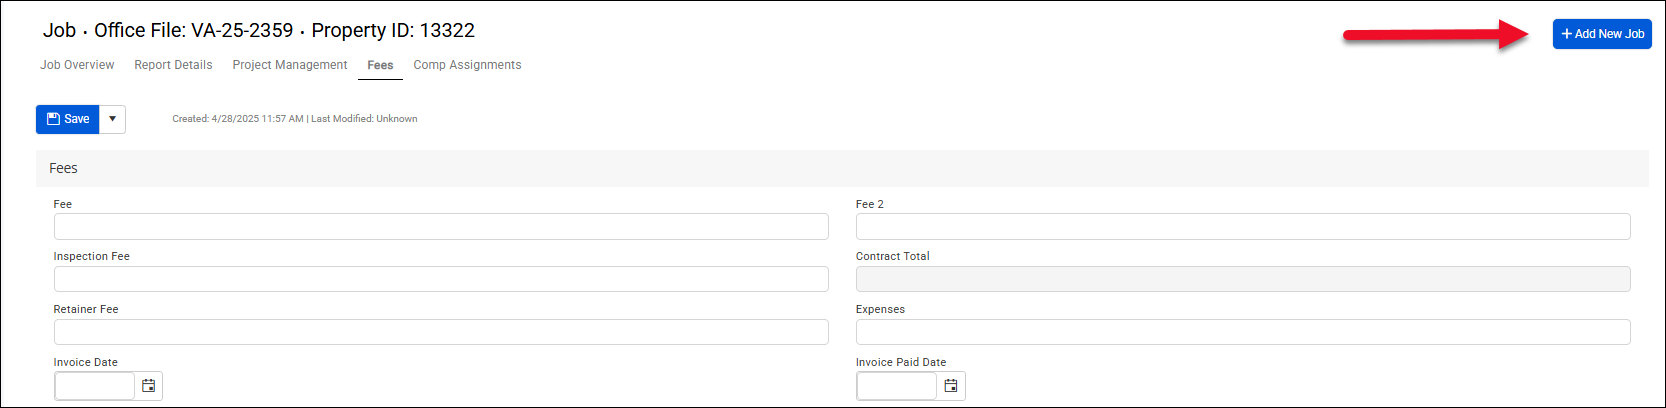
Was this article helpful?