Improvements
- Print
- DarkLight
- PDF
Improvements
- Print
- DarkLight
- PDF
Article summary
Did you find this summary helpful?
Thank you for your feedback!
The default Improvements section contains fields for a variety of Property Major Types, including Office, Commercial-Retail, Industrial, and Multifamily. Enter Improvements data as a summary record or add multiple buildings and view summary data for all of them in a single location.
Action Bar
Several tools are available at the top of the page, nested beneath the Save button. Click the arrow next to Save to expose the following commands:

- Save: Saves the changes made on the current tab.
- Save and Add Another: Saves changes made to the current record and creates a new record associated with the same property ID.
- Copy to New Record: Copies all values and data from the current record and creates a new record with those same values and data.
- View Jobs: Open the Report Writer Jobs Manager and displays any Jobs associated with the property ID.
- Share: Click to open the Share modal. See Share for more information.
- Delete: Click to delete the current record. A popup will request confirmation.
The Select Print Sheet dropdown menu makes it easy to create a print-ready page in the desired format.  Click a command in the dropdown menu and a new browser tab will open with the property information in that format.
Building Data
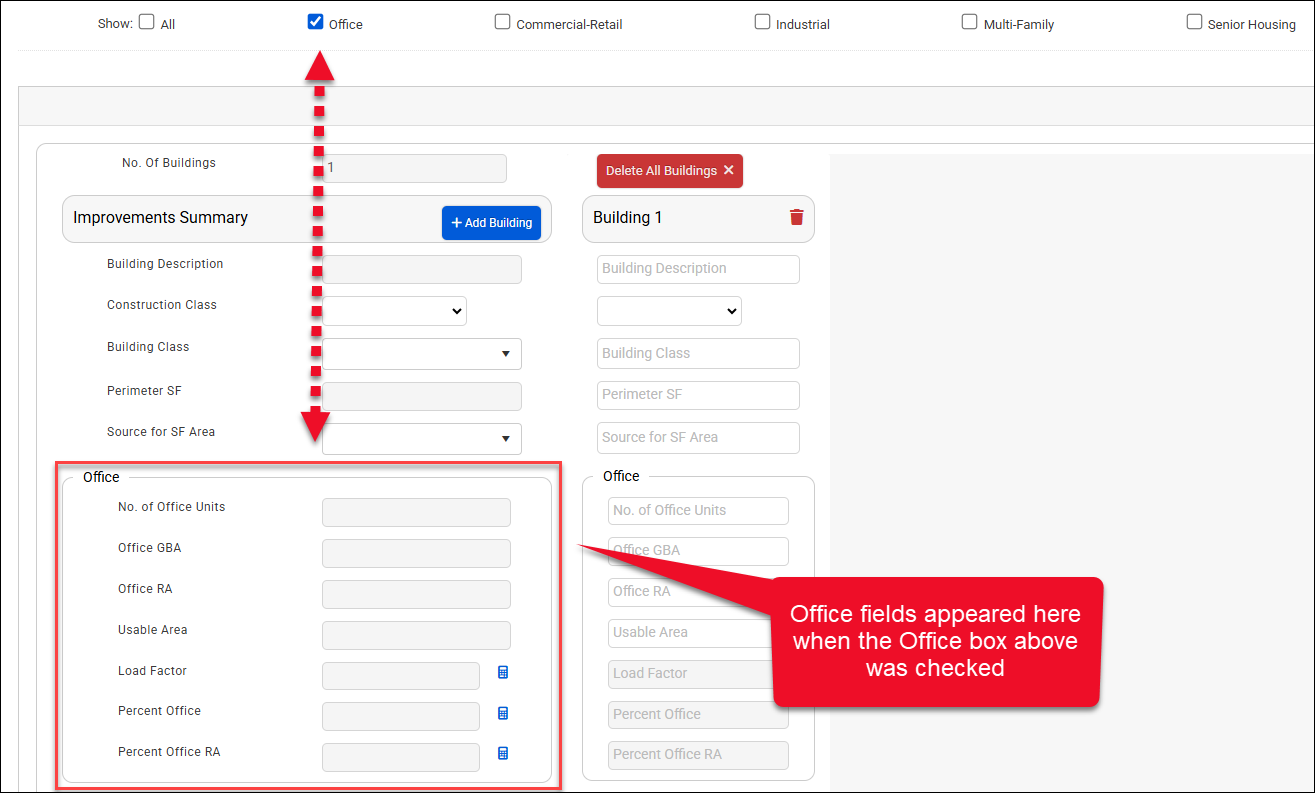
You can customize which fields are displayed in the Building Data section by selecting which property types you would like displayed.

Each checkbox corresponds with a set of fields. The Building Data section will automatically update to reflect these changes.
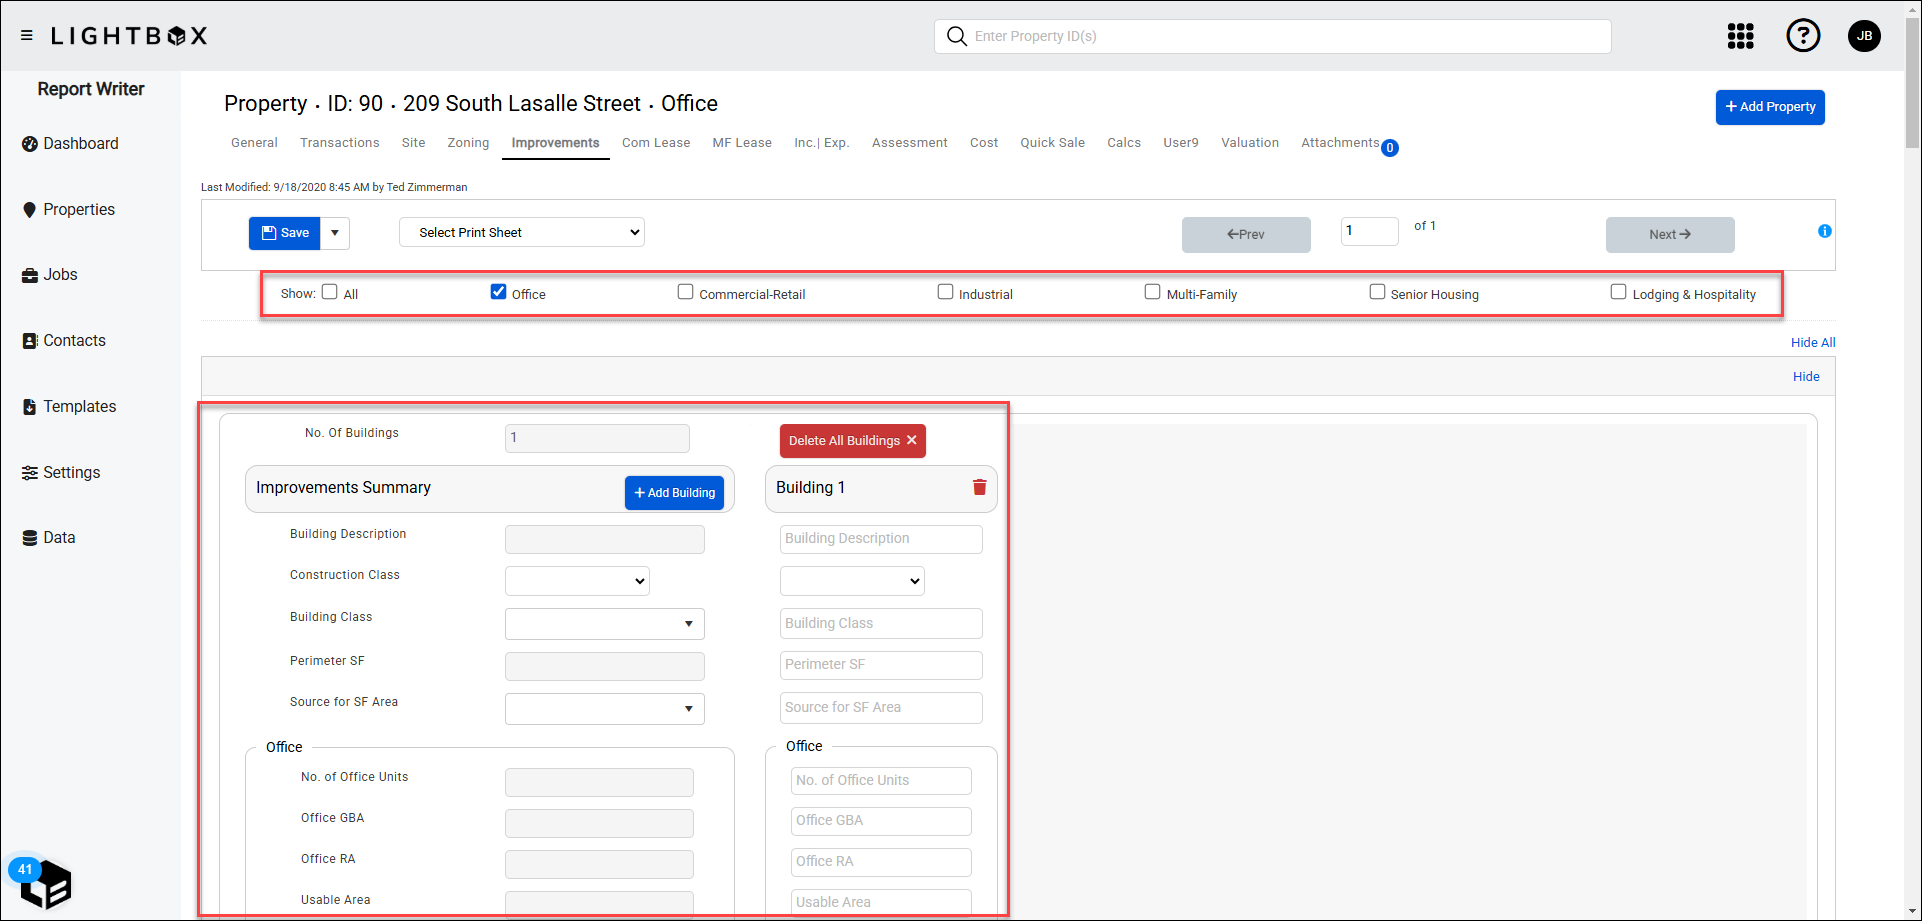
The fields correspond with what you have selected in the Toggle Display menu. For example, if you deselect Office in the display menu, Office GBA|RA will disappear from the fields below.
Note:
Adjusting the GBA, RA, Units, Rooms and Bed fields will result in a change to the Price Per fields located on the Transactions pages.
Meter fields will automatically calculate based on the square foot entry and vice versa.
Meter fields will automatically calculate based on the square foot entry and vice versa.
To add a one-off item that is not available in the dropdown menus, enter the value you wish to have available in the text box at the top of the menu. Click Update Other to replace the Other menu item with the entered text.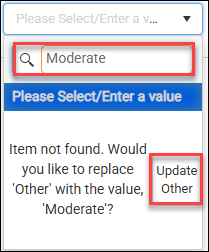
Adding and Removing Buildings
| The Improvements tab allows adding multiple buildings. To add a building, click the Add Building button. | 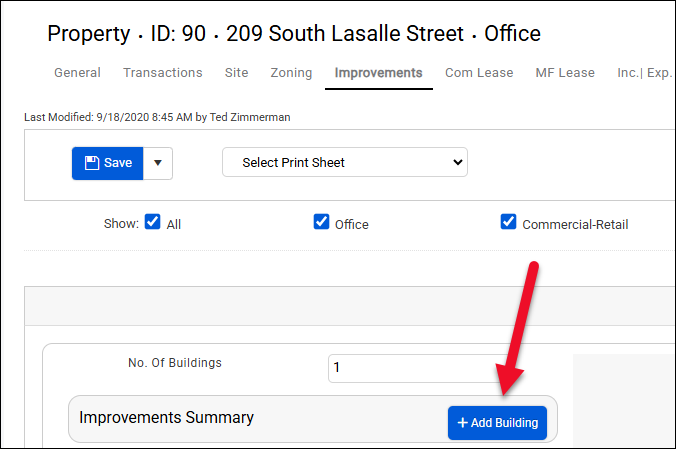 |
A new building column will appear to the right of the existing building column(s). | 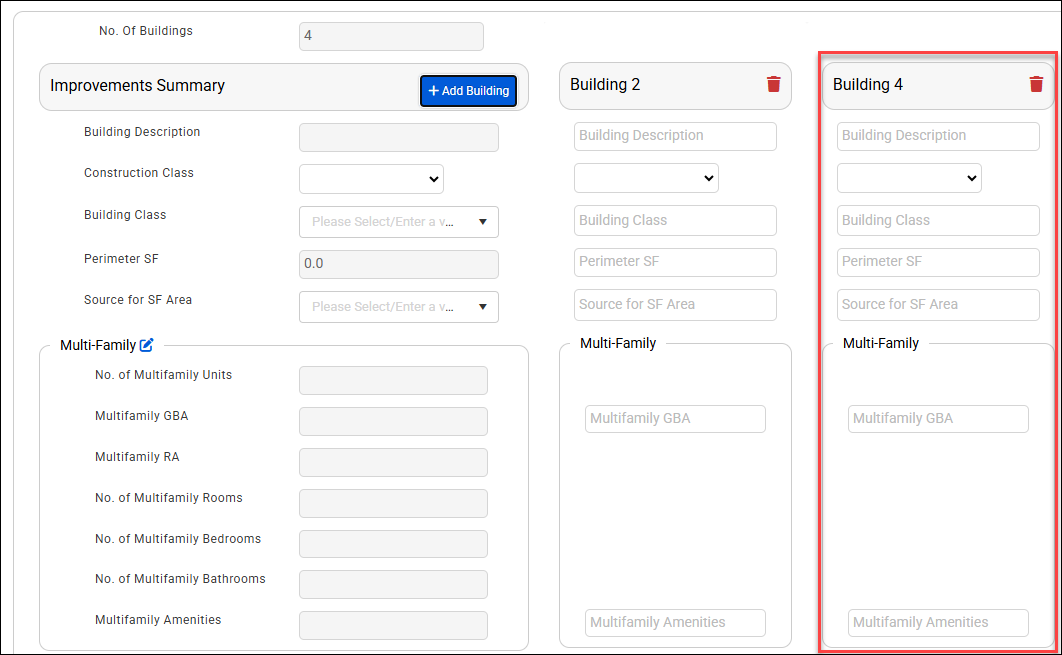 |
| Enter information in the fields. Before navigating away from the Improvements tab, click Save or Save and Add Another. A message will appear in the upper right corner of the page when the changes have been successfully saved. | 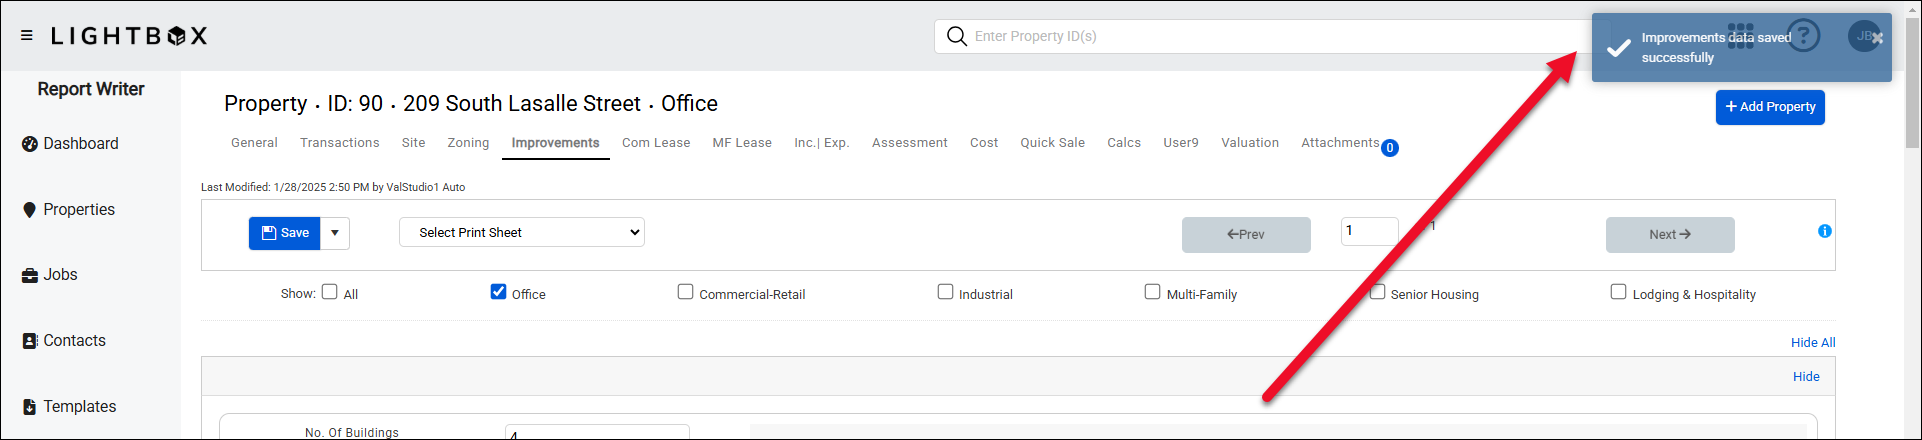 |
| To delete a building, click on the trash can icon at the top of that building’s column. A popup will request confirmation. Click Yes to delete the building. | 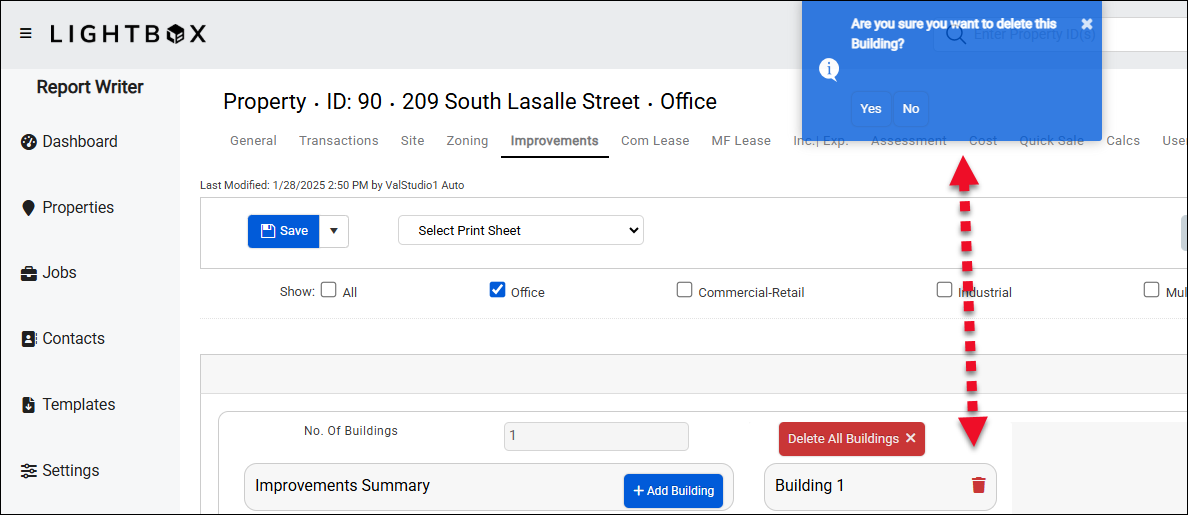 |
| The column on the left provides summary information for all of the individual buildings. The summary information varies based on the field type, either concatenating the field values or totaling, averaging or taking the maximum value of them. Example: The Building Class summary field concatenates the individual Building Class fields while the Perimeter SF summary field totals the values in the individual Perimeter SF fields. | 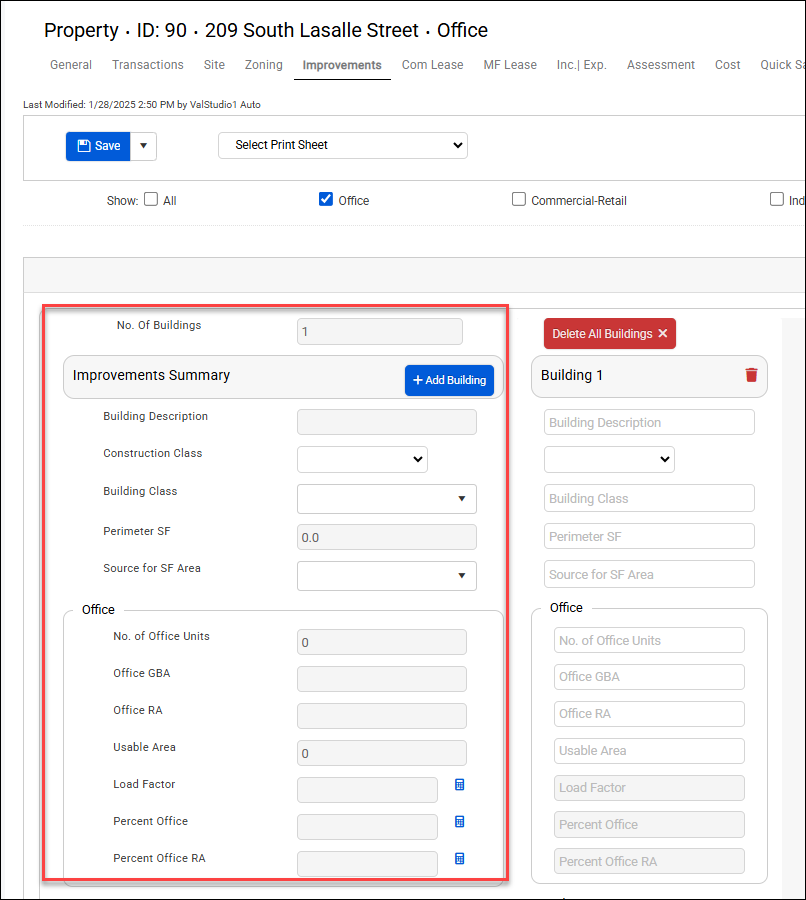 |
Note:
While there is not a limit on the amount of buildings you can add, only 10 buildings will import into the 46.02 version of the Valuation - Excel template.
If your version of the Excel template does not appropriately import the subject buildings, add the N1DB names to the appropriate parcel, increasing the number 2, 3, etc.
Ex: N1DBDescription_Building_1
If your version of the Excel template does not appropriately import the subject buildings, add the N1DB names to the appropriate parcel, increasing the number 2, 3, etc.
Ex: N1DBDescription_Building_1
User Assigned Fields
In addition to the default Improvement fields, you may create your own fields. These are called User Assigned Fields. Standard Improvement fields will be greyed out in this section. All standard Improvement fields are in the UI. |  |
Improvement Comments The Comments box allows you to enter comments for the Improvements as a whole. Note that these comments will not appear in the N1-Excel workbook when importing comp data. |  |
Unit Features and Project AmenitiesAdd any features and amenities in the Unit Features and Project Amenities section. | 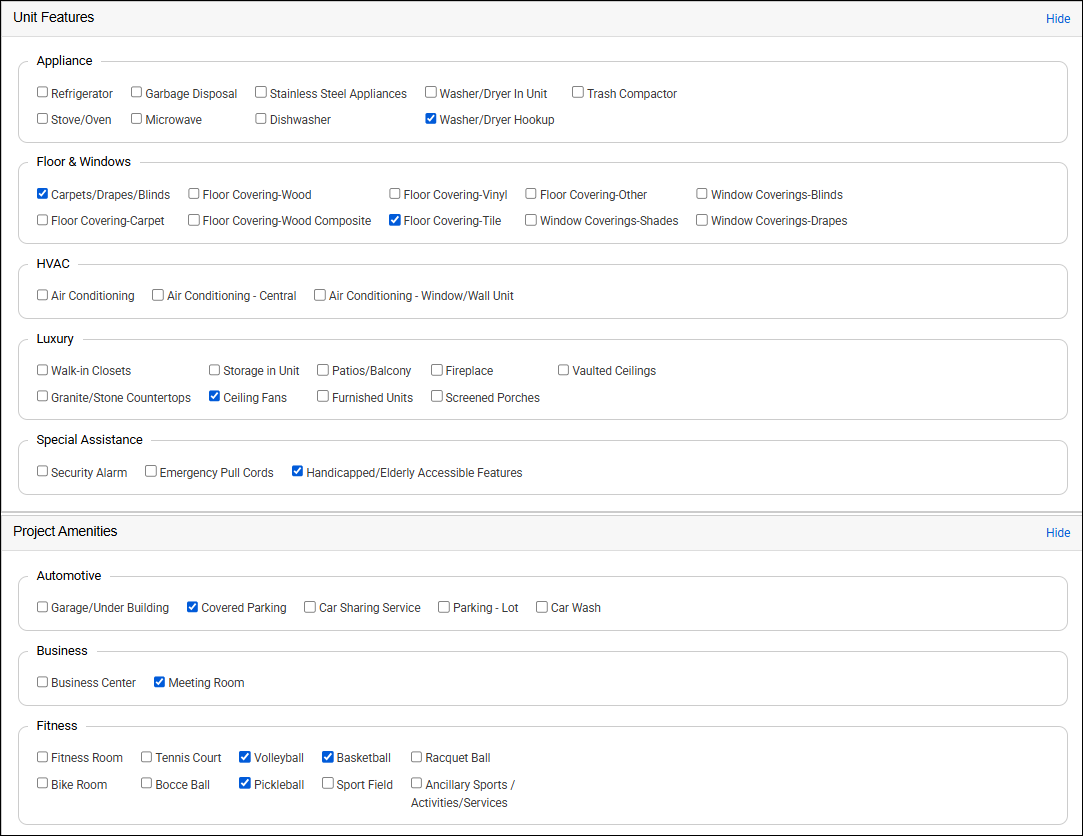 |
| After selecting Unit Features and Project Amenities, click Copy Features/Amenities to MF Lease to add the values to the MF Lease page. |  |
| A pop-up will request confirmation to overwrite any existing Unit Features and Project Amenities values. | 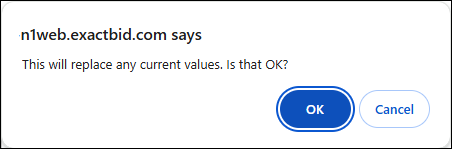 |
| Click OK to proceed. A second pop-up will request confirmation to Save. Note that if you click OK, it will save any changes made on the page, not just those made in the Unit Features and Project Amenities fields. | 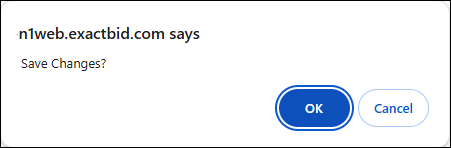 |
The page will refresh and a confirmation message will appear. To view the Unit Features and Project Amenities, click on the MF Lease button in the top navigation bar. |  |
Was this article helpful?