How to control the width of an inserted table
- Print
- DarkLight
- PDF
How to control the width of an inserted table
- Print
- DarkLight
- PDF
Article summary
Did you find this summary helpful?
Thank you for your feedback!
You can force any table to scale down by using a single-cell table in Word to control their size, so they do not reset to the full page width on update. Bear in mind this uses Word’s “tables” function, which is distinct from, and unrelated to, the “tables” (technically just pictures) that come in from Excel.
Instructions
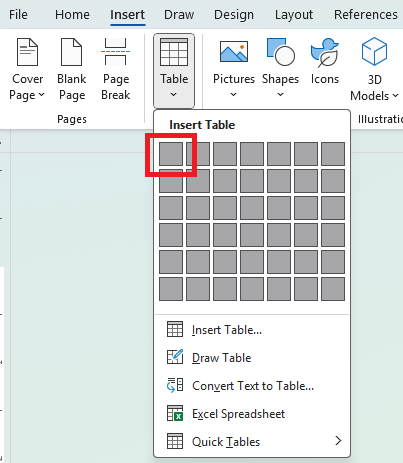
Navigate to the Insert ribbon in Word and select "1x1 table" (just a single square at the top left corner of the grid). This will create a table consisting of just one, empty cell.
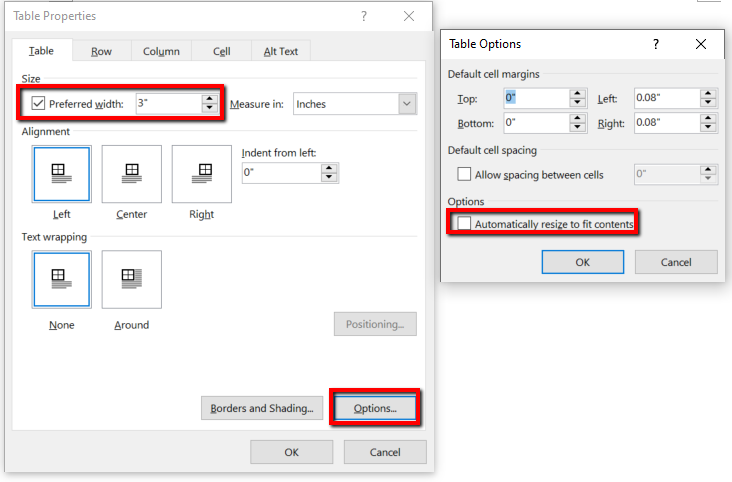
Right-click the resulting table, and check "Preferred Width", and enter the width to which you would like the table limited. Images in Word normally appear as wide as the page will allow, up to the image's actual size. Restricting the width can help pare it down. Also click "Options", and un-check "Automatically resize to fit contents".
You can optionally click "Borders and Shading" and select "None" to make the table's borders invisible in printouts and the like.
By narrowing the table, you can somewhat control its height as well, since it will automatically shrink to stay in proportion to its width.
Lastly, just insert the excel table image which size you are correcting inside the newly created cell. Click inside the cell, and use the Fields and Tables tool to insert it. Or, you may be able to cut and paste an existing table into the cell instead.
Was this article helpful?