- Print
- DarkLight
- PDF
Fields and Tables
- Print
- DarkLight
- PDF
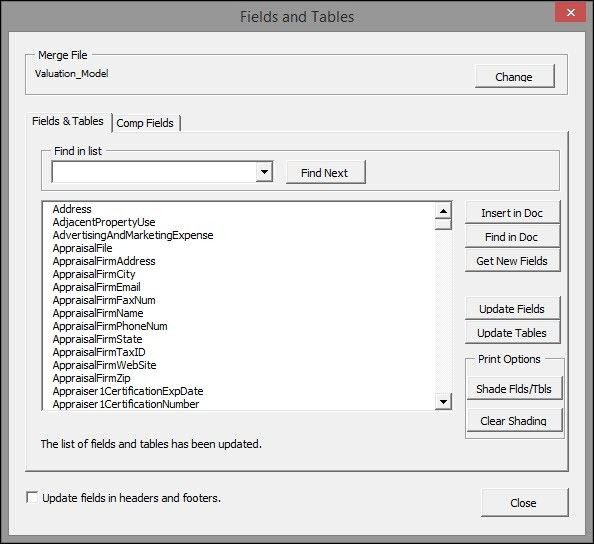
Your Report Writer Word document is composed of fields and tables that are directly funneled in from a corresponding Report Writer Excel document. There may be instances where you wish to insert a default Report Writer field or table into a spot in your document, or perhaps you've created a custom table in Excel and wish to have it imported; using the Fields and Tables function will allow you to quickly add anything created within your Report Writer Excel document into a report.
The function can be accessed from either the LightBox Ribbon in Microsoft Word, or by right-clicking in Word and selecting Fields and Tables.

Features
Merge File - Change
When you begin working with a Report Writer report file, you must merge your appraisal data from a Report Writer Excel. If you are ever unsure of which file your report data is filtering in from, you can check the name under Merge File to quickly determine the source document.
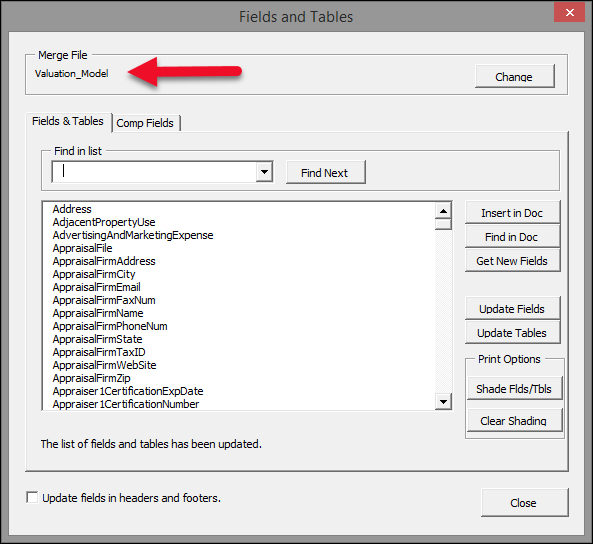
If you wish to merge the data from a different Excel file, simply click Change and select the appropriate source.
Find in List
The Find in List drop-down allows you to quickly parse through the list of fields and tables below in order to find the first instance of a selected option.
For example, selecting Parcel from the drop-down and clicking Find Next would automatically highlight the first field pertaining to the first parcel. You may also type part of a field name and click Find Next to find the field or fields that contain that search phrase. Continuously clicking Find Next would allow you to advance through the list.
Field and Table List
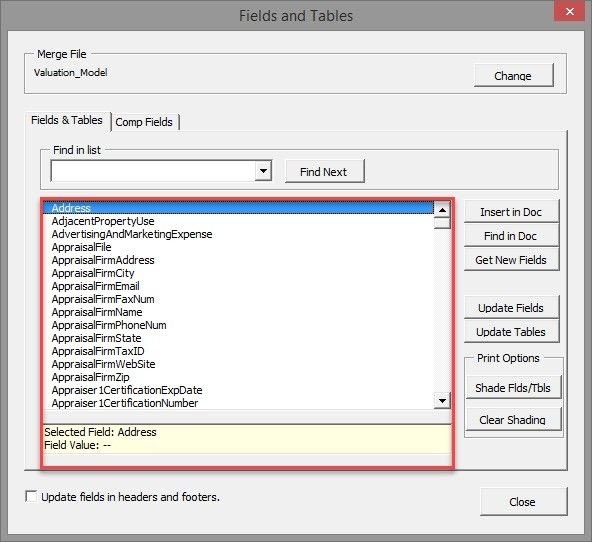
The center-most element in the Fields and Tables window is the actual list comprising your Excel document's fields and tables.
From here you can scroll through and select from every single field and table that exists within an Excel file. As such, it allows you the easiest way to import a custom table you created into a report.
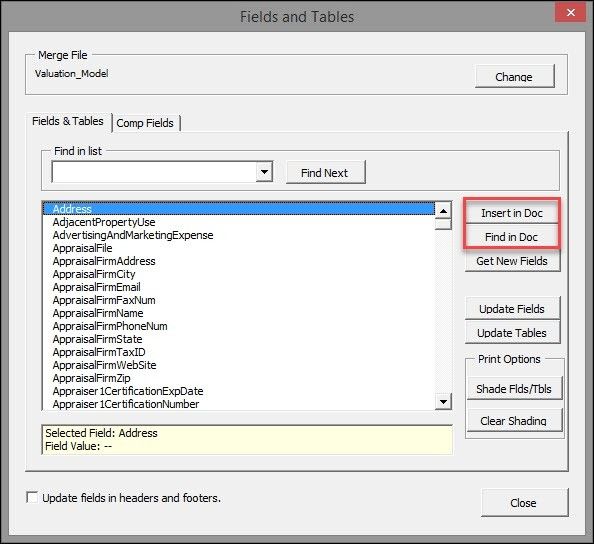
Simply select a field from the list and use either the Insert in Doc or Find in Doc buttons adjacent to the section to perform an action.
Insert in Doc and Find in Doc
Once you have selected a field or table from the list, you can choose between two options to take advantage of that selection: Insert in Doc or Find in Doc.
If you want to add a field or table into your report document:
In your Word document, click on the area on the page where you would like your field or table to appear.
Select a field or table from the list in Fields and Tables.
Click Insert in Doc.
Format as desired.
Find in Doc simply allows you to find the first instance of a selected field or table from within your Word document. If there are multiple instances of a field or table, clicking Find in Doc repeatedly will bring you to each location in the order in which they appear.
Click here to learn more about saving custom fields and tables into a template file for easier use.
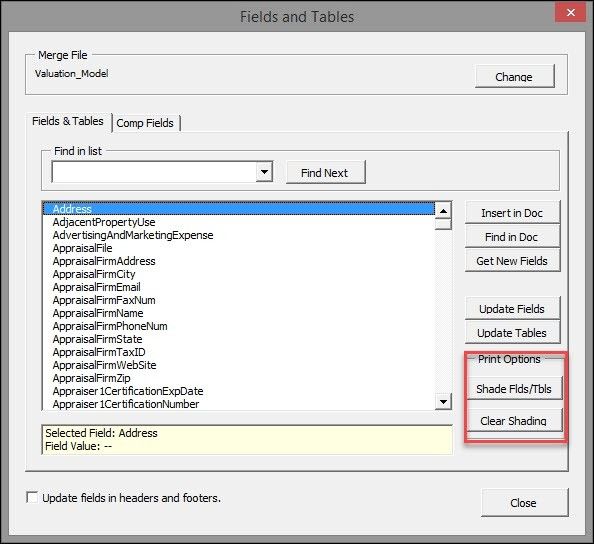
Shade Flds/Tbls & Clear Shading
Your report document is composed of fields and tables, and sometimes it might be hard to discern which entries are filtering in from your Excel document, and which are just part of the Word document. Clicking Shade Flds/Tbls will highlight every Report Writer field gray and outline every Report Writer table with a red dashed line, making them easier to identify. This function allows you to print out a document, or print to PDF, to understand field placement for customization purposes. Note: Regular highlighting applied with the Word highlighting tool will not appear in a printed document.
To reset these changes, click Clear Shading.
To learn how to highlight your Report Writer fields and tables without the shading effects being visible to other users, or in a print version, refer to Enabling Field Shading.
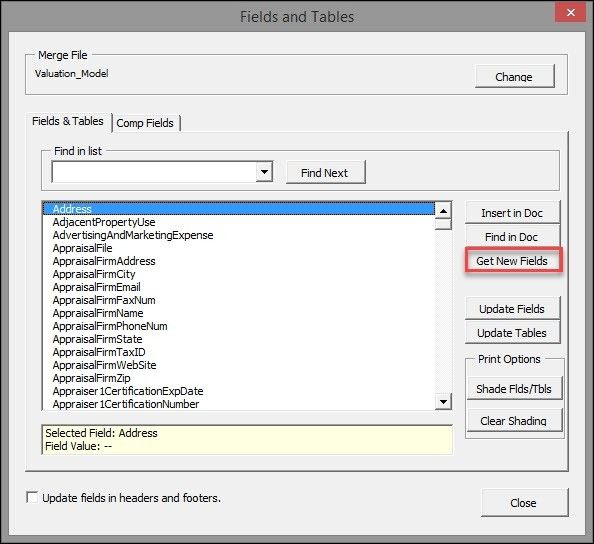
Get New Fields
There may exist a situation where you are using an older Report Writer report document in conjunction with a newer Report Writer Excel file. This could result in some fields not properly mapping over upon merge: for example, your Excel file might have fields in it that your Word file doesn't. Clicking Get New Fields would ensure your Word document is up-to-date with the latest Report Writer standards.
It is advised that this feature is only used with instruction from a Report Writer Support representative.
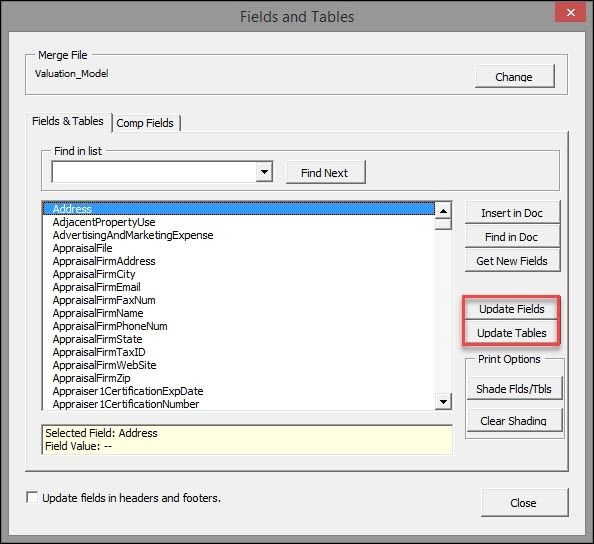
Update Fields and Update Tables
The process of clicking Merge Fields and Tables will ultimately result in all of your report document's fields and tables becoming updated with the latest information from your Excel document. However, if you only wanted to update fields, rather than tables, you could click Update Fields.
An example of a time where selecting to update only fields would be if you changed the name of a contact, or if the field you changed is used throughout your report; clicking update fields would update every instance of the contact's name in the report, ultimately providing a faster solution.
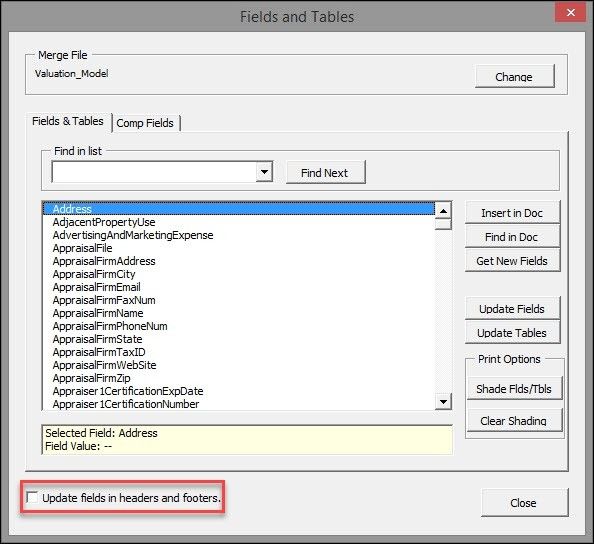
Update Fields and Tables in Headers and Footers
It is possible to select a field and use the Insert in Doc button to have the field inserted into the header or footer. If you have fields or tables featured within headers or footers, ensure that the Update Fields and Tables in Headers and Footers box is checked. Otherwise, clicking Update Fields and Update Tables will not affect these areas.
Examples of using a field within a header might include inserting a property address or job number, along with an appraisal firm in the footer. Inserting this information into a template file will allow it to be consistently available in all of your projects.
Comp Fields
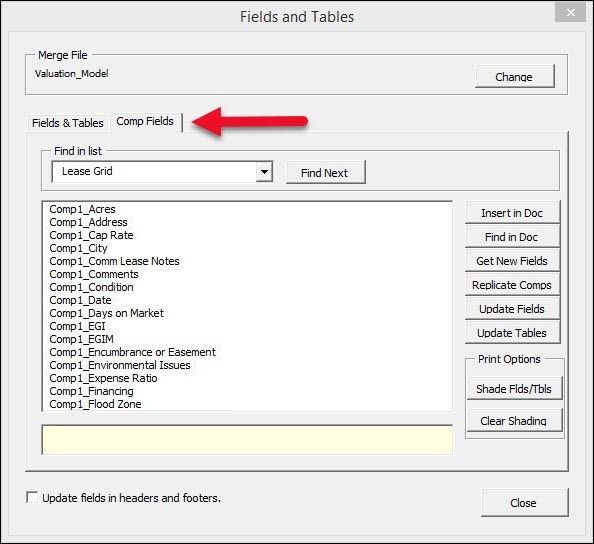
The Comp Fields tab will only appear if you have enabled the Comp Names checkbox in the LightBox Excel Ribbon utility, Options. From here you can access all fields associated with the comparables featured in your grid worksheets.
The most effective use of this functionality is to construct an entirely custom comp sheet. You may, of course, use the default Report Writer Comp Sheets, but you may find that you do not like the design scheme and thus wish to substitute it with your own. Using the fields from your Comp Fields tab will allow you to build Comp Sheets that mirror your design preferences and overall needs. Note: Use of this feature will significantly increase prep and merge time.
Replicate Comps
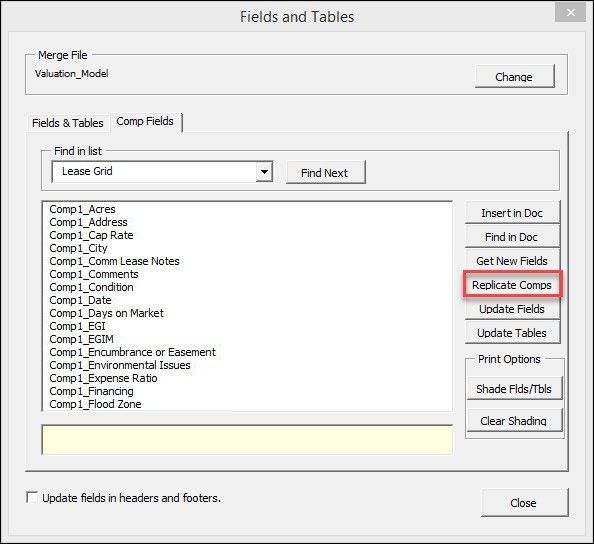
The Replicate Comps button appears only when you select the Comp Fields tab in Fields and Tables. It allows you to create copies of a custom comp sheet you've created for comparables 2-10.
For example: Imagine you have created a custom comp sheet for land comp 1. If you wanted to apply that custom comp sheet to land comps 2-10, you could click Replicate Comps. In order for this function to work, you must first highlight the first custom comp sheet that was created, and then click Replicate Comps.
From there, you could highlight the custom comp sheet and click Save Autotext to have that custom design made accessible from any future report document.
.png)

.png)