How do I export Jobs from Report Writer and import to Quickbooks?
- Print
- DarkLight
- PDF
How do I export Jobs from Report Writer and import to Quickbooks?
- Print
- DarkLight
- PDF
Article summary
Did you find this summary helpful?
Thank you for your feedback!
Setup Before First Import
Before you import from Report Writer Jobs for the first time, there are a couple of items which need to be set up within QuickBooks for seamless import.
Custom Transaction Numbers
In order to use the Office File Number from Report Writer as your invoice number, the QuickBooks Custom transaction numbers setting needs to be on. To check and/or set this:
- Log into QuickBooks.
- Go to Account and Settings from the gear icon in the upper right corner of the screen.
- Choose the Sales menu item from the left.
- Confirm & edit if needed to ensure Custom transaction numbers is On.
.png)
Products & Services
In order to use the Report Type field from Report Writer Jobs as the service provided, services need to be added to your Quickbooks matching Report Type options.
- Log into QuickBooks.
- Go to Getting paid & pay on the left menu and Products & services from the left submenu.
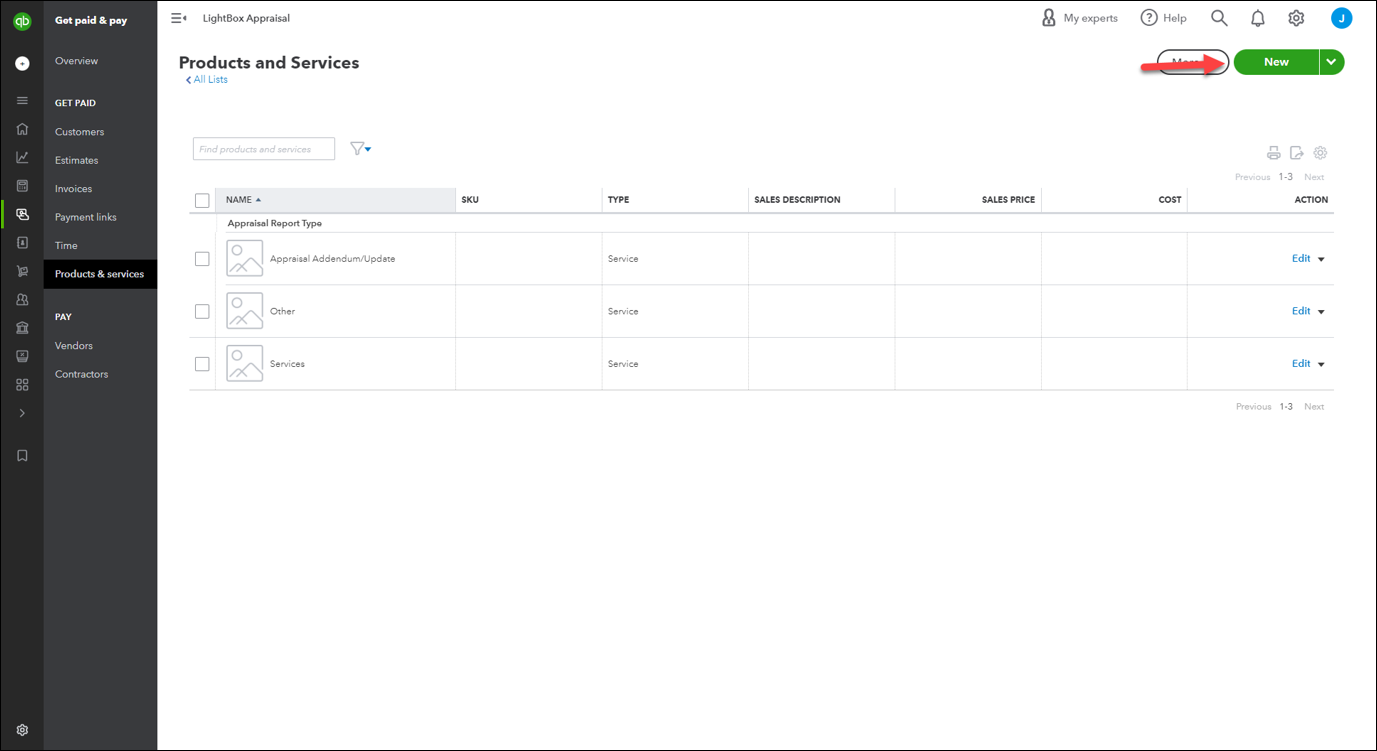
- Use the New button in the upper right to create new services using the names from Report Writer.
- Note: do not assign a category to these services or the data will not import from Report Writer without modification.
- Repeat this for each of the Report Types you will be using in Report Writer.
- Alternatively, you can also import services to QuickBooks – click HERE to download a sample file that will provide you with a listing of Report Writer Job Report Type options for review & import.

Job Export and Import
- Log into your Report Writer web database and navigate to Jobs.
- Run a Search for table population with Jobs you want to import into QuickBooks.
- Click on the down arrow next to Export to Excel in order to select Export all fields.

- When the export has downloaded, open the file and use Save As to save as a .csv file as required by QuickBooks.
- Log into QuickBooks.
- From the Settings icon in the upper right, select Import data.
- Select Invoices.
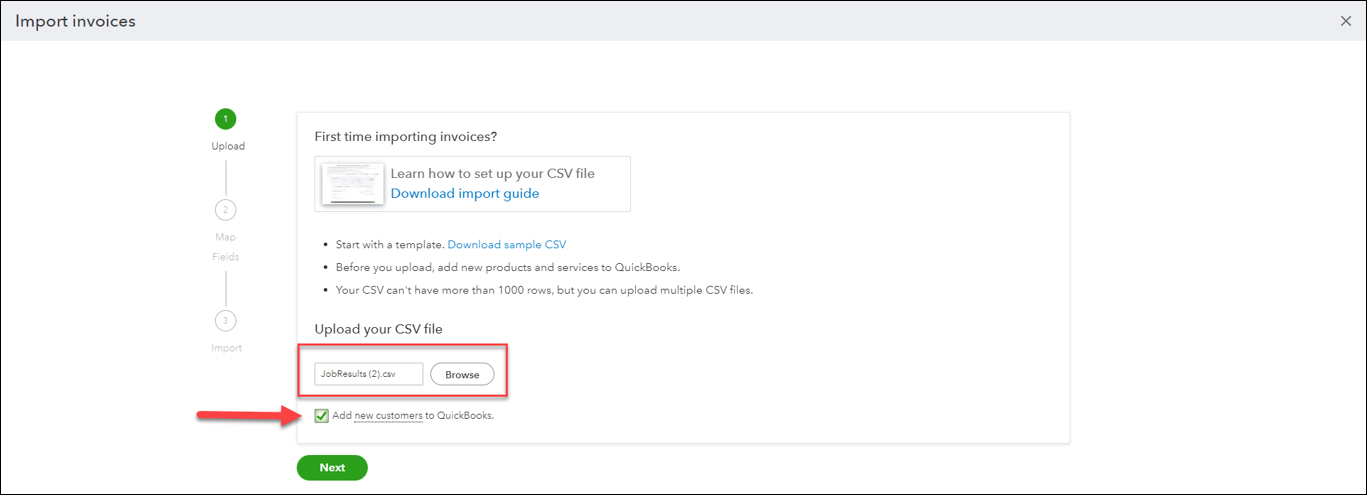
- Use the Browse button to select your downloaded file of Report Writer Jobs and click Next.
- Note: We recommend checking the box for the option to Add new customer to QuickBooks.

- Note: We recommend checking the box for the option to Add new customer to QuickBooks.
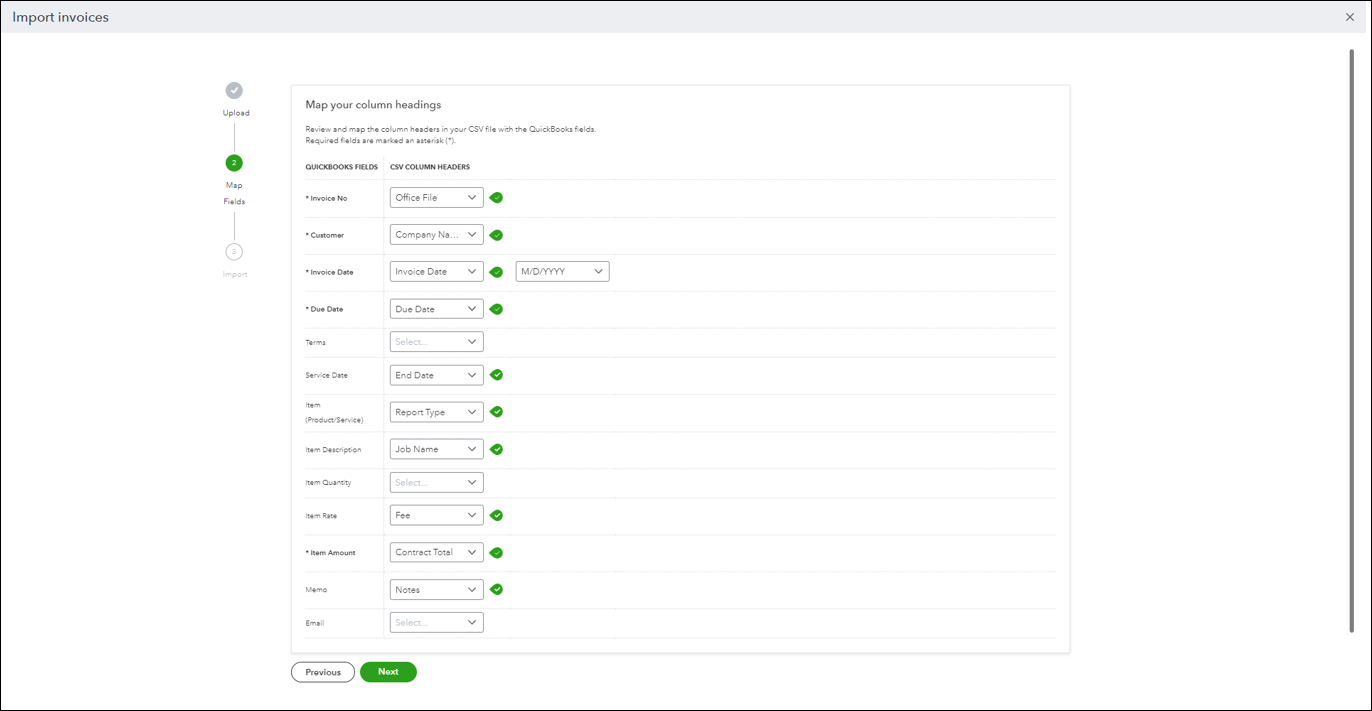
- Report Writer Jobs field names will need to be mapped to their corresponding QuickBooks fields. Below is an example of common data field mapping, although you may wish to select different fields. The drop down arrows will allow you to view the list of available fields to select. When done, click Next.

- QuickBooks will provide you with a confirmation of the import being ready, detailing how many contacts will be added (if add new contacts option selected) – or call out where errors were found, which will prevent importing.
- If errors are called out you will need to go to the Previous page and change your data mapping or make edits in your Jobs export file, going back to the first step in QuickBooks and reselecting the file for import after saving changes.
- If there were no errors, click Complete import.
- QuickBooks will provide confirmation of successful import.
- Your imported jobs may now be found in QuickBooks under Bookkeeping > Transactions > All sales or Get paid & pay > Invoices
- Customers imported with jobs will be under Customers & leads > Customers
Was this article helpful?
.png)

.png)