Define Site
- Print
- DarkLight
- PDF
Define Site
- Print
- DarkLight
- PDF
Article summary
Did you find this summary helpful?
Thank you for your feedback!
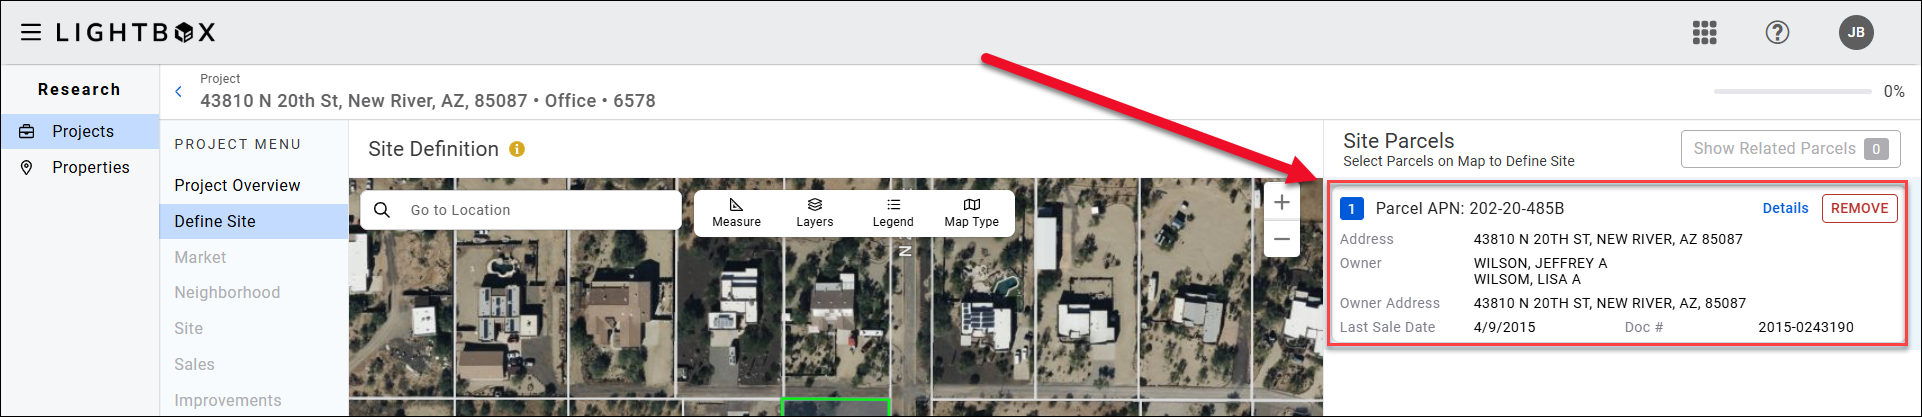
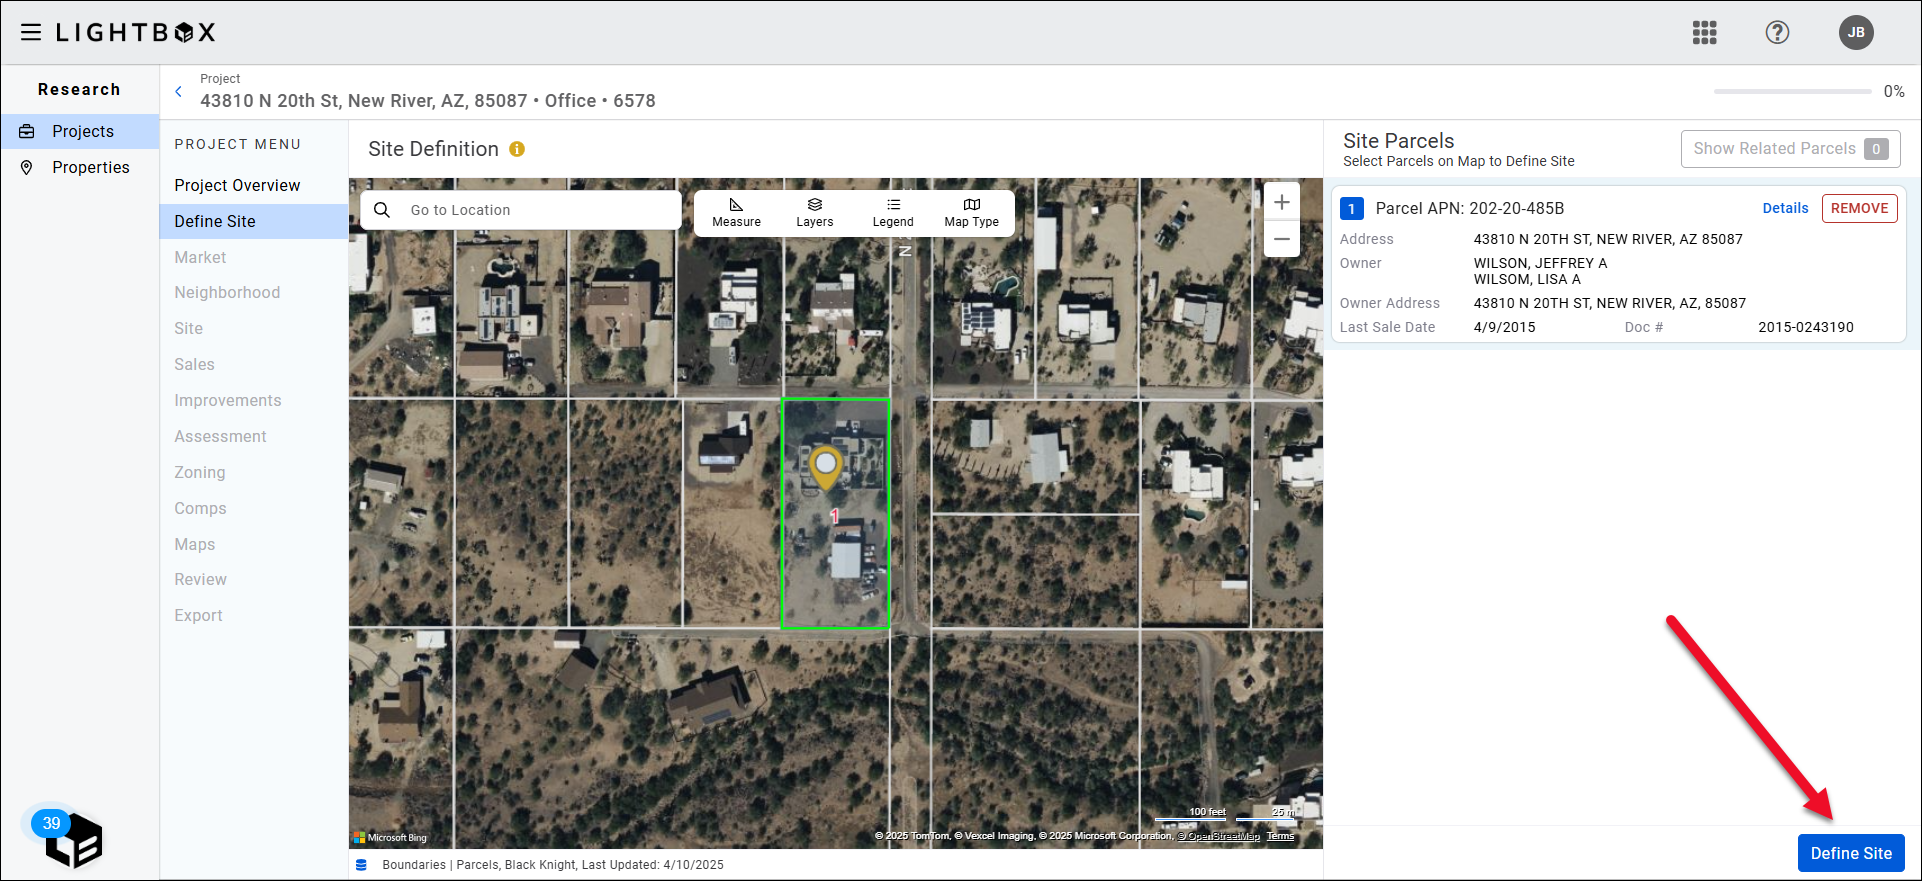
The Site Definition tool harnesses the power of LightBox Vision, providing complete control over subject property boundary verification. The initial Site is derived from intersecting the Address or Lat/Long from the Job with parcel boundary data from LightBox Vision. Summary data is provided as a quick context check. You can explore nearby parcels and are provided with parcel attributes.
NOTE
LightBox provides data for 100% of U.S. parcel boundaries. If parcel data is not available for your subject property, you will be prompted to draw the site boundary manually. Refer to Drawing Site Boundaries below for instructions.
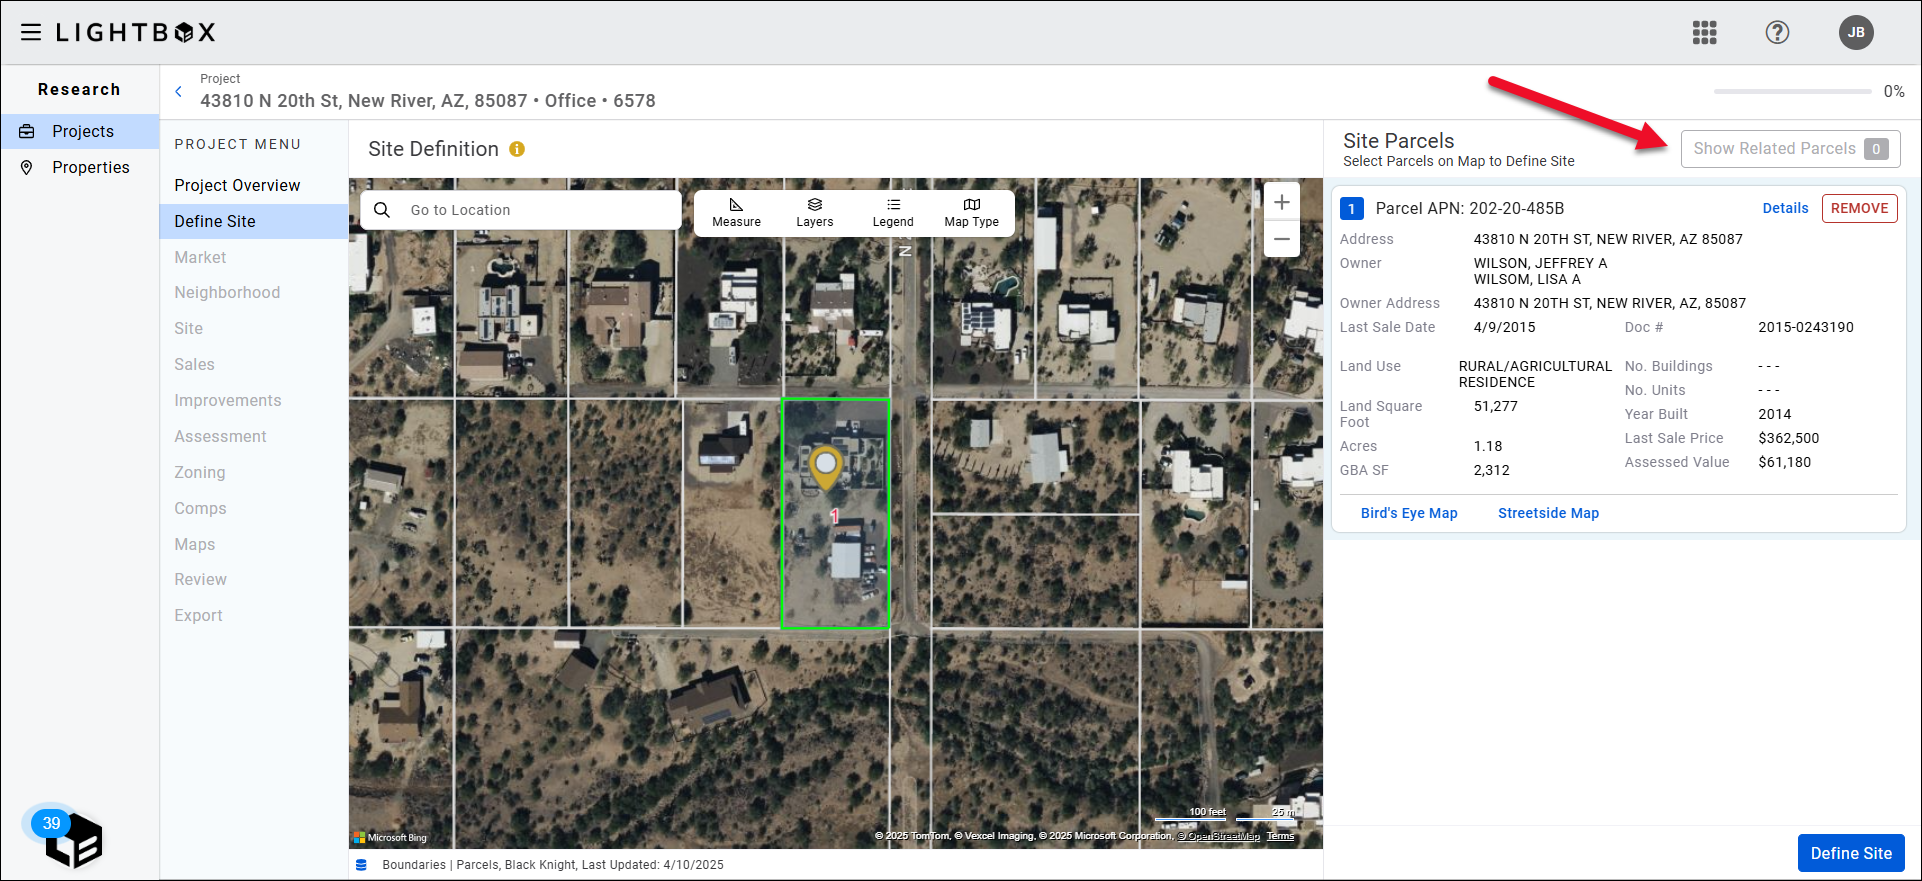
Click Show Related Parcels to activate the Related Parcels Layer. A layer is a map tool that overlays a specific type of visual data on the map. When active, the Related Parcels Layer highlights parcels that could be part of the Site. Related parcels are defined by same owner names, same owner addresses and same sale dates and sale document numbers.
NOTE: If there are no related parcels, the button will read: "0 related parcels."
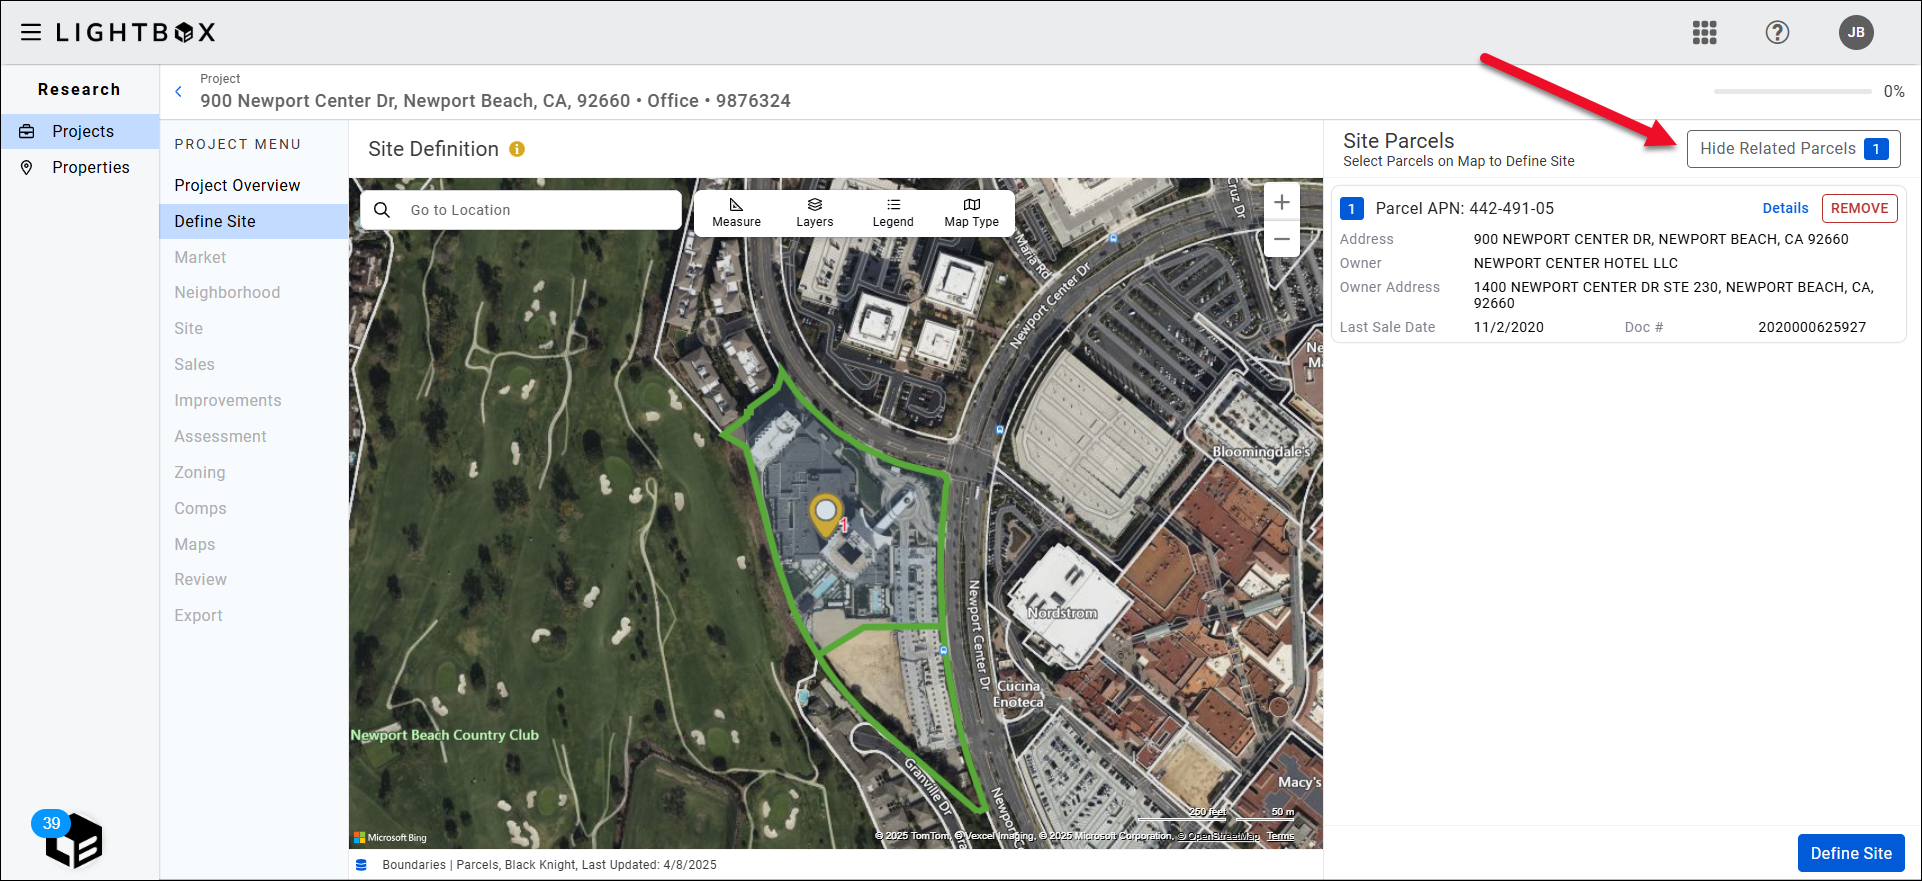
Click Hide Related Parcels to turn the related parcel layer off.
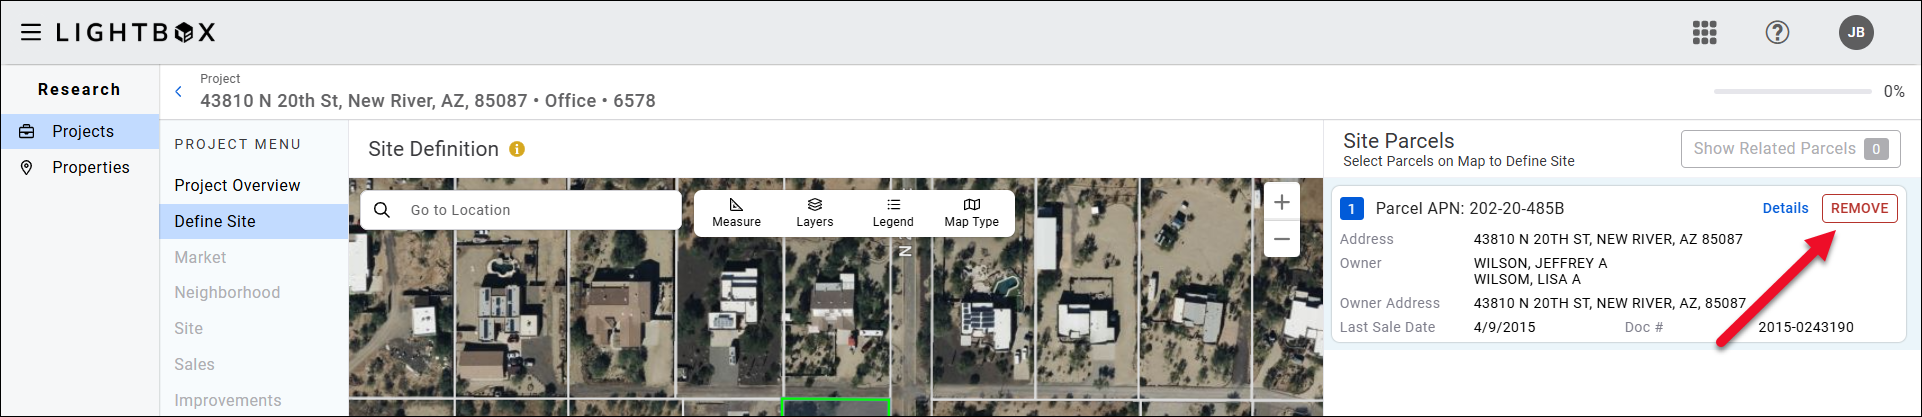
Remove a parcel by clicking on the parcel on the map. Or click the Remove button on the parcel card.
Note: There must always be at least one parcel item in the list.
If you require more data on the parcel, click the card to expose parcel attributes. Click the card again to close the detailed view of the parcel.
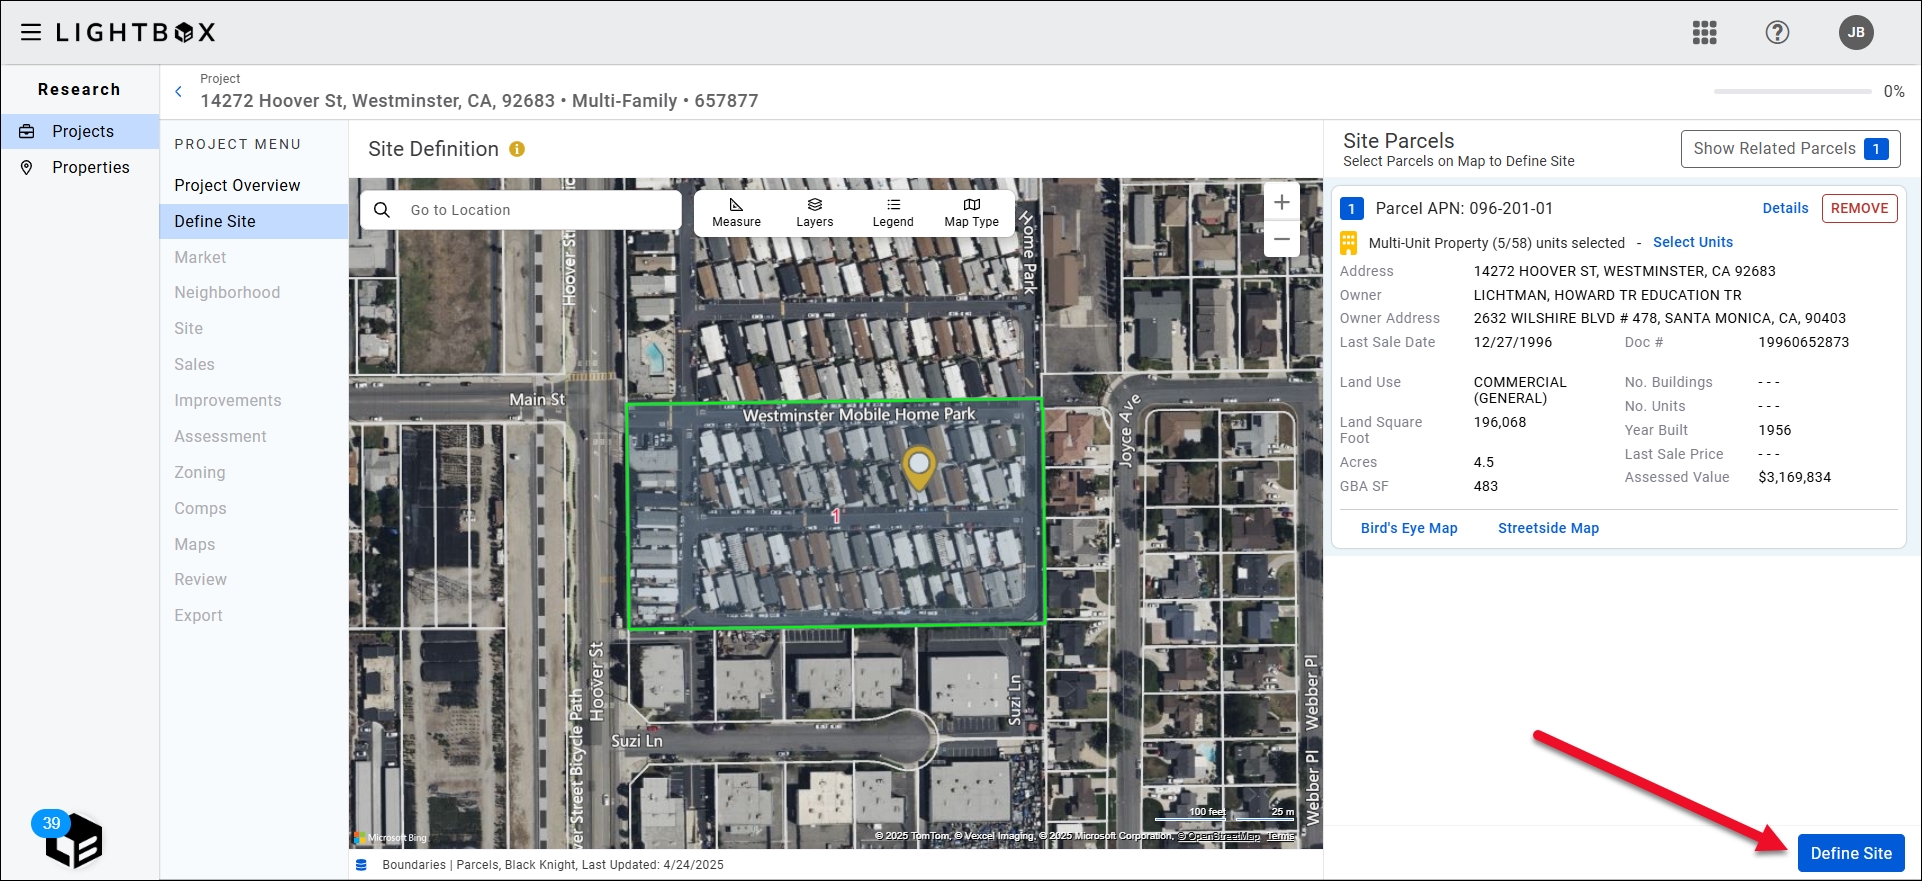
Click Define Site to confirm the site boundaries.
Should you realize that a parcel was accidentally left out or left in, click the Back button to navigate back to the Add/Remove parcels screen.
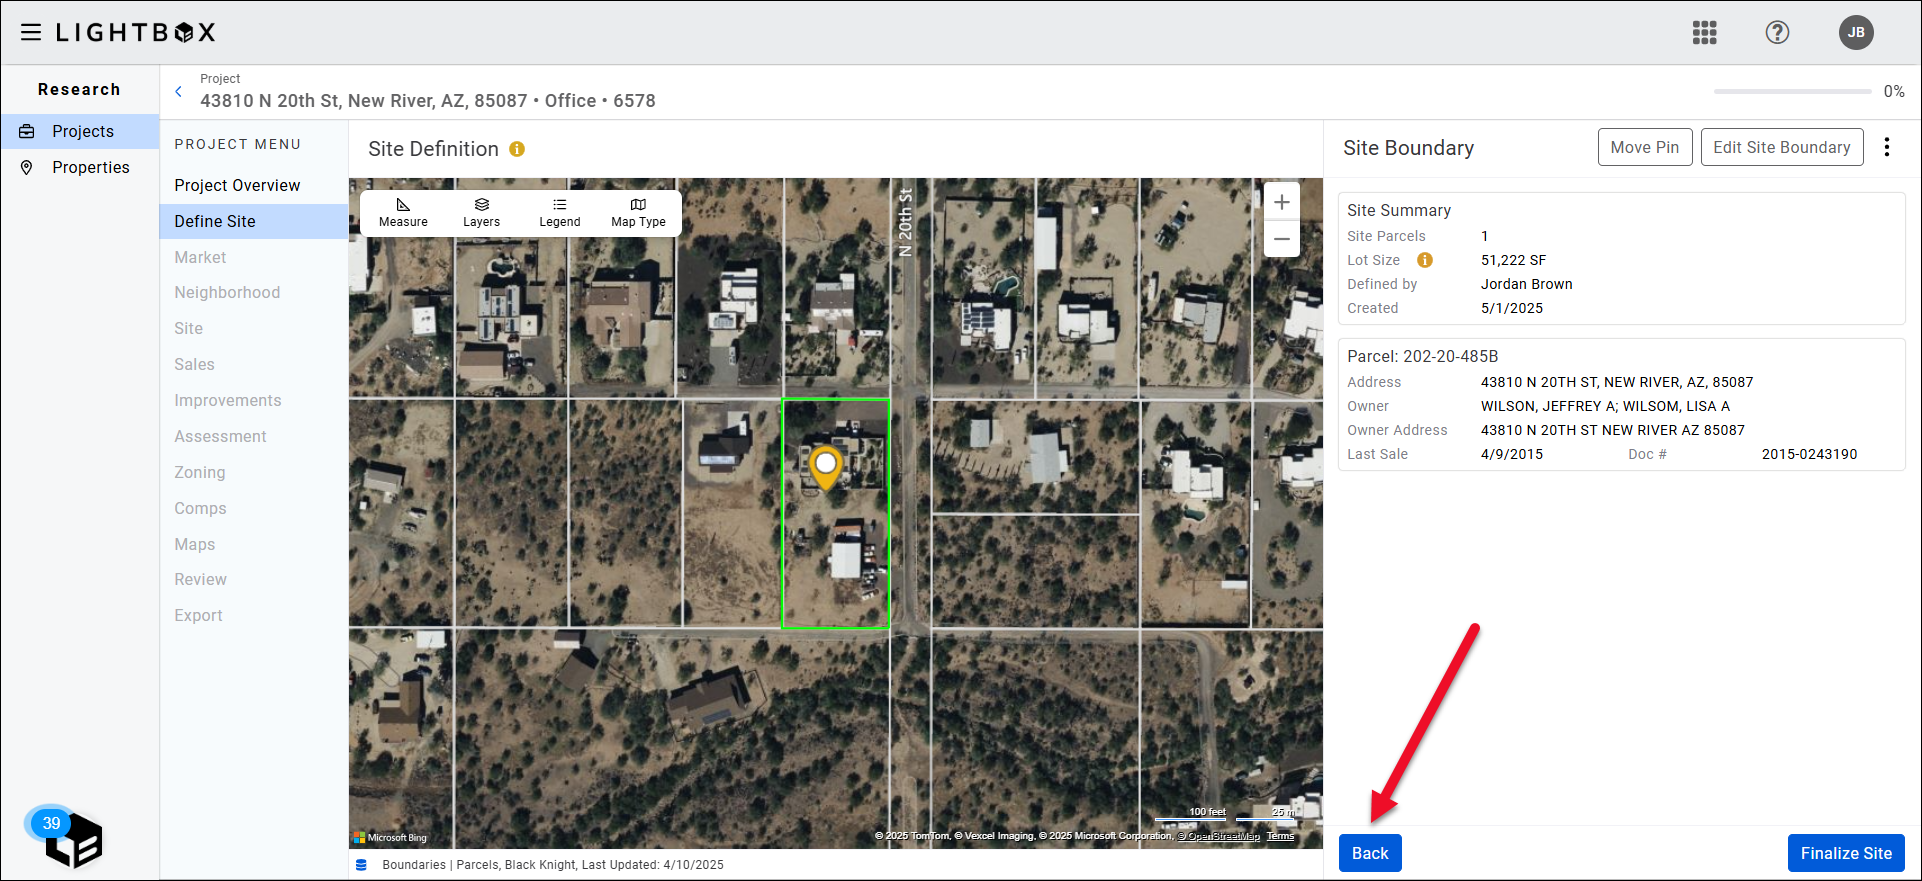
Finalizing the Site
Once the Site is finalized, the data for the project will be automatically served up. It is imperative that once the Finalize Site button is clicked, that the correct boundaries, lat/long and parcels are chosen.
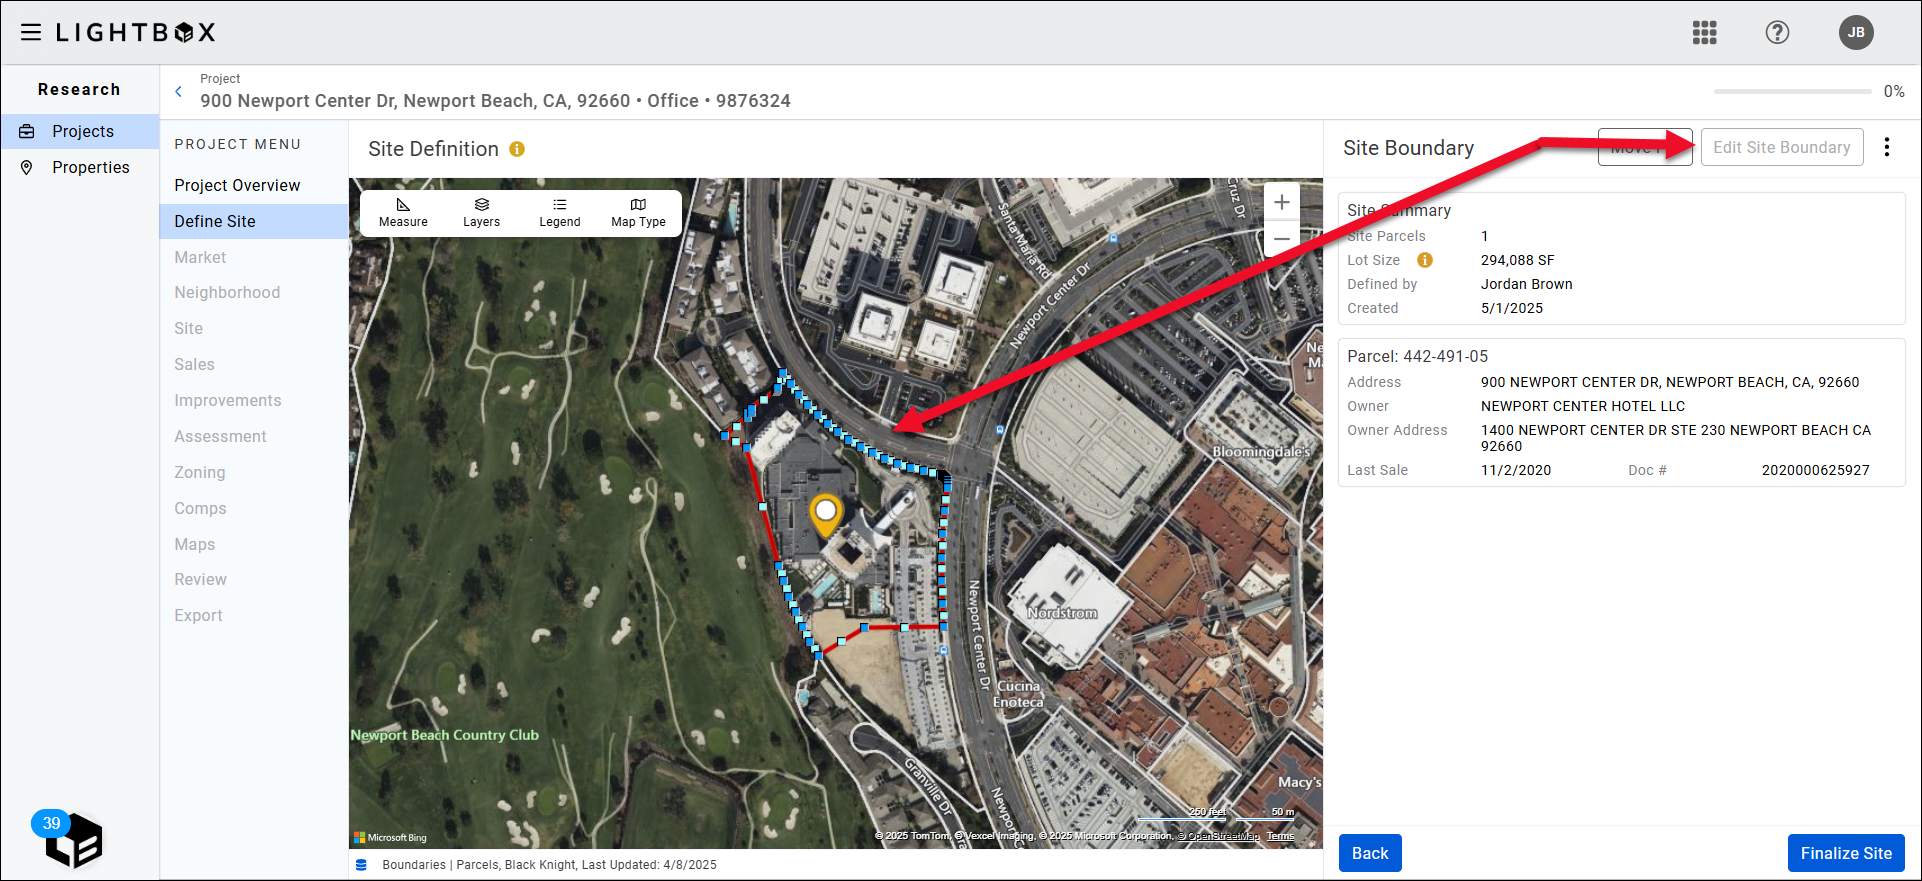
Editing the Site Boundary
Where there is a parcel split or the county's shapefiles are not up to date, you may edit the vertices of the site by clicking Edit Site Boundary. Next, grab a vertex and move the point or points to the desired location. Click on the map to end the action.
NOTE: This is not the recommended method of defining the Site. It can be a potentially destructive step in providing the auto-population of parcel data where the geometry does not match the existing parcel envelope.
Adjusting Latitude and Longitude
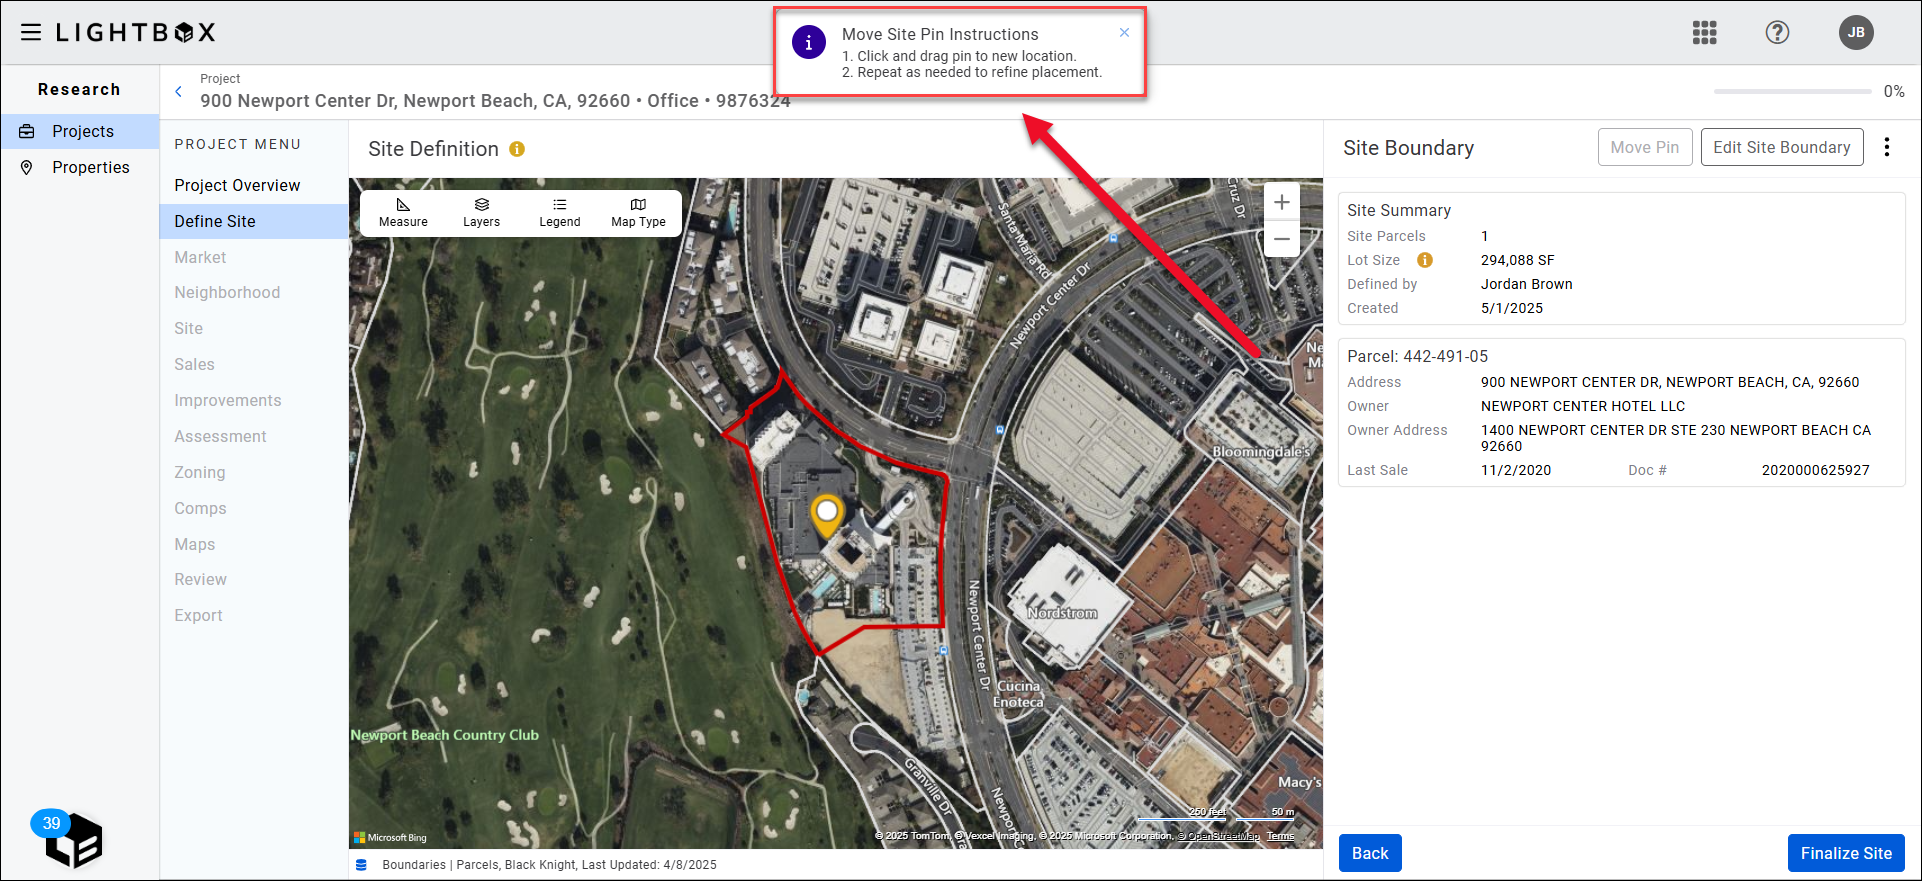
The yellow site pin on the map can be moved. Click Move Pin in the upper right corner of the page.
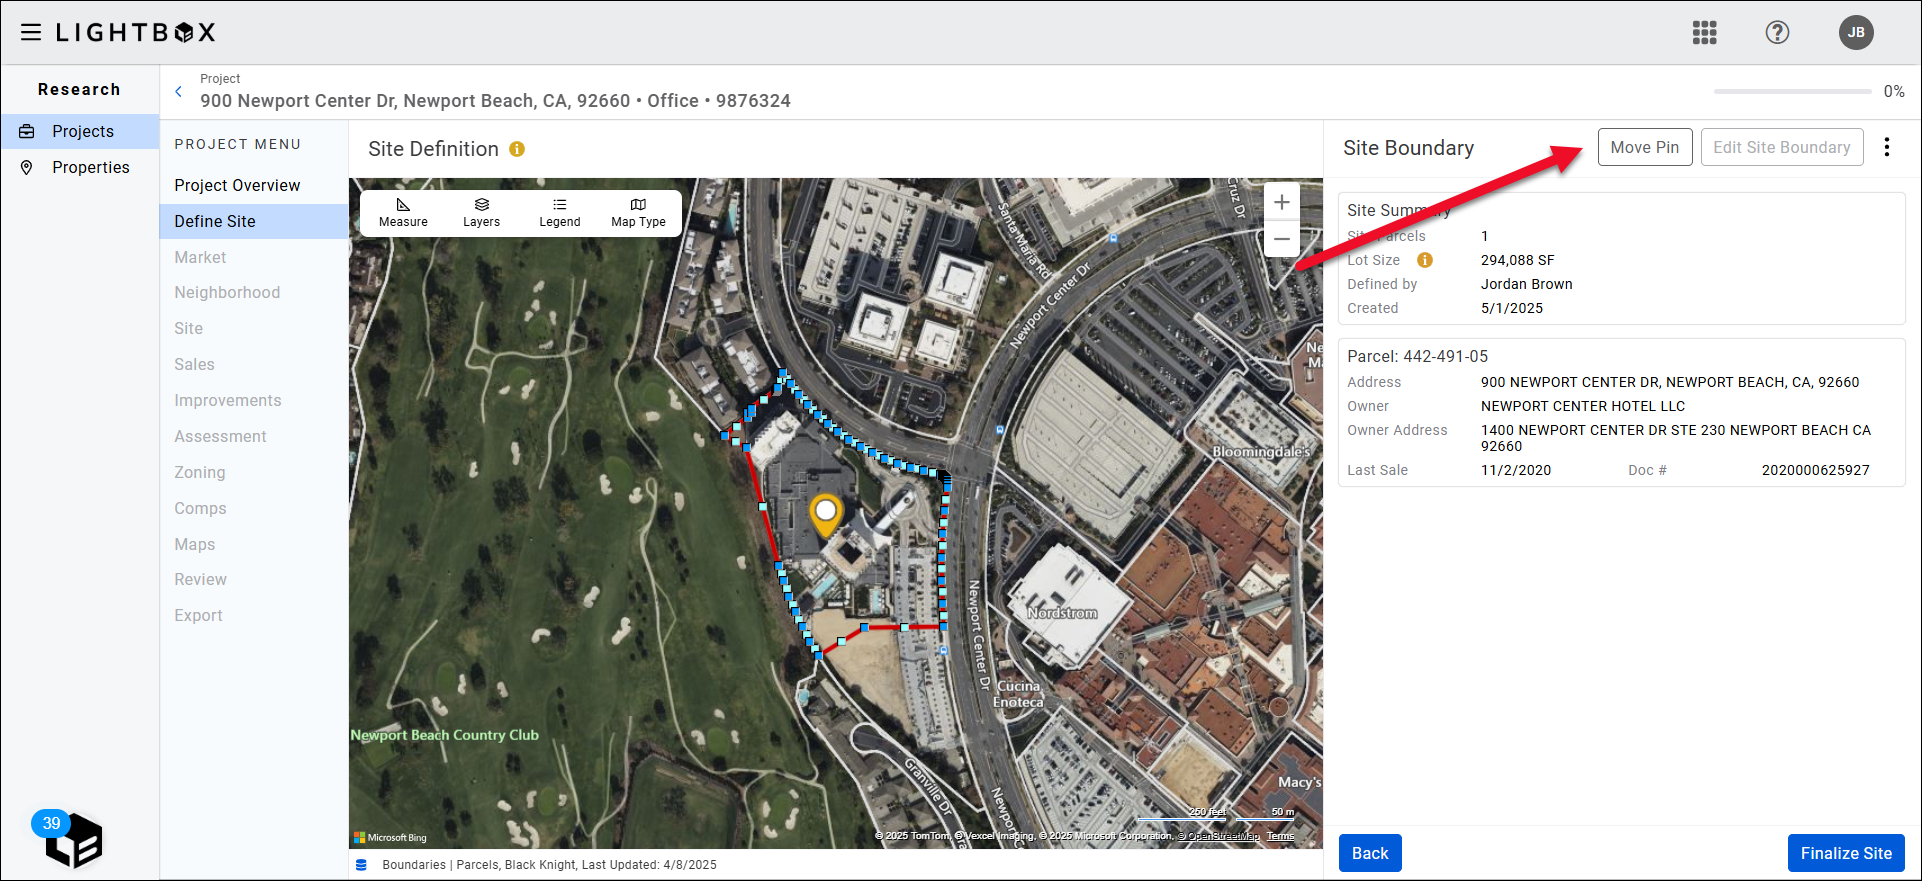
A pop-up message with instructions appears at the top of the page.
- Click and drag pin to new location.
- Repeat as needed to refine placement.
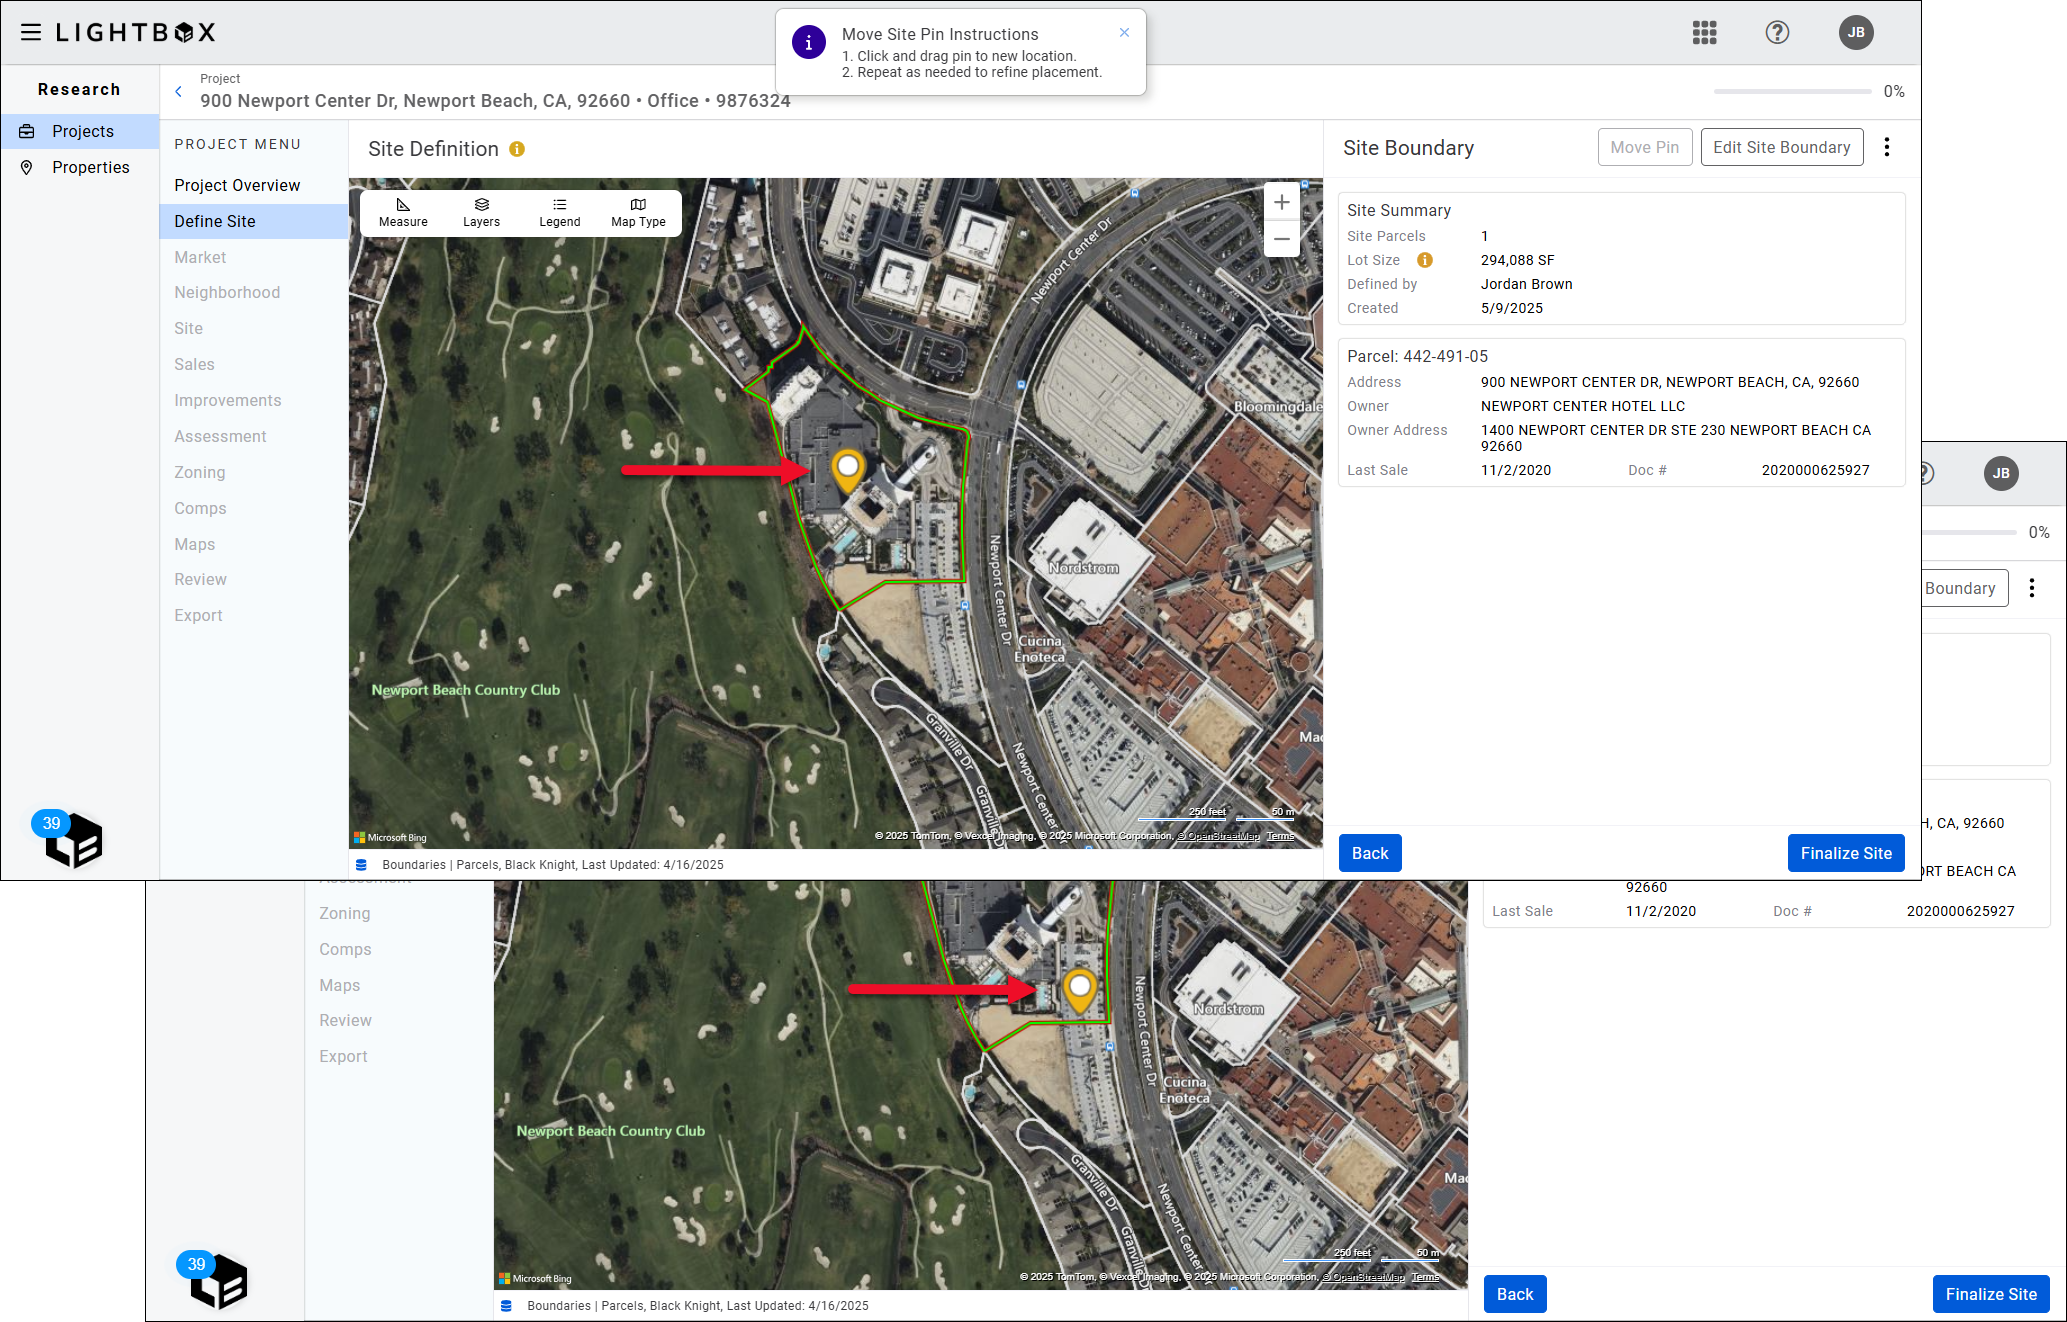
Click and drag the pin to the desired location on the map.
NOTE: Once the site has been finalized, the Latitude and Longitude will update to reflect the new pin position. These values can be viewed on the Project Overview page.
Remove Excess Parcels
If the site has more than one parcel, a remove button will be available on each parcel card on the Finalize Site screen. Excess parcels can occur when a county's shapefiles overlap or when a user edits the site boundary. Click Remove to remove an unnecessary parcel.
.png)
A popup will warn that the action cannot be undone and requires confirmation. Click Delete to remove the parcel.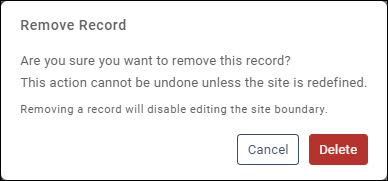
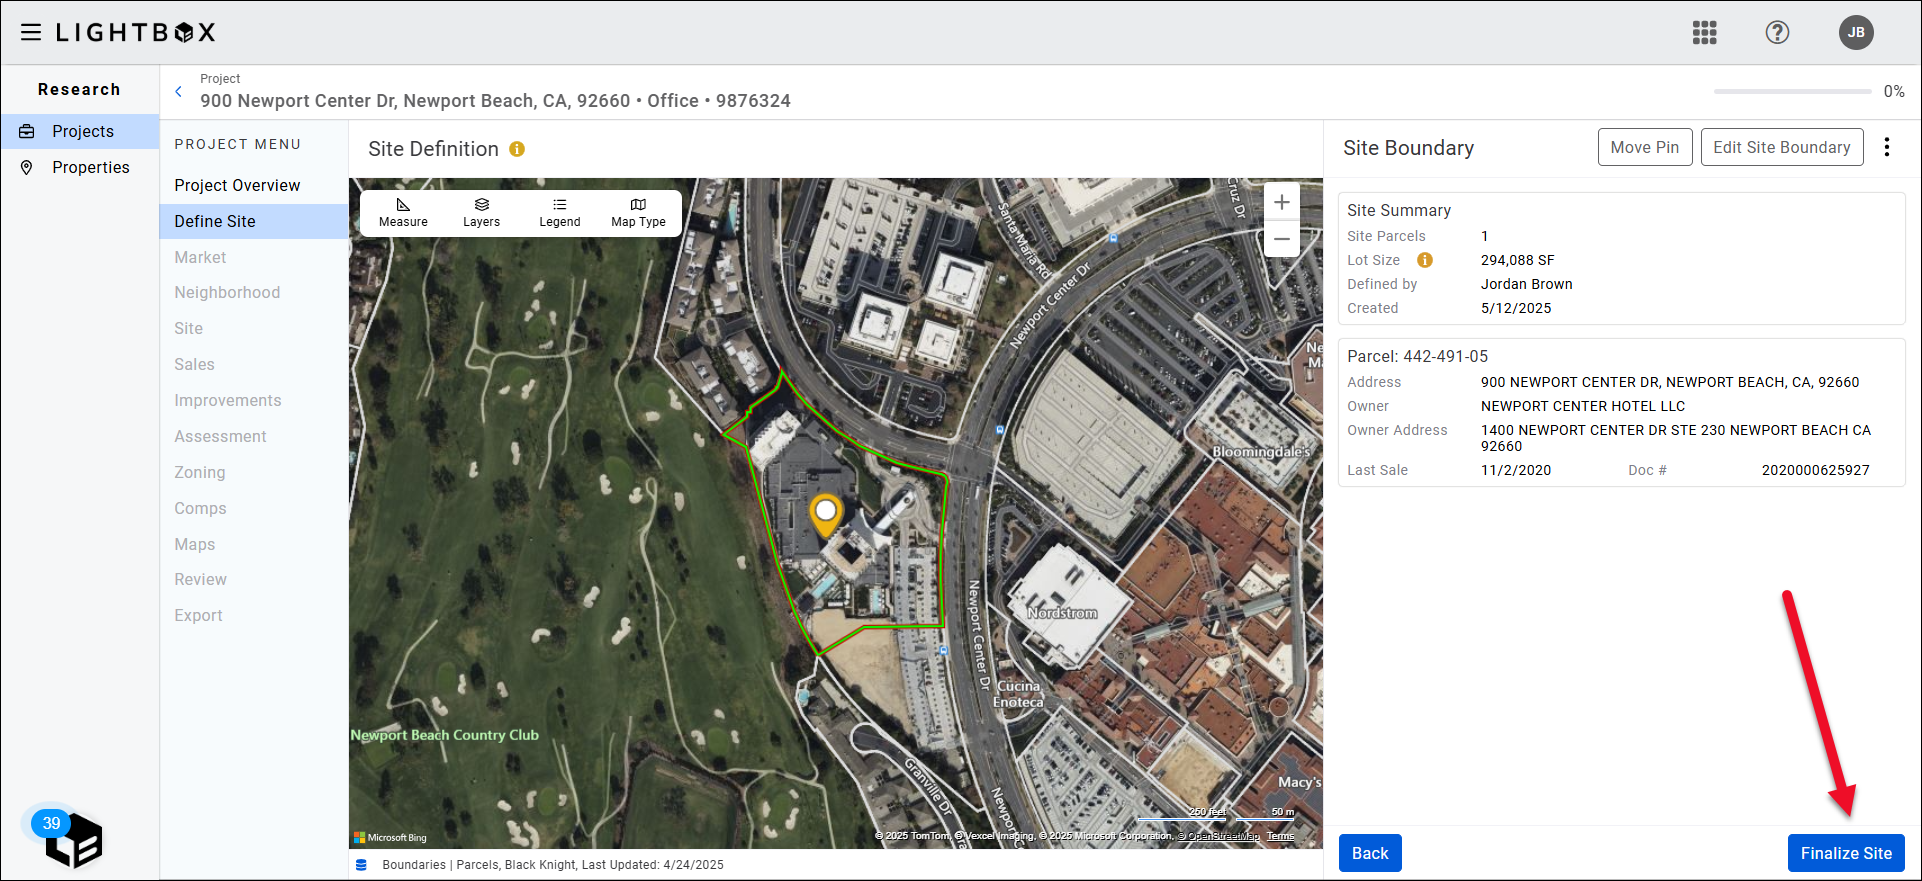
Click Finalize Site to finalize the define-site process. Once the Site is finalized, a roll-up of the parcel data is provided. This step is critical to the auto-population of the public data and you cannot continue until the Site has been “defined.” Once the Site has been finalized, the rest of the Research checklist will become available, providing access to the Assessment, Zoning, Maps, Review, and Export pages.
Redefining the Site
Should you choose to Re-define the site at any time in the workflow a warning message will appear and state the following:
”Redefining your Site will reset all project task statuses. Data collected may now be inaccurate and will need to be reverified or revised.”
Click Redefine to proceed or Cancel to abort the redefinition. 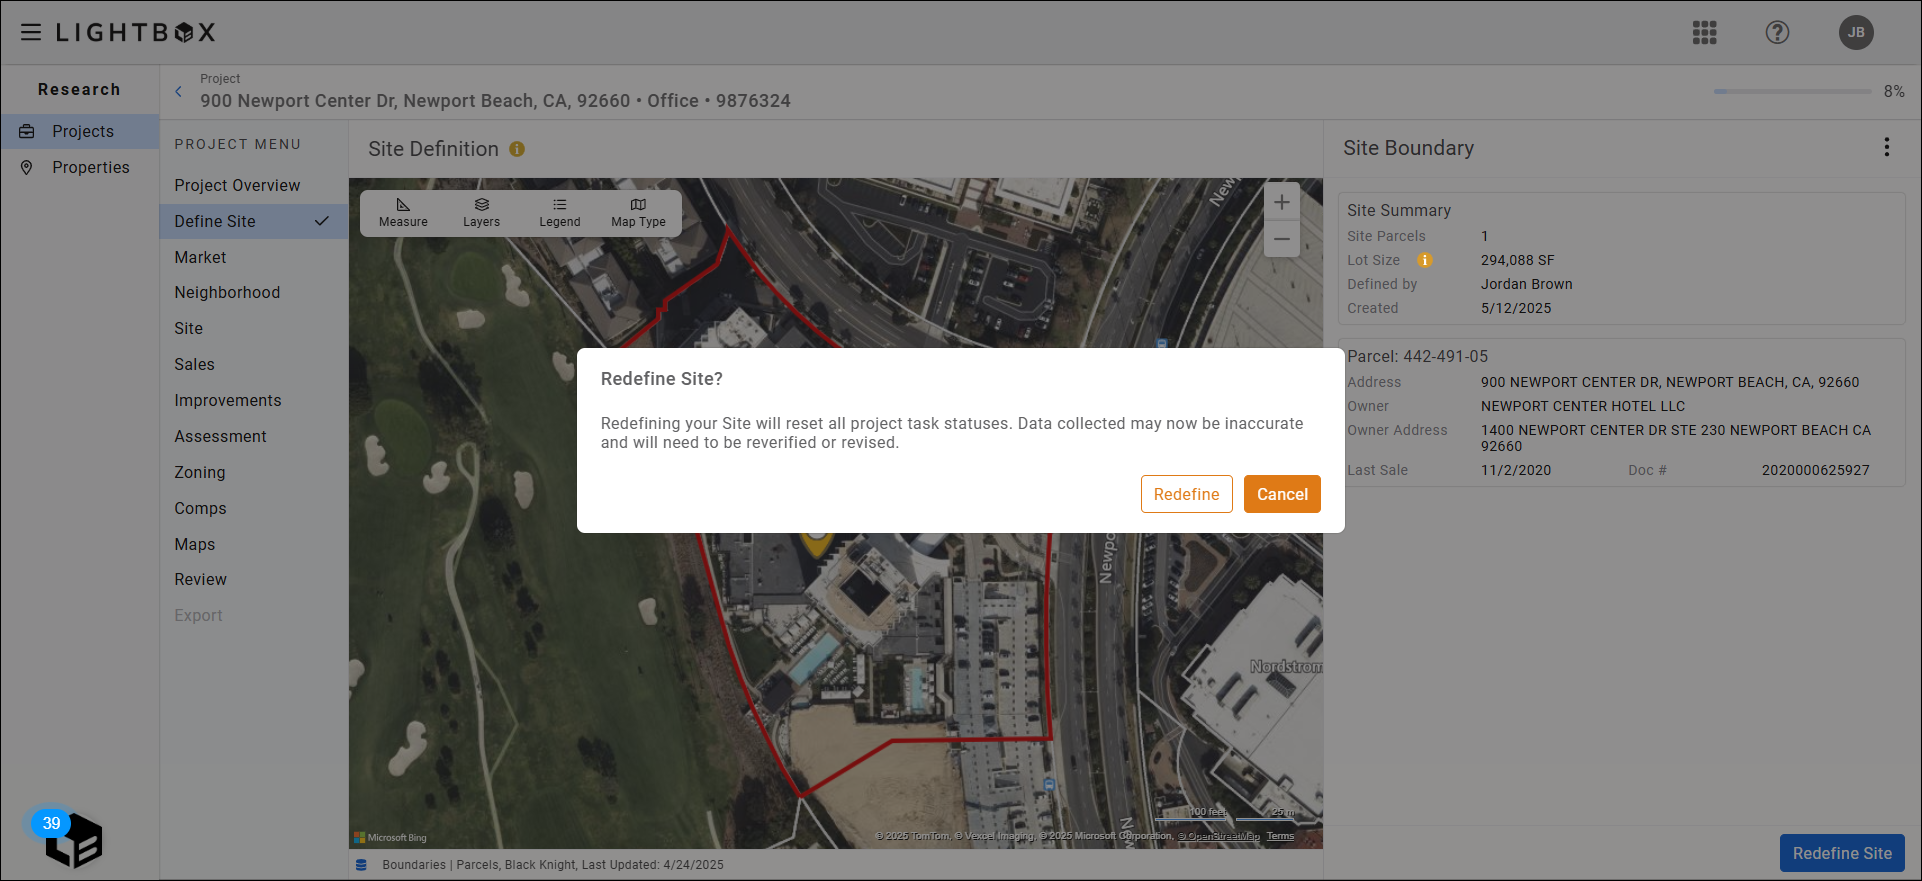
Drawing Site Boundaries
When LightBox Valuation cannot provide parcel data for the subject property, the Define Site tab will prompt you to draw the site boundary manually. Click Draw Site Boundary to proceed. .png)
A message appears at the top of the page and provides the following instructions:
- Click on the map to start drawing.
- Single-click to add a point to the site boundary.
- Double-click to finish drawing.
Follow the instructions to draw the parcel boundary.
Once you have completed the polygon, the line color will change from blue to red and the map will zoom out to show the parcel. The Draw Site Boundary button will change to Re-Draw Site Boundary. Click Re-Draw Site Boundary to clear the existing polygon and draw a new one, or click Define Site in the lower right corner to finalize the site definition step and proceed to the Sales tab of the Research application. 
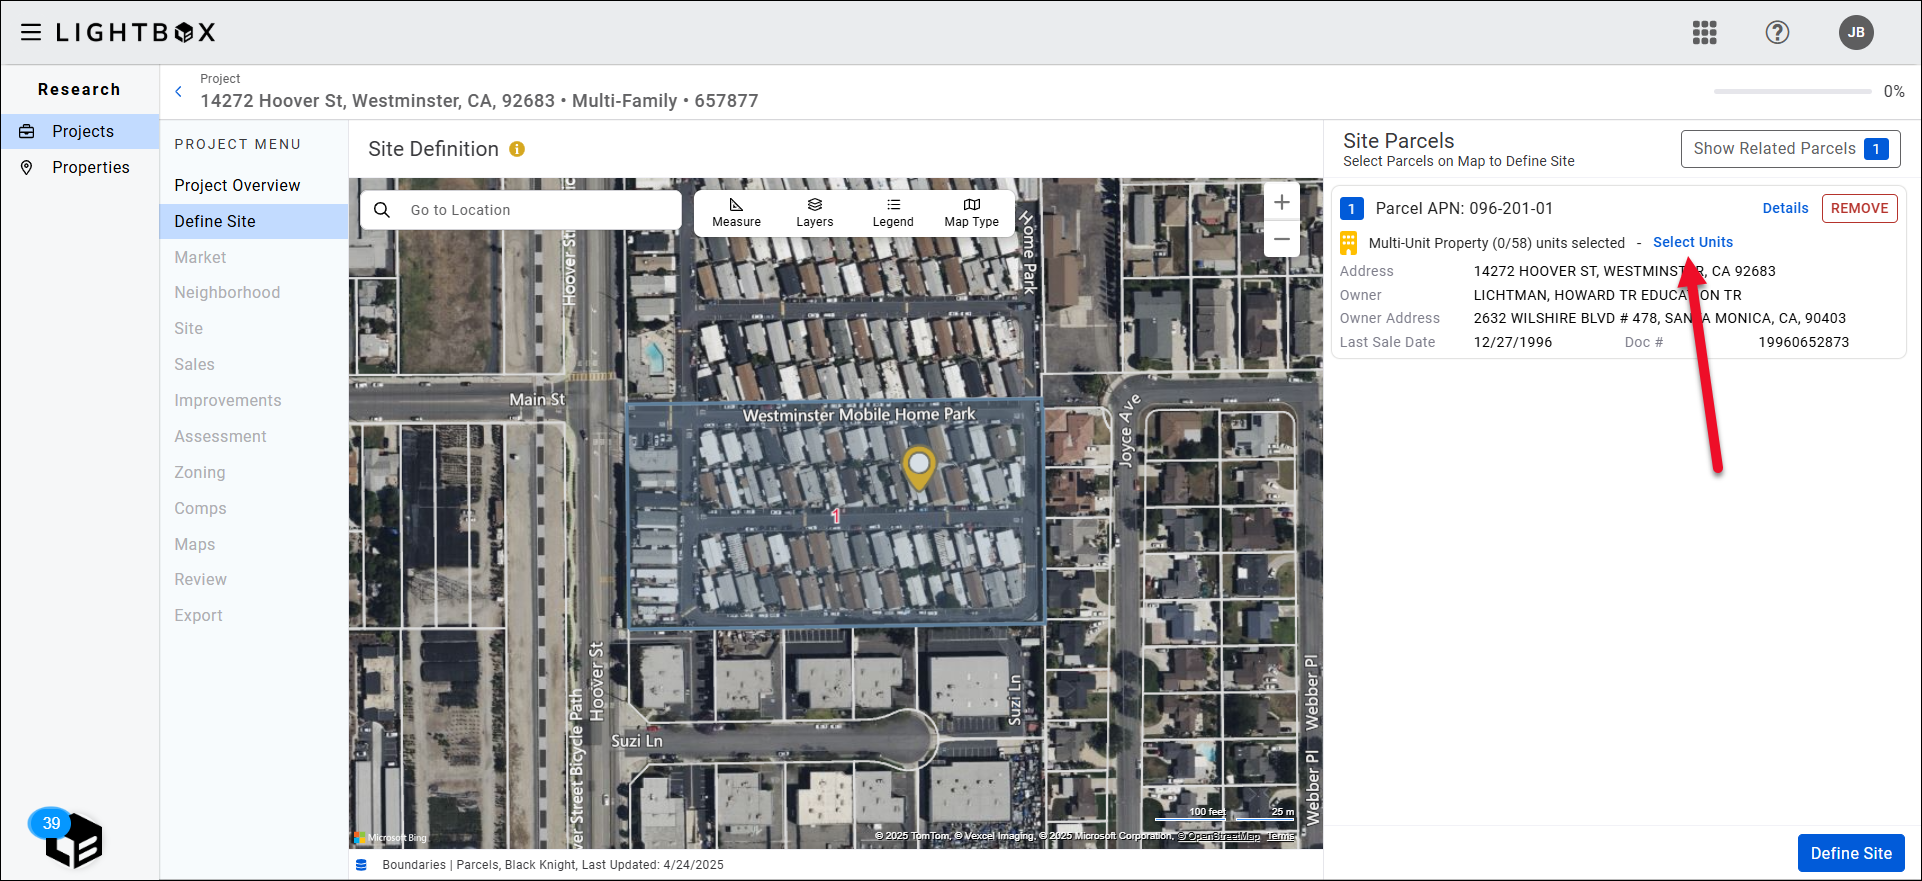
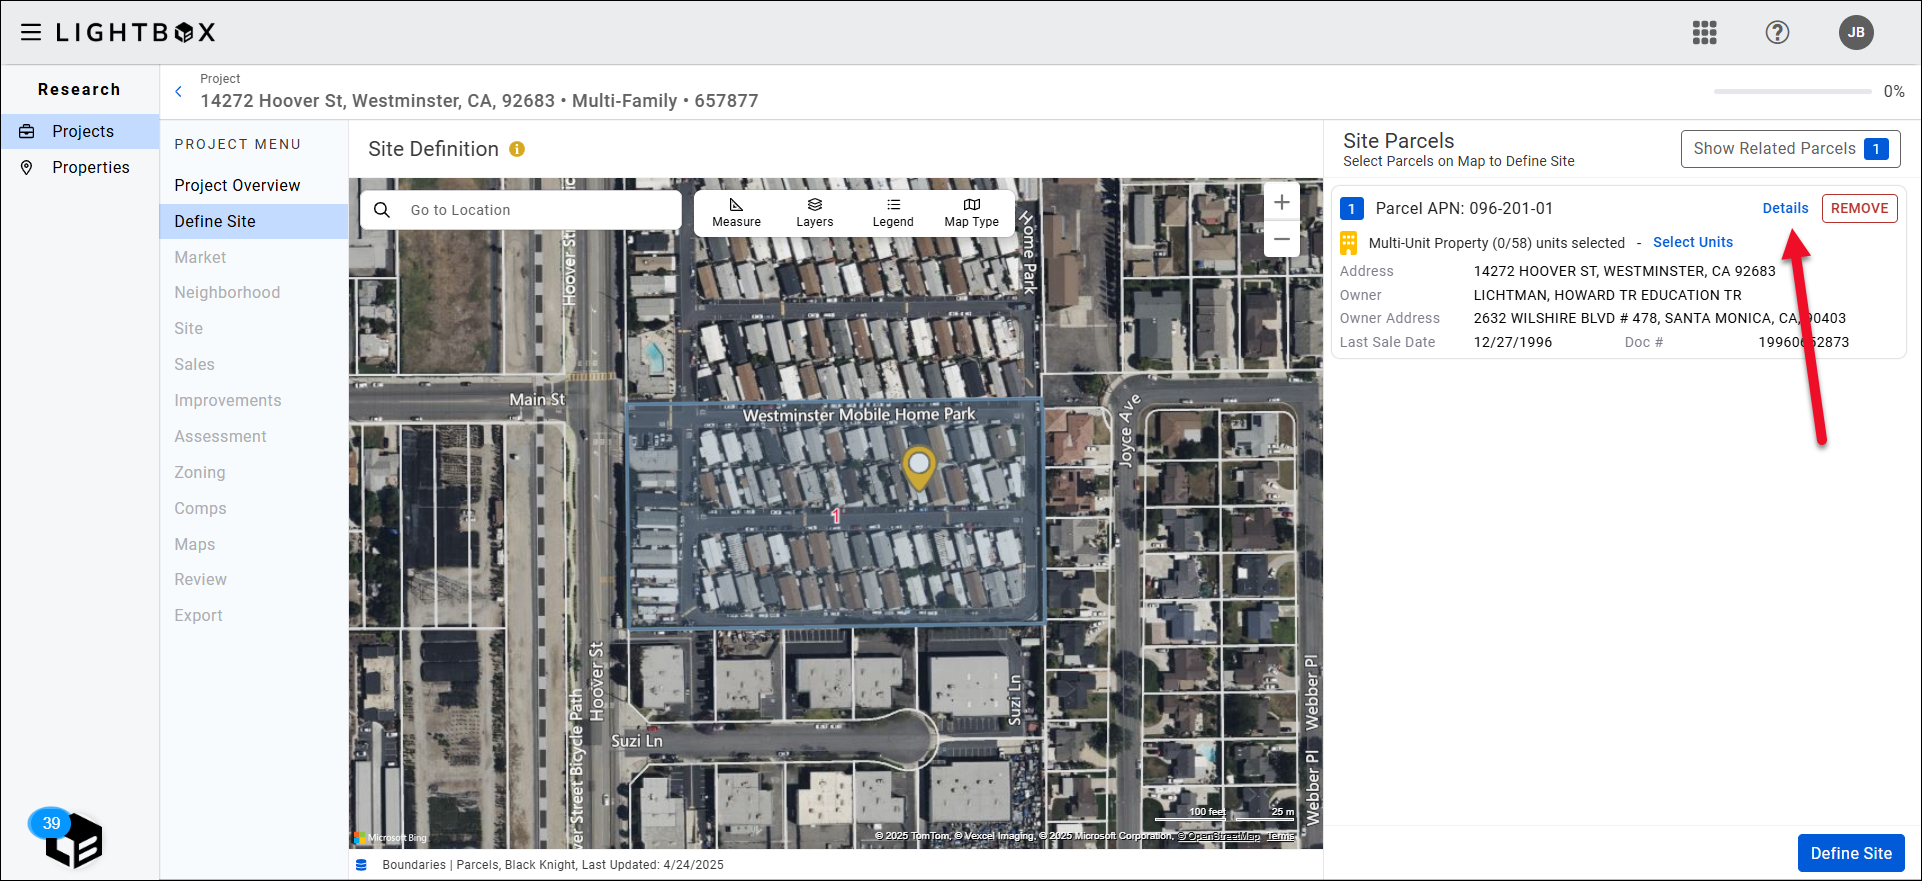
Defining Multi-Unit Parcels
If a parcel includes multiple property records, the Research application provides a tool to select the appropriate unit(s). A yellow high-rise icon appears on the parcel record to indicate a multi-unit parcel.
Click Select Units to open the unit-selection modal.
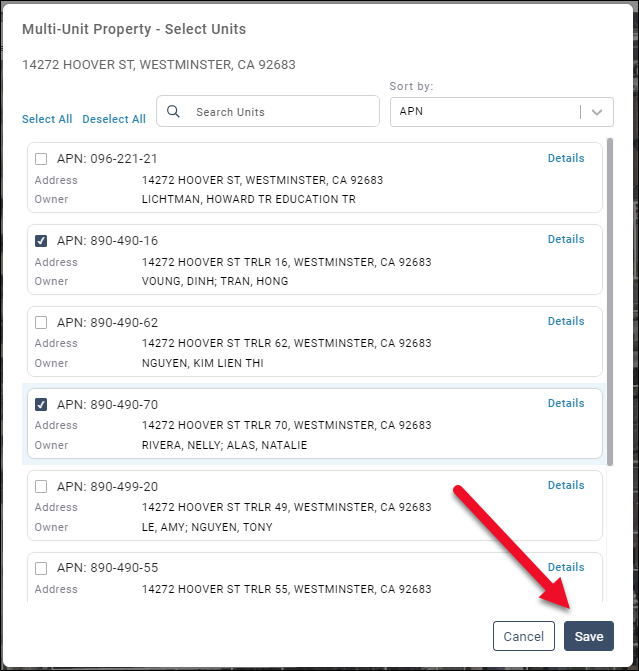
The modal lists the individual units. Click the Details button to display additional information about a unit.
Enter a search phrase and press enter on your keyboard to search the unit records. All fields within the unit records are searchable.

Click the Sort by dropdown menu and select a command to sort the unit records. Options include:
- APN
- Address
- Owner Name

Select individual records by clicking the checkbox on the left side of the record.
- Click Select All to select all records.
- Click Deselect All to deselect all records.
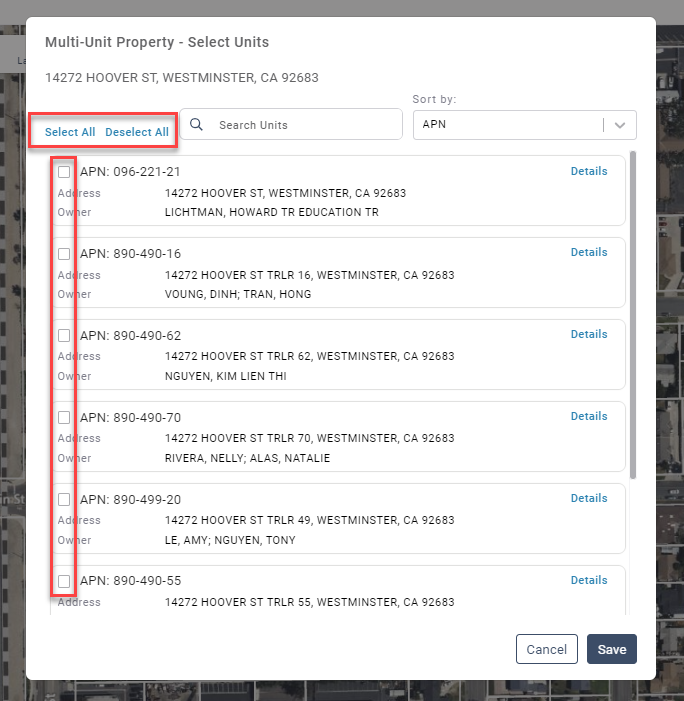
Click Save to save the selections. The number of units selected is listed on the parcel card.
The number of units selected is listed on the parcel card.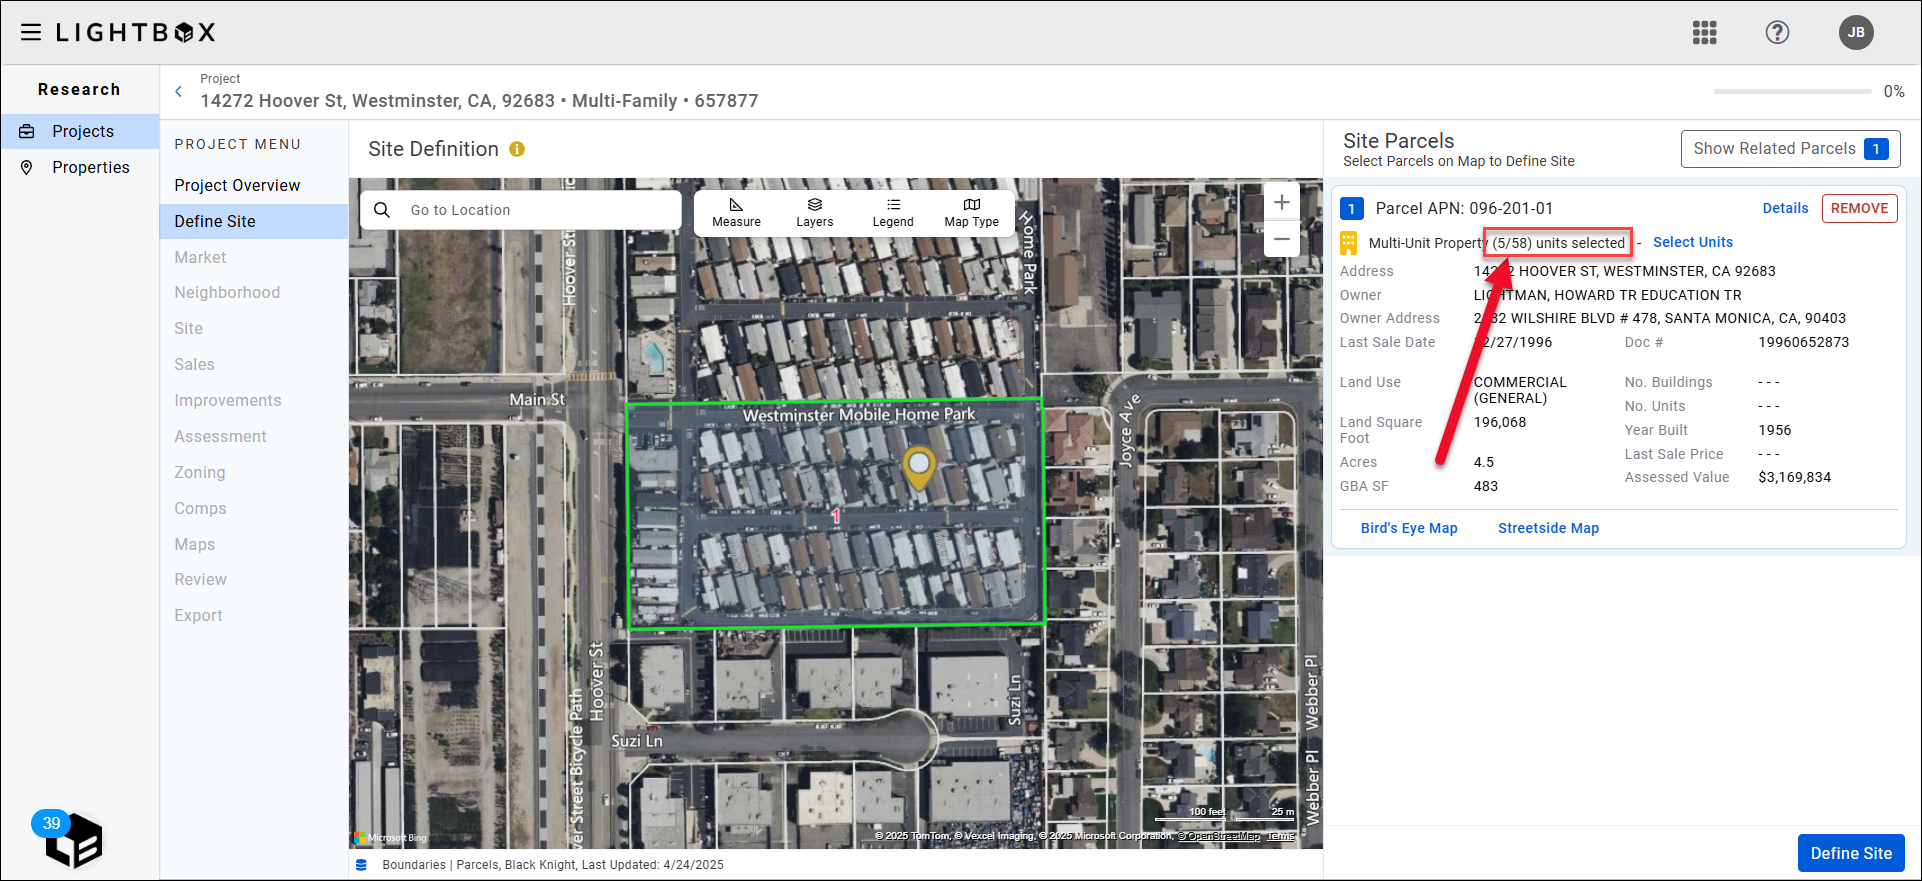
Click Define Site.
The parcels and individual property records are listed on the right. Click Finalize Site to complete the site definition process and proceed to the next step of the Research process. 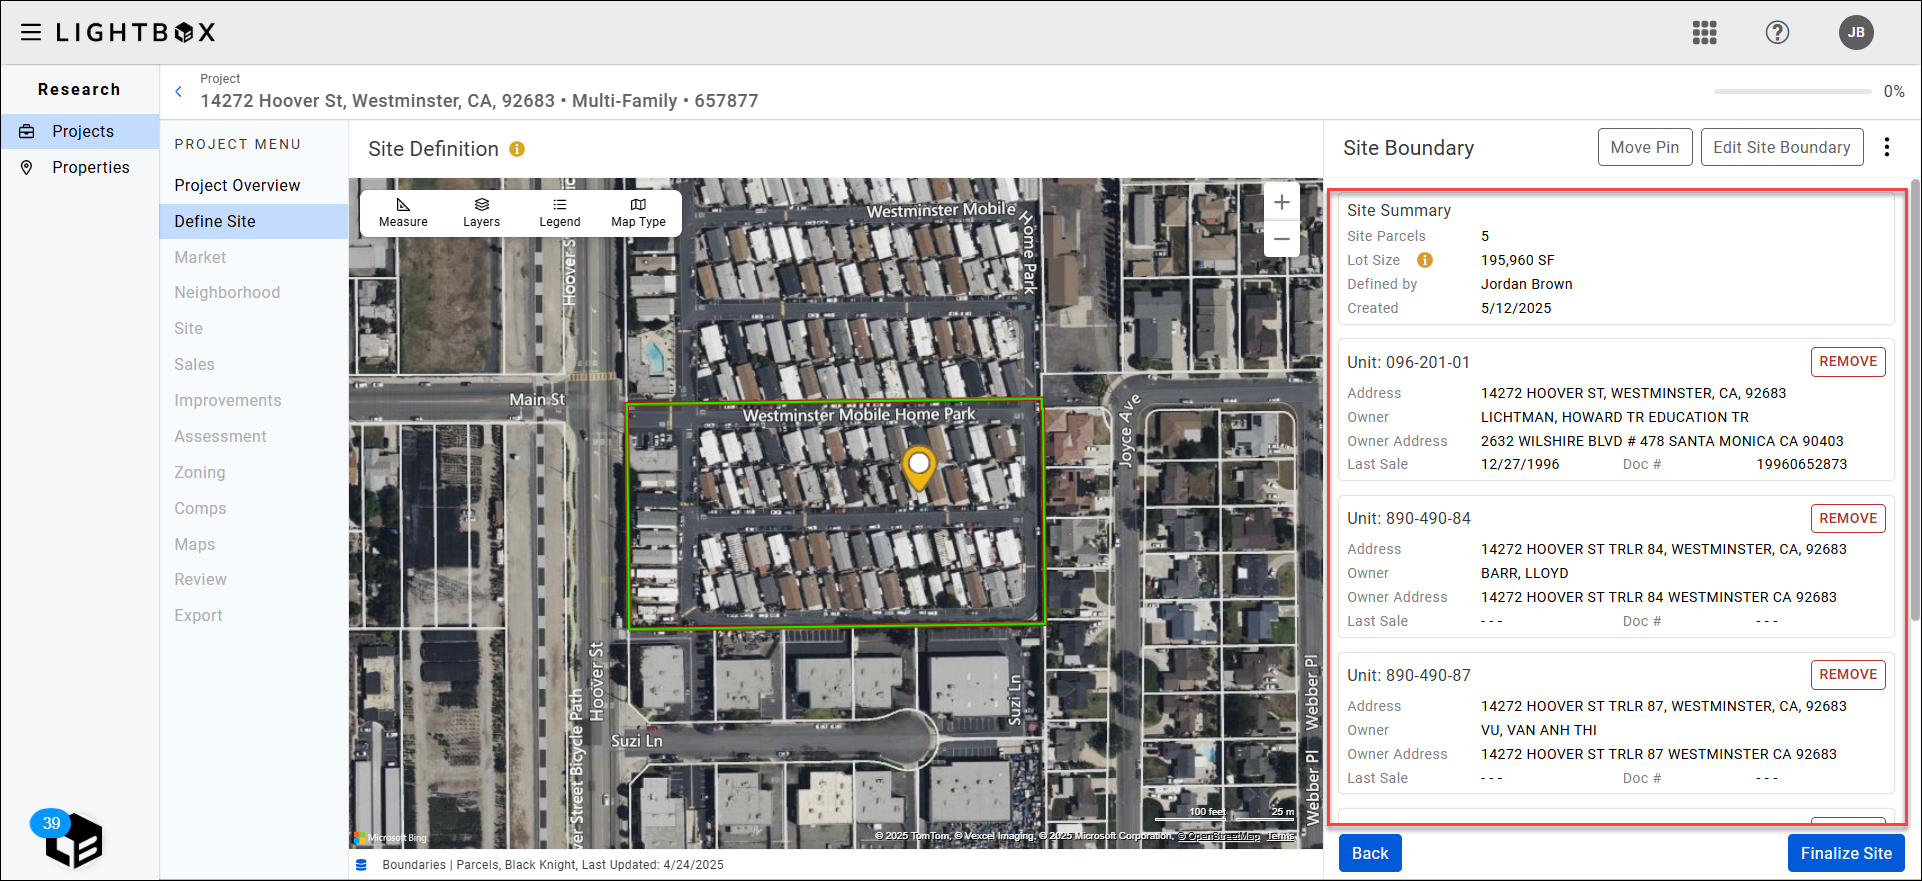
NOTE: The property units selected will each have a corresponding address attribute listed in the other Projects sections (e.g., Improvements, Assessments, etc.).
Order Verification Services
Upon clicking Finalize Site, a popup will appear.
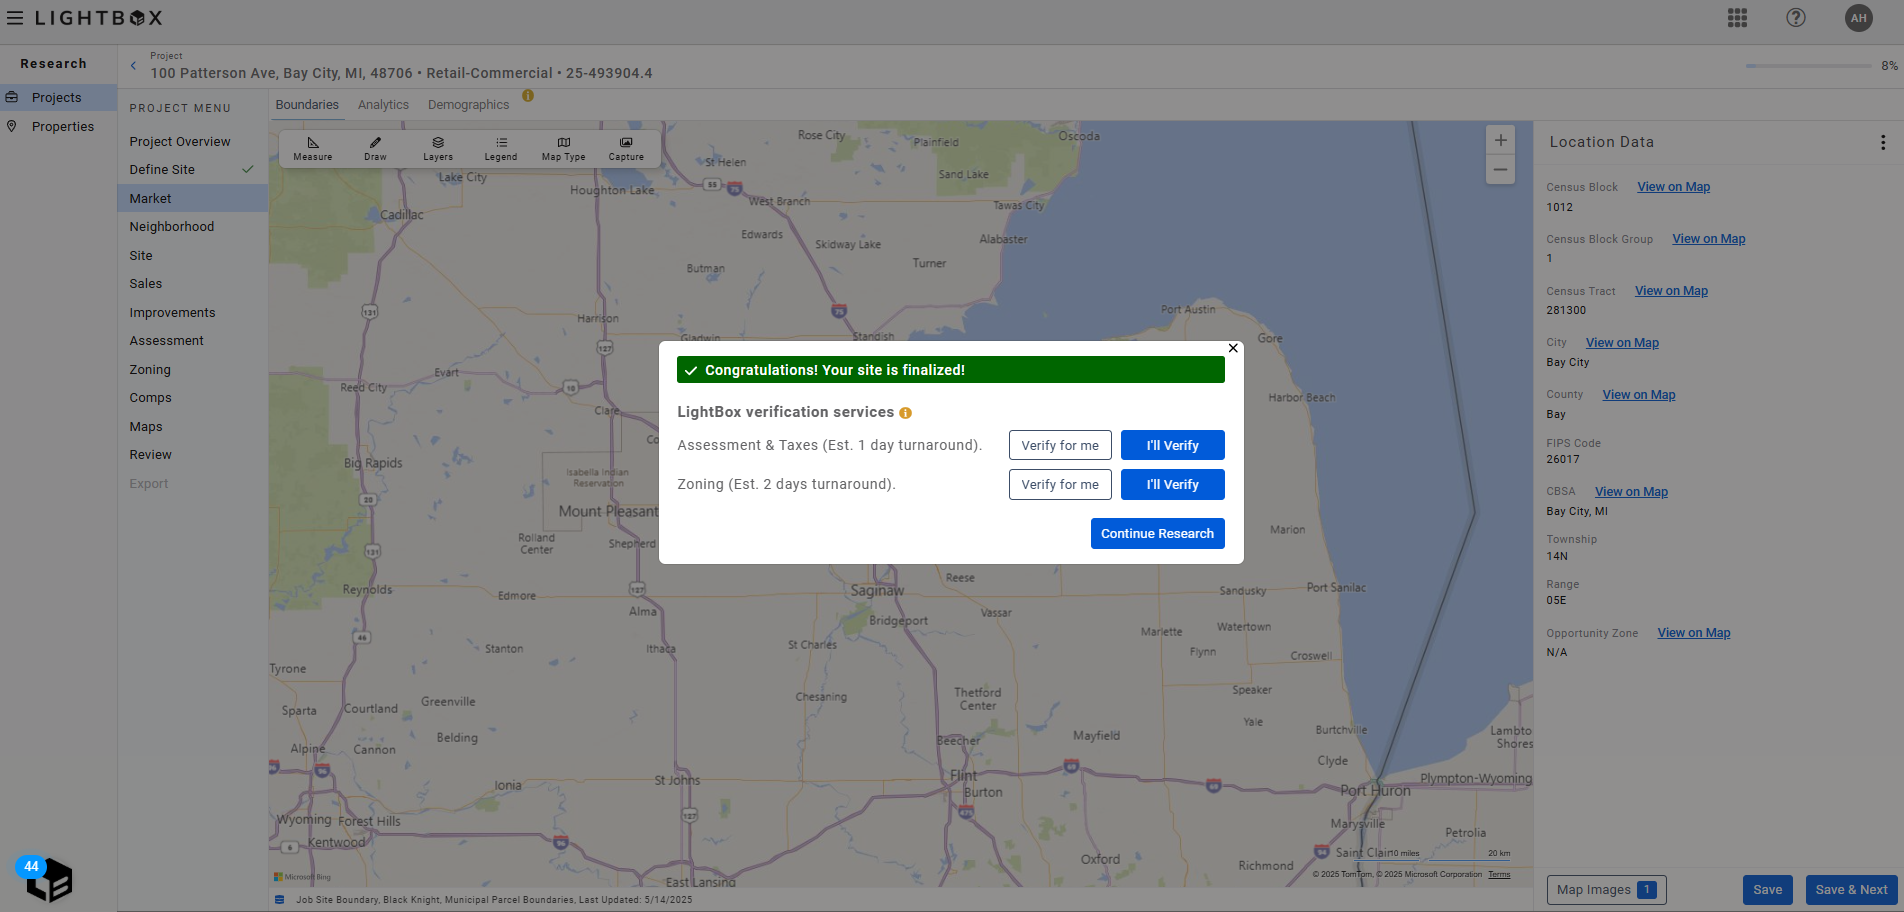
The Assessment & Taxes and Zoning data can be verified by the LightBox Fulfillment team. Turnaround times range from within one to four business days depending on the complexity of the site or if the fulfillment team needs to track down verification via a phone call.
Verify for me is selected by default for both services. Click Continue Research to progress to the Market section of Research and have the LightBox Fulfillment team verify both data sets.
If you wish to skip the LightBox verification process for one or both data sets and verify yourself, click I'll Verify. The LightBox fulfillment team verification process will not proceed. If you later decide to have the fulfillment team verify the data, you will first need to redefine the site.
Was this article helpful?