Custom Pages and Fields
    • Dark
      Light
    • PDF

    Custom Pages and Fields

    • Dark
      Light
    • PDF

    Article summary

    A custom page can simplify data entry for a specialty property type. Custom pages support user-defined fields, which are covered in detail below.

    This is an admin-only feature.

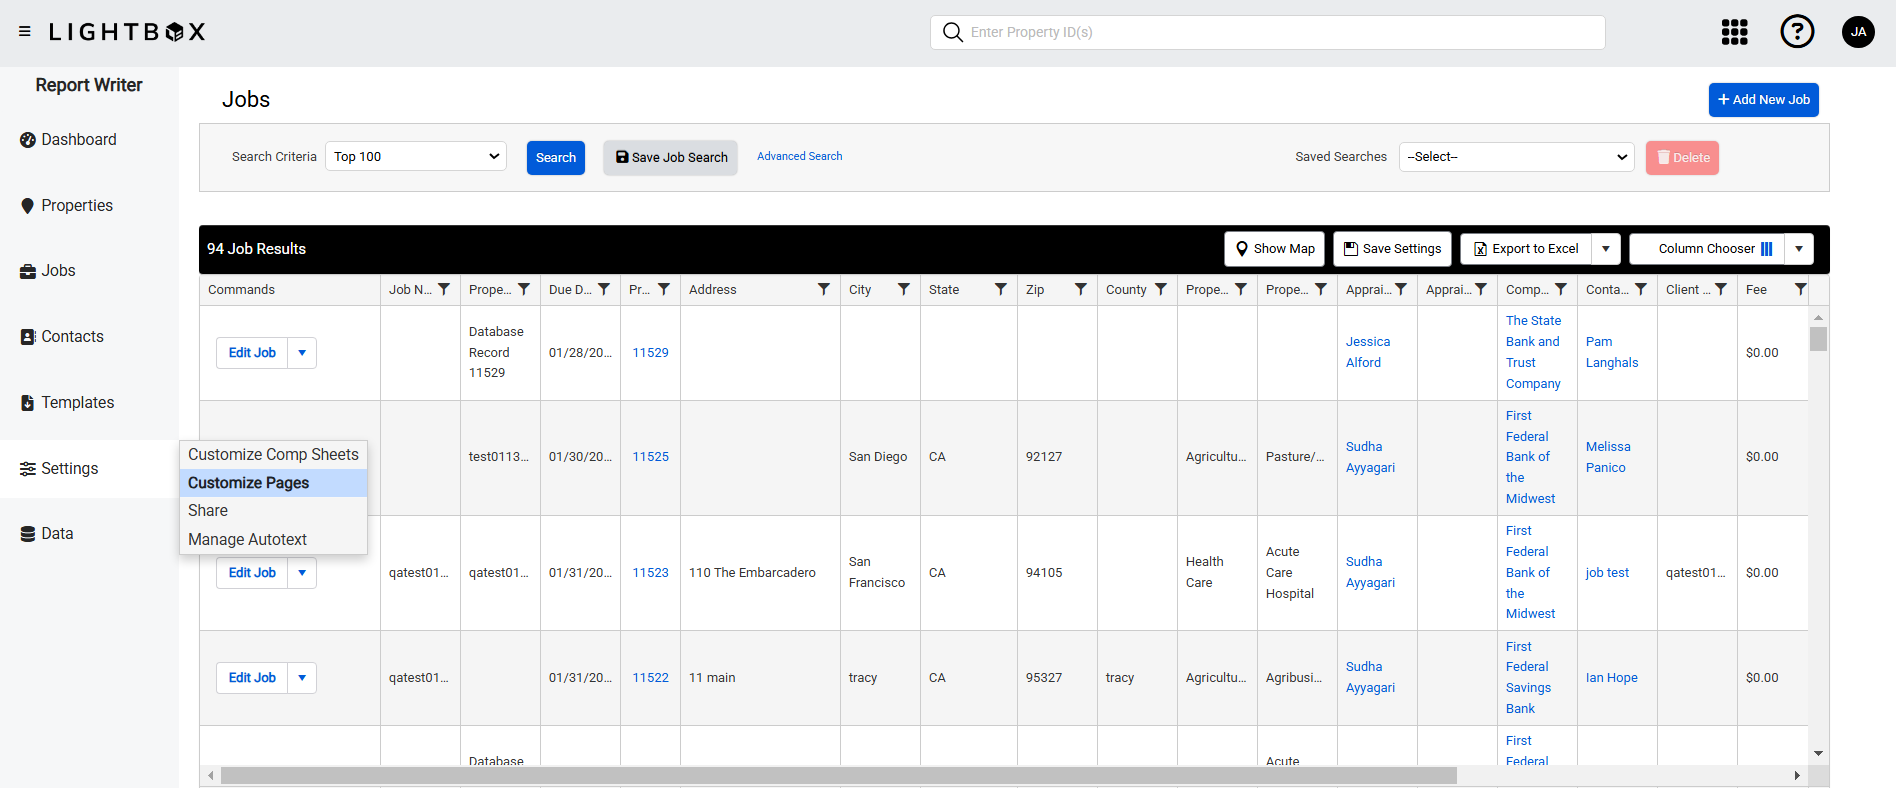
    To access the customization tools, click on the Settings button in the navigation bar on the left side of the Report Writer web application, then click Customize Pages.
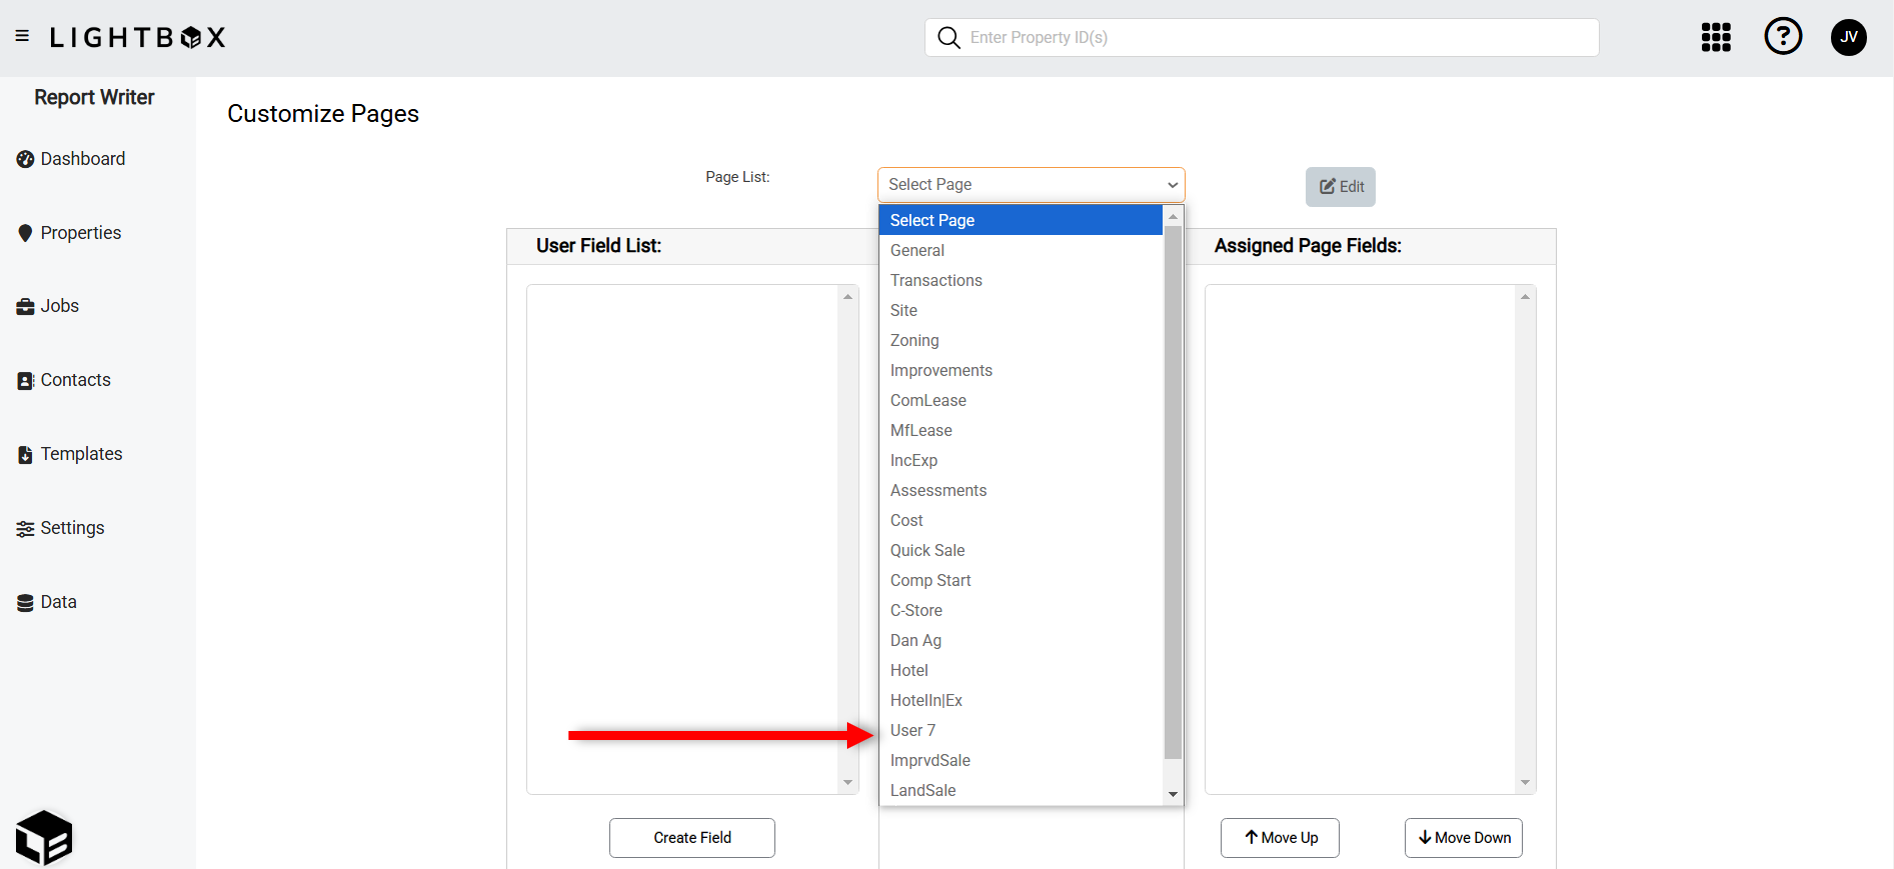
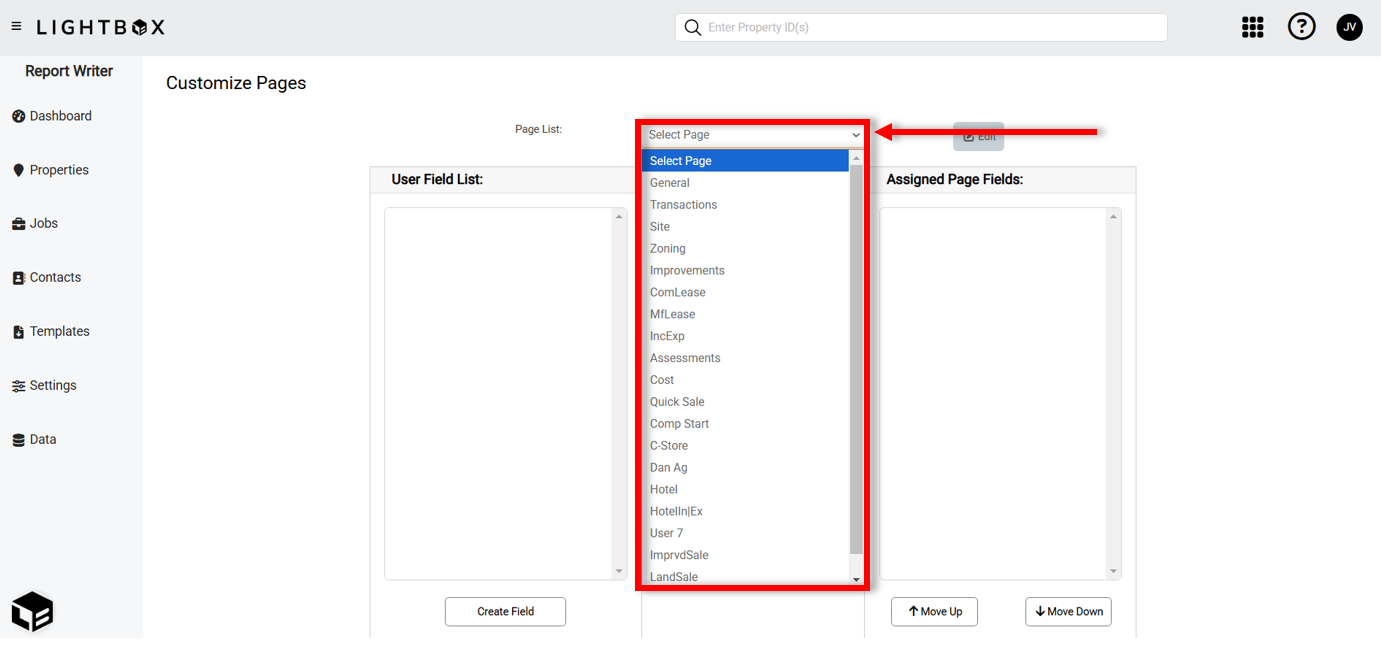
    Click on the dropdown menu at the top of the page to view a list of the available custom pages and data pages.  
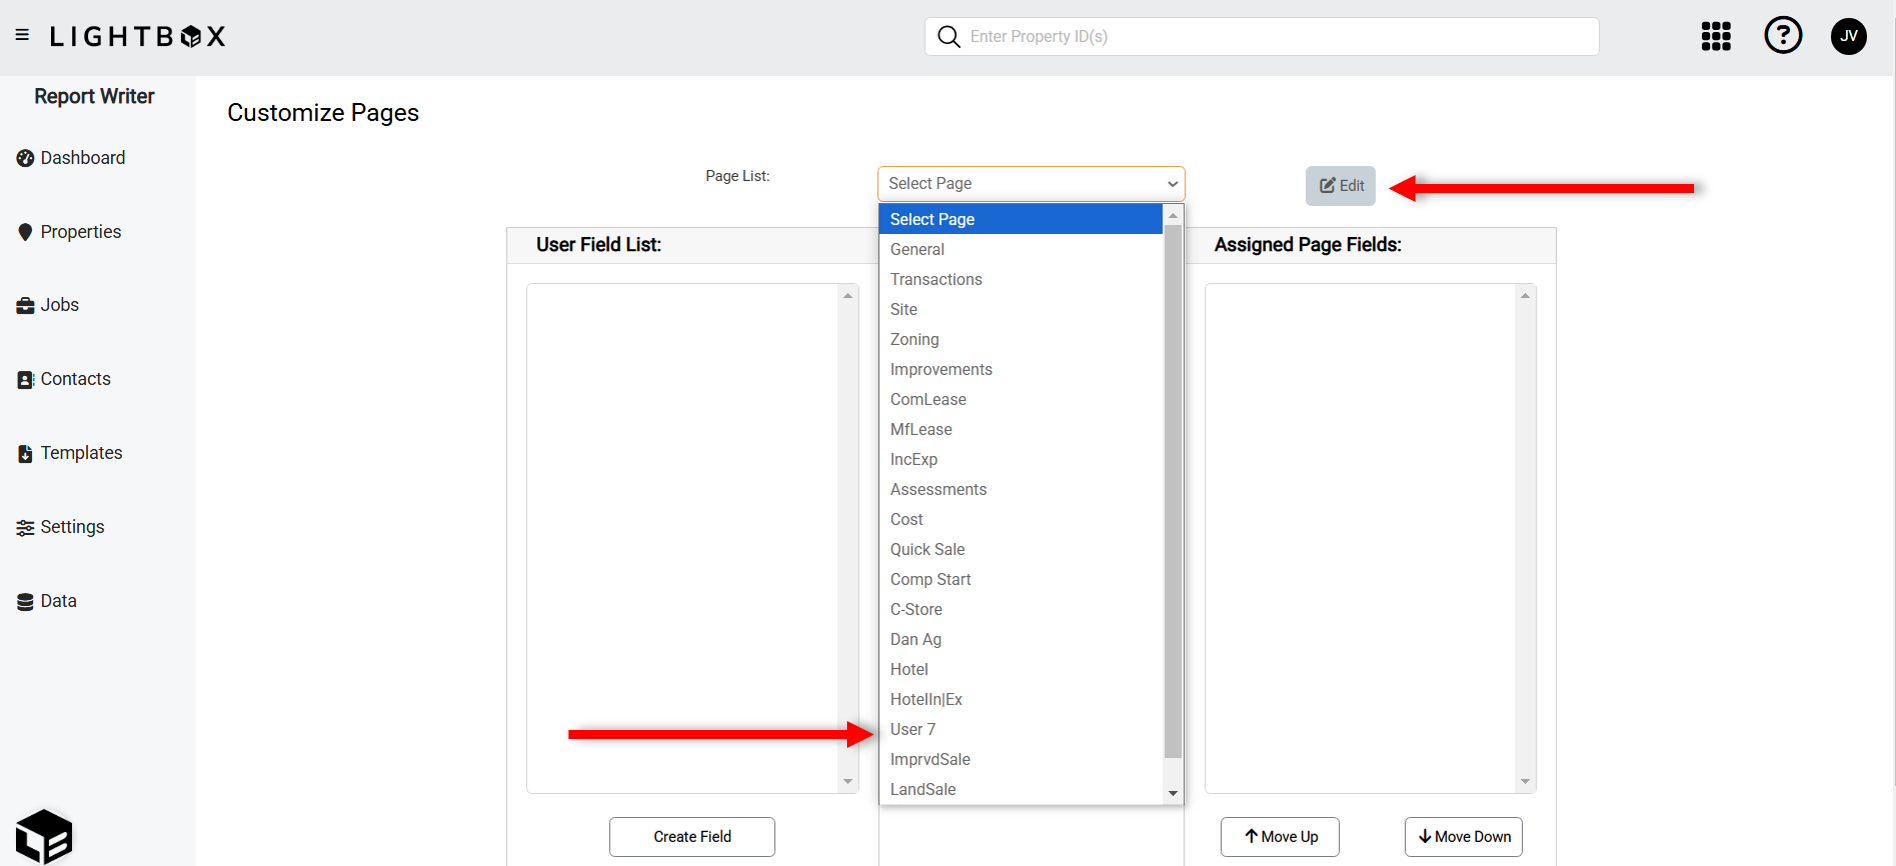
    The data pages (General, Improvements, Zoning, etc.) can be customized, but the page titles cannot be changed. Ten additional custom pages can be created and given custom titles of up to ten characters. To edit a page name, select it from the dropdown menu and then click the Edit button.
    Enter a page title in the Page Name field and then click Save Changes. 


    To assign a field to a page, select that page from the dropdown menu. 

    A list of available fields appears in the User Field List box on the left. This list includes all default fields, as well as any user-defined fields. A field can only be added to each page once.
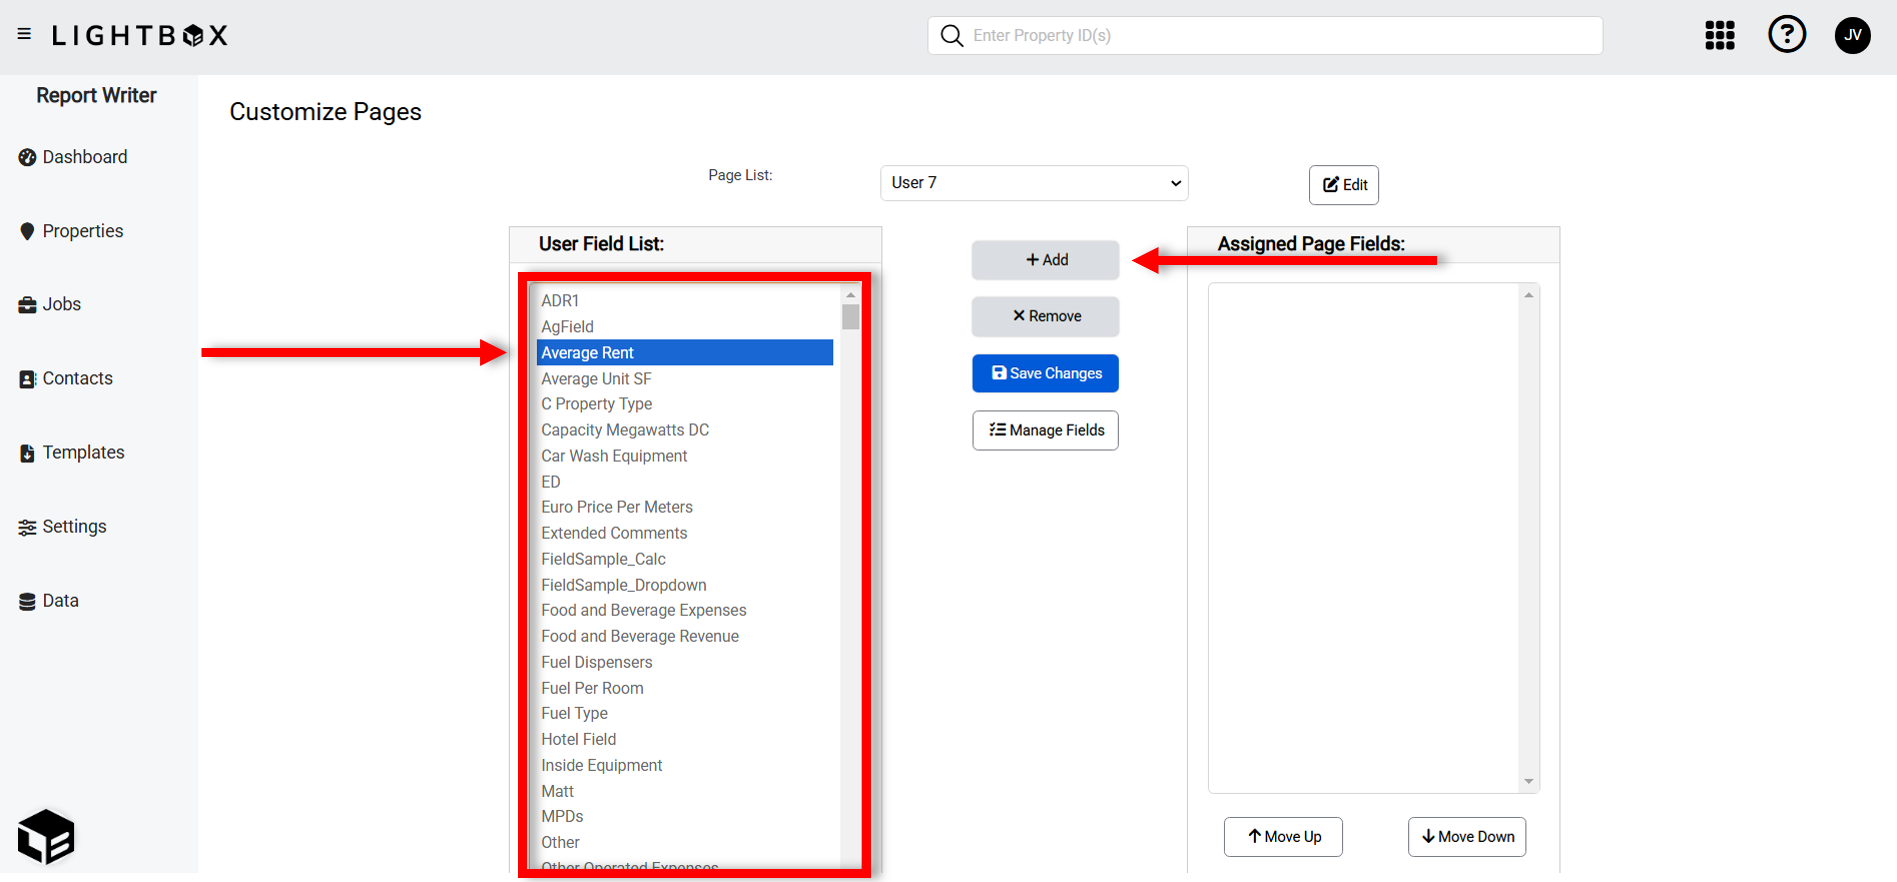
    Click a field in the User Field List box, then click Add to add it to the Assigned Page Fields box on the right. This box lists all the fields that will appear on the custom page.

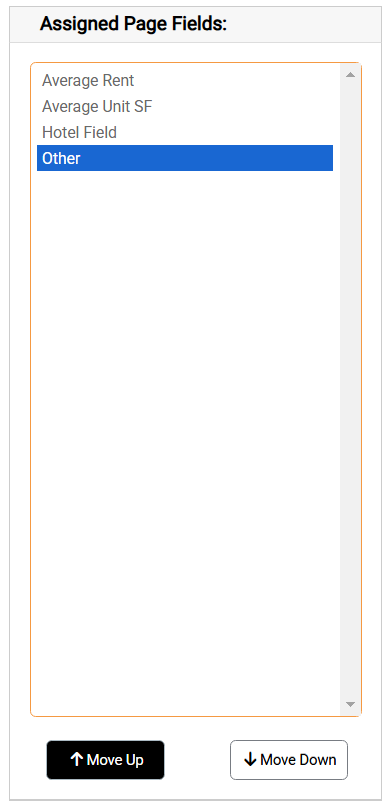
    Click a field and then click the Move Up or Move Down button to move that field up or down. This determines the order in which fields are displayed on the custom page. 

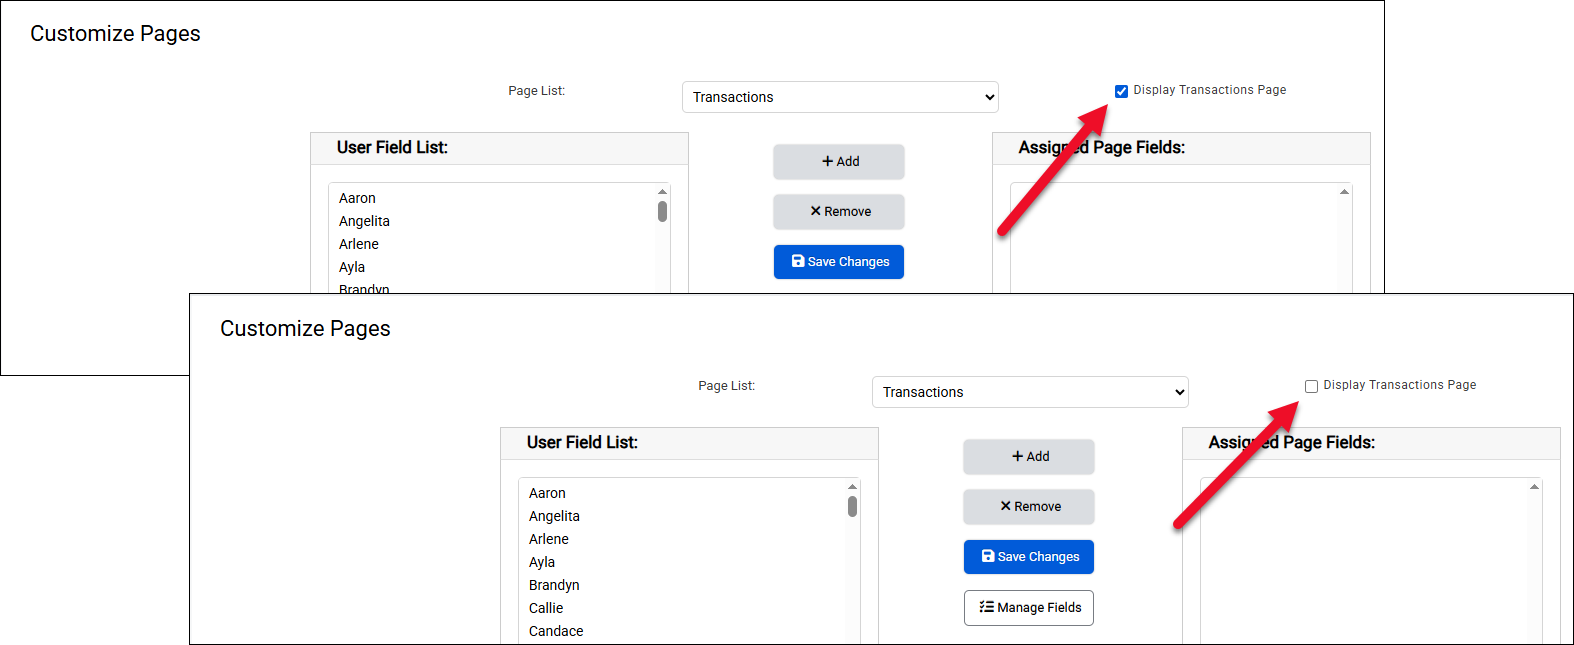
    Once at least one field has been assigned to a custom page, that page will appear with the other data pages after changes have been saved.

    Note that the Improvements page has an additional list of options to the right, under the Views heading.
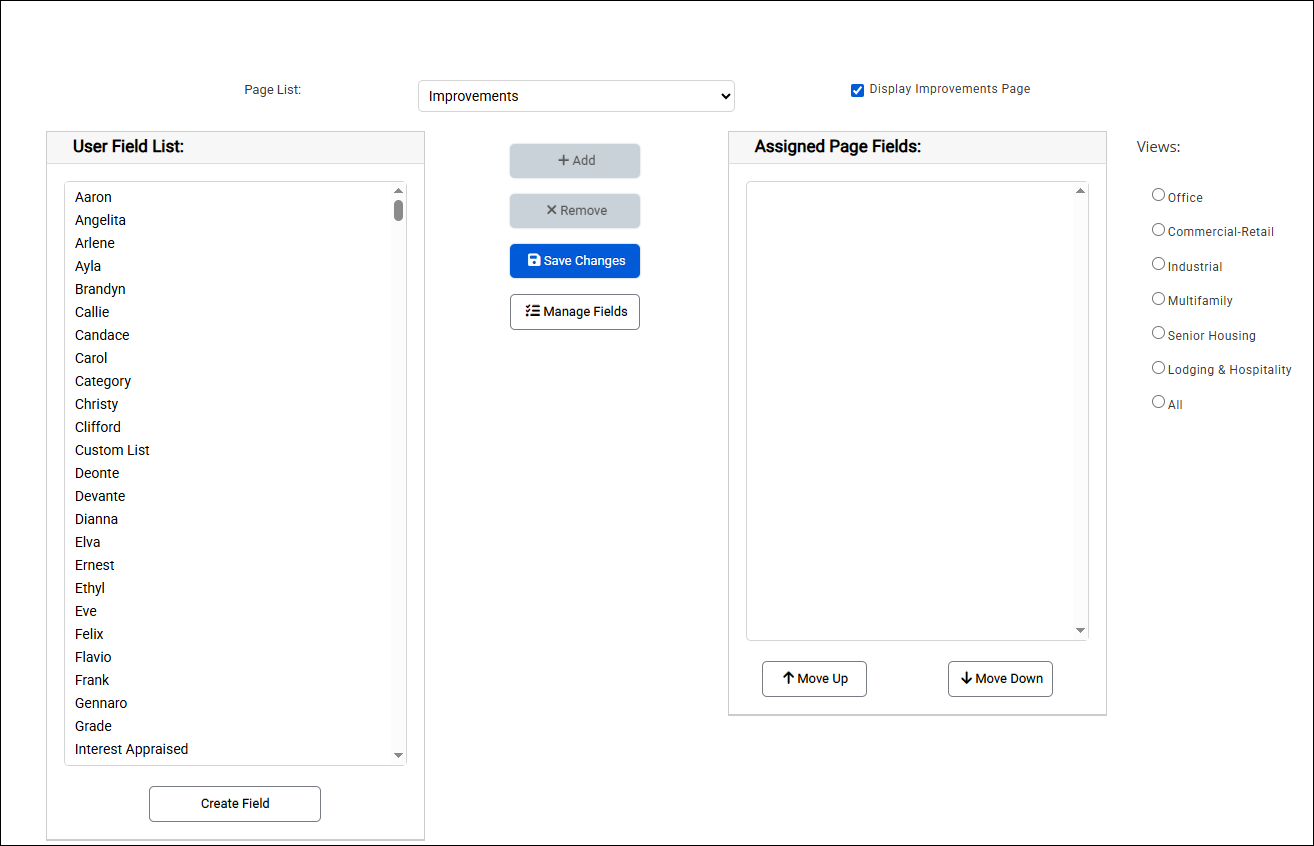
    Select a View from the list to see what fields are visible in that view, and to add or remove fields from that view. 
    User-Defined Fields

    Custom Fields, also called user-defined fields or UDFs, supplement the default data fields provided by Report Writer.

    Click Create Field to create a new user-defined field.


    Enter a Display Name.

    Select a field format from the dropdown menu.

    The field format determines what type of values can be entered in the field and how those values will be displayed. For example, both the Numbers format and the Currency format accept numerical values, but the Currency format will display those values as a dollar amount with two decimal points while the Numbers format will display the numbers as entered. 

    The Display on Search checkboxes define on what search pages the field will be available for selection in the Column Chooser tool. Note: For the best user experience, we recommend a maximum of twenty user-defined fields to each search page.


    In the example above, this user-defined field will be available in the Column Chooser on the Commercial Lease search page.
    Note that adding Custom fields to the Search Grids can cause performance degradation.

    Optionally, enter comments that explain the purpose of the user-defined field. Comments are only visible in the Edit Field modal and cannot be seen in the Report Writer database frontend.

    Click Save to create the field.

    To edit or delete a user-defined field, click Manage Fields.

    The Edit User Field modal appears. Select a field to edit from the dropdown menu at the top of the modal.

    The Display Name and Comments can be edited and the field can be deleted. The Field Format cannot be modified. Make the desired changes, then click Update.

    Or delete the field by clicking Delete. A popup will request confirmation. Click Yes to delete the field.

    Note

    If a user has an existing custom field with the preferred name, they should rename the field, re-create the field as a custom list and send a support request to migrate the previous field's data. Once the user is satisfied, they can delete the previous field.


    Was this article helpful?

    Changing your password will log you out immediately. Use the new password to log back in.
    First name must have atleast 2 characters. Numbers and special characters are not allowed.
    Last name must have atleast 1 characters. Numbers and special characters are not allowed.
    Enter a valid email
    Enter a valid password
    Your profile has been successfully updated.