- Print
- DarkLight
- PDF
Create Jobs/RFPs
- Print
- DarkLight
- PDF
Description
The Jobs app allows the user to create Jobs and RFPs, making it possible to track Jobs and RFPs that originated outside the LightBox ecosystem.
Create a Job
To create a Job, navigate to the Jobs page, then click the Create button.

The Create Job modal opens.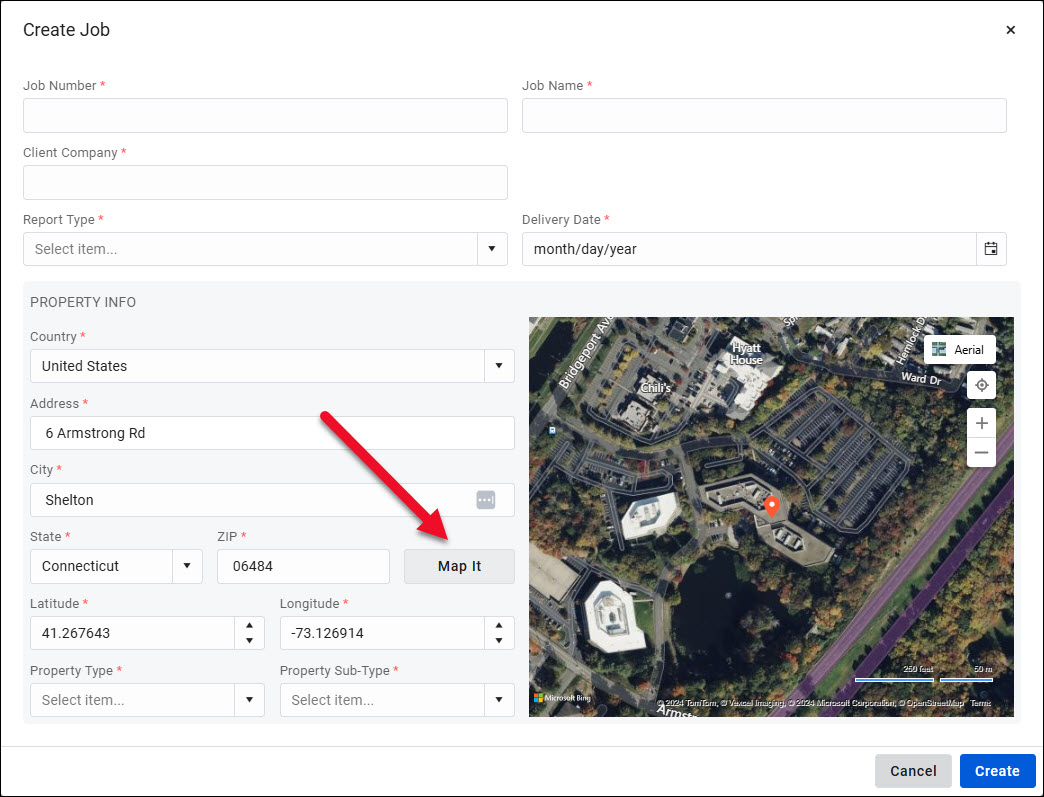
Note: Jobs that are uploaded via the Bulk Upload Jobs tool or manually created individually will NOT appear in the Lightbox Valuation Insights application. For a Job to appear in Insights, an associated RFP must first exist; this is not possible when creating Jobs with the Bulk Upload Jobs tool or creating a Job manually. If analyzing Job data in Insights is important to your organization, please consider creating individual RFPs or using the Bulk Upload RFPs tool, then transitioning those RFPs to Jobs.
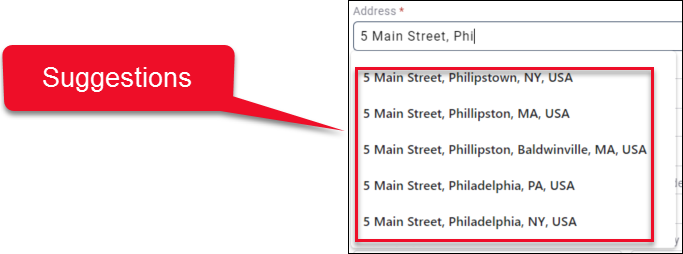
Enter data about the Job. Fields with a red asterisk are required. After entering address data, you may need to click Map It to validate the address information entered. Note: It is only required to enter latitude/longitude data or street address data, as the Create Job modal will populate whichever data is missing when you click Map It, assuming the information you have entered is accurate. After clicking Map It, you may manually edit any address changes that the Create Job modal made. As you begin to enter address data, the modal will suggest possible addresses for selection:
Once you have entered all of the required data, click Create to proceed.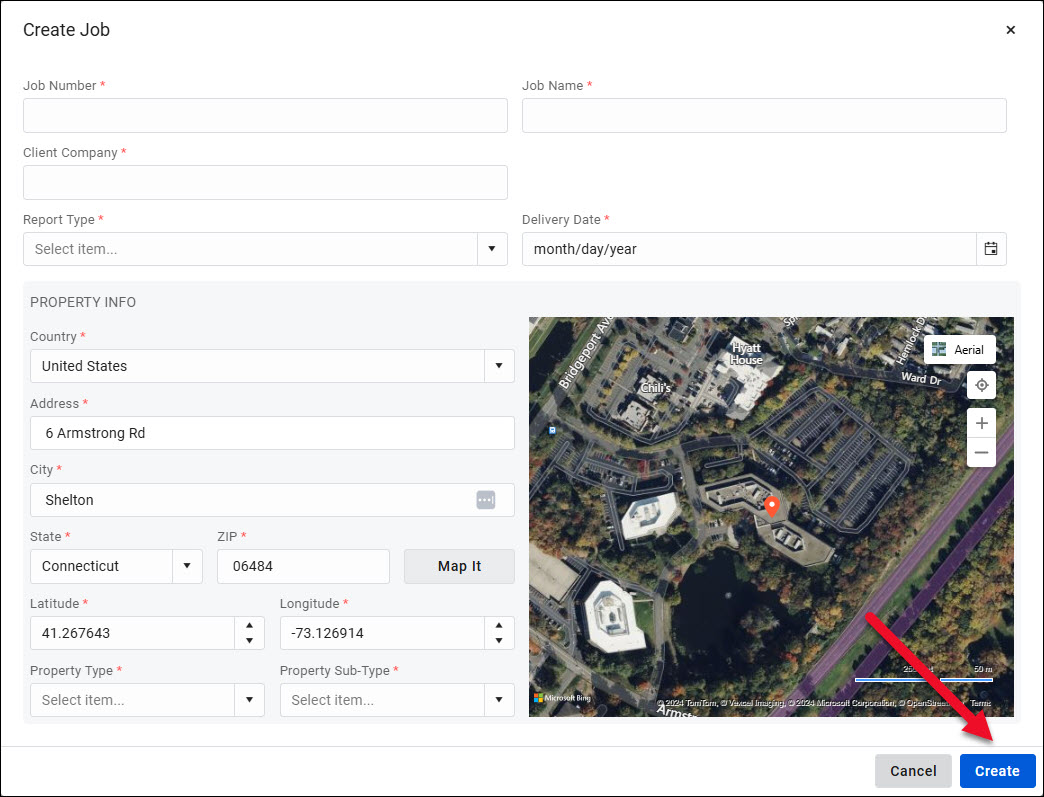
A success message will appear along with four new buttons.
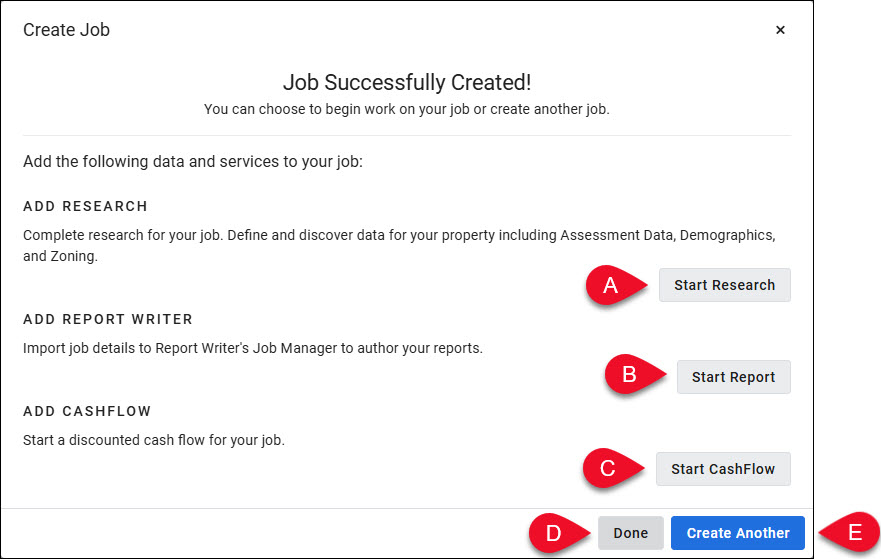
A. Start Research: Navigate to the Research app, which provides tools to define and discover data for the subject property. Refer to Projects - Overview for more information about the Research app.
B. Start Report: Navigate to the Report Writer app to begin authoring your report. Refer here for more information about the Report Writer app.
C. Start CashFlow: Start a discounted cash flow for the Job.
D. Done: Close the Create Job modal.
E. Create Another: Create another Job.
The newly-created Job will appear in the All Jobs tab and Not Started tab of the Jobs app.

Click Open Job to view information about the Job, and the Job Status, in an editable format.
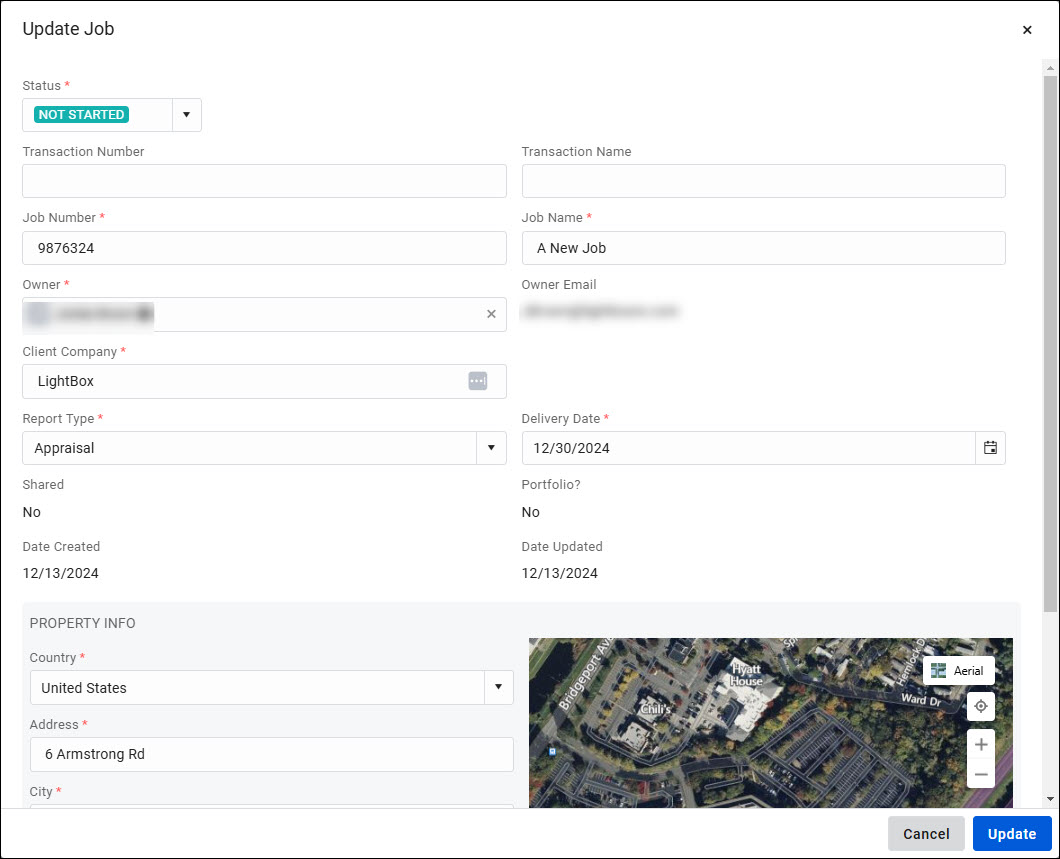
Create an RFP
To create an RFP, navigate to the RFPs page and then click the Create button.

The Create RFP modal opens.
Note: Creating an RFP requires more information than creating a Job; the RFP information collected is tracked and made available to you for analysis in the Insights app.
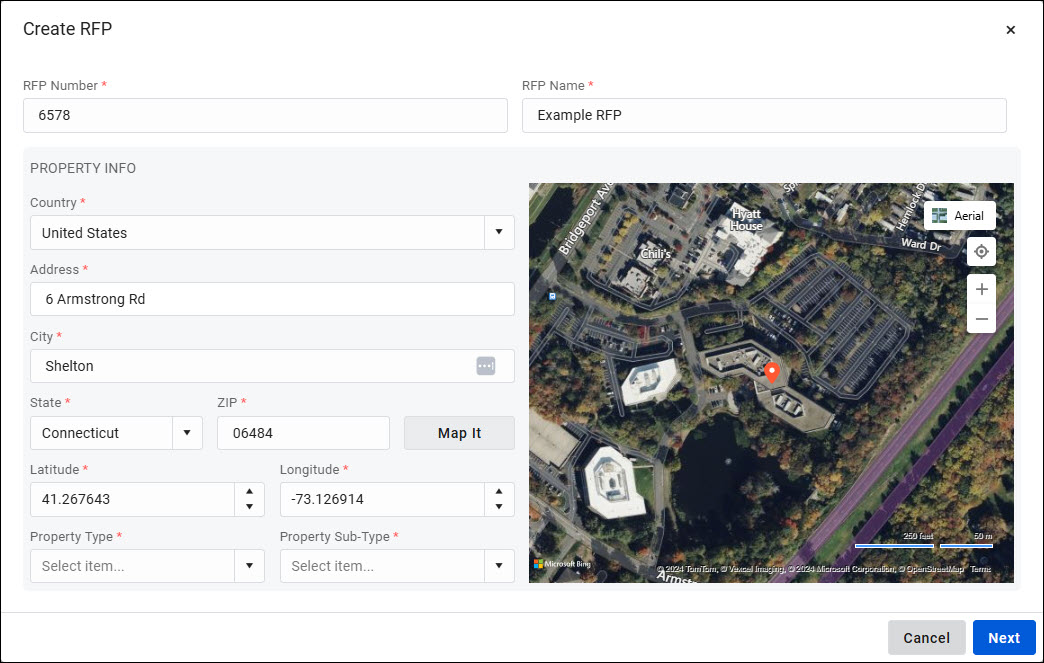
Enter information on the RFP Details tab. Fields with a red asterisk are required. If you attempt to proceed without filling out all required fields, an error message will be displayed and the required field(s) that are missing data will be noted with red text. After entering address data, you may need to click Map It to validate the address information entered. Note: It is only required to enter latitude/longitude data or street address data, as the Create RFP modal will populate whichever data is missing when you click Map It, assuming the information you have entered is accurate. After clicking Map It, you may manually edit any address changes that the Create RFP modal made.
As you begin to enter address data, the modal will suggest possible addresses for selection:
.png)
Click Next to proceed.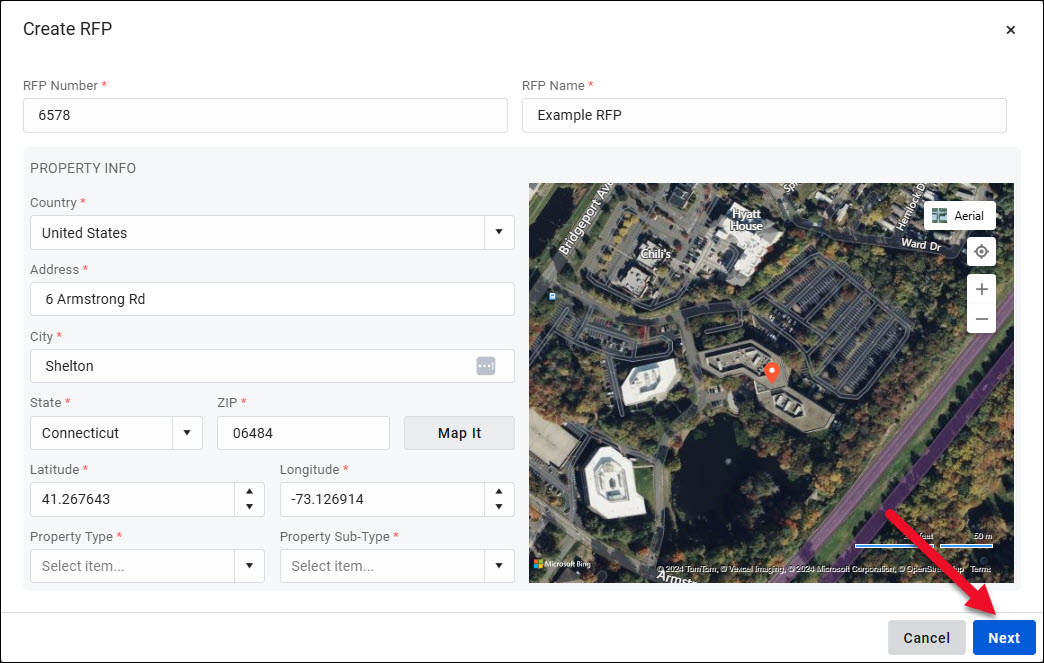
Enter information on the Bid Details page. Click Launch Bid Intelligence to open the Bidding Intelligence page and view any information about Jobs previously done for that address. Refer to Bidding Intelligence for more information.
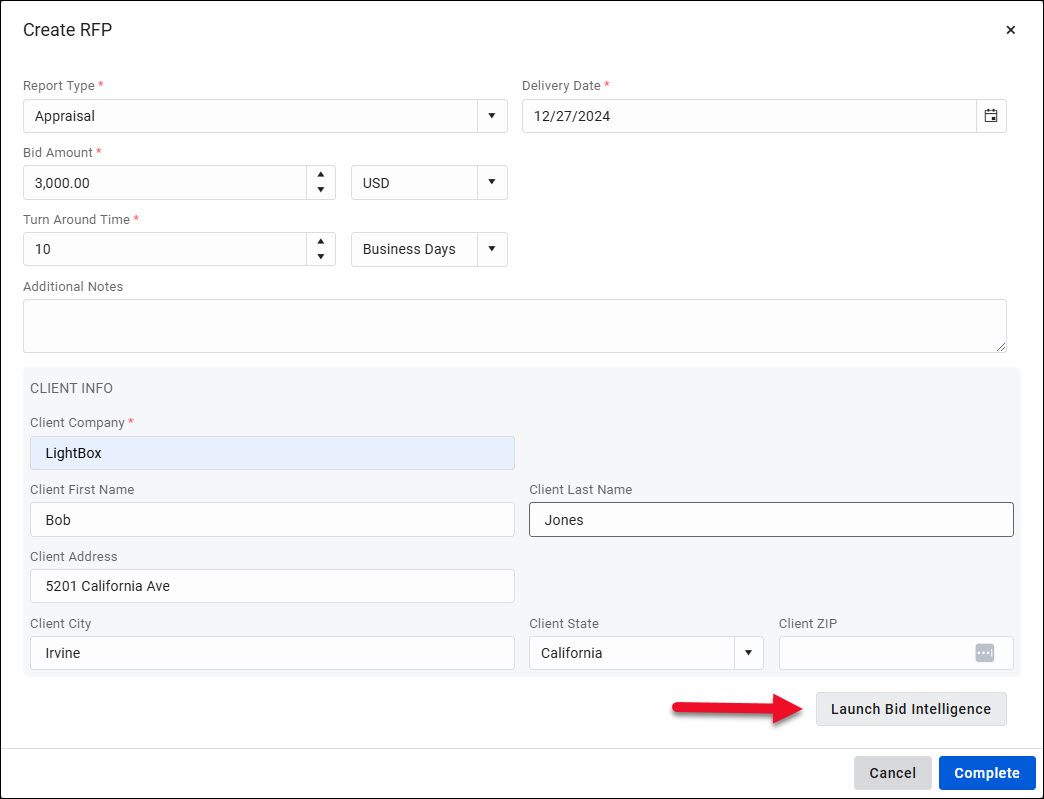
Click Complete to create the RFP.
.jpg)
A success message will be displayed along with three buttons.

A. View RFP: Click to open a modal that displays the RFP information in an editable format.
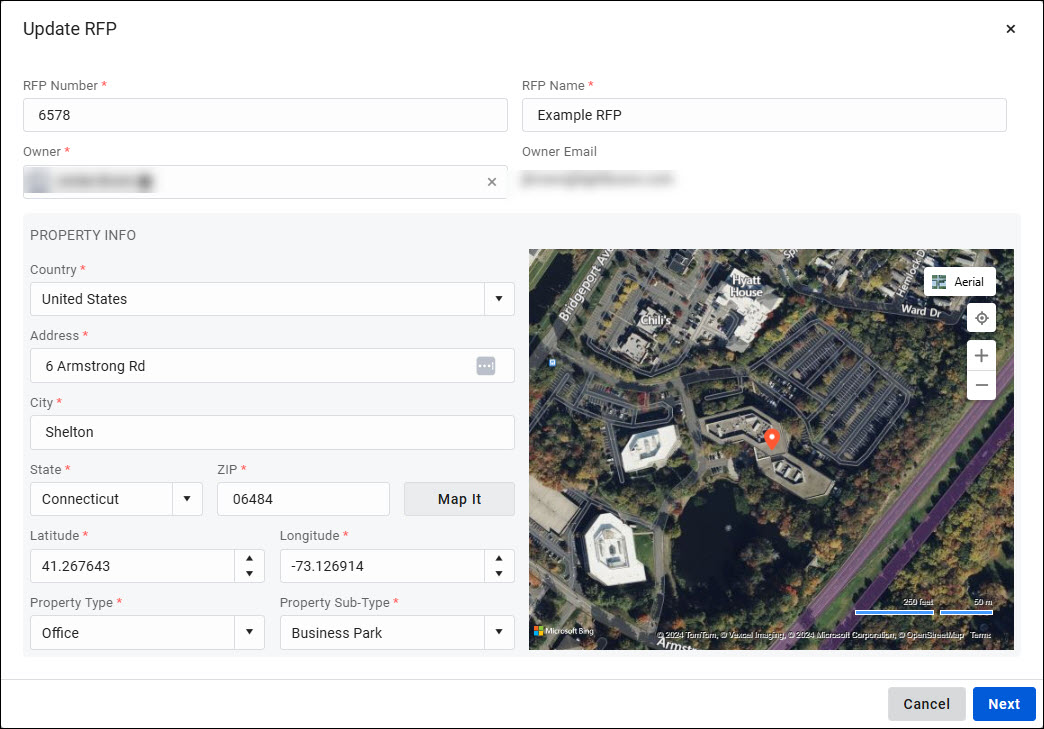
B. Done: Close the Create RFP modal.
C. Create Another: Create another RFP.
Once an RFP has been created, it can be found on the Submitted tab. Click the down arrow next to the RFP to expose a menu.

The drop-down menu contains five commands:
Bid Intelligence: Click to open the Bidding Intelligence tool. Refer here for more information.
Share: Click to open the Share RFP modal. Refer here for more information.
RFP was accepted: Click to mark the RFP as accepted and automatically create a corresponding Job. A pop-up message will appear and notify you that a Job has been created and has a status of “Not Started.” The pop-up contains three buttons:

- Cancel: Cancel the process of marking the RFP as accepted.
- Confirm: Creates the Job and closes the modal.
- Confirm and View Job: Creates the Job and opens a modal with editable information about the Job and its status.
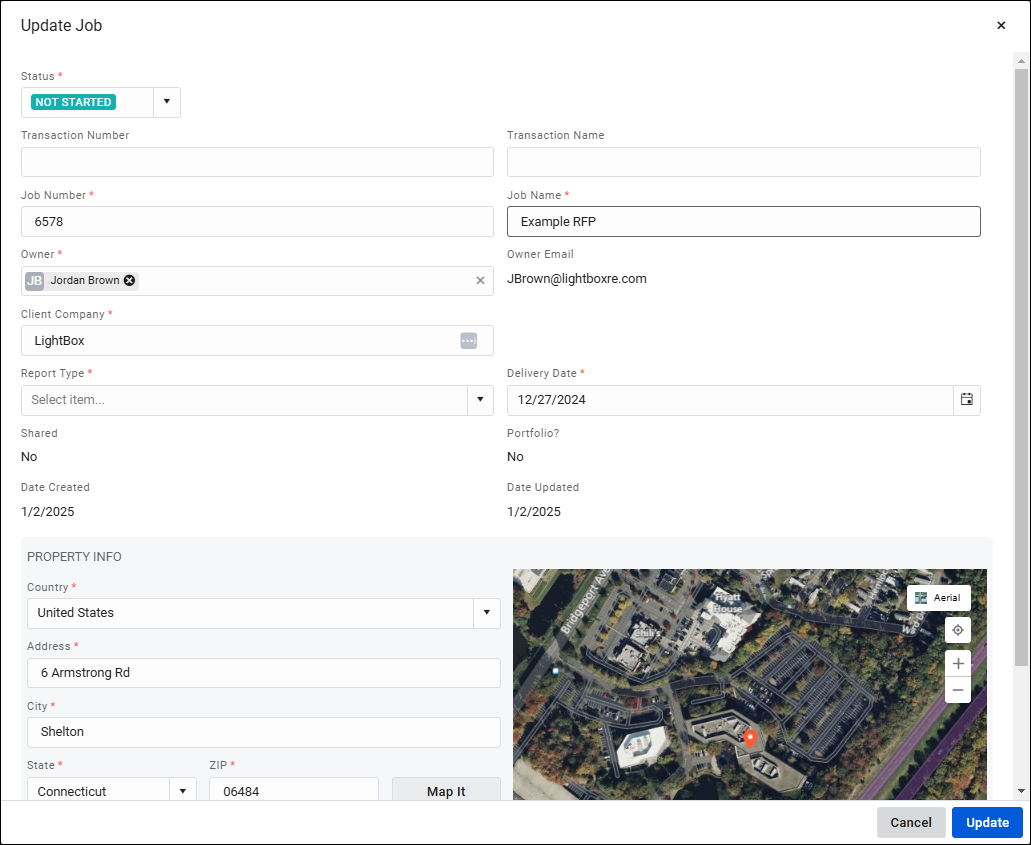
RFP was rejected: Click to mark the RFP as rejected. A pop-up will confirm that the RFP has been marked as rejected and can now be found in the All RFPs tab. Click Done to close the pop-up.

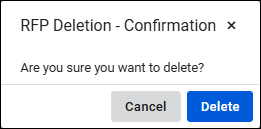
Delete RFP: Click to delete the RFP. A pop-up will request confirmation. Click Delete to confirm the deletion or Cancel to cancel the deletion.
.png)

.png)