Vendor Service Area Management
- Print
- DarkLight
- PDF
Vendor Service Area Management
- Print
- DarkLight
- PDF
Article summary
Did you find this summary helpful?
Thank you for your feedback!
The Vendor Service area allows the Content Administrator to establish a Service Area for an individual Vendor.
Having a Service Area will cause the Vendor to be displayed as an RFP candidate for RFPs which match the specific geographic, Property Type and loan amount criteria for that Task.
- Create or Edit a Vendor Service Area
- Edit an Existing Service Area
- How the Service Area Impacts the RFP
Create or Edit a Vendor Service Area
To create a new Service Area or access an existing Service Area to make changes, log on to RIMS as a Content Administrator. Hover over the Settings button in the navigation bar at the top of the screen, then click View All Settings in the drop-down menu. On the System Settings page, click the Vendor Service Area link. |  |
Next, set the desired filters. The geographic filters are set from the National level down to an area as small as a single county. Regions are predetermined groupings of states, and State Areas are predetermined groupings of counties. These areas are set up by a Content Administrators through the Regions/State Area links and must be made available for selection prior to selecting them here. Not all of the fields shown below must have a selection. When a field is left unselected, that is interpreted as All. For example, if no Task Codes are selected, this Service Area would apply to All task codes. |  |
Once the filters have been set at the Geographic/Task/Lending Group/Organization level, click on the Add button. A new page for defining Property Types will load. This is a required step in order for the Service Area to function. Leaving the Properties undefined does not include all. To add the Property Level filters, double click on the row to select area and then click View/Edit Details link. |  |
| The View/Edit Details screen contains two buttons: Save/Back and Add Type. Click the Add Type button to add a Property Type(s) to be used in the Service area. To make multiple selections, hold the control key down while clicking on each item, then click Select. | 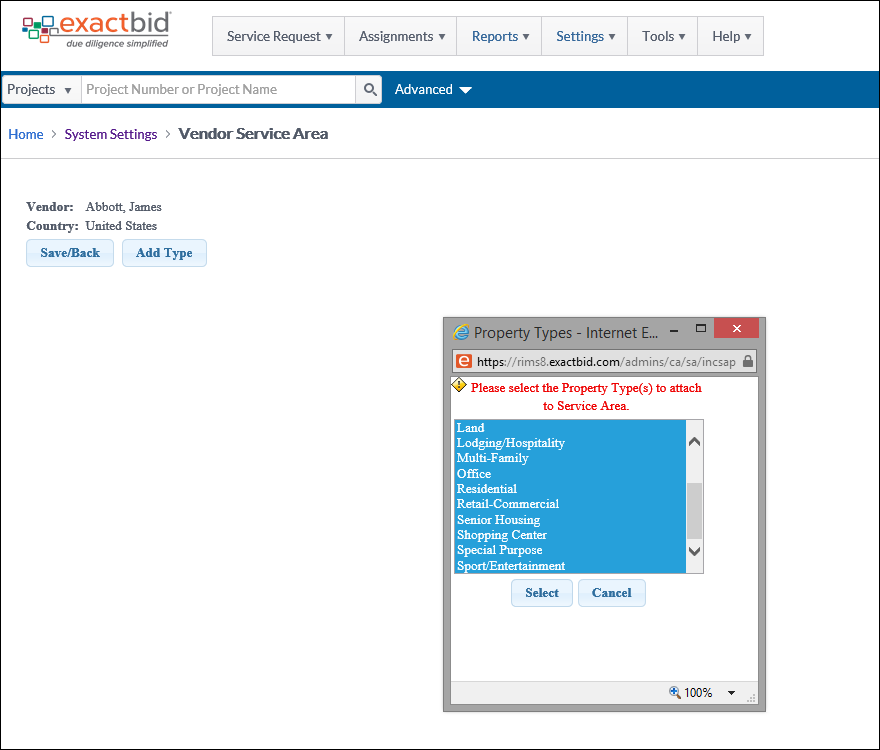 |
Once one or more Property Types have been added, the page will reload with additional fields for the Property Types selected. Leave the Value thresholds blank to allow the Vendor to be displayed as a candidate regardless of the loan amount. |  |
To make batch changes, enter the desired values in the fields at the top of the form, then click the Apply to button. This will apply the changes to all of the Property Types. The page will reload. | 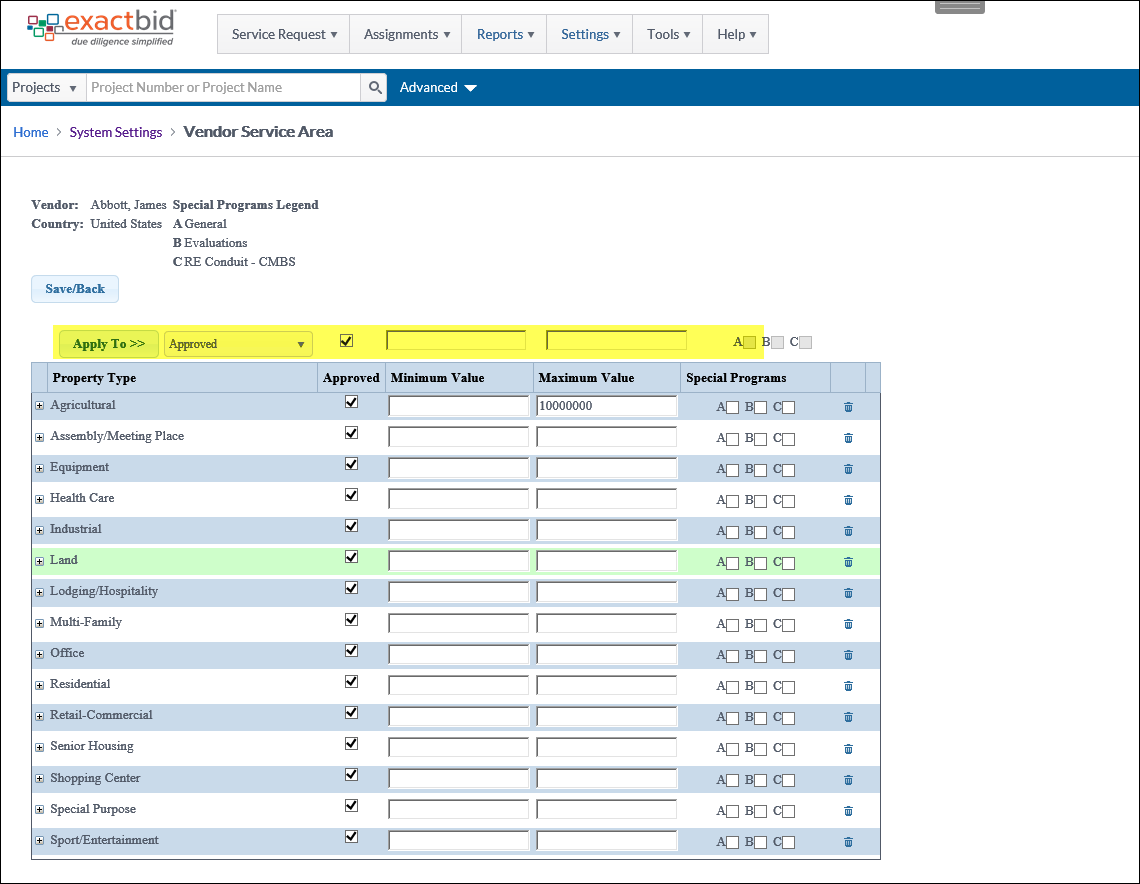 |
Once updated, the changes will appear for all of the Property Types and Subtypes. Edits can be made to change or deselect any of the specific types after the updates have been applied. On the right-hand side of the page there are three Special Programs columns. These allow for customization of the Service Area to specify programs that may be unique to your institution's process. The Special Programs Legend at the top left of the form is based on each institution's specific instructions and has a corresponding legend that can be used at the RFP page. | 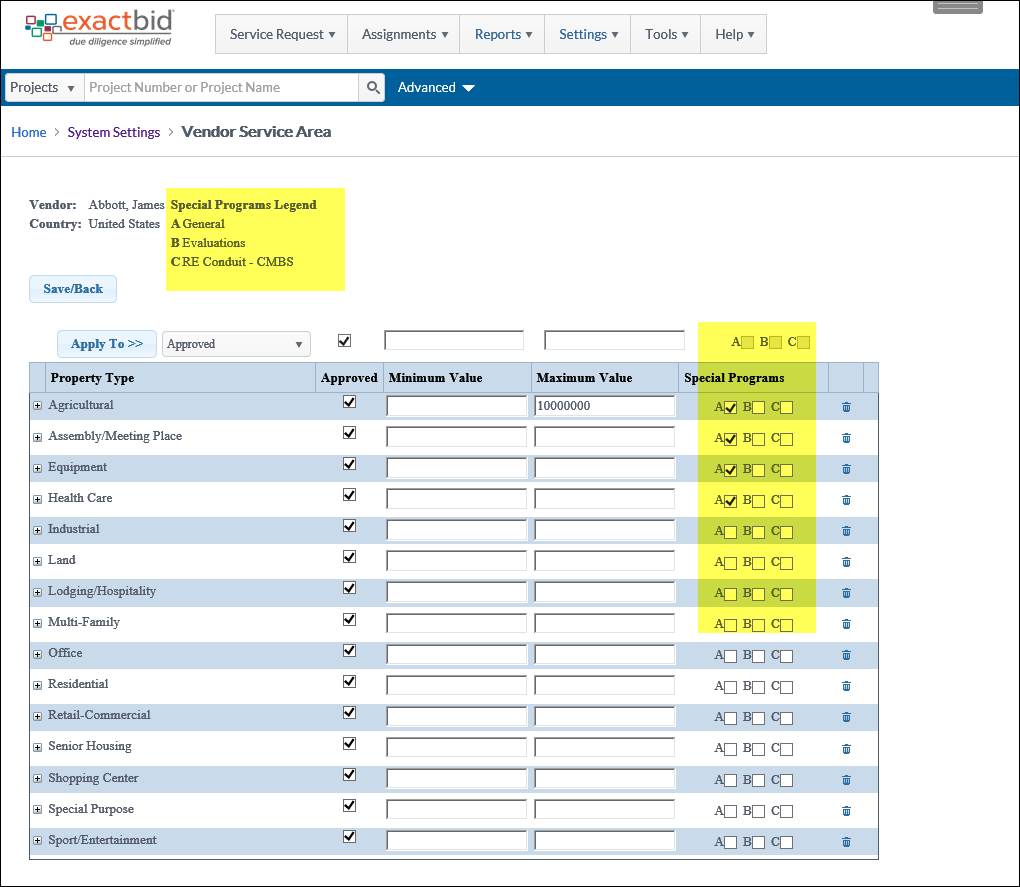 |
| Once the changes have been made, click the Save/Back button. Click Yes in the confirmation window to store (save) all of the changes that have been applied. | 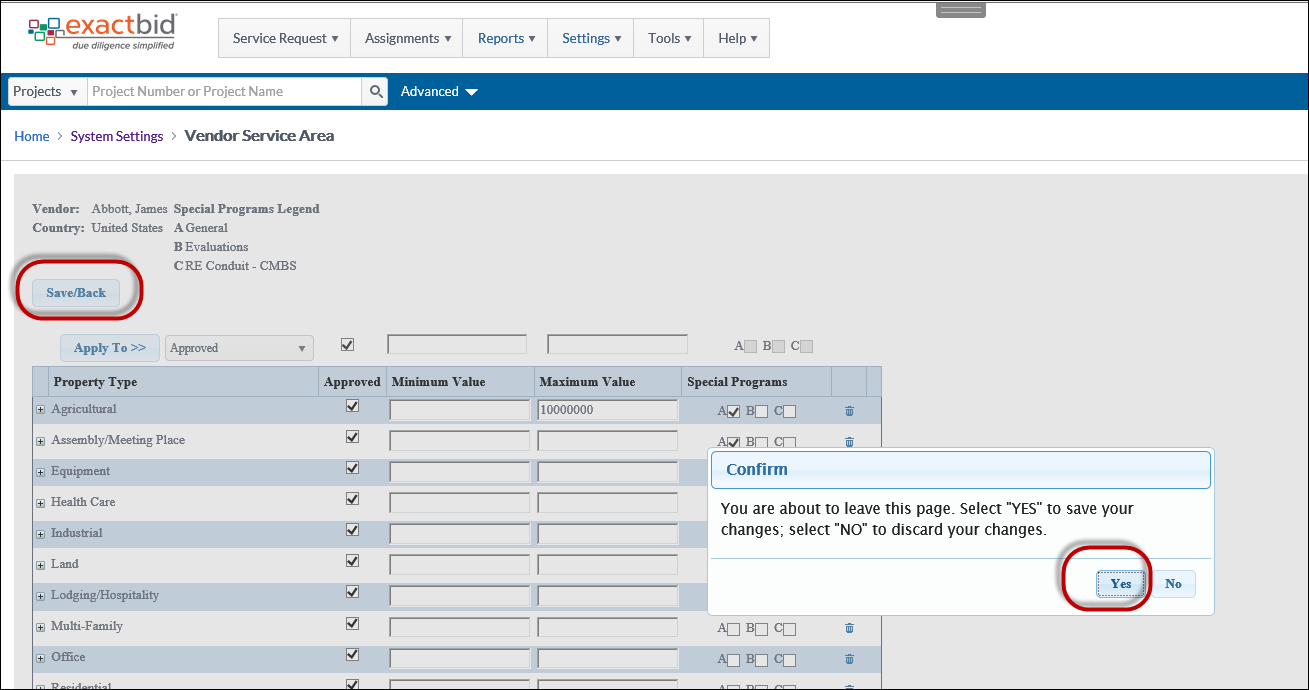 |
Edit an Existing Service Area
Vendors who have an existing Service Area will automatically be displayed in the RFP Candidates window on the RFP screen in the Project Console. The Vendors displayed are based upon all of the criteria set at the Vendor Service Area, including Geographic Area, Job Type, Task Codes, Lending Groups and Property Types. Vendors in the RFP Candidates box do not automatically receive the RFP. To send the RFP to a Vendor, check the box in front of their name and click Select. | .png) |
| To search for a Vendor who has had a Special Program included in their Service Area, click Include Vendor Service Area, then expand the Special Program section. | 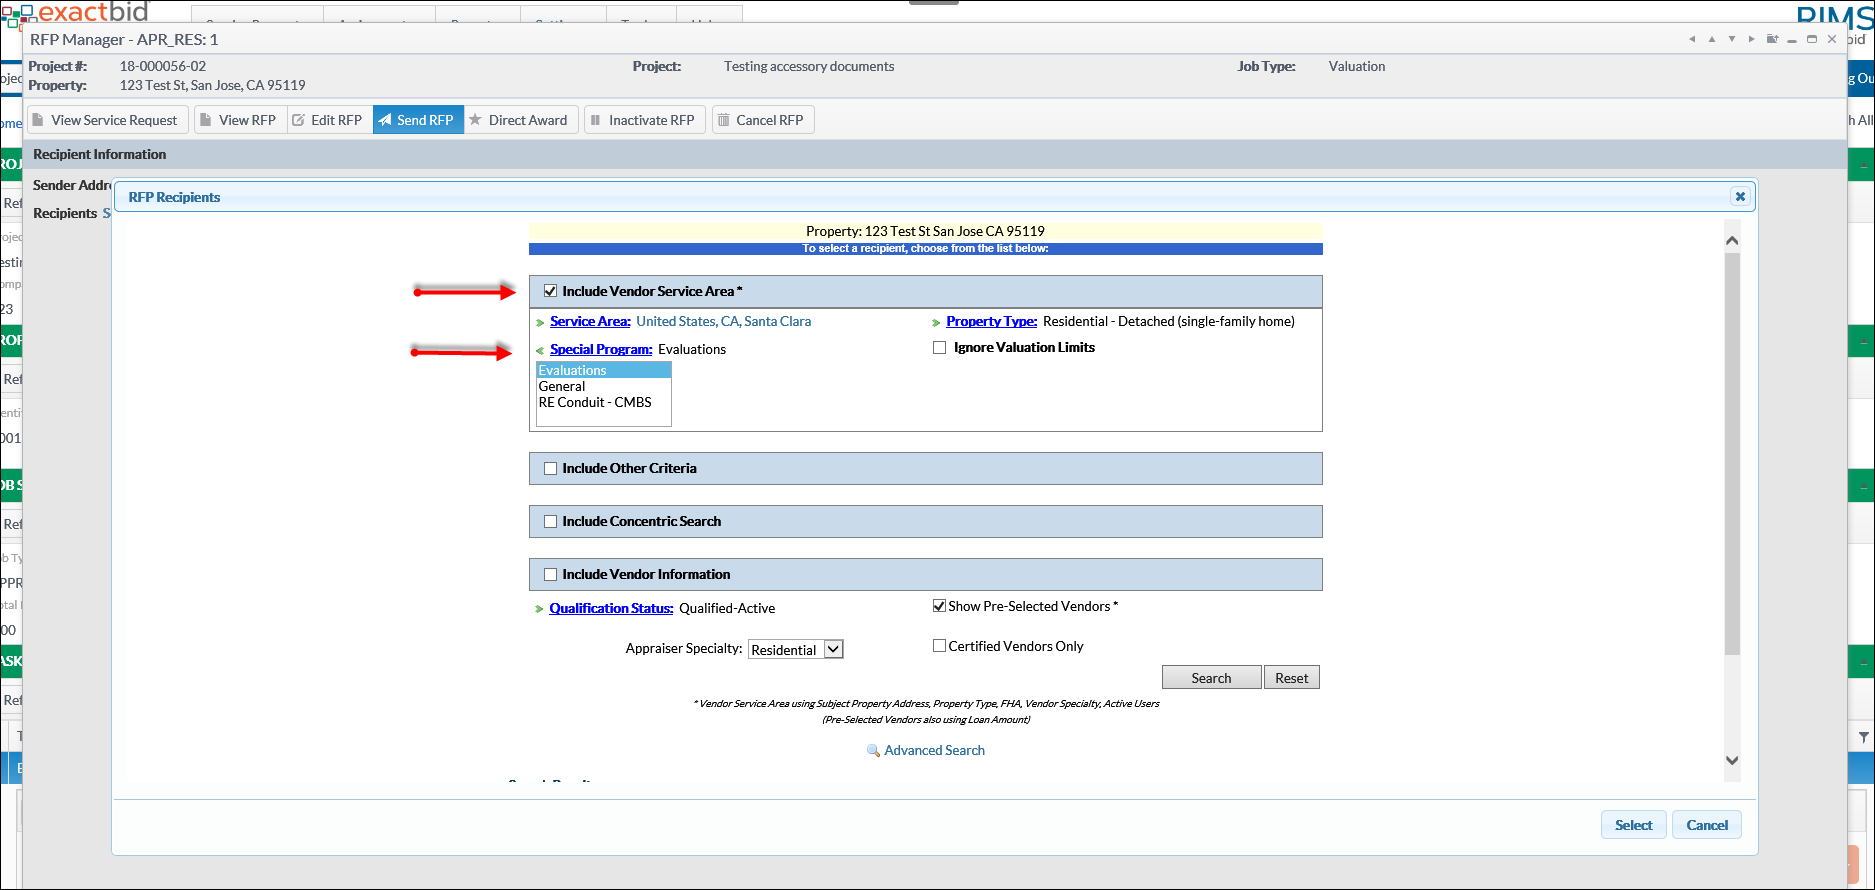 |
Was this article helpful?