Service Request Creation and Mgmt
- Print
- DarkLight
- PDF
Service Request Creation and Mgmt
- Print
- DarkLight
- PDF
Article summary
Did you find this summary helpful?
Thank you for your feedback!
This document describes the process for creating and managing Service Requests, including the following:
- Creating a Service Request
- Viewing Sent Requests
- Viewing Unsent Requests
- Searching Requests from All Account Officers
Creating a Service Request
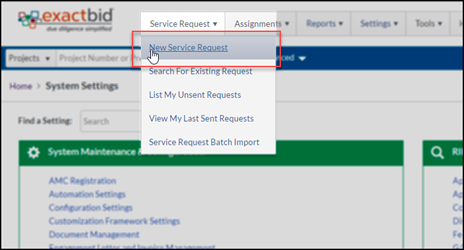
Note: The Service Request is specifically configured for each RIMS Customer and may have unique field labels and differ in what is presented and/or required. To create a new Service Request, login to the RIMS site. In the upper left-hand corner of the screen, click on Service Request, then click on New Service Request in the drop-down menu.
The next screen lists one or more service types. Note that the services listed on this page vary by institution and the settings for each individual user account.
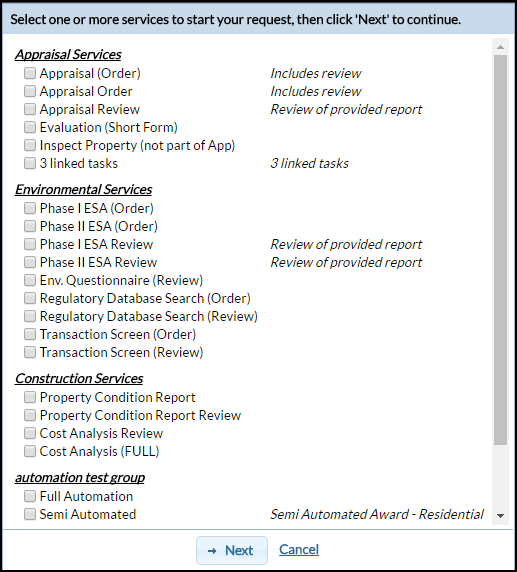
Make the desired selection and then click Next. The fields on the following page will reflect the selection made; in this example, Appraisal Order was selected.
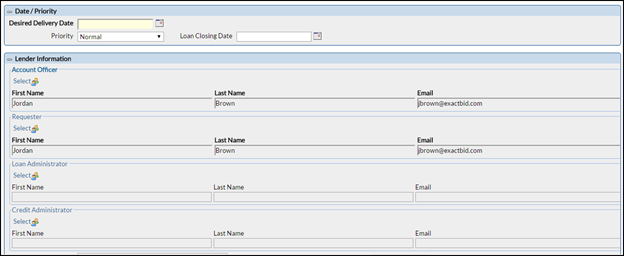
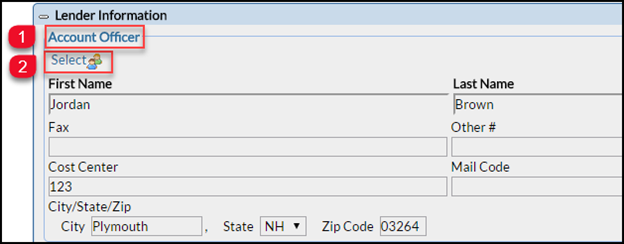
Note that on this page and all others, bolded and yellow fields are required. When saving a page and moving on to the next step in the process, if any required fields are missing data, a warning will appear. Begin with the Desired Delivery Date field data, which can be hand-entered or selected by clicking on the calendar icon and clicking a date. Next is Lender Information. The Account Officer fields will be auto-populated with your information. To change that information, (1) click on the blue Account Officer button, (2) followed by the Select button with the people icon next to it.
This will open a screen to search for an Account Officer.
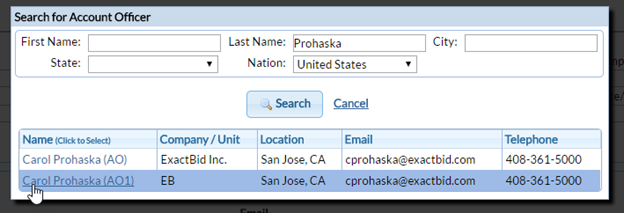
In the above example, Account Officers with the last name “Prohaska” were searched for, returning two results.
Click on the desired Account Officer and that individual’s information will be populated in the Account Officer fields.
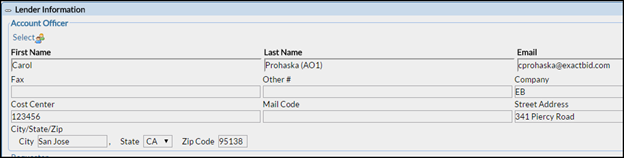
The same process can be followed for Requester, Loan Administrator, and Credit Administrator. The Lending Group, Branch Number, and Billing Cost Center fields should automatically populate based on the Account Officer chosen.
After making any changes to the above fields, proceed to the Transaction Information section. This section is for the Project itself. Enter a Project Name, borrower information, and loan information. Note that if the SBA Involvement menu is set to YES additional information will be required.
.png)
The next section is Property Information. Select the appropriate major Property Type, followed by the Property subtype. Then click Save and Continue. If all required fields have been filled out, the data will be saved and a new window will pop up.
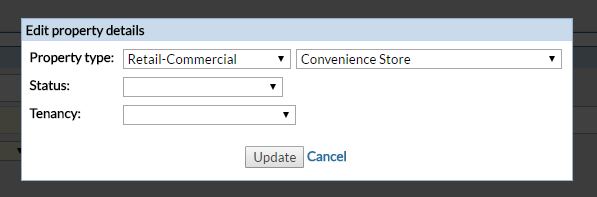
The selections made here will determine what fields are present on the next page. For example, if Land Only is selected, the next page won’t request information about the year the structure was built or when it was last renovated, as there is no structure. Click Update to proceed to the next page.
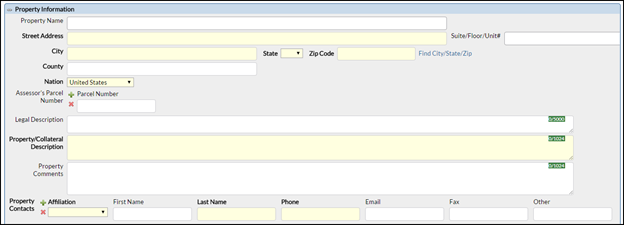
Begin by entering a Property Name, then the street address. Upon entering a partial address, a list of possible matches will display. Select the appropriate address.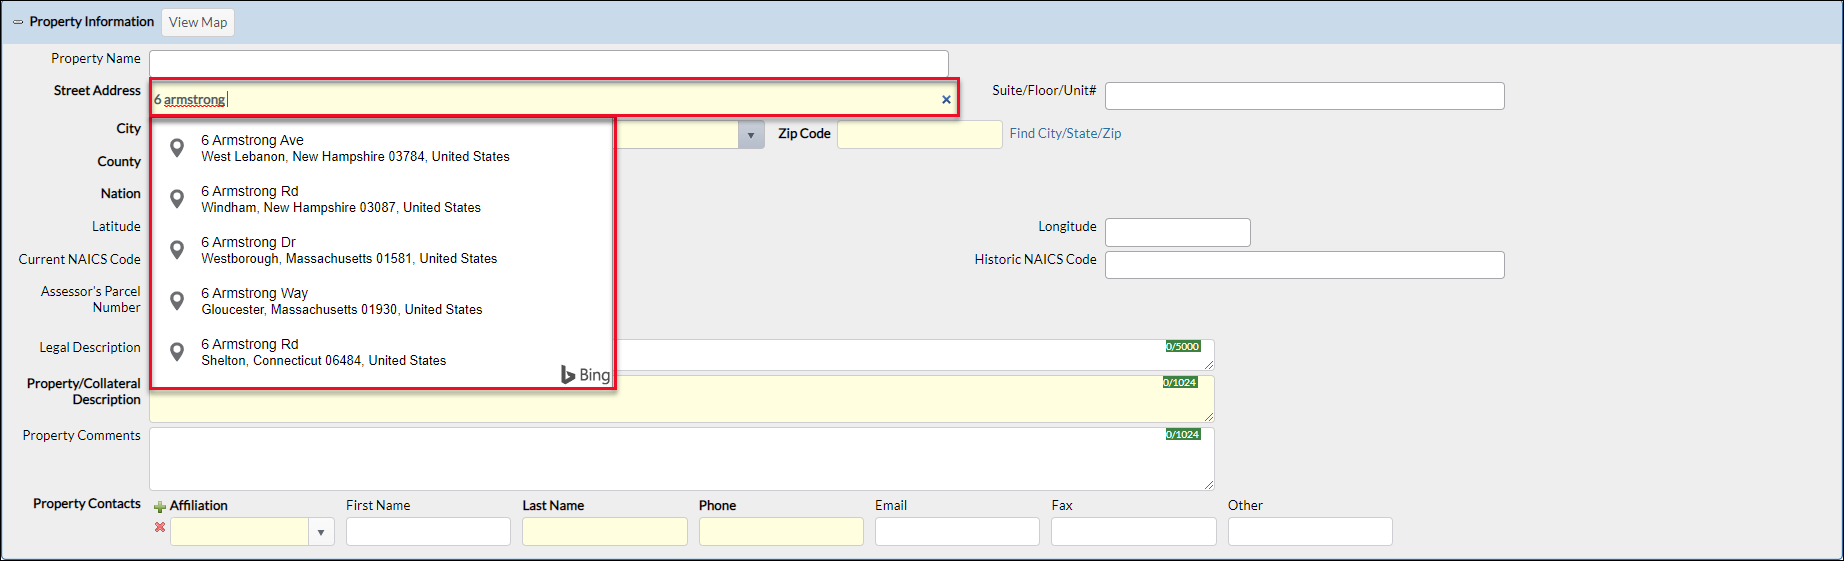
The address, city, state, county, nation and zip code fields will populate. There may be instances where there are multiple zip codes from which to choose.
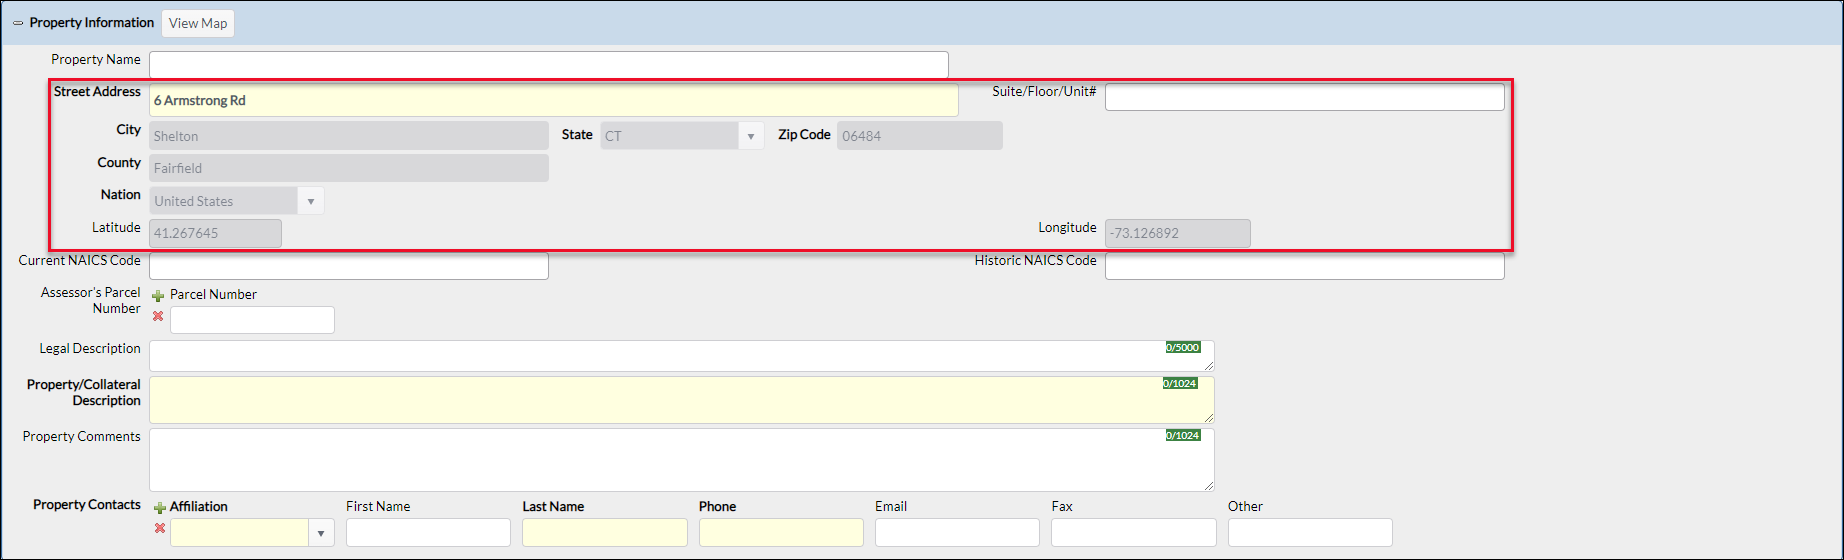 This address normalization feature not only saves time, but also helps eliminate typos and improve address matching.
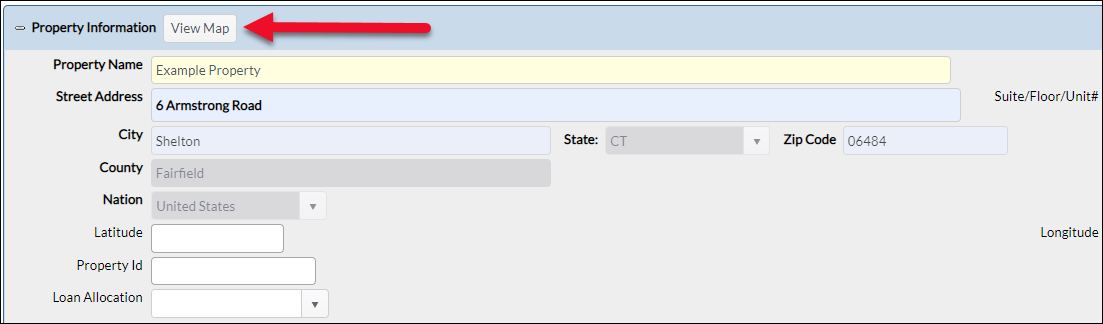
Click the View Map button to open a Google map of the property in a new browser tab. Note: If the address is not valid, it will use the latitude/longitude if filled out, otherwise the view Map button will not be displayed.
Enter the Assessor’s Parcel Number. Click the green plus icon to add another parcel number. The Property/Collateral Description and Property Contacts fields are both required. If the Property Contact is someone that is already in the system, the contact information will automatically populate. An additional Property Contact can be added by clicking on the green plus icon.
The next section is Additional Property Information.

This section contains the details of the Property. An important field that is sometimes misunderstood at first glance is Secondary Improvement Size. This is not a second building, but rather another way of evaluating the Property. For example, the Primary Improvement Size for an apartment building might be the number of units in the building. The Secondary Improvement Size could be the square footage of the entire complex.
If Yes is entered for Pending/Recent Sale, Listed for Sale, Proposed renovation or demolitions, or Is property subject to Ground Lease, additional information will be required.
Once all data has been entered, click Save and Continue at the bottom of the page. At this point, the Service Request is saved as a draft. If any required fields have not been filled out, they will be flagged with red text.
The next page is the final page in the Service Request creation process.
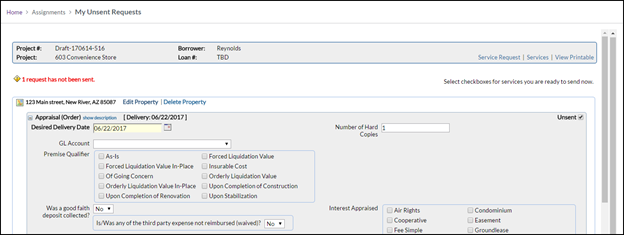 This page lists the service requested (Appraisal Order, in this example) and has some final questions, including the GL Account and Premise Qualifier. Note that if multiple qualifiers are chosen, it is often helpful to include notes. For example, if Upon Completion of Construction is selected, add an explanatory note, such as “waiting for driveway resurfacing.”
Once all the relevant information has been added, click Save Details to save the information to the database.
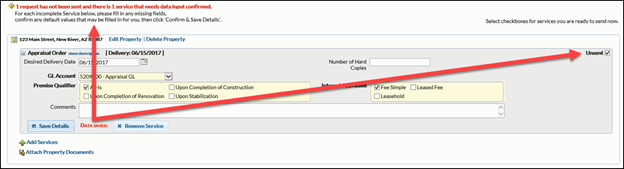
Once the Service Request details have been saved to the database, the Unsent checkbox in the upper right-hand corner will be checked, and the Send Selected Services button will be available.
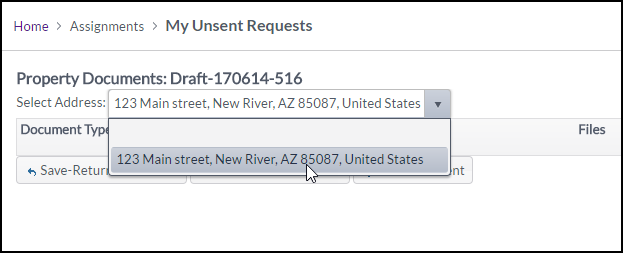
To attach documents to help the Appraisal Department get started, click on Attach Property Documents. If there is more than one Property associated with the Project, select the appropriate Property from the drop-down menu.
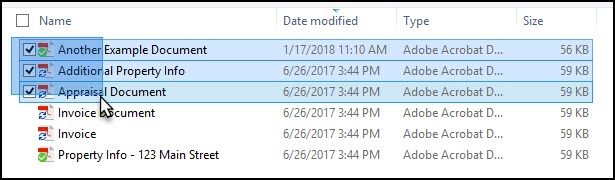
Click Add a Document, browse to your computer, and double-click on the desired document to upload and attach. To attach multiple documents at once, hold the ctrl key on the keyboard while clicking on the desired documents. This allows multiple documents, including documents that are not next to one another, to be selected.

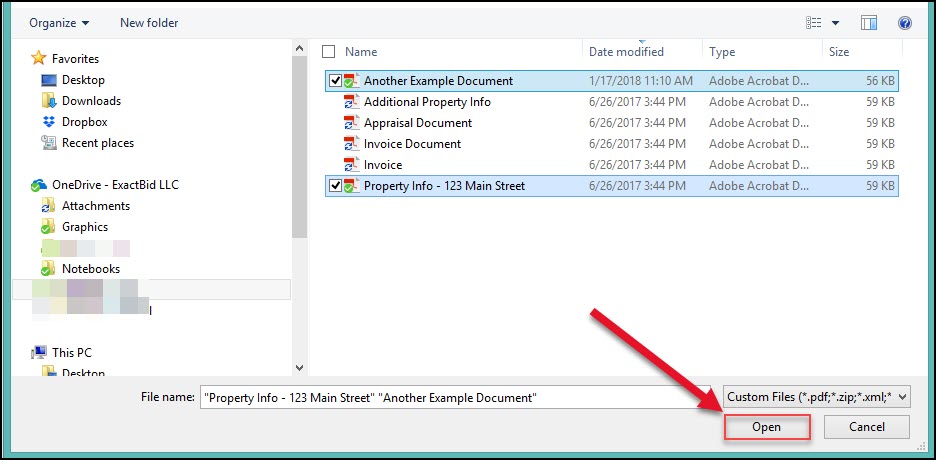
In this example, the "Additional Property Info" document and the "Property Info - 123 Main Street" file have been selected.
Multiple documents can also be selected by clicking and holding the left mouse button while dragging the cursor over the files to be selected. Release the left mouse button to select the highlighted files.
Once the desired documents have been selected, click the Open button to upload those documents to RIMS.
Once one or more documents have been uploaded, click on Document Type to see a drop-down list of labels for the document. The document label tells the Appraisal Department what type of document it is, such as Legal Description.

To apply the same Document Type to multiple documents, click on the Document Label drop-down menu at the top of the list of documents and select the desired label.
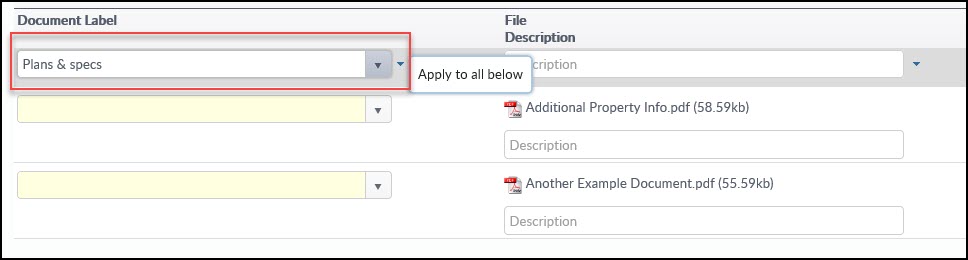
Click the small, blue arrow to the right of the drop-down menu to apply that Document Label to all documents below.

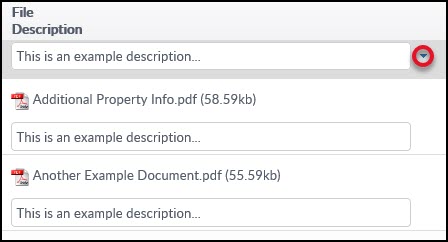
To apply the same File Description to multiple documents, enter the desired text in the File Description box at the top of the list of documents.

Click the small, blue arrow to the right of the text field to apply that File Description to all documents below.
Before saving the page, note the checkboxes to the right. If there is not an electronic copy of the document available to send, click the checkbox next to the method by which it will be sent.

Click Save in the lower right-hand corner. If required information is missing, an error message will appear in the upper right-hand corner.

If all required information is present, a confirmation message will appear in the upper right-hand corner, and the window will close.

Then click Save-Return to Services in the bottom left-hand corner, which will save the information and close the Property Documents window, re-opening the New Service Request page.
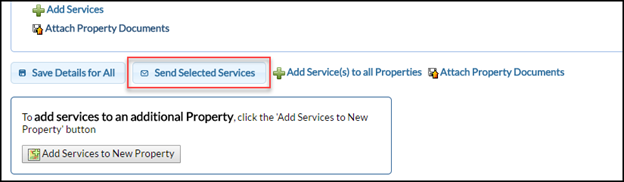
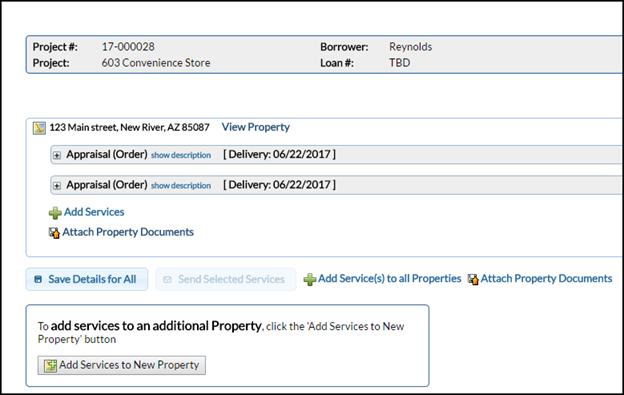
To associate more than one Property with the loan, click on Add Services to New Property in the lower left-hand corner.

This will open the menu to select a service.

Select the desired service, then click Next. The process for adding a new Property will be identical to that of adding the original Property, with the exception that much of the information will be prepopulated when adding the second Property.
Enter the information for the new Property. As was the case with the original Property, if any required fields are missing, they will be flagged. Once all information has been entered, click Save and Continue to save the Property and return to the New Service Request page. Both Properties will be listed on the page.
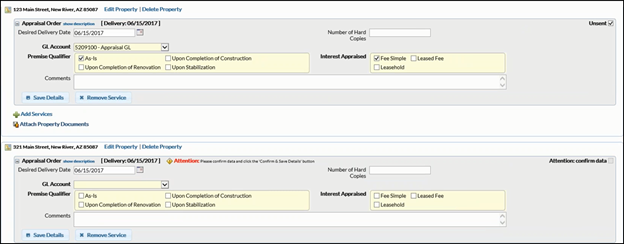
Fill in the missing information for the new Property, including GL Account, Premise Qualifier, and Interest Appraised. Once that information has been entered, click Save Details in the bottom left-hand corner. As with the original Property, the message stating “Attention: confirm data” will change to “Unsent.”

Once all data has been entered and the details have been saved for each Property, click Send Selected Services to send the Service Request Forms to the Appraisal Department.
Viewing Sent Requests
To see all your recently sent Service Requests, click on the Service Request button in the upper left-hand corner of the screen, then click Last Sent Requests in the drop-down menu.
This lists your recently sent Service Requests, arranged in descending order of creation date.

Click on a Project Number to open the Service Request page for that SRF.

Viewing Unsent Requests
To see Service Requests you’ve started, but have not yet sent, click on the Service Request button in the upper left-hand corner of the screen, then click List My Unsent Requests in the drop-down menu.

If there’s a draft number in the Project Number column, that means the SRF has not yet been sent to the Appraisal Department. Items with a Project Number have been sent to the Appraisal Department, but have had something added and have not yet been re-sent.

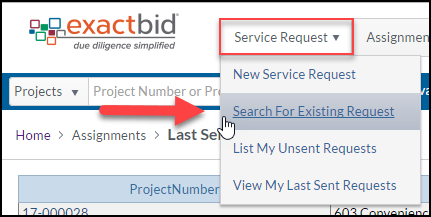
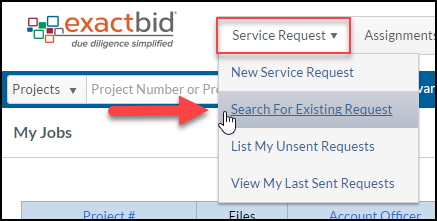
Search Requests from All Account Officers
To search Service Requests sent by all Account Officers, click the Service Request button in the upper left-hand corner of the screen, then click the Search For Existing Request button.
This screen provides a number of search criteria, such as Project Number, Loan Number, Account Officer, etc. Note that multiple filters can be used concurrently. For example, the following search will return results where Account Officer has the last name Prohaska, and the state is Arizona.

Once all criteria have been selected, click the Search button.
Note that Draft Project and Inactive Projects will not be included in the search results by default. To include them, click the checkboxes in the lower left-hand corner of the screen.

Was this article helpful?