- Print
- DarkLight
- PDF
Send Docs/Reg B (workflow)
- Print
- DarkLight
- PDF
The Send Docs tool can be used to email documents from within the RIMS system. Instructions for enabling and configuring Send Docs can be found here (Content Administrators only).
There are two methods for using the Send Docs tool:
- Job Attachments Process
- Internal Task Process
Job Attachments Process
On the Project Console page, click on the Job Attachments button in Job Summary section..png)
Click on the checkboxes next to the document(s) that should be sent. You may select up to three documents, then click Batch Send Docs.
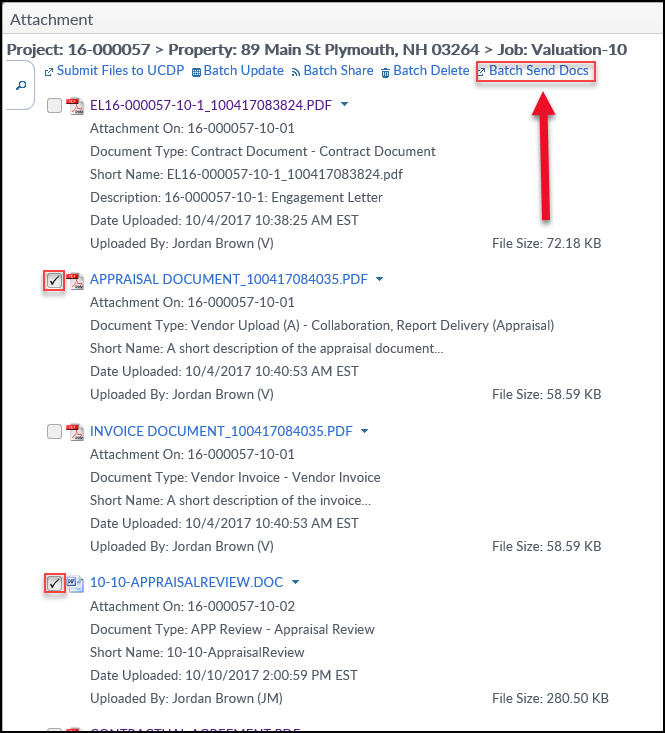
On the next screen, enter the email addresses of the desired recipients. Fill out the body of the message.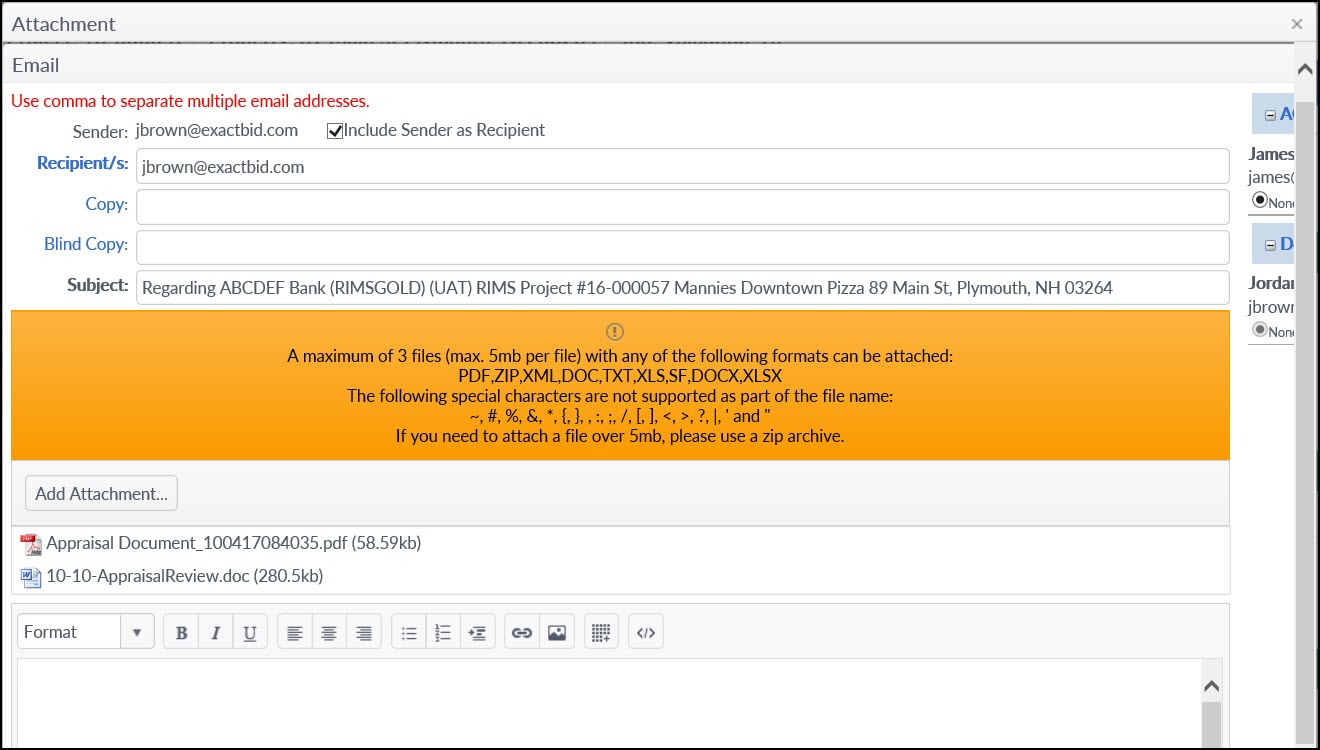
Additional files can be added by clicking the Add Attachment button. However, note that there are restrictions on the number and size of file attachments, as well as the formats accepted. The specific restrictions vary among client sites.
Once the message is complete, click on Preview/Send in the bottom right-hand corner of the screen.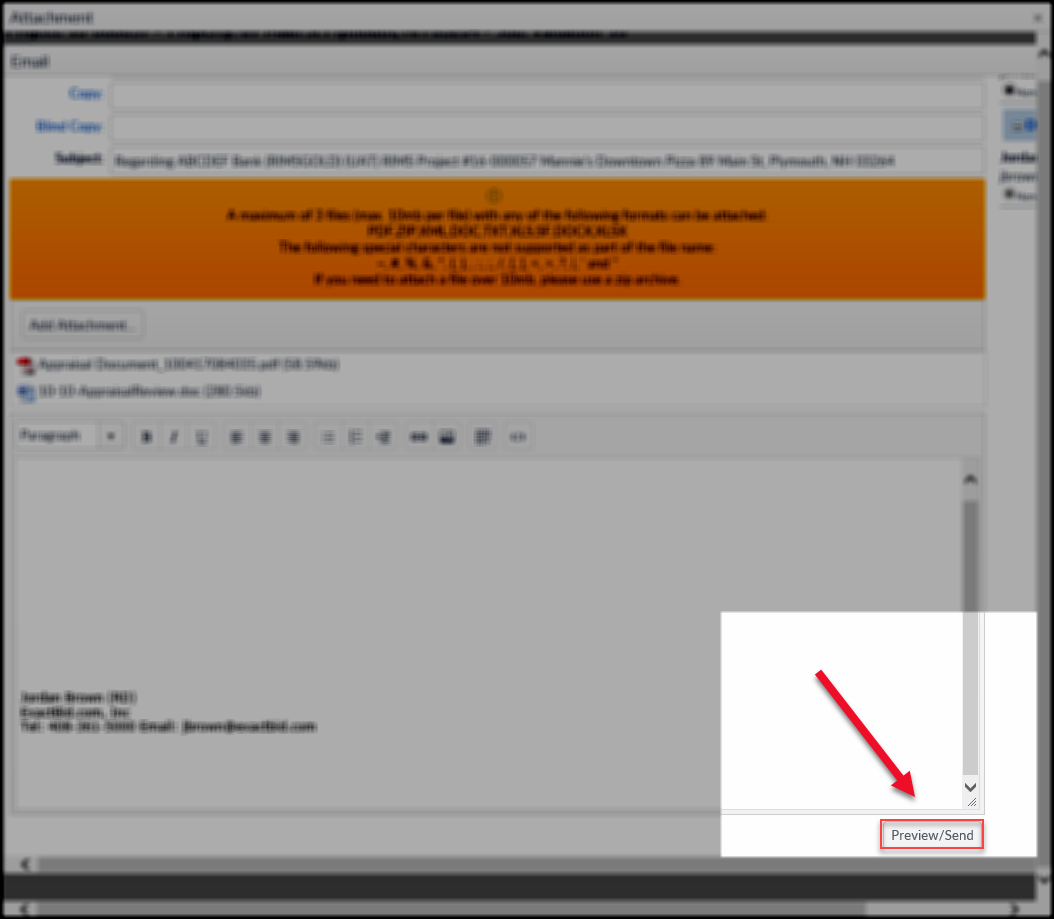
A preview of the email will load, with the addressees and attachments listed at the top. 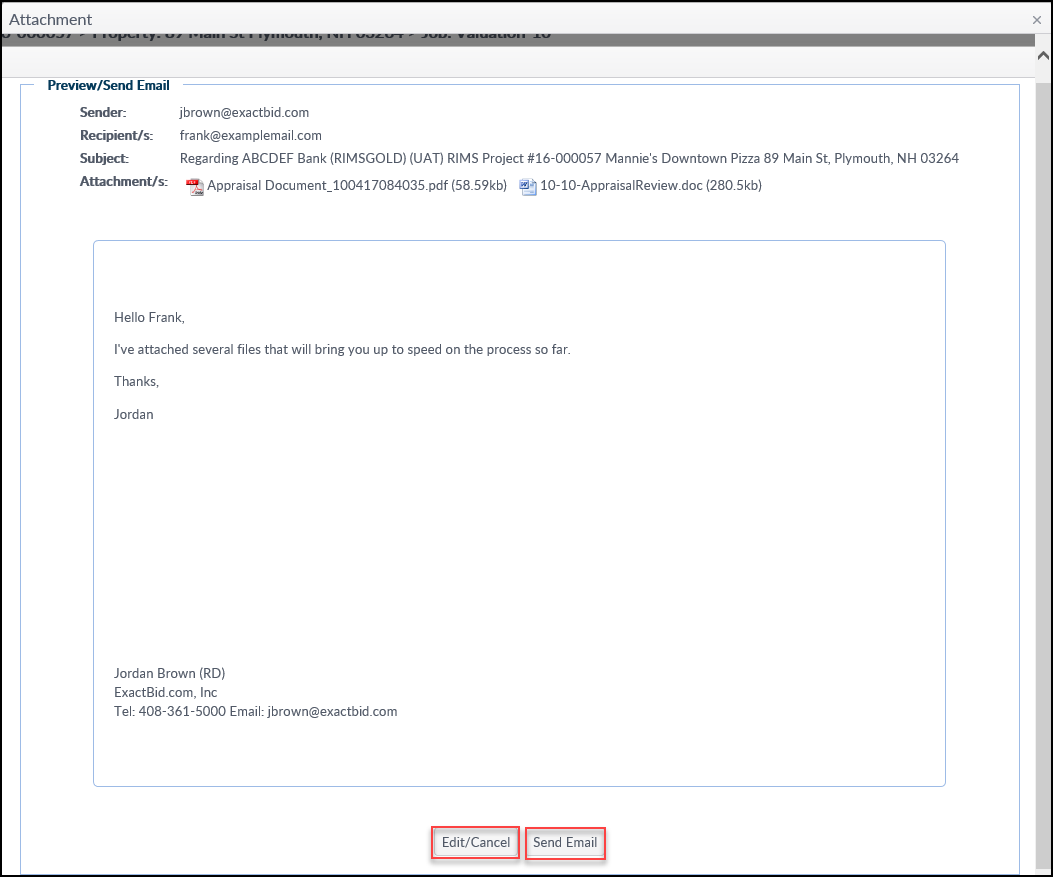
Click the Edit/Cancel button to close the preview and return to the previous screen to make edits.
Click the Send Email button to send the email.
The email and attachments will be sent to the recipients. The screen will reload and a new button will appear at the bottom: Send Another Email. Click the Send Another Email button to start the email process over again. Or, click the X in the upper right-hand corner of the screen to close the window.
Internal Task Process
The Send Docs feature can also be used to meet Reg B requirements. Once enabled by the RIMS Support team and configured by a Content Administrator, a new Internal Task will become available.
If the Job requires the Reg B Task and it hasn't been created, click on the Add Task button on the Job Summary navigation bar.
The Task Type is Internal. The Task Code is REG B - REG B. Note that the Start Date and Due Date fields are also required.
Once all desired information has been entered, click the Save button at the bottom of the modal.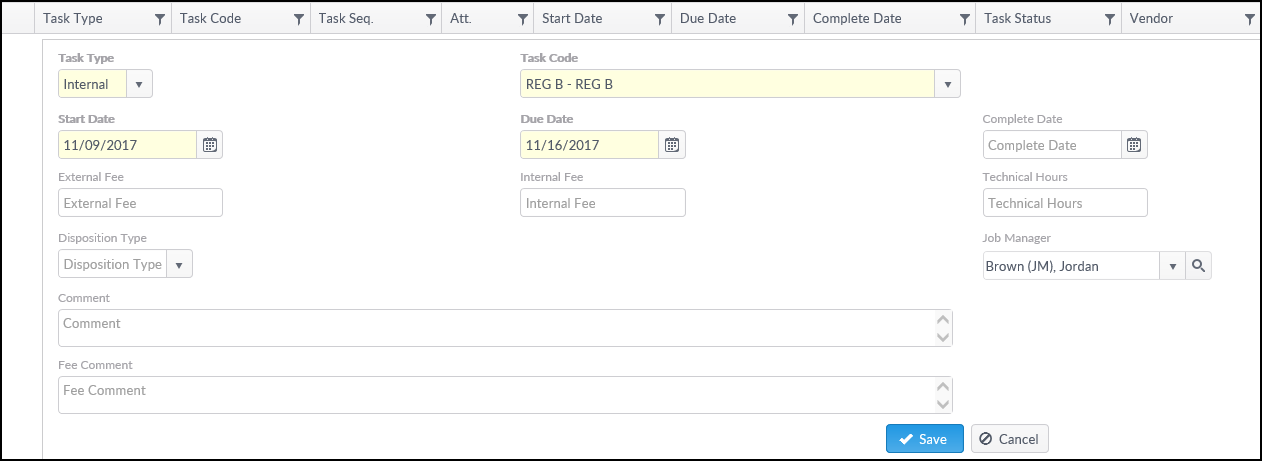
A confirmation message will appear in the upper right-hand corner of the screen.
A new Internal Task will be added to the currently-selected Job.

Click on the Send Docs button.
The Attachments modal will open. Click the checkboxes next to the documents you wish to send to the Borrower. Once one or more files have been selected, additional buttons will appear at the top of the modal. Click Batch Send Docs.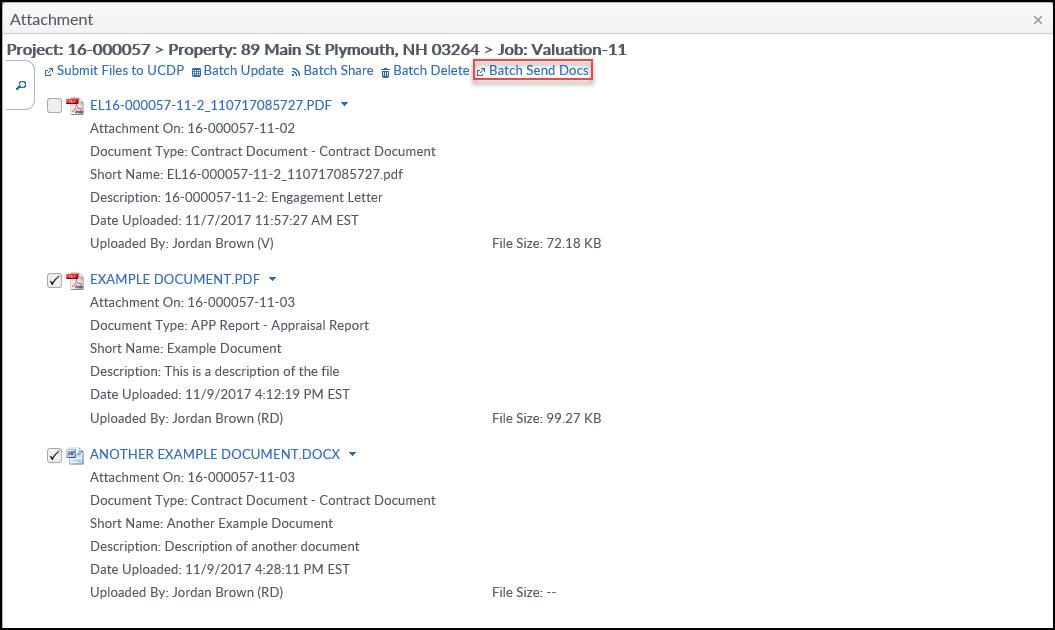
The email screen will open. Enter the Borrower's email address in the Recipient/s field. Note that in some cases, depending on your institution's settings, this field may be pre-populated with the Borrower's email address.
Enter any other recipients and complete the body of the email. Note that additional documents can be attached at this step by clicking the Add Attachment button.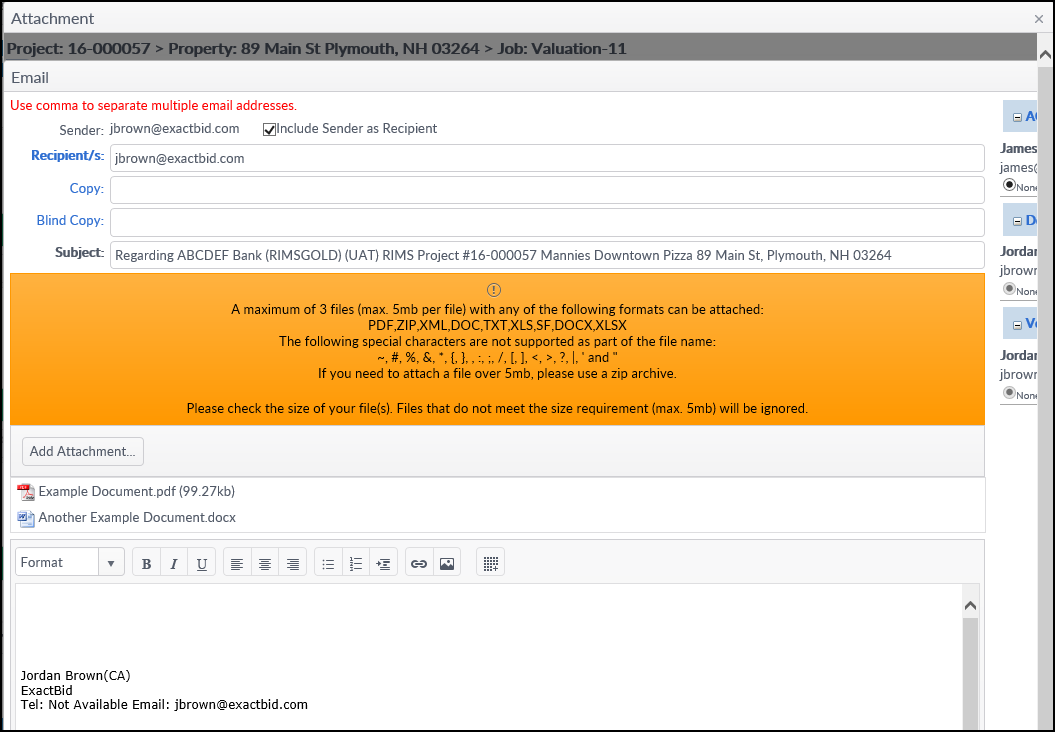
Once the message is complete, click on Preview/Send in the bottom right-hand corner of the screen..png)
A preview of the email will load, with the addressees and attachments listed at the top.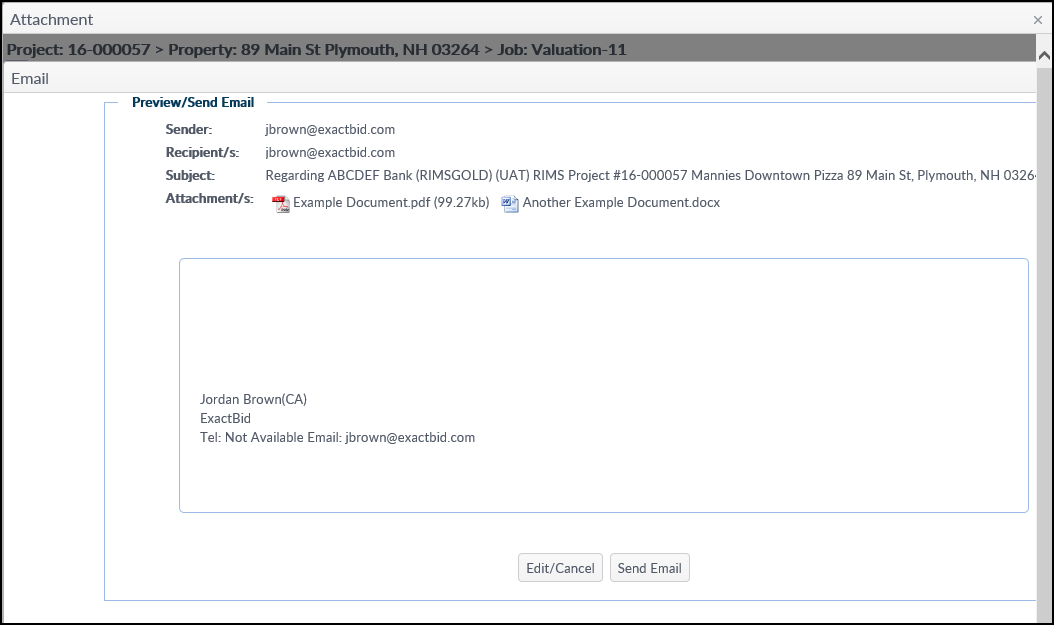
Click the Edit/Cancel button to close the preview and return to the previous screen to make edits.
Click the Send Email button to send the email. The email and attachments will be sent to the recipients. The screen will reload and a new button will appear at the bottom: Send Another Email. Click the Send Another Email button to start the email process over again. Or, click the X in the upper right-hand corner of the screen to close the window.
Logs
Regardless of which of the two processes is used to email the document, once they have been sent, it will be logged in two locations: the Job Change Log and Job Notification Log.
Change Log:
Notification Log:.png)
.png)
