- Print
- DarkLight
- PDF
RFP Manager
- Print
- DarkLight
- PDF
Click on the right-pointing arrow or the row to expand the Task, then click on the RFP Manager button to open the RFP Manager window..png)
There are four phases for the RFP Manager:
- State One: Creating and Sending RFP
- State Two: After RFP has been Sent
- State Three: Award Made
- State Four: Award Cancelled
As you proceed through this process, the Task Status will reflect the current state of the Task.
.png)
In the example above, the Task Status is Not Started
State One: Creating and Sending RFP
Task Status - Not Started
When opening the RFP Manager for the first time, there are buttons for creating an RFP. In some cases, there will be more than one RFP template. Click on the appropriate template to proceed..png)
Fill out the RFP fields, noting that any with bolded titles are required..png)
Once all appropriate values have been entered, click on the Save RFP button at the bottom of the screen. If any required fields have not yet been filled out, an “Incomplete Entry” will pop up. If all required data has been entered, a popup will request confirmation. Clicking Yes will create the RFP. The RFP Manager screen will reload with new buttons at the top.
Task Status - RFP-Draft.png)
a. View Service Request: View the initial Service Request.
b. View RFP: Click to view the RFP. To print a copy of the RFP, click on the printer icon in the upper right-hand corner of the screen. The Property information can also be edited by clicking the View/Edit Property button in the upper right-hand corner of the screen..png)
To select the Vendors who will receive the RFP, click the Select/Edit Recipients button..png)
This will open the RFP Recipients screen..png)
One or more Pre-Selected Vendors will be displayed in the search results. These can be hidden by unchecking the Show Pre-Selected Vendors box. Note that Pre-Selected Vendors are based on the creation of a Vendor Service Area. Not all sites have this setup.
Qualification Status – The Qualification Status is derived from the Vendor user profile. Qualified-Active is selected by default. Clicking the Qualification Status link will open a list of statuses. Multiple statuses can be selected by holding Ctrl while clicking.
Appraiser Specialty – The Appraiser Specialty is derived from the Vendor user profile; the default selection will be based on the Property type. Click on the dropdown menu to change the Appraiser Specialty selection. Click the blank/NULL value to include all specialties.
Certified Vendors Only – This is derived from the Vendor’s RIMSCentral certification information.
Clicking on a Vendor’s name will open the Vendor Performance screen, which reveals the Vendor’s Performance, Vendor Performance Comments, and Vendor Certifications. Note that the first box lists the Vendor's details, such as address and rating..png)
Work In Progress is sorted in ascending order by due date; Work Completed is sorted by Complete Date.
The Vendor Performance Comments screen lists any comments that have been created about the Vendor..png)
The Vendor Certifications screen lists the states in which the Vendor is certified..png)
The RFP Recipients screen also offers numerous search criteria categories, including Vendor Service Area, Other Criteria, Concentric Search, and Vendor Information..png)
In this example, the Vendor Service Area section has been expanded, with Service Area expanded below that.
Click on the checkboxes for any of the sections to reveal search criteria sub-categories underneath. Note that multiple search criteria can be used concurrently to produce a highly-targeted list of Vendors.
All columns can be resorted in ascending/descending order by clicking on the column name..png)
Click the checkbox next to the name of all desired recipients in the search results, then click the Select button in the bottom right-hand corner to proceed. Note that all Vendors in the search results can be selected by clicking the Vendor Name checkbox.
On the following screen, verify the list of Vendors who will receive the RFP, then click Send RFP. Note that it's possible to go back and select additional recipients by clicking on the Select/Edit Recipients button. Any Vendors that have already been selected will be retained.
Task Status - RFP 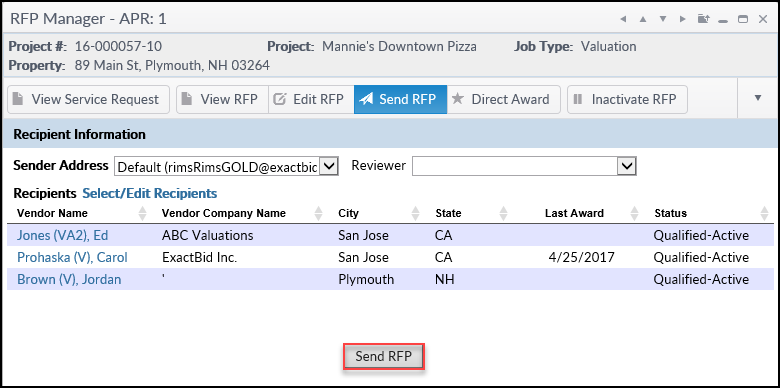
State Two: After RFP has been Sent
Once the RFP has been sent, the View Bids screen will be displayed. This screen lists the Vendors to whom the RFP was sent, along with details about each, such as their rating (field from Vendor profile), fees, and any Bids received..png)
Once Bids have been received, Awards and Direct Awards can be made from this screen.
Task Status - RFP (Bids).png)
Note that there are two ways to leave comments..png)
a. If a Vendor has left a comment, it will appear in their row ("I'm familiar with this property," in the example above). The Account Officer cannot see these comments. To pass along a comment to the AO about a specific vendor, click the JM link and enter the comment. It will now be visible to the AO when Bids are submitted for authorization. Putting a comment on a particular Vendor's bid will not reveal who the Vendor is; they will be identified with a number..png)
b. To leave comments about the collection of bids as a whole, use the Overall Comments box.
To send a request for Bid authorization, click the checkbox next to the names of the desired Vendors, then click the Send for Authorization button. The button will change to say “Please wait…” and a popup will confirm that the request was sent. Click OK. Note that not all sites have the Bid authorization functionality activated.
Task Status - RFP (Notified).png)
When the Bid has been authorized by the Account Officer, the row will change to orange.
Task Status - RFP (Authorized).png)
To make an Award, click on the Award button next to the desired Vendor.
.png)
The Award Information page will open, pre-populated with the Fee, Delivery Date and Award Comments. It will also list any Vendor Reference documents, which can be attached to provide additional information for the Vendor.
Make any desired edits, then click the Award Bid button. Note that any of the Award fields can still be edited at this point in the process..png)
The Engagement Letter Templates window will open if there is more than one Engagement Letter Template. Select the desired template from the list and then click Select. Note that not all Job types have an Engagement Letter Template..png)
Task Status - Contract Pending
A notification will confirm that the Award has been made. The Vendor will receive an email notifying them of the Award.
Task Status - Contracted (once the Vendor has accepted the reward)
An Award can also be made to a Vendor who has not made a Bid, either to a Vendor on the recipient list, or one not in the list. Click on the Direct Award button in a Vendor’s row to award that Vendor. Note that the Direct Award link is only available if the Vendor has not submitted a Bid..png)
Fill out the relevant information, then click Direct Award..png)
If any required information is missing, a notification will pop up. Additionally, the Delivery Date field is validated, so if the delivery is before the contract date, a notification will pop up and require that the date be adjusted.
A version of this screen can also be reached by clicking on the Direct Award button in the menu bar above..png)
The screen will appear identical to the Direct Award screen above, with the addition of a Recipient Information section at the bottom.
Click the Select/Edit Recipients button, which will open the RFP Recipients screen..png)
Conduct a search, and then select the Vendor to send the Direct Award to by clicking on the checkbox next to that Vendor’s name. Click the Select button in the lower right-hand corner of the screen.
The RFP Manager screen will open again. The Recipient Information section will now be populated with the data of the chosen Vendor..png)
Click Direct Award. If all the required information has been entered, a list of Engagement Letter templates will appear; click on the desired template and then click Select..png)
RFPs can also be inactivated and cancelled. Click the Inactivate RFP button on the navigation bar to inactivate an RFP that’s been sent.
A popup will request confirmation.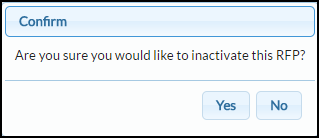
The RFP will not be deleted, but it will no longer appear as open for bidding in RIMSCentral. Once an RFP has been inactivated, a new button titled Activate RFP will appear in the navigation bar. Click this to open a popup window that will request confirmation. Click Yes to reactivate the RFP.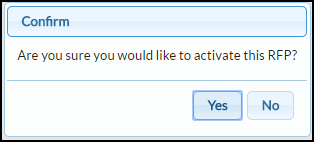
Click Cancel RFP on the navigation bar to cancel the RFP entirely.
To email the Vendors who received the RFP, click on View/Email RFP Recipients in the top navigation.
The View/Email Recipients window will open. Note: User can send up to 3 files (max 1 MB each) if the information needs to be available to the Vendors during the bidding process.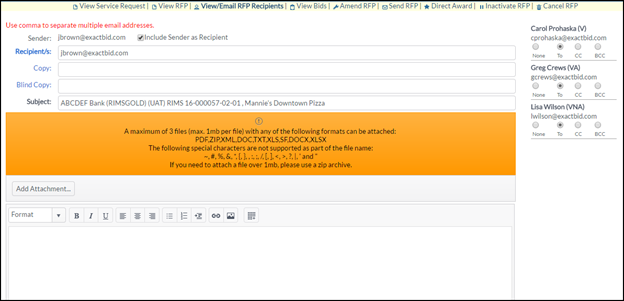
To change the RFP, click the Amend RFP button on the top navigation bar.
The RFP Manager window will open. The RFP is open for editing.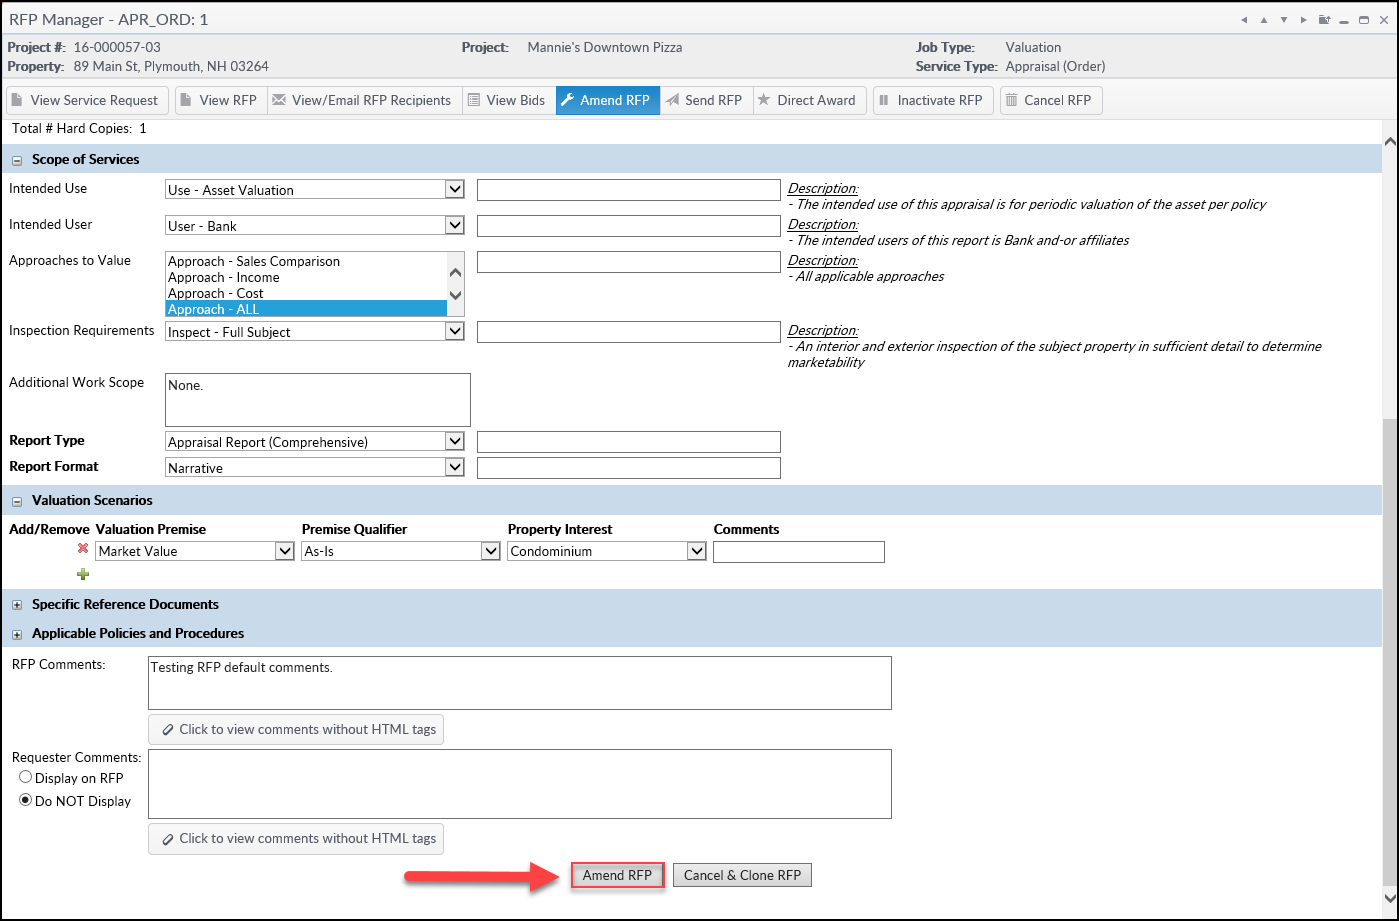
Once the desired changes have been made, click Amend RFP or Cancel & Clone RFP. Amend RFP sends a notice to the original list of recipients that the RFP has been amended, while Cancel and Clone sends a notice to the original list of recipients that the RFP has been cancelled. Note that the latter option also clears the list of recipients and allows for selecting a new list.
State Three: Award Made
Once a Vendor has been awarded, the navigation bar will update once again; several buttons will disappear, and the View Award button will appear. Click the button to open the Award Information screen.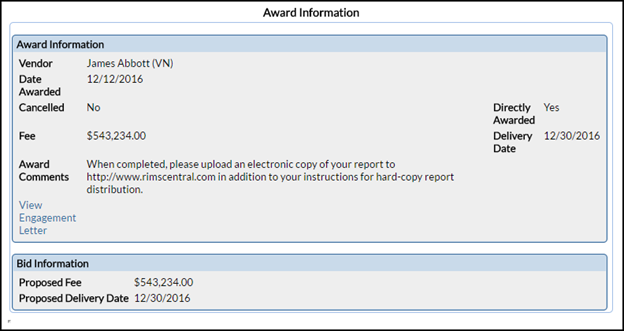
State Four: Cancel Award
If an External Task has been contracted to a Vendor and the assignment needs to be cancelled, either due to rejection of the Award from the Vendor or at the discretion of the lender, it can be accomplished using one of the two following methods.
Option One: Cancelling the Award via RFP Manager
When work has not been performed on the assignment, the original Vendor can be disassociated with the Task so that it can be awarded to a different Vendor.
1. Open the Project Console page for the assignment in question, navigate to the Task row, expand the External Task for which the Award cancellation is necessary, and select RFP Manager..png)
2. Once in the RFP Manager, click “Cancel Award.”
3. The Task will revert to the status it was in before the Award was made: RFP, RFP (bids), RFP(authorized).
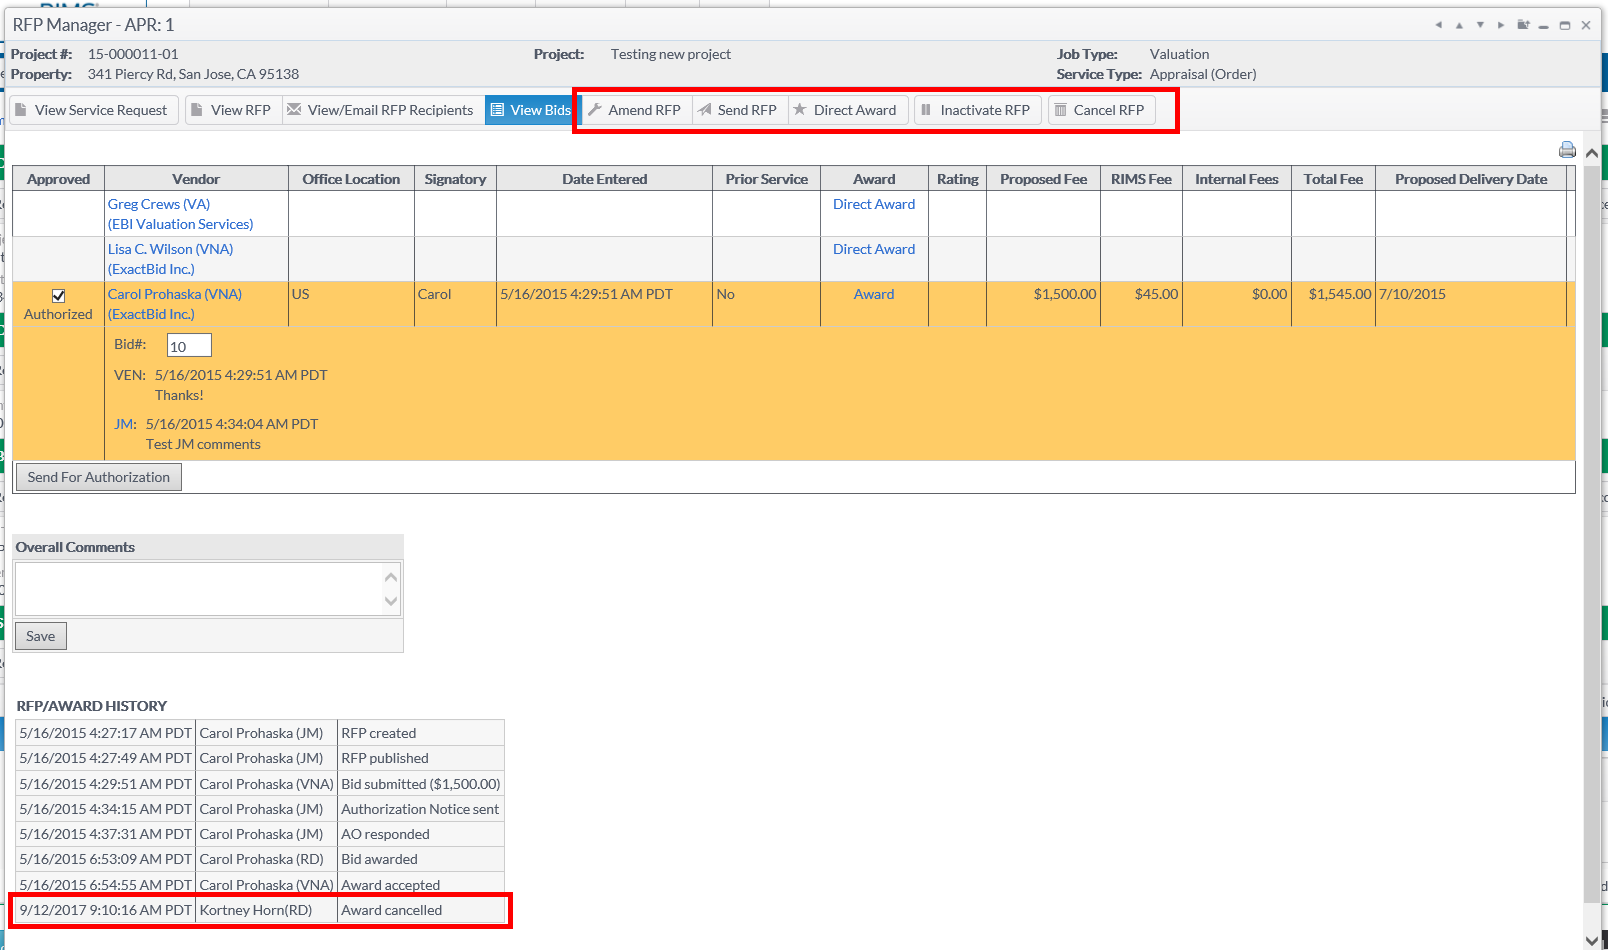
After cancelling the Award, the RFP can be amended, inactivated, or cancelled. It can also be re-awarded as-is. All of the changes a user made to an RFP, whether through Amend or Cancel/Clone, will be stored on the RFP/Award history within the RFP Manager, as well as in the Job Change Log.
a. Inactivate RFP removes the RFP from the Vendors bidding opportunities in RIMSCentral so they cannot view it or change any data. All of the information remains in place within RIMS, allowing the Job Manager to re-activate the RFP at a later date without losing anything.
b. Cancel RFP deletes all information and forces the Job Manager to re-start the RFP.
c. Amend RFP allows the user to change the Scope Items within the RFP, but not the Recipients. This action notifies all original RFP Recipients/Bidders that the RFP has been amended so they can resubmit a Bid.
d. Cancel and Clone RFP (found within the Amend RFP option) allows the user to edit both the Scope items and the Recipients. This action notifies the newly selected RFP Recipients/Bidders via email of an amended RFP, so they can place another Bid. The JM also has the option to Direct Award to a specific Vendor using the previously-entered Bid information. When Cancel & Clone is selected, the RFP will go back to an RFP-Draft Status, so items and/or Recipients can be edited. The Vendors originally selected are not stored; they will need to be re-selected.
Option Two: Cancelling the Task with the Vendor still contracted
This option is appropriate when the Vendor has performed work on the Assignment and needs to stay associated with it, particularly if the Vendor is still owed payment. The Vendor stays linked to the Task and it cannot be re-assigned to any other Vendor.
1. Open the Project Console page for the assignment in question, navigate to the Task row, expand the External Task that needs to be cancelled, and click Edit Task.
Change the Disposition type to Cancelled.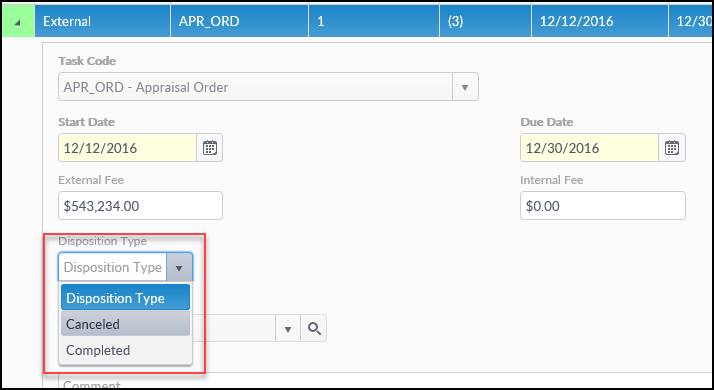
a. If payment is to be made to the Vendor, leave the External Fee in place.
b. If no payment is to be made to the Vendor, remove the External Fee.
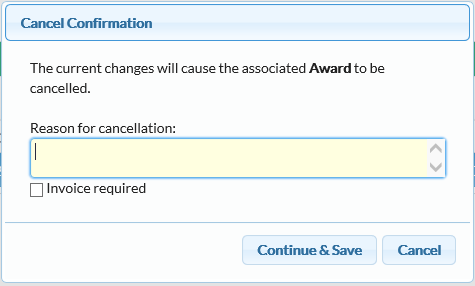
2. Once the Task has been edited, click Save. A popup will appear, requiring the user enter a cancellation reason and check a box if "Invoice required.” Only check the box if the Vendor is still owed payment.
3. The Task is now cancelled. It will appear within the Vendor’s performance record on their user profile and in Reporting.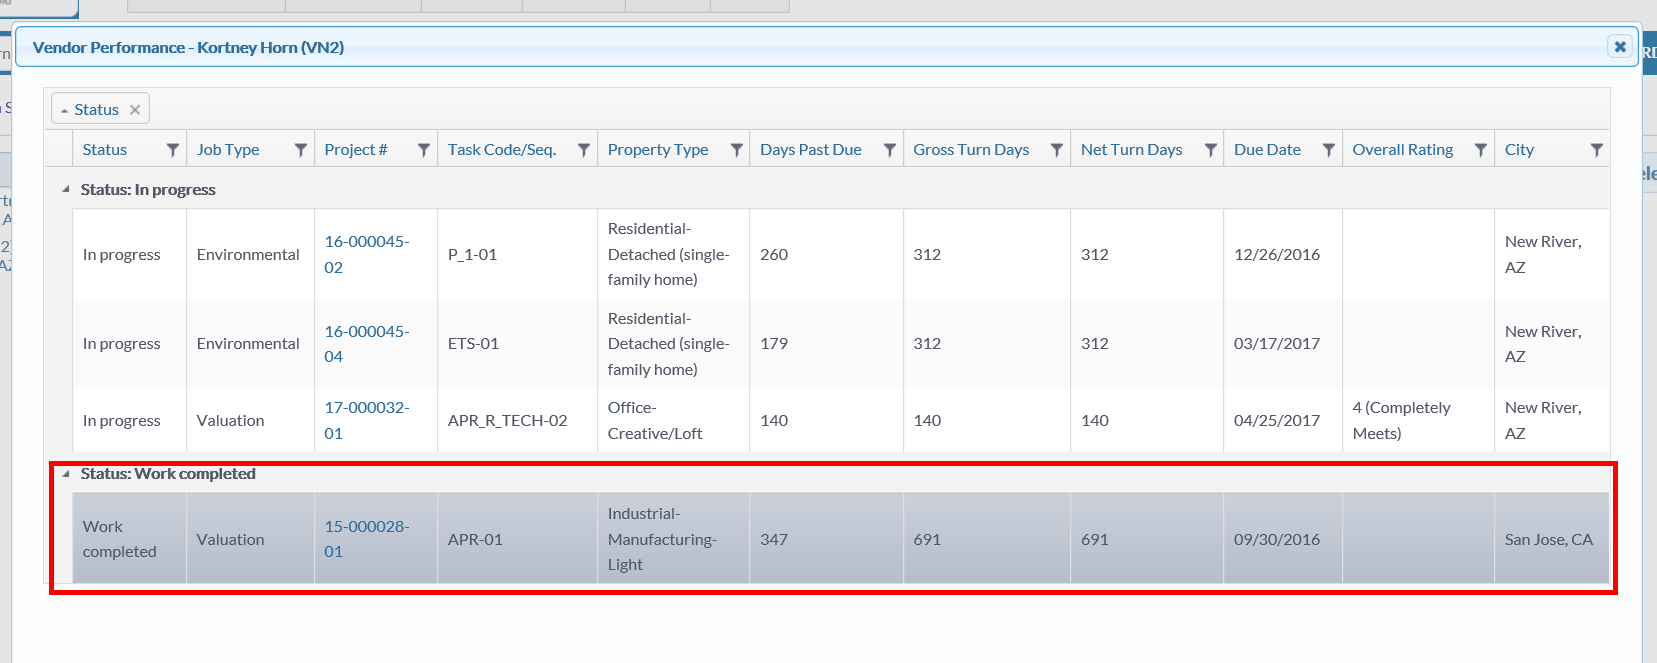
4. If the work still needs to be re-assigned, create a new Task and go through the typical Task-assignment process.
.png)
