- Print
- DarkLight
- PDF
Paying Vendor Invoices
- Print
- DarkLight
- PDF
Once the Tasks have been closed the status of the External Task changes to Unpaid.
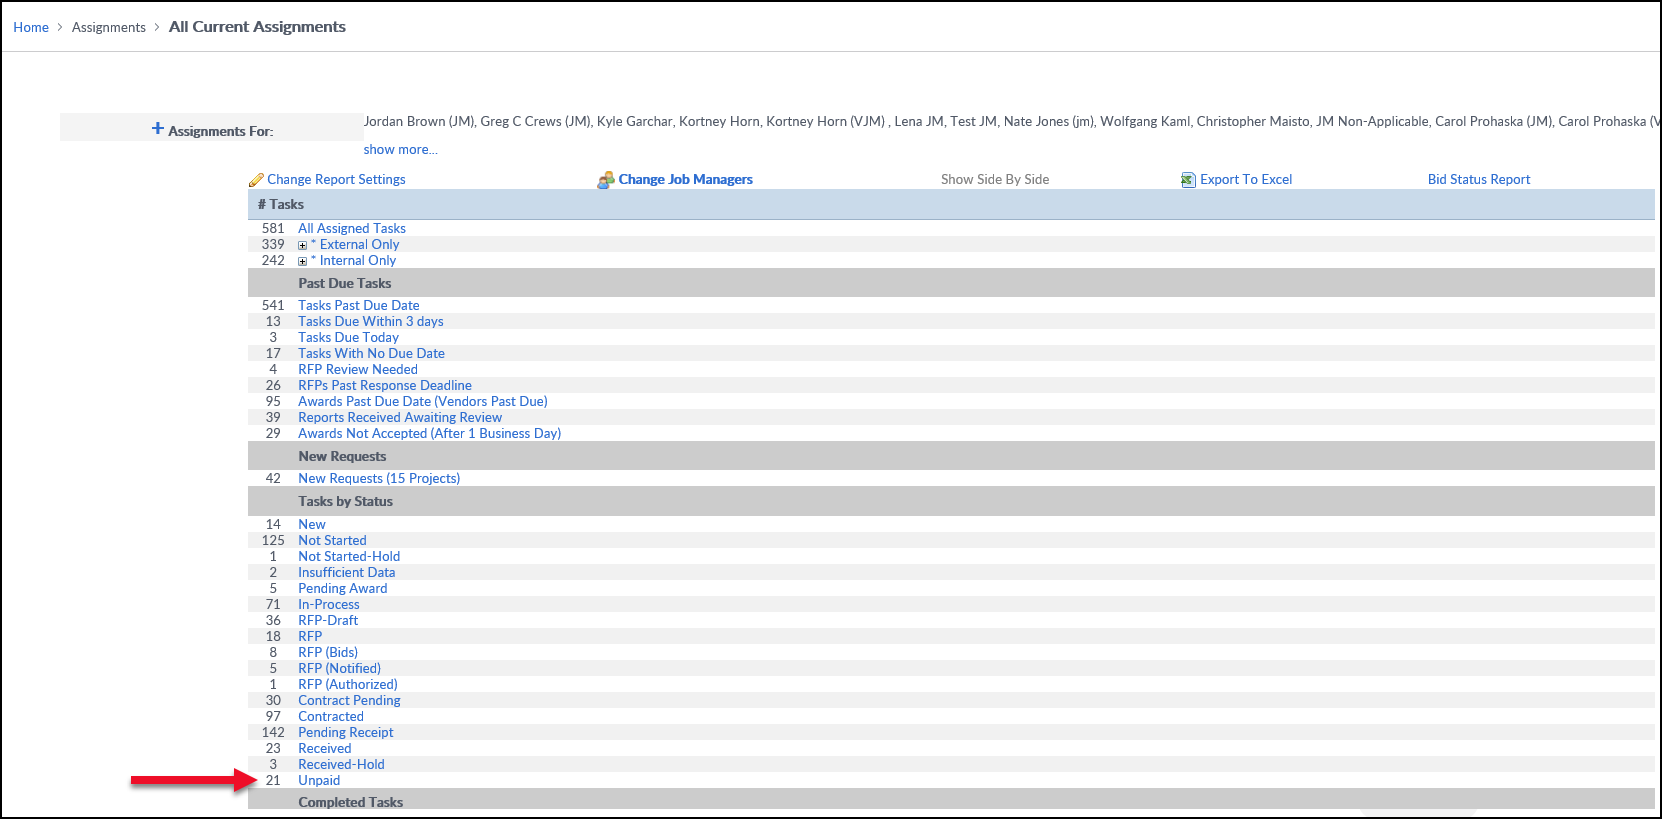
The Job Manager can also find this - and all other - unpaid Invoices by navigating to All Current Assignments and clicking on Unpaid.

All Tasks with an unpaid Invoice will be listed.

There are two methods for paying the Invoice:
- Click the Pay Invoice button to make a one-off payment to the Vendor
- Click the Vendor Invoices button to use the Batch Invoice feature (for those institutions that have this feature enabled)

Pay Invoice
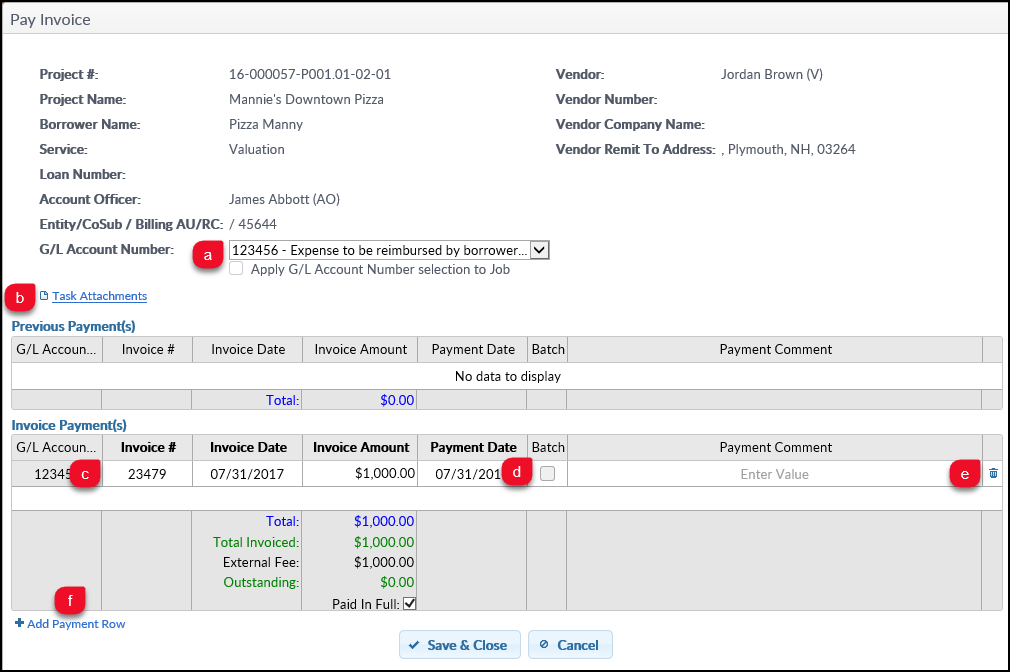
Click on the Pay Invoice button to open the Pay Invoice modal.
This page lists the history of payments made for the current service. It also allows the user to record Invoice payments.
- G/L Account Number: This will default to the Select the appropriate G/L Account from the dropdown.
- Task Attachments: Opens the Task Attachments modal to access the Invoice.
- Payment Fields: The Invoice #, Invoice Date, Invoice Amount and Payment Date fields are required.
- Batch: Checking Batch sends to Vendor Invoice for approval, making it available for Batch payment. Note that this option is not available on every site.
- Payment Comment: Comments can optionally be added to the payment. This displays on the Vendor Invoice page before batch is committed or on the Pay Invoice screen.
- Add Payment Row: Click to add a new payment entry.
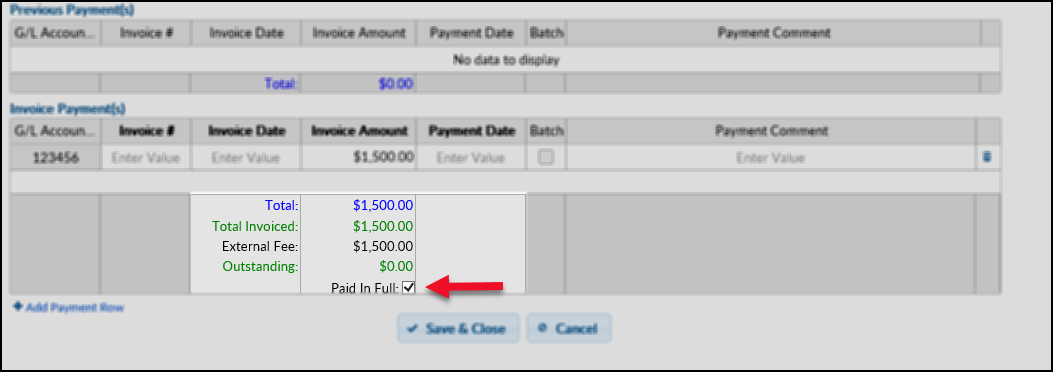
Fill in any missing values. When the Invoice Amount has been entered and it matches the External Fee amount, a Paid in Full checkbox will be filled.
The Task Status will now change to Closed. To reference the Invoice details in the future, click on the Pay Invoice button on the Project Console page..png)
This process simply verifies that the Job Manager has received the appropriate signatures and presented the Invoice to Accounting for processing.
Vendor Invoices
For institutions using the Batch Invoice feature, click on the Vendor Invoices button to open the Vendor Invoices window.
Depending on site configuration, there may be other fields.
Note that the visibility of this feature, and the fields included, are based on the User's permission level.

The Vendor Invoices window lists all Invoices associated with the Task. Payments which have not yet been processed will have the option to Approve under the Action column. Click Approve to approve a payment.

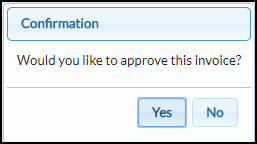
A popup will request confirmation.

Click Yes to approve the invoice. The status of the invoice will now change to Approved for Payment, and the user who approved the payment will be recorded.

This will send the Invoice to the Batch Invoice tool.
.png)
