Insufficient Data
- Print
- DarkLight
- PDF
Insufficient Data
- Print
- DarkLight
- PDF
Article summary
Did you find this summary helpful?
Thank you for your feedback!
If the information the Account Office (AO) provided is insufficient, the Job Manager responds with an Insufficient Data notice.
While logged in as the assigned Job Manager: On the Project Console page, scroll down to the Task lacking data. Click on the arrow next to the Task to expand it, then click the Insufficient Data button.

The Insufficient Data window opens.
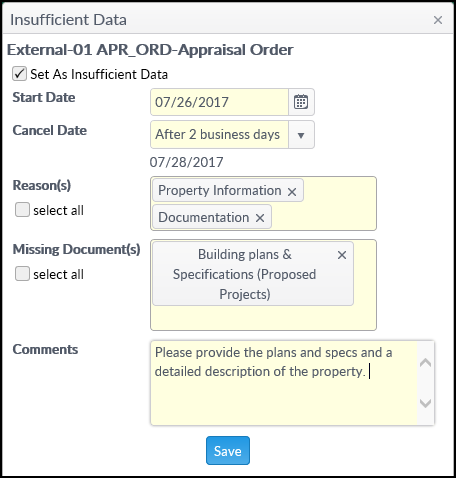
- Start Date - The date on which the Task was marked as having Insufficient Data. This defaults to the current date.
- Cancel Date - If the Account Officer has not responded by the Cancel Date, the Job is cancelled.
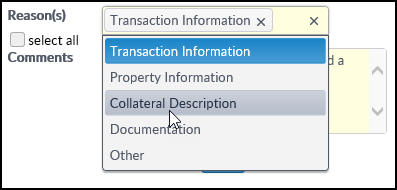
- Reasons - Click to select one or more Reasons, or click the Select All button to add all Reasons.
- Documentation - If Documentation is selected in Reasons, a new Missing Document(s) menu appears. Click to select one or more Missing Documents
from the list, or click the Select All button to add all Documents.
- Comments - Add Comments to further explain to the Account Officer what information is lacking.
Click Save to send an Insufficient Data notice to the Account Officer. That notice will also be logged under the Notification Log in the Job section of the Project Console.

While logged in as the Account Officer who created the SRF: Upon logging into the RIMS site, an Insufficient Data notice will be at the top of the My Jobs list. Jobs with an Insufficient Data Status will always automatically sort to the top of the My Jobs list.
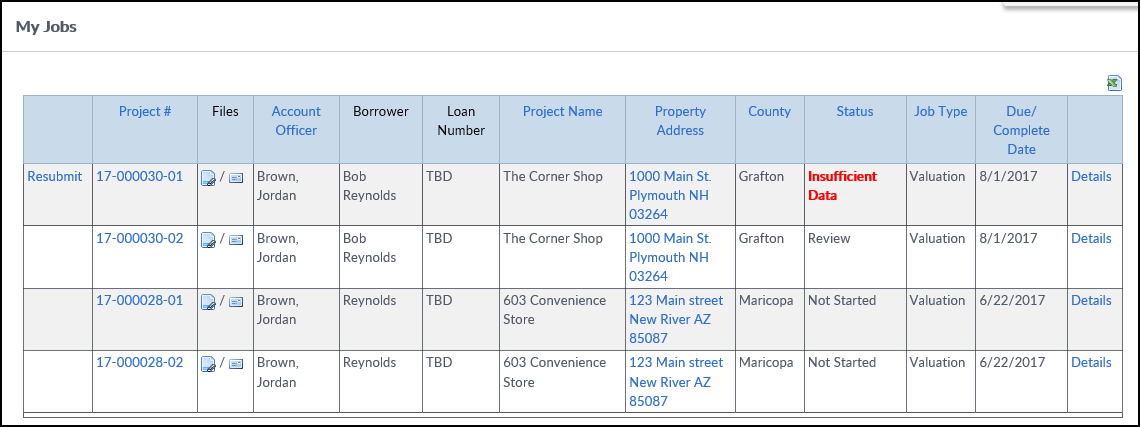
Click the Insufficient Data button to view the details of the JM's Insufficient Data notification.
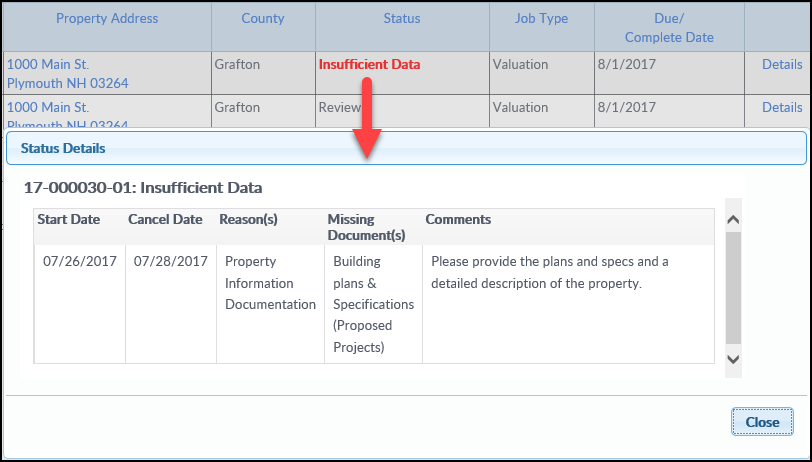
Once it's clear what information is missing, click the Close button on the Status Details window. On the My Jobs screen, click the Resubmit button next to the Job marked as having Insufficient Data.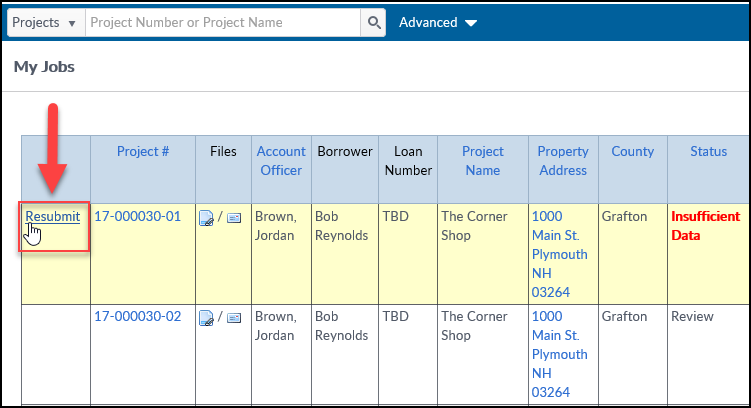
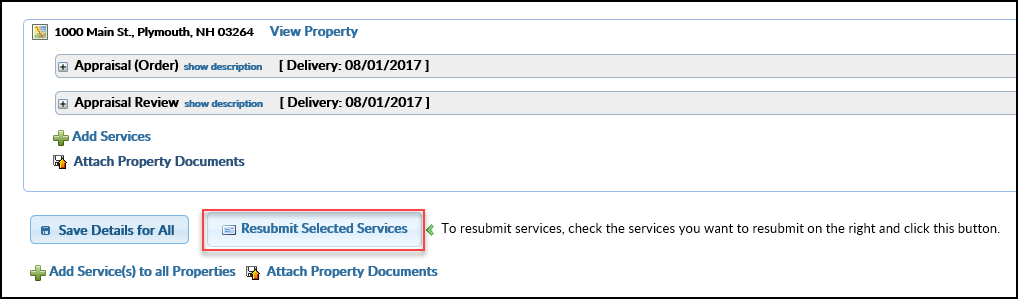
This will open the SRF. Normally, once an SRF has been sent to the JM it is un-editable. However, when resubmitting a Job marked as having Insufficient Data, the SRF becomes editable.
Make any changes requested, such as adding additional documents, then click Resubmit Selected Services. Note: If the Resubmit Selected Services button is grayed out, click Save Details for All. Then the Resubmit Selected Services button should be clickable.
Once the Resubmit Selected Services button has been clicked, the Job Manager is notified. He/she can continue where they left off, reviewing the Task(s). If data is still missing, the Job Manager can mark as Insufficient Data again, repeating the process above.
On the Account Officer's Jobs screen, the Job's Status automatically changes back to Not Started. Note that when the Job is no longer marked as Insufficient Data, it won't automatically sort to the top of the list anymore.
Was this article helpful?