- Print
- DarkLight
- PDF
Engagement Ltr & Invoice Templates
- Print
- DarkLight
- PDF
Create or maintain your Engagement Letter and Invoice templates by selecting Engagement Letter and Invoice Management from the System Settings page.
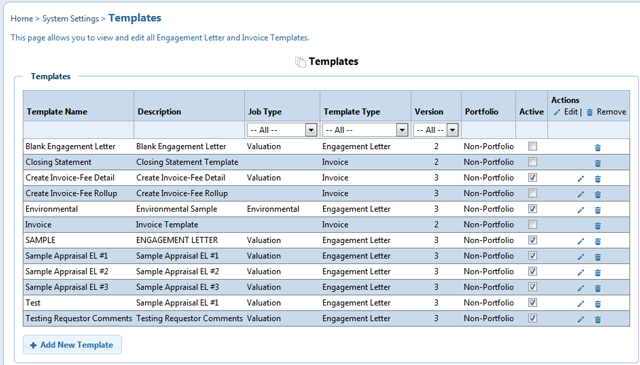
The initial page display will include any existing Engagement Letter or Invoice templates created for your environment. Editable templates will show a value of '3' or higher in the Version column.
The listing allows you to filter content by Job Type, Template Type and Version; one or more filters may be applied to narrow the results displayed.
For each listed editable record, you may edit template content, and mark the template Active / Inactive; you may also remove any template if no longer needed.
Add / Edit Template
Click the edit icon in the Actions column to edit an existing template, or click the Add New Template link in the lower left corner of the listing to add a completely new template.
Template Settings
Name and define your template type using the five elements in the Template Settings section. The 'Portfolio' option is available only for Engagement Letters. Each template requires a unique Name, Description and Template Type selection; in addition, some content in the Body of the template is required before saving.
Page Layout
Select your template margins or use the default values; these values will determine the basic layout of the generated document.
Headers
Add one or more headers including available graphic (logo) images. You may not have two headers on the same page - page selection is required when adding a Header element.
Body
Letter or invoice content, including both static and dynamic content; extensive formatting controls allow for very specific letter and invoice generation.
Footers
One or more footers may be added; like the Headers element, only one footer may appear on a page, although you can have different footer elements on specified pages.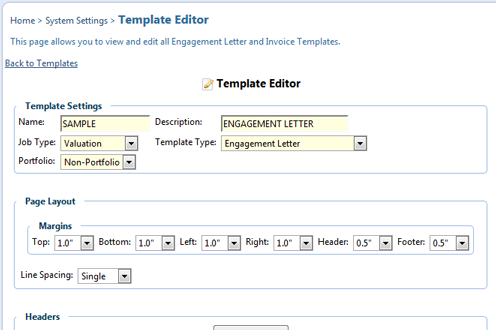
Edit Content
When editing each section of a template, the toolbar shown below is available to format the content; hover over any tool to display the tool tip description. The template content is based on HTML, so tables are used to provide structure and control of your content placement.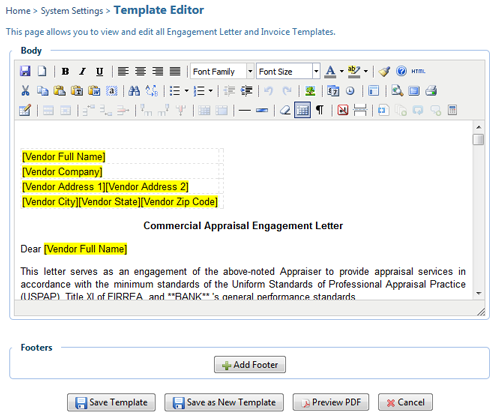
The yellow shaded fields displayed in a template are 'Smart Fields' - essentially RIMS content to be inserted at the time the letter or invoice is generated. Click the Smart Fields icon on the third row of the tools ribbon to insert a smart field at your current cursor location. There are two types of smart fields; Data and Function.
Smart Fields - Data: The Data listing is all available RIMS data fields that can be inserted into the engagement letter or invoice. Place your cursor in the field and begin typing to quickly find the data element to insert. Data elements may have special formatting options once selected to control appearance or add conditional elements (if not null for example).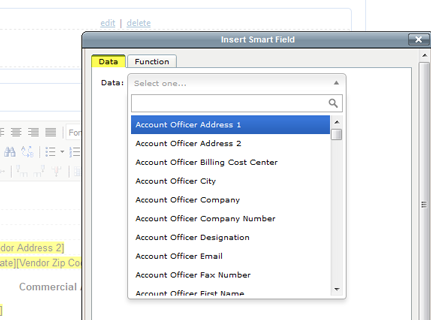
Smart Fields - Function: The Function listing includes those elements composed of (potentially) multiple members, like 'Valuation Scenarios', 'Addressees', 'Distribution', 'Scope of Work', and other similar items where there may be a set of data containing multiple values of the same type.
Various options will be available for each data set, including labels and formatting to match the data set to be included.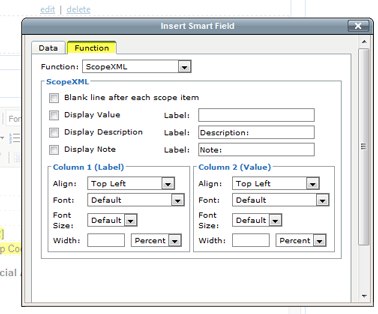
Predefined Template Content: For Invoice templates only at present - there is a predefined invoice template available by selecting the Predefined Template Content icon on the second row of the tools ribbon. You can view the selected template or template section and insert the entire contents at your present cursor position by selecting the 'Insert' button. Once inserted, you can modify the layout and content to meet your specific needs.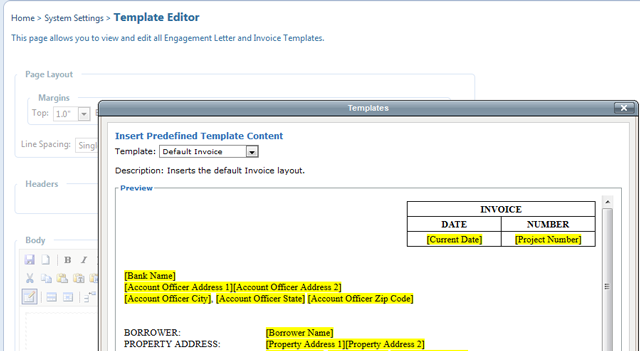
.png)
