- Print
- DarkLight
- PDF
Editing the Property Level of a Template
- Print
- DarkLight
- PDF
Every Service Request must have a Property. To configure the Property fields, start by clicking the Edit button in the Property Filters column of the Service Request Templates page.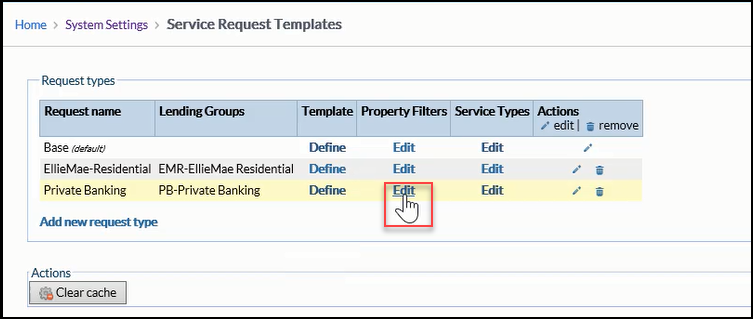
The Property Filters screen will open, listing the Default Property Filter, as well as any User-created Property Filters. The Default Property Filter will call out anything not covered on other Property Filters.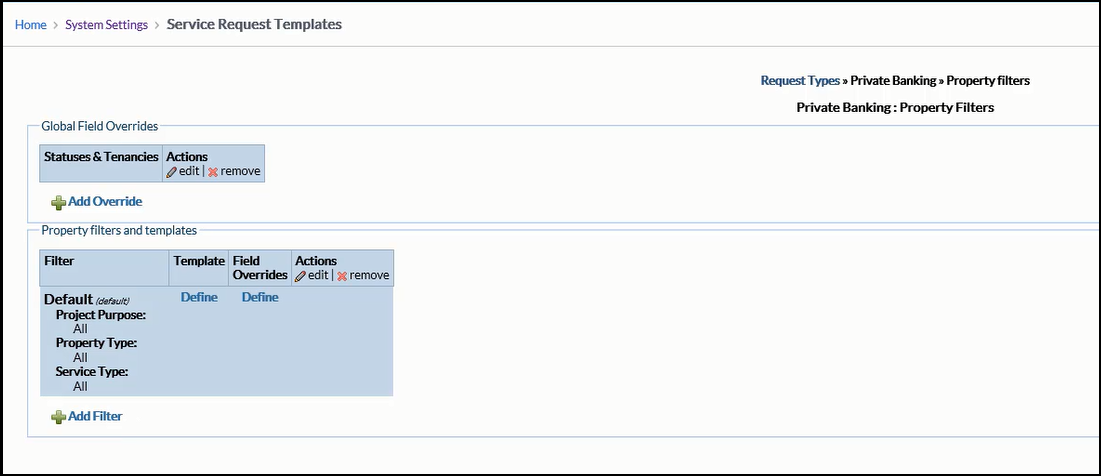
Click Define in the Templates column to edit a Property Filter.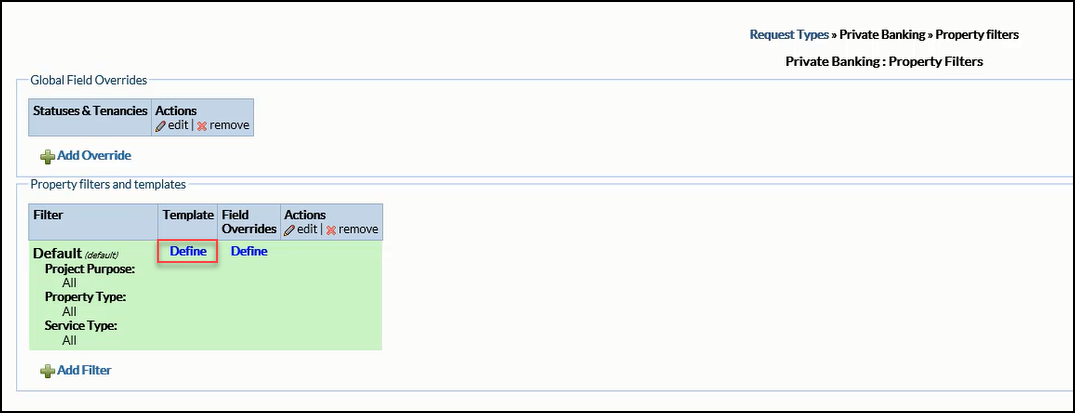
In the example above, the Template button for the Default Property Filter is highlighted.
The Property Filter page will open. The fields on this page are configured in the same way as the Transaction Level of the Template, allowing the User to define what will be displayed, what will be required, and what will be optional.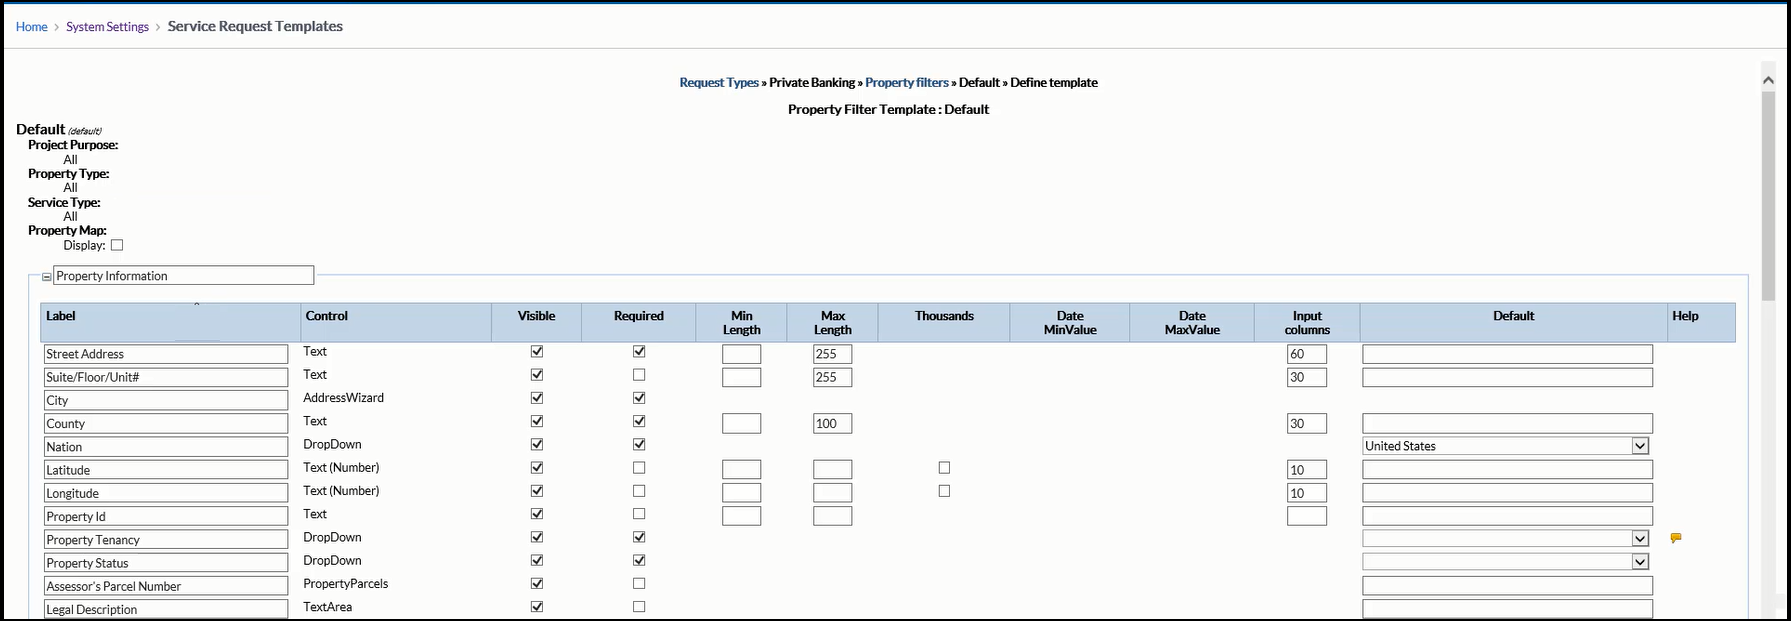
The Default should cover most situations. To cover other scenarios, such as Residential or a particular Property type, click Add Filter.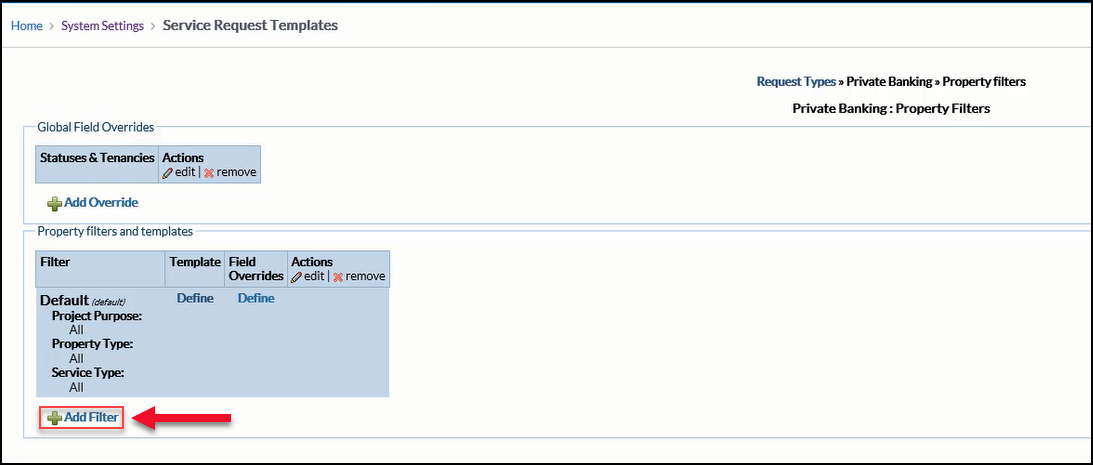
Enter a Name. The Filter can be based on Project Purpose, Property Types, or Services.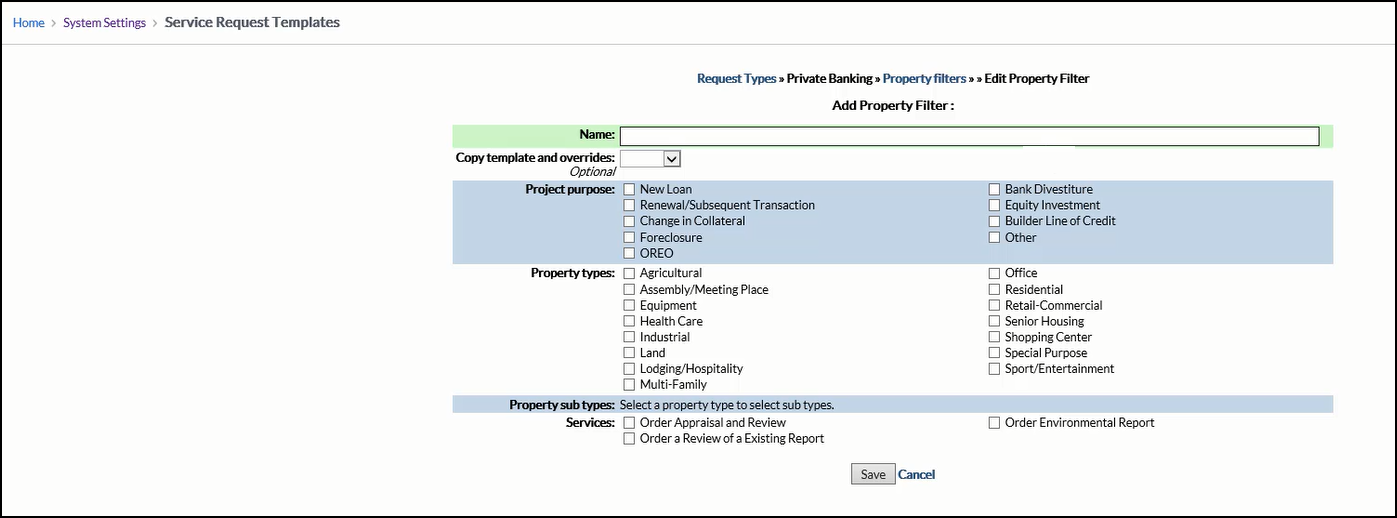
When a Property Type is selected, all of the relevant Property Sub Types will appear below.
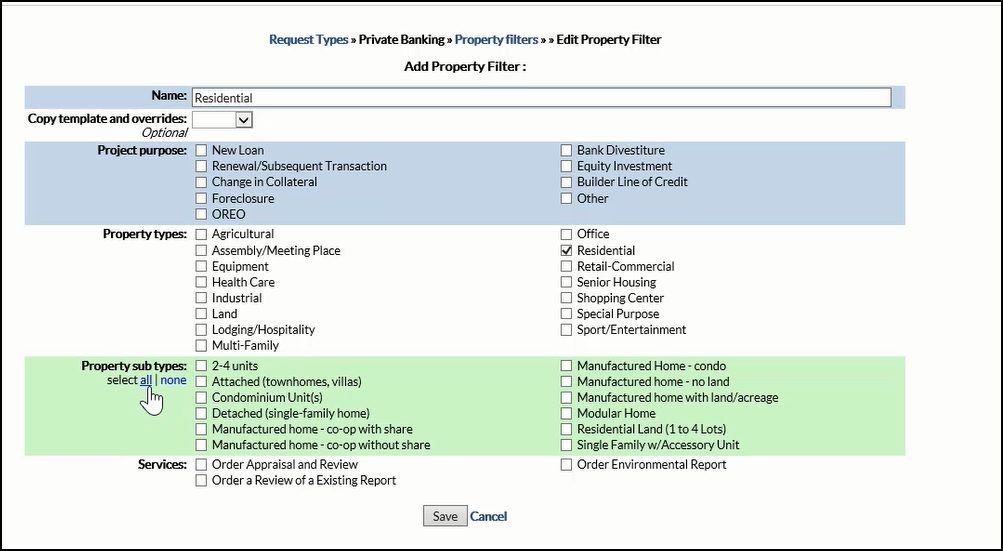
In this example, Residential was selected in the Property types section, exposing all of the possible Residential sub types.
Click All to select all of the Property sub types. Once all desired selections have been made, click Save.
Now there are two Property Filters: a Residential filter and one for everything else (Default).
To define the fields that appear, click Define in the Template column of the Property Filter.
The Property Template page works the same as the other Template pages. For more information about working with these Templates, refer to the instructions in Editing the Transaction Level of a Template.
Overrides
In some circumstances, it's not desirable to have all of the Property fields appear or be required. For example, if the Property is bare land or proposed construction, it might not make sense for the year built to be a required field. An Override can make that field optional when bare land is selected.
In other cases, it is desirable to have additional requirements. For example, if the Property is Multi Tenant, it might be useful to have an Override that makes entering the number of tenants required.
To add an Override, click on Add Override underneath Global Field Overrides.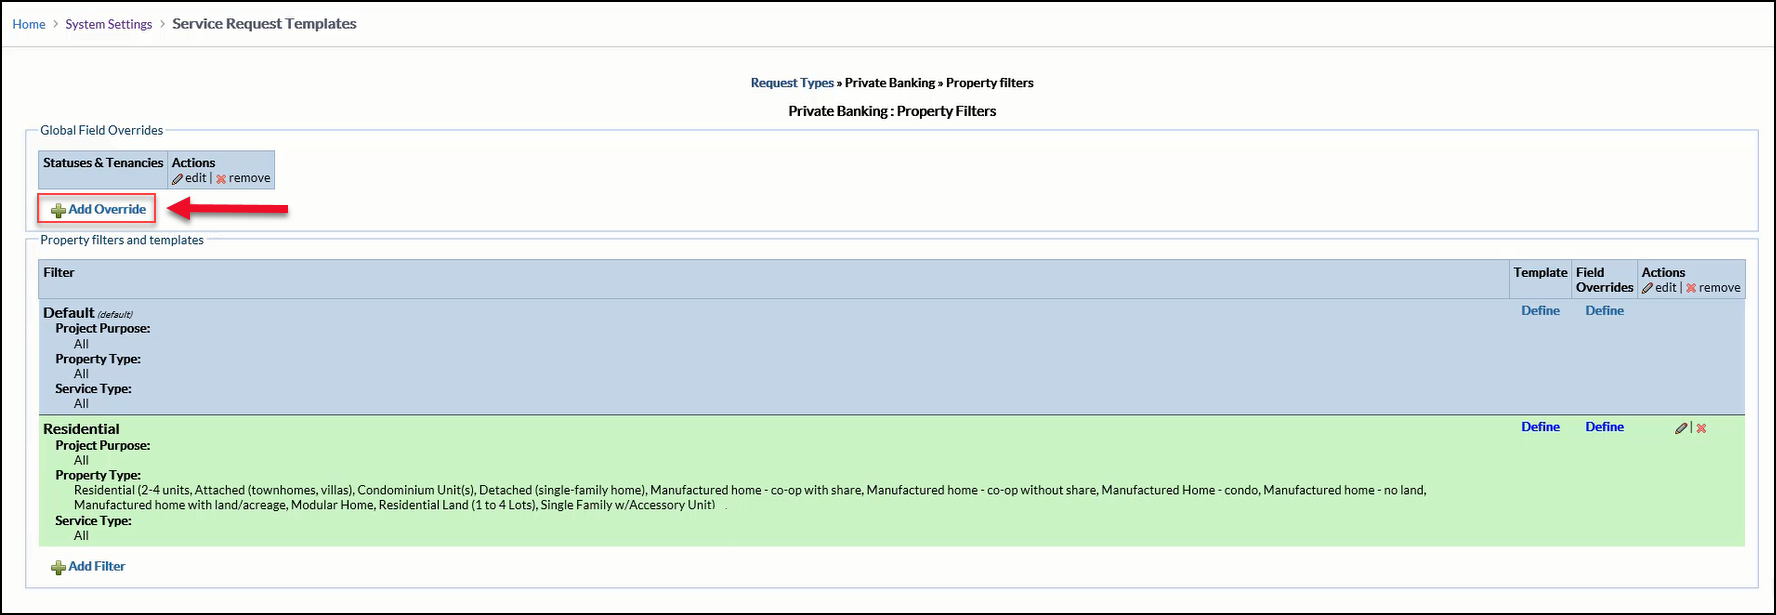
Select what will cause the Override.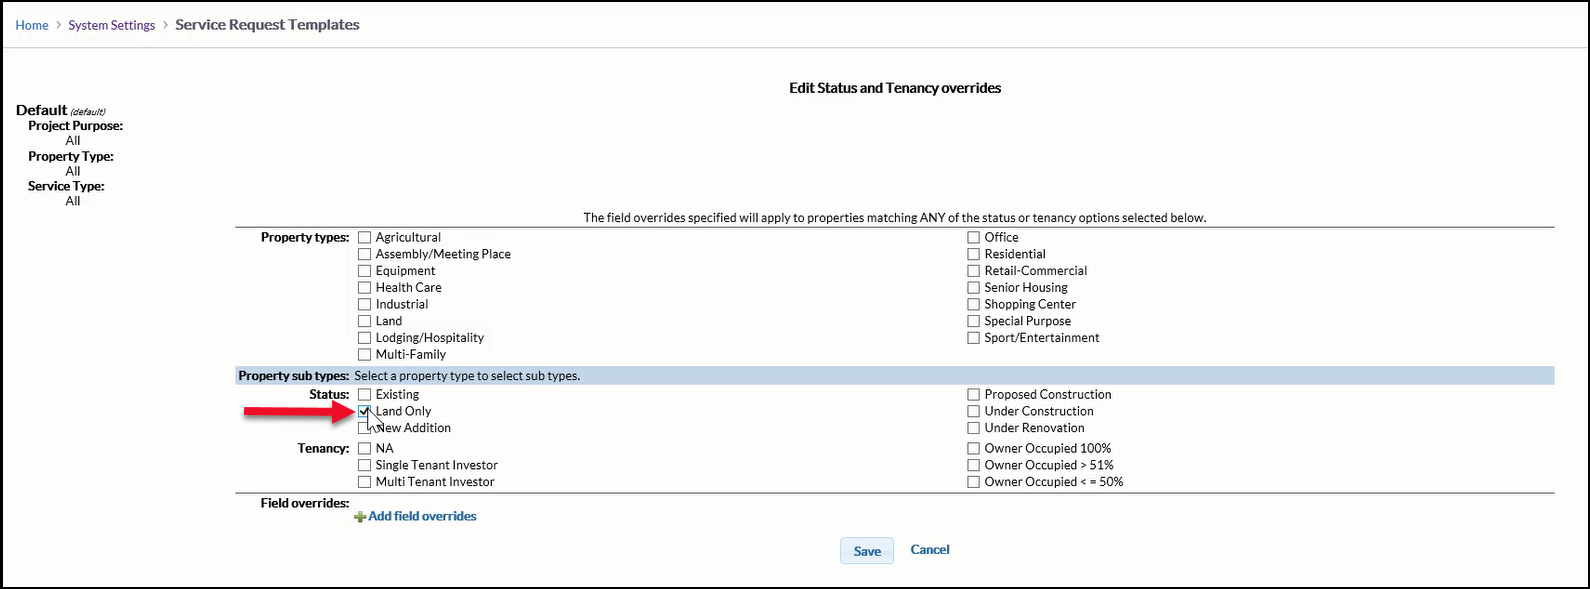
Then click Add field overrides.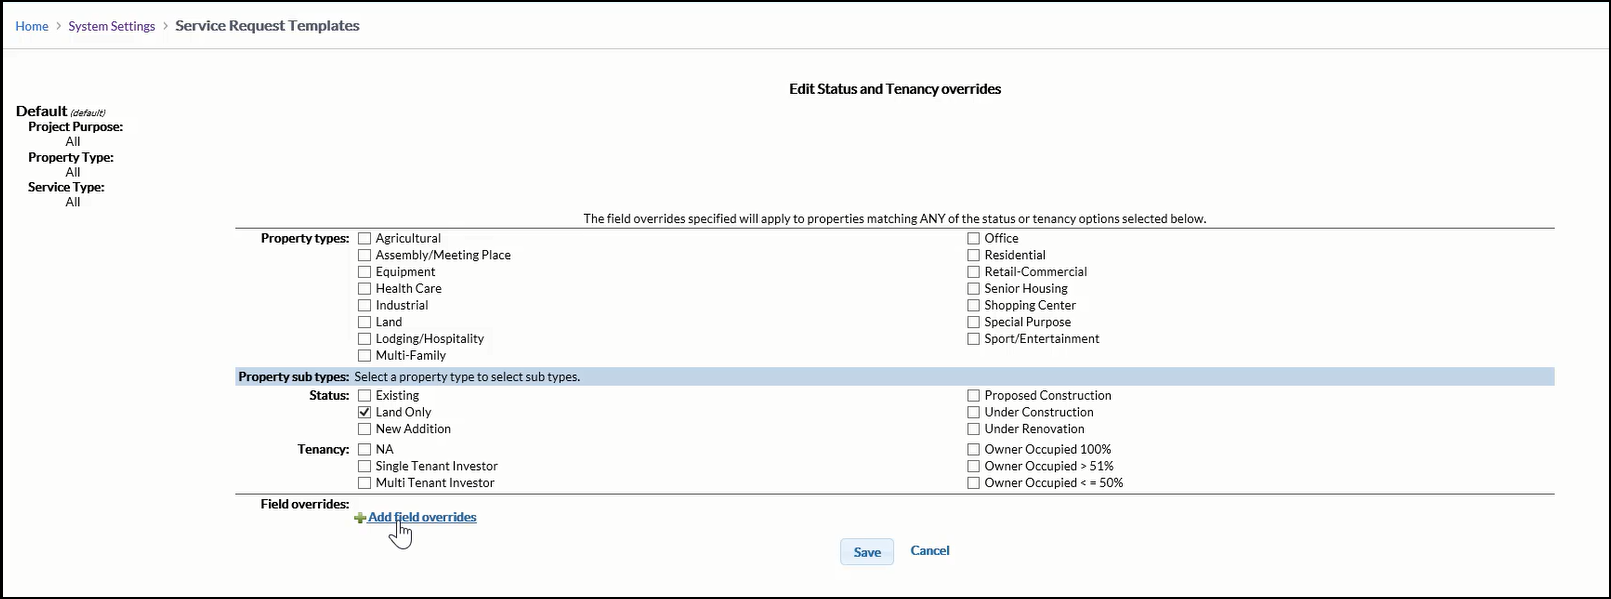
A pop-up will appear. Select the field to be overridden. Once that's selected, the pop-up fields will change to show additional options. In this example, select the Approximate Year Built field and then uncheck "Visible" and "Required," then click Save Changes. So now, if Property is Land Only, the Approximate Year Built field will not appear.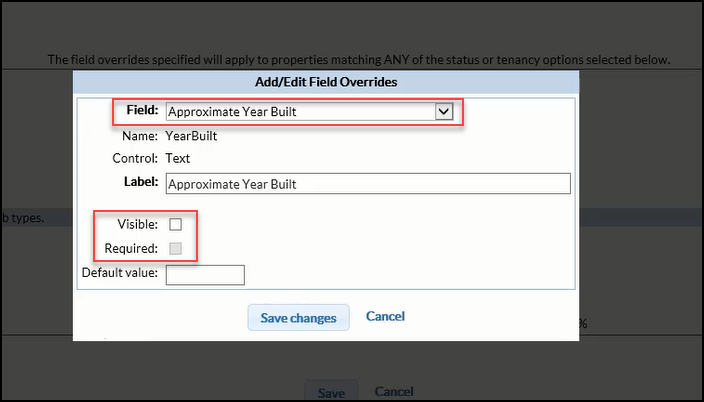
There is no limit to the number of Overrides that can be added.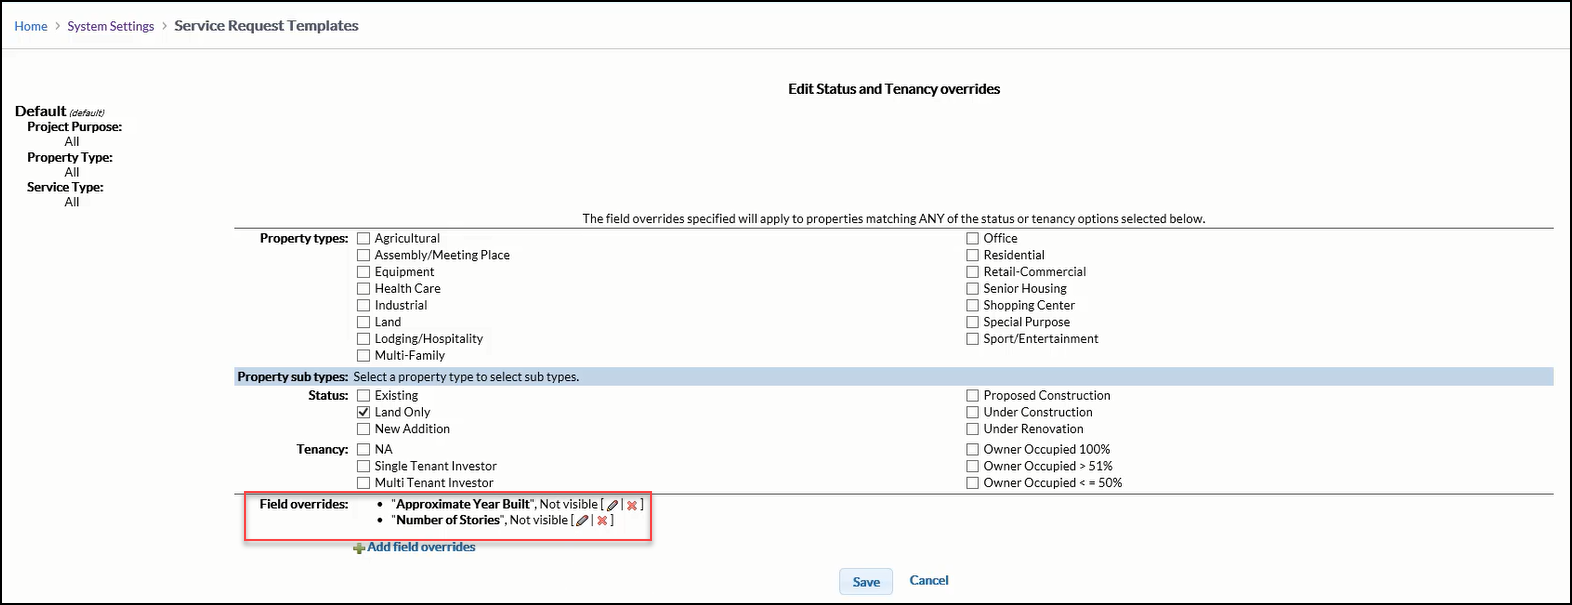
The Override created in the example above applies to all Property Templates, as it was created in the Global section. To create an Override for just one Property Filter, click on the Define button in the Field Overrides column of that specific Filter.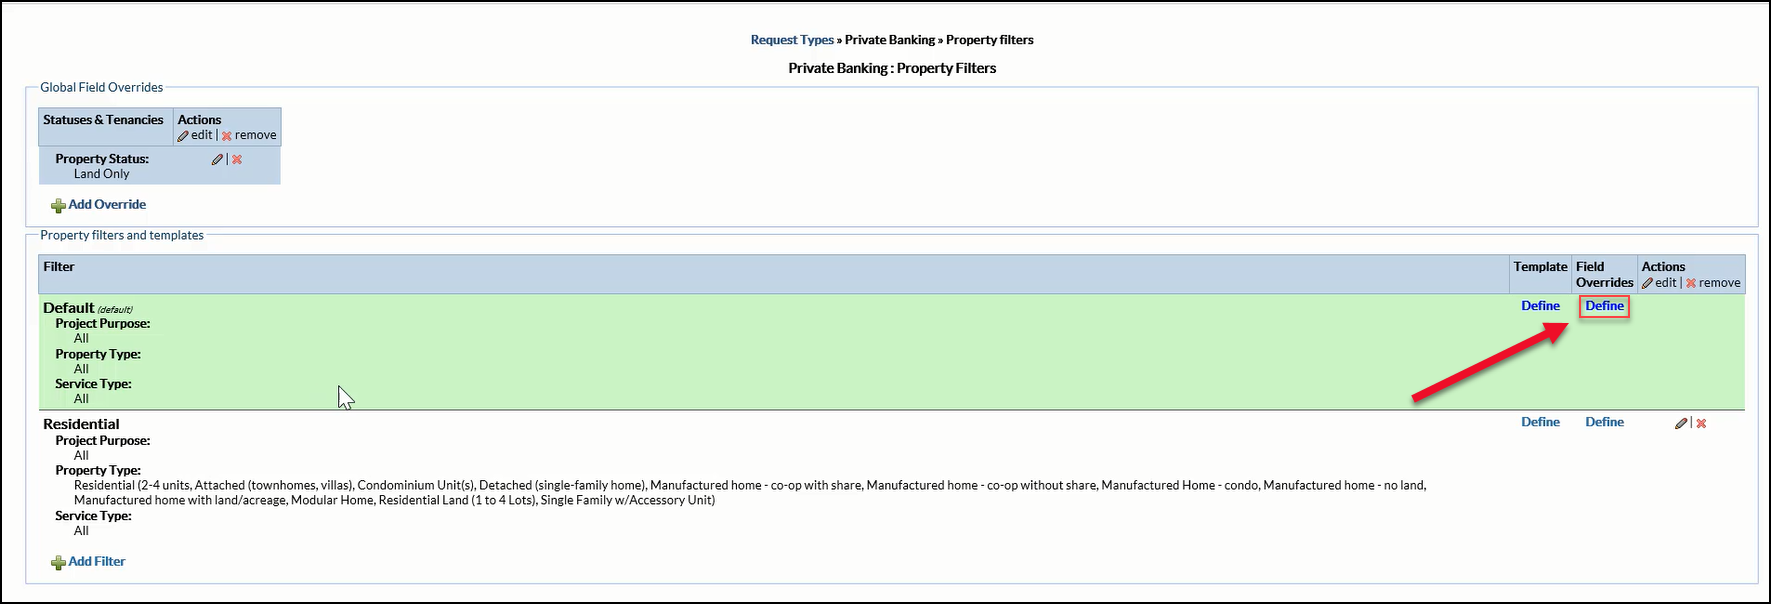
Then click on Add Override on the next screen. Repeat the process used to create a Global Override.
The final step in the SRF Template creation process is Additional Requirements.
.png)
