- Print
- DarkLight
- PDF
Editing Recipients
- Print
- DarkLight
- PDF
To determine who receives a Notice, click on the people icon next to the Template. 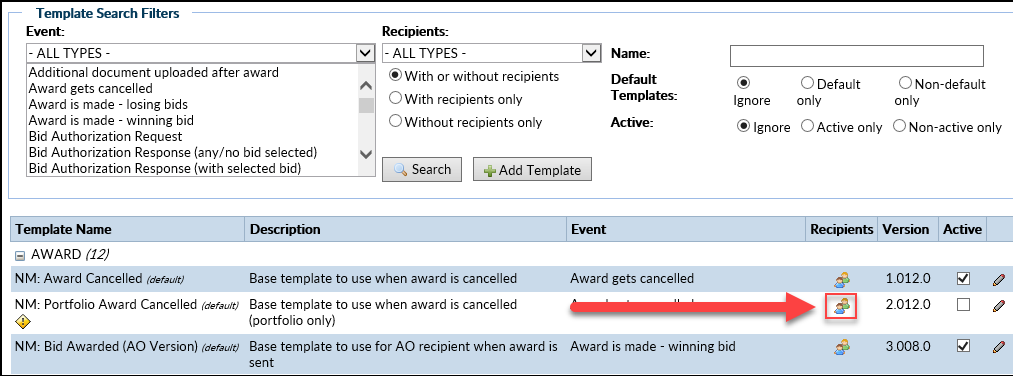
The Edit Recipients window will open: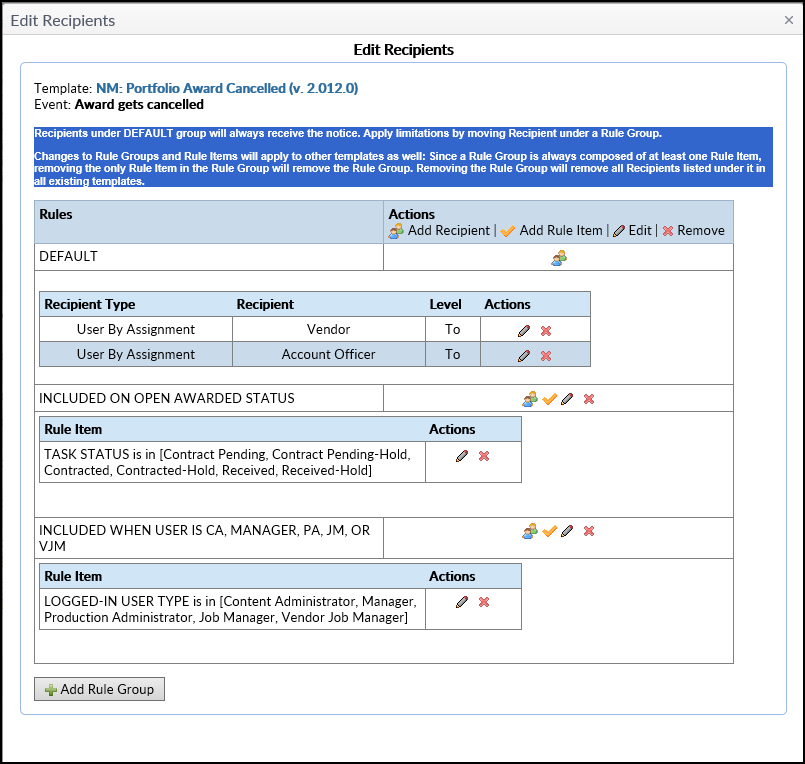
The Edit Recipients page is composed of the Default Groups and Rule Groups sections. If a Recipient is added in the Default section, then the Notice will be sent to them without considering any of the Rules.
The Default Group is displayed at the top of the screen, along with this explanatory text:
Recipients under the DEFAULT group will always receive the notice. Apply limitations by moving Recipient under a Rule Group.
Changes to Rule Groups and Rule Items will apply to other templates as well. Since a Rule Group is always composed of at least one Rule Item, removing the only Rule Item in the Rule Group will remove the Rule Group. Removing the Rule Group will remove all Recipients listed under it in all existing templates.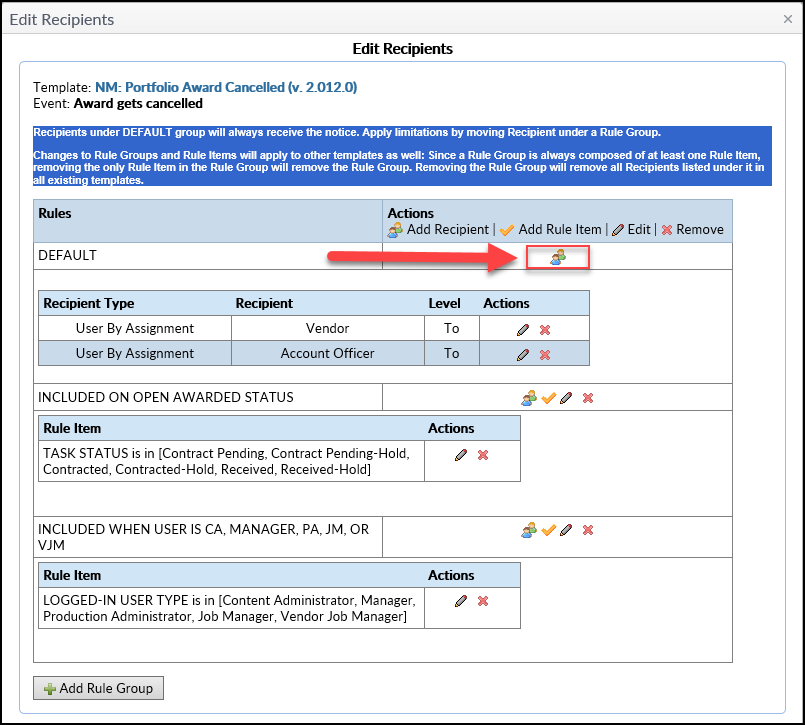
Click on the people icon in the Default Rules row, which will open the Add Recipient Modal.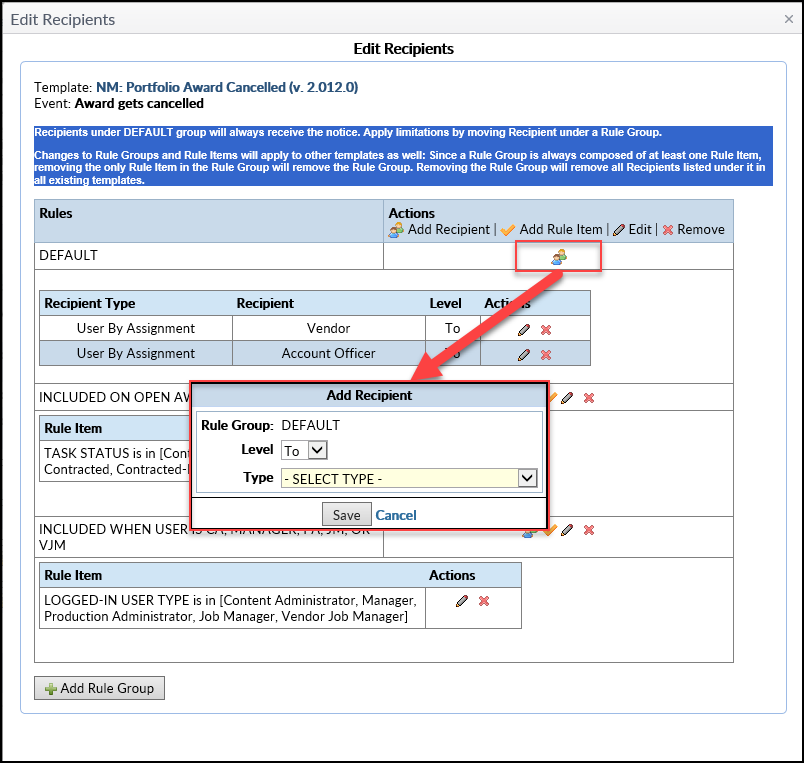
Click on the Level button to define whether the User or User Group receives the Notice as a To, CC, or BCC.
Click Type to choose one of the following Recipient types from the drop-down menu:
- User by Assignment: Users identified with a specific RIMS Project, Job or Task. A user's assignment status is checked at the time of the Event that triggers a Notice being sent.
- User by Group: Displays options after creation of User Groups.
- Custom Email Address: Add a specific, non-RIMS account email address.
- User by Manual Selection: Gives the sender the ability to select a user during a specific event, such as a View/Email RFP Recipients.
If User by Assignment or User by Group are chosen, a new drop-down menu will appear and allow for the selection of the desired User or User Group. If Custom Email Address is selected, a text field will appear and allow for the entry of a specific email address.
If User by Manual Selection is chosen, nothing else will appear; instead, the User(s) will be selected later, when the trigger Event occurs.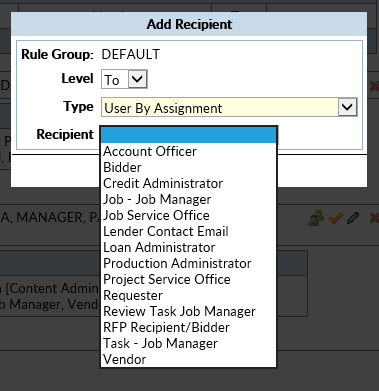
In the above example, User by Assignment was the Type selected, which presented a list of User Types from which to choose.
Once the desired selection has been made in the Add Recipient modal, click Save.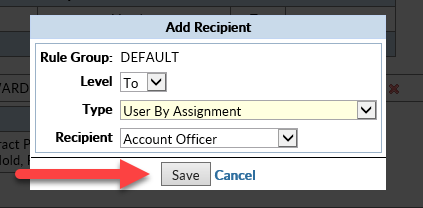
Beneath the Default box is a list of the Recipients.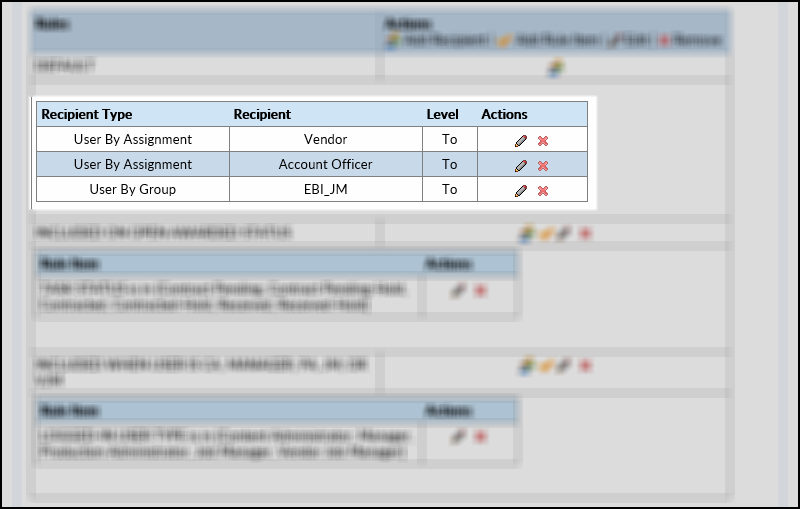
In the above example, there are three Recipient entries: Vendors and Account Officers by Assignment, and members of the EBI_JM User Group.
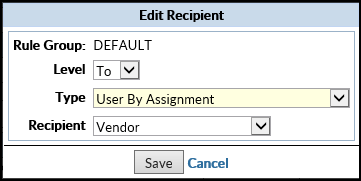
To edit an entry, click on the pencil ![]() icon. This will open the Edit Recipients modal. Make the desired changes and then click Save.
icon. This will open the Edit Recipients modal. Make the desired changes and then click Save.
To delete an entry, click on the red "X".
Then click OK to confirm the deletion.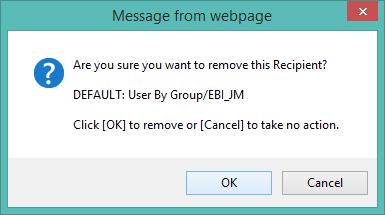
The Rule Group is the lower section of the Edit Recipients page.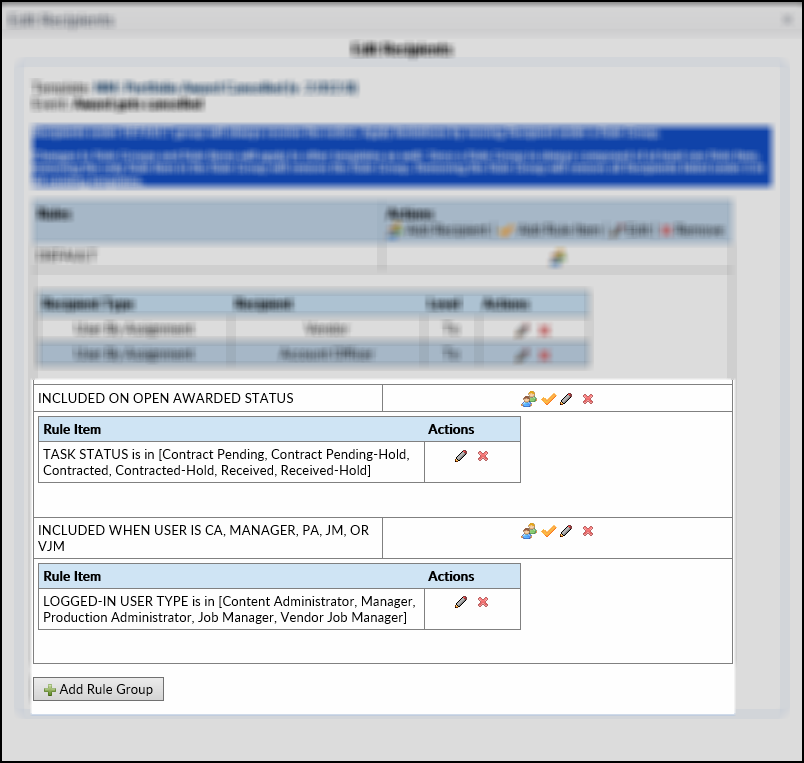
Conditional Rules determine if/when Notices are sent to Recipients.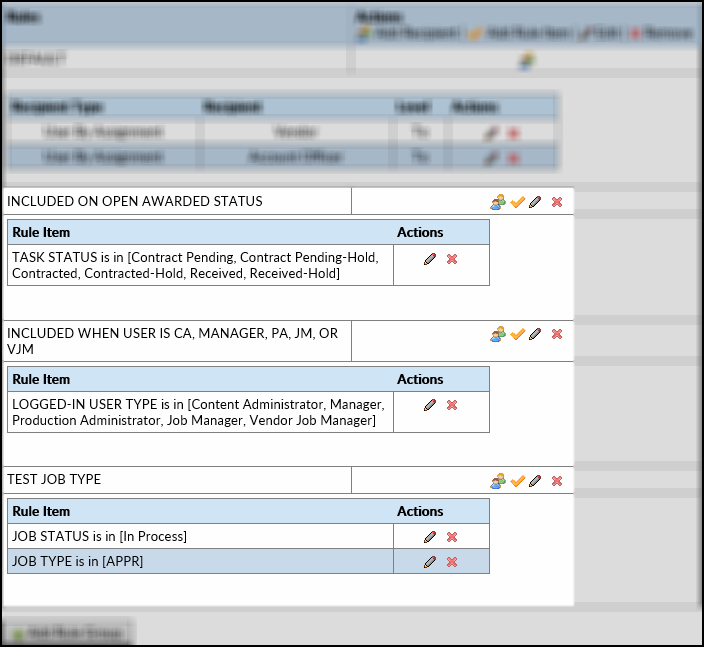 In the example above, there are three Rule Groups and four Rule Items.
Each Rule Group contains one or more Rule Items.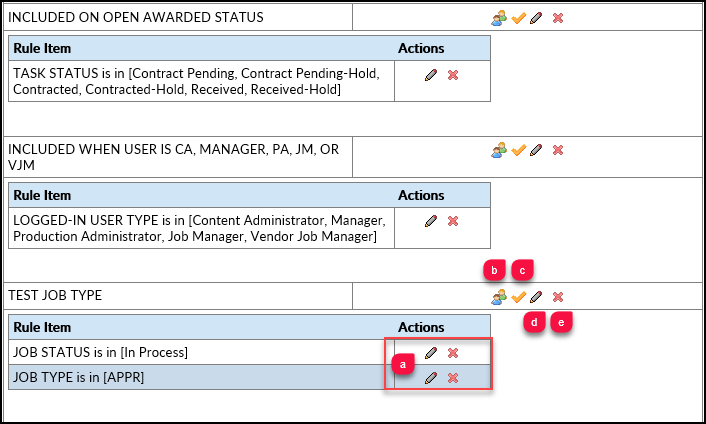
a. Click the pencil icon to edit a Rule Item. Click the red X to delete a Rule Item.
b. Click to add Recipients to the Rule Group. This works similarly to the Default Recipients section above, with the added feature that Recipients will only receive Notices if they meet the requirements of one or more of the Rule Items.
c. Add a new Rule Item to the Rule Group. The specific fields and drop-down menus will vary, based on selections made, but most require three selections:
- Field - The field being checked (Task Status in the example below)
- Comparison - The comparison being made regarding the field's value (IS IN in the example below)
- Value - The value of the field being checked (Contracted in the example below).
Note: Holding the Ctrl key while clicking allows the user to select multiple values.
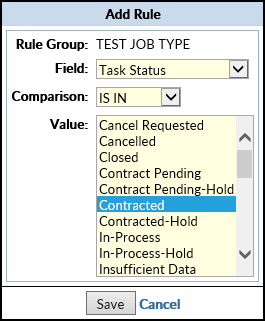 In this example, the Task Status field is being checked to determine if it is in the Contracted state.
d. Click the pencil icon to edit the Rule Group title.
e. Click the red X to delete the Rule Group.
.png)
