- Print
- DarkLight
- PDF
Editing Lookup Tables
- Print
- DarkLight
- PDF
RIMS Content includes a number of key lookup tables that are central to the functioning of a RIMS site. Included in this page are all the listed tables with the exception of the following, each covered in separate topics:
- Task Code - RFP (RFP templates)
- Job Manager Service Area
- Vendor Service Area
- Content Tables
Disposition Types
Disposition Types are used in RIMS to indicate how a Task has been completed. On most sites, External Tasks (those ordered from external consultants) have Disposition Types that indicate whether the Task was completed or cancelled. For Internal Tasks, like reviews, dispositions are often more qualitative in nature and may indicate whether the report was acceptable, whether further action is required, etc.
Select Disposition Types on the System Settings page to edit the content of the Disposition Types look-up table.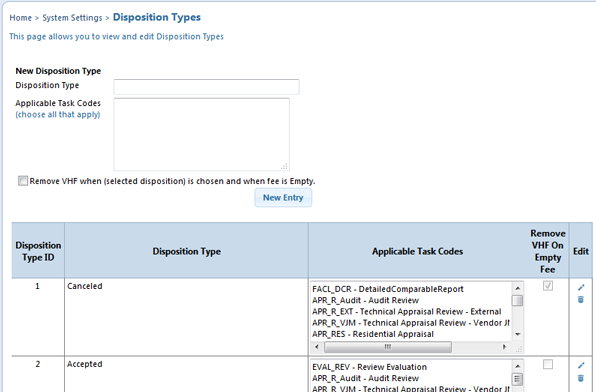
Use the form fields at the top of the page to create a new entry, or click the edit icon on any individual row to edit the content for the selected item. The look-up table creates relationships between Disposition Types and Task Codes so that the selected Task Codes will have that Disposition Type as an option.
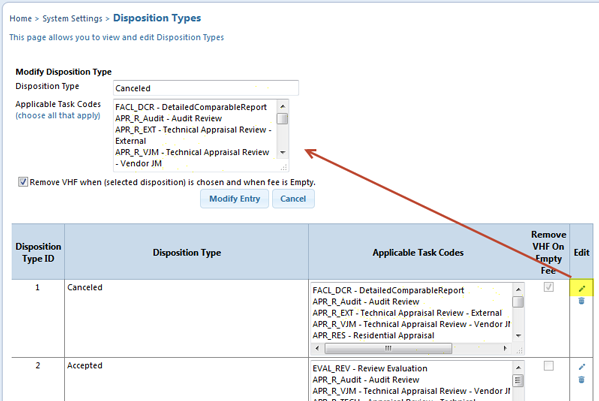
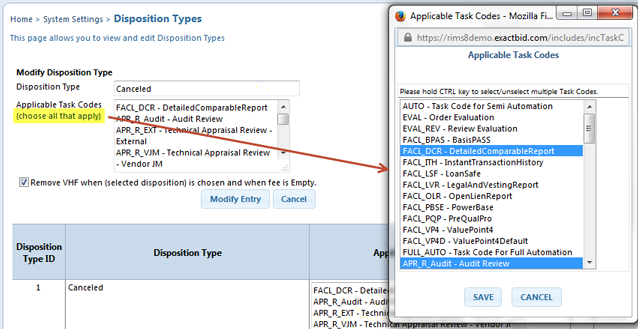
To select one or more applicable Task Codes for the selected Disposition Type, click the choose all that apply link highlighted in the image below and then select Task Codes in the presented dialog. To make multiple selections, hold down the CTRL key while clicking subsequent Task Codes. When done, click the 'Save' button to save your selections.
Job Types - Task Code
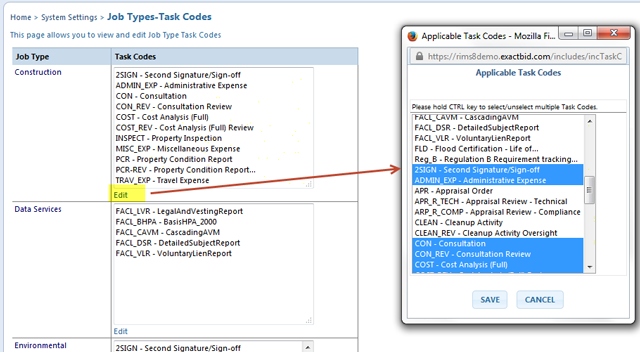
Not all Task Codes will be applicable to all Job Types; use Job Types - Task Codes to associate Task Codes with one or more Job Types. Select Job Types - Task Codes on the System Settings page to manage these relationships.
Existing Job Type - Task Codes relationships are displayed when the page loads. Click the Edit link at the bottom of one of the listings to add or remove a task code for the selected Job Type. Use the CTRL key to select multiple task codes. When done, click the 'Save' button to save your selections.
Fee Schedule
The Fee Schedule in RIMS allows you to predefine Internal fees for select Tasks based on table settings.
Select Fee Schedule on the System Settings page to add new Fee Schedule records or edit existing records. Use the form at the top of the page to create a new entry or click the edit icon on any existing Fee Schedule row to update that entry.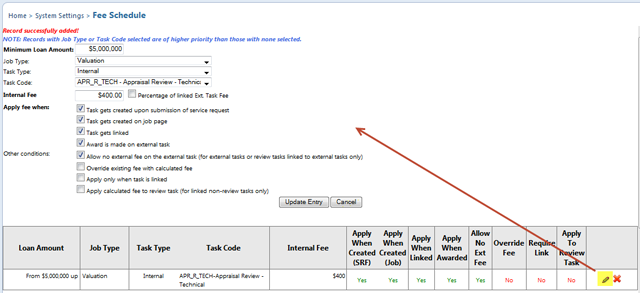
Each Fee Schedule record can have the following attributes:
- Minimum Loan Amount (required) - defaults to $0
- Job Type (optional) - select Job Type when appropriate to have different standard fees based on job type.
- Task Type [Internal/External] (optional) - use this control to filter available Task Codes if making a Task Code selection
- Task Code (optional) - select a Task Code to manage exceptions or when default fees are not appropriate for all Task Codes
- Internal Fee (required) - enter a static fee amount or select the checkbox for a fee to be based on a percentage of an external fee
- Apply fee when (required) - choose one or more options to determine when fee is to be calculated
- Other Conditions (optional) - specify how the fee calculation interacts within the Job framework
RFP Maintenance
RFP Maintenance allows you to set any outstanding RFP to 'Inactive'; an inactive RFP is not visible to the vendor and will not allow bids to be submitted or existing bids to be updated. To re-activate an RFP, go to the RFP Manager and select 'Activate RFP' at the top of the 'View RFP' page.
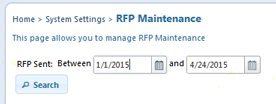
Select RFP Maintenance on the System Settings page to mange active RFPs. The initial page display contains search controls for the date the RFP was sent. Enter dates in both date fields and click the 'Search' button to search for active RFPs.
Select any record in the search results list and click the 'Set as Inactive' button to make the selected RFPs inactive. Click Back to Search to revise the date range and search again.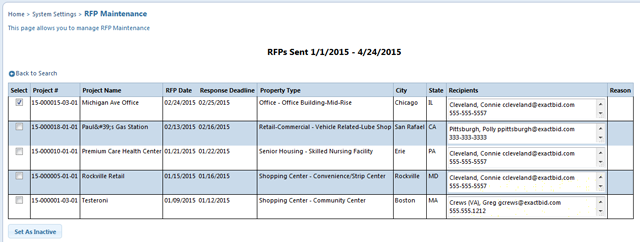
G/L Account
General Ledger (G/L) Accounts are utilized in RIMS for vendor invoice payment processing. The G/L Account look-up table allows you to construct a table of valid G/L Account numbers for your institution and associate them with select Job Types and Lending Groups where applicable.
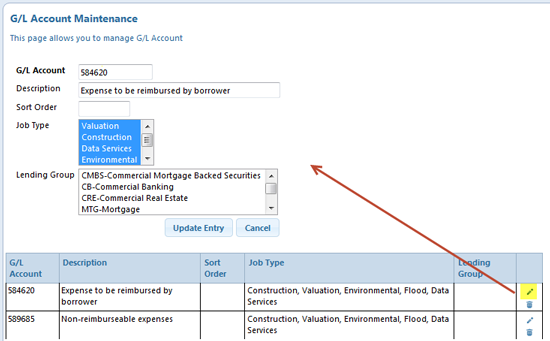
Select G/L Account on the System Settings page to add new G/L Account entries or edit existing records.
Use the form at the top of the page to create a new G/L Account record, or click the edit icon for an existing record. Enter a G/L Account number (required), along with a Description (optional), one or more Job Types (optional) and one or more Lending Groups (optional) to create a record.
.png)
