- Print
- DarkLight
- PDF
Document Labels
- Print
- DarkLight
- PDF
Document Labels are the labels an Account Officer will see when they are attaching Property Documents to a Service Request. This documentation covers the following topics:
- Creating Document Labels
- Deleting and Editing Document Labels
To access the table that controls the Document Labels, login into RIMS as a Content Administrator. Click on Settings, then click View All Settings.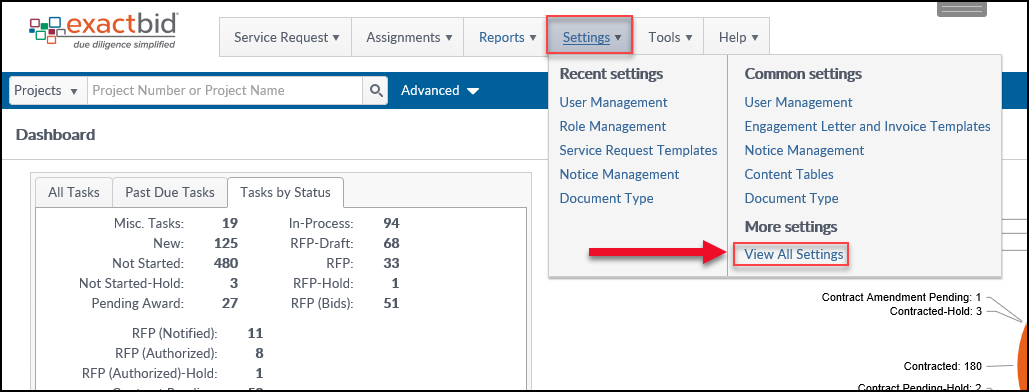
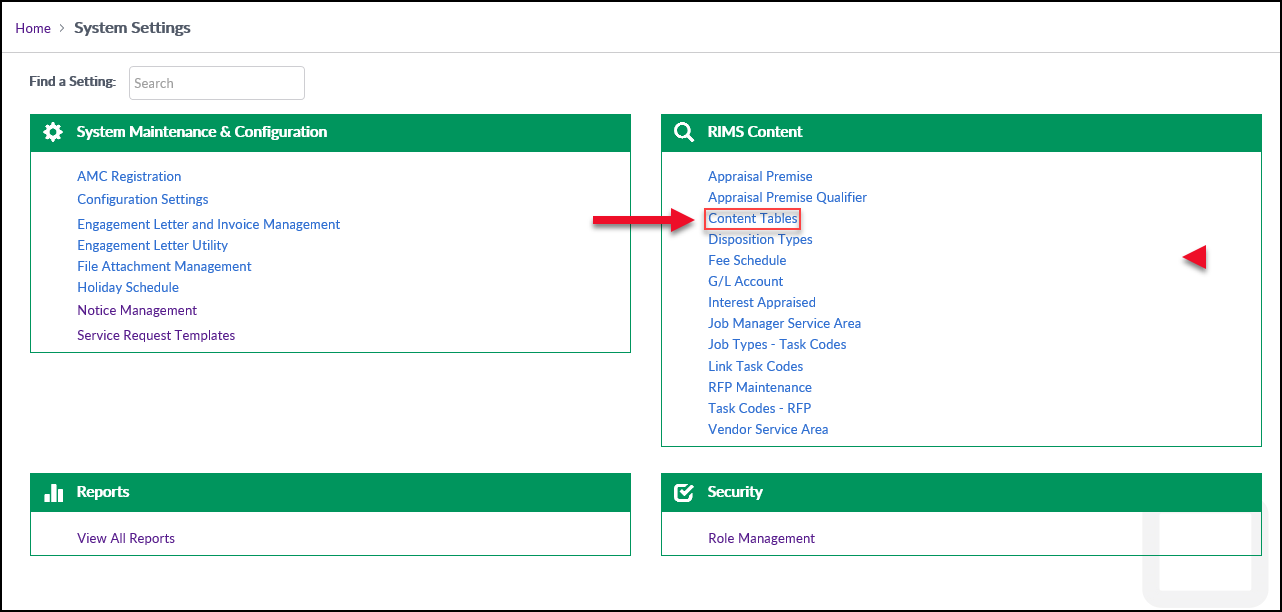
On the System Settings page, click on Content Tables.
On the Content Tables page, click on Document Labels.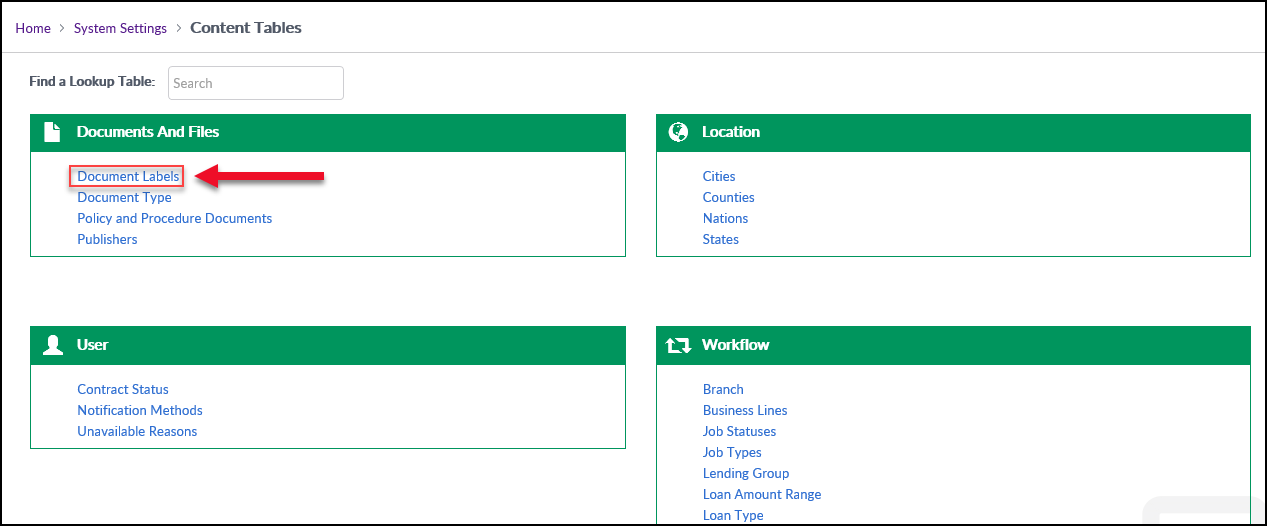
The list of available Document Labels available is on the left-hand side.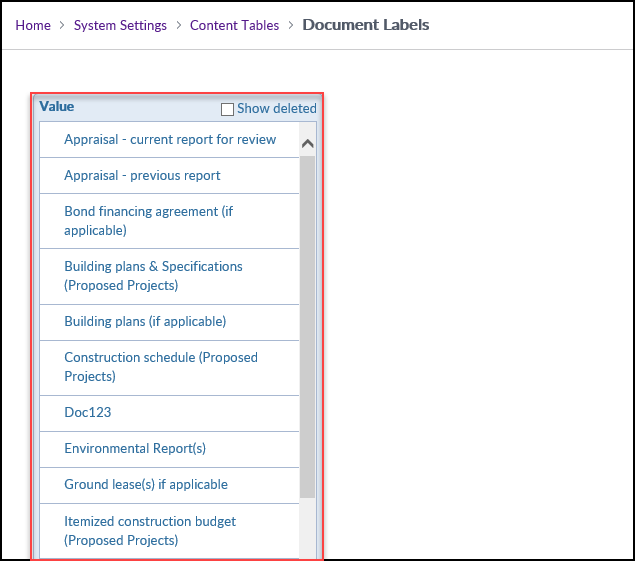
Creating Document Labels
To add a new Document Label, click the Add New Item button in the upper right-hand corner of the screen.

A new screen will load with several blank fields.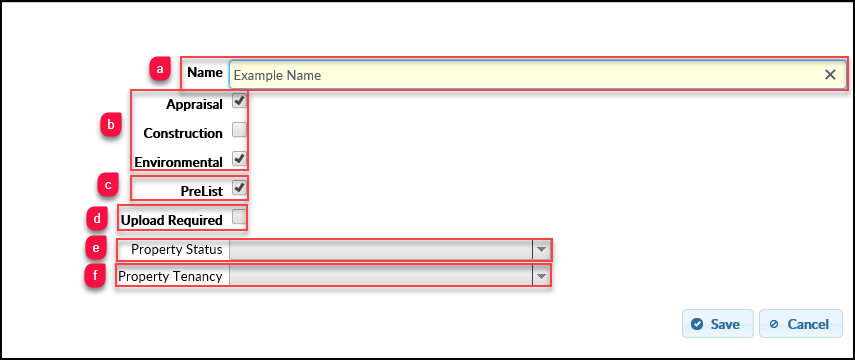
a. Name: The name of the Document Label. This is required.
b. Jobs: These are the Job types for which the Document Label is available.
c. PreList: When the Account Officer adds a Document to the Service Request Form, Prelisted documents will be available for selection. If PreList is selected, one or more Property Statuses must also be selected. One or more Property Tenancies may also be listed. In order for the Document Label to appear as a Prelisted option, the SRF must meet at least one of the Property Statuses chosen, and at least one of the Property Tenancies chosen (if there are any).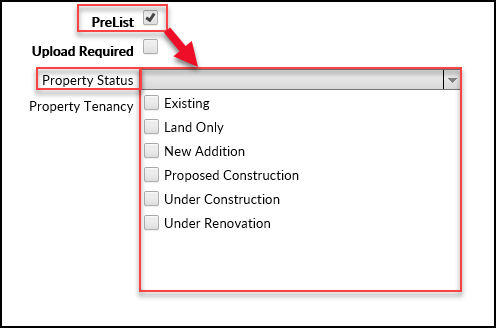
d. Upload Required: Checking this box will not only PreList the Document Label, but it will require that a document with that Document Label is attached to the SRF if the Property Status and Property Tenancy requirement are met.
e. Property Status: Select one or more Property Statuses. Document Labels that are Prelisted or Upload Required will only appear on SRFs that meet one of the Property Statuses selected.
f. Property Tenancy: Select one or more Property Tenancies. Document Labels that are Prelisted or Upload Required will only appear on SRFs that meet one of the Property Tenancies selected.
Here's an example Document Label: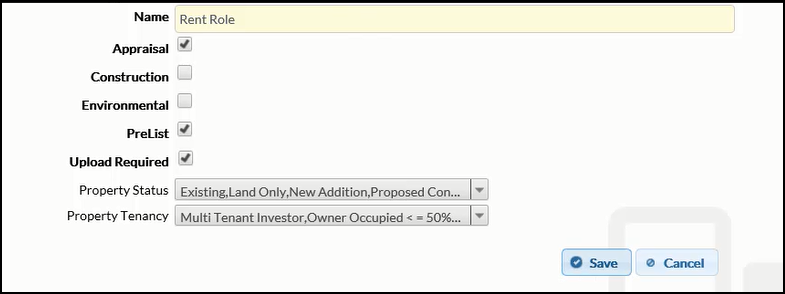
When an Account Officer reaches the final SRF page for a Service that meets the above requirements, they will be required (due to Upload Required being selected) to attach a Rent Roll document. For example, a Service Request for an Appraisal Job on a Property with an Existing Property Status that's Owner Occupied would require a Rent Roll document be attached.
If the above conditions are met, a notice on the final SRF page will tell the AO that a Service requires the document. Additionally, the Send Selected Services button will be grayed out.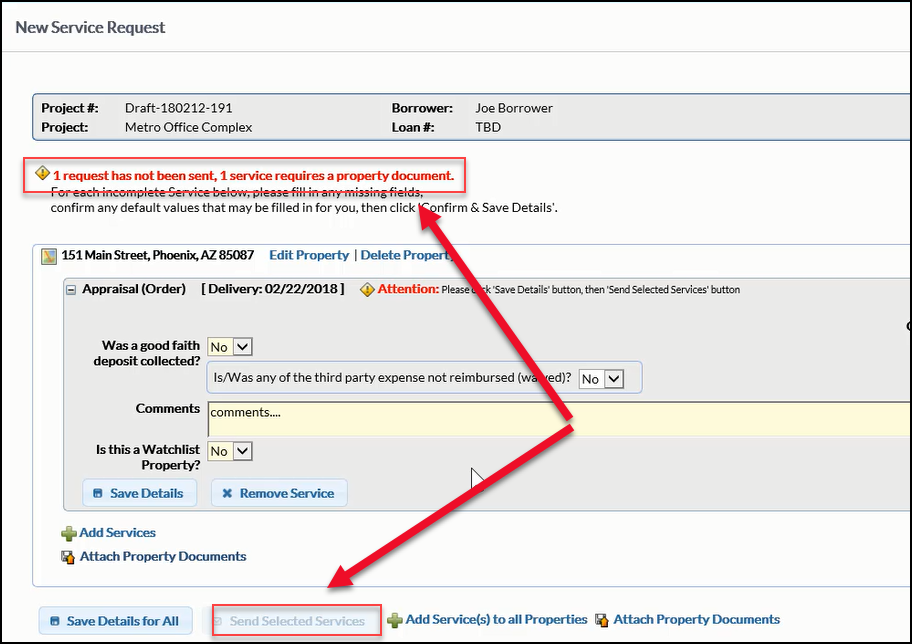
To proceed with the Service Request, the AO must attach the required Property Document. To do so, click on the Attach Property Documents button beneath the Property.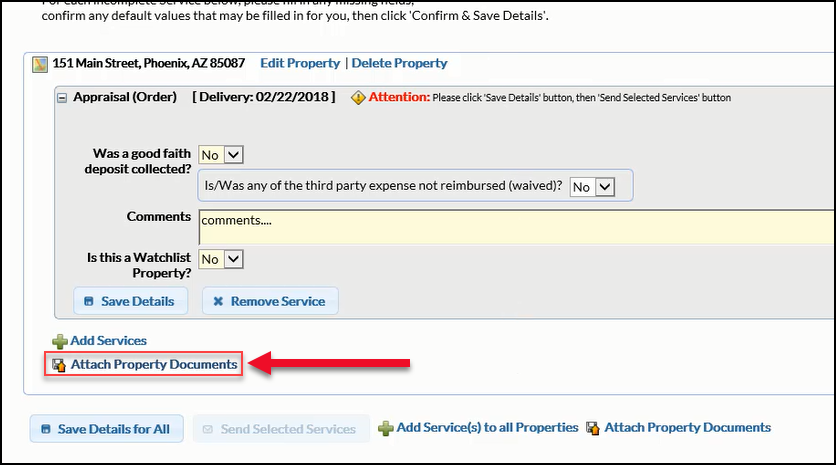
The Property Documents screen will open. Note that there are two Document Labels listed - Purchase and Sales Agreement; Rent Roll - and both are marked as required. 
To add a Property Document, click the + symbol on the right-hand side of the page.
Select the desired document and then click Open to upload it.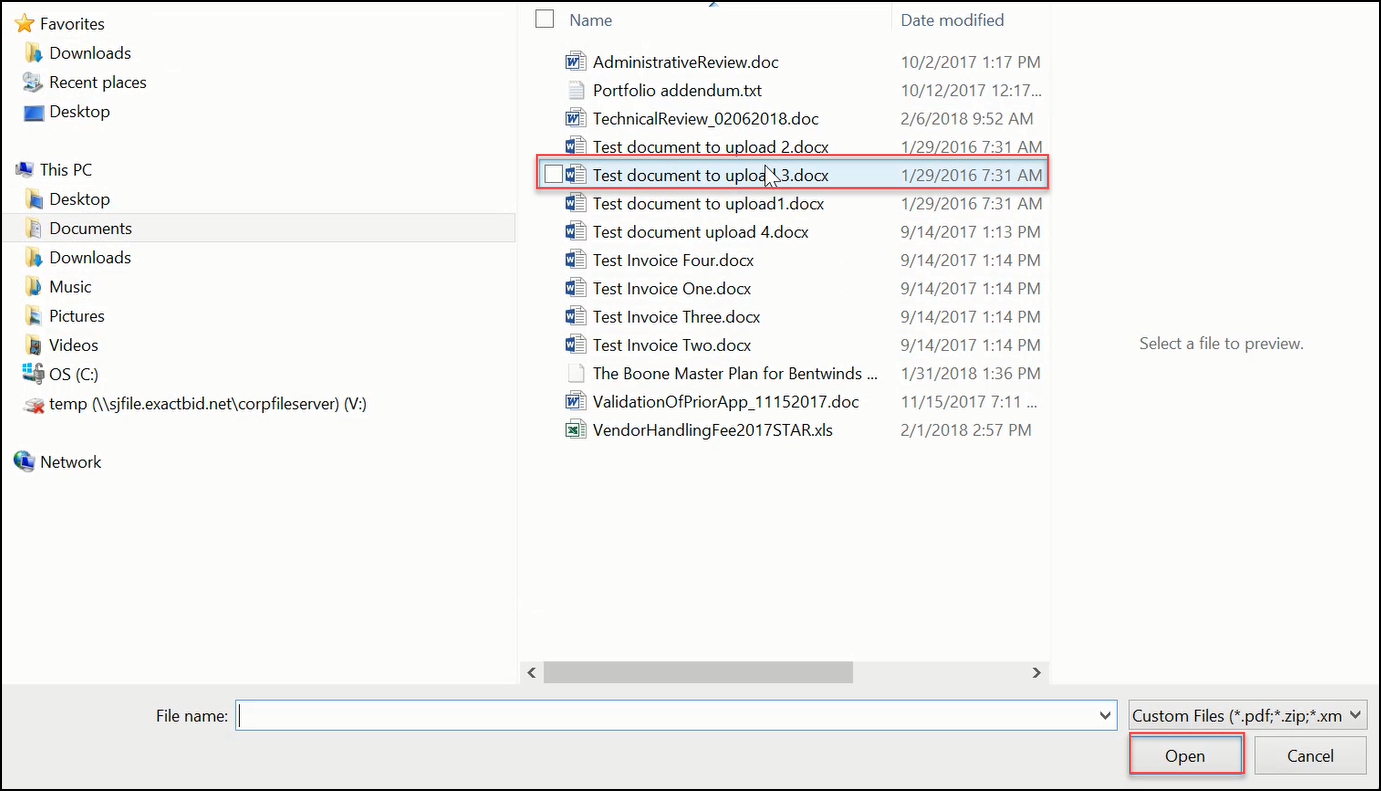
Once the file has been uploaded, click Save.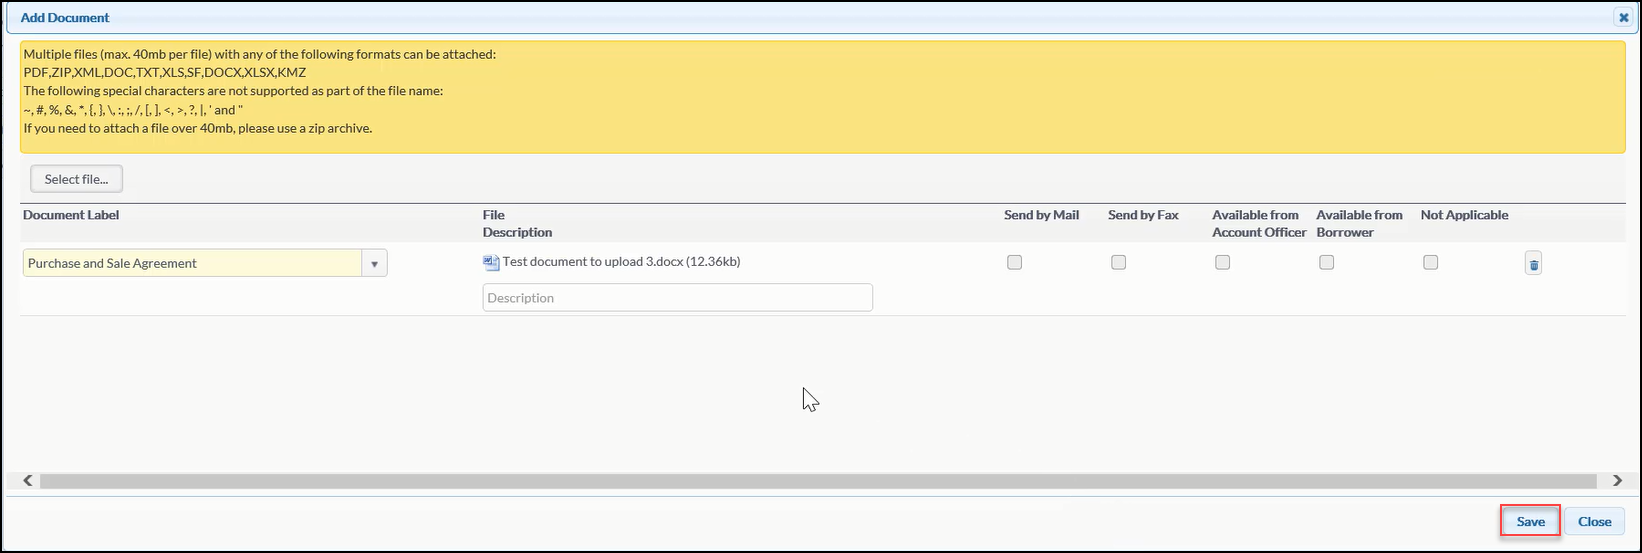
A pop-up notification will ask for confirmation. Click OK to complete the upload.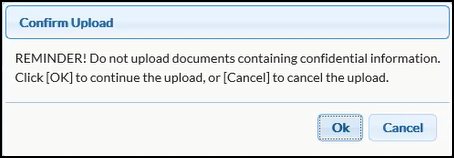
The Property Documents screen will load again, with the newly-uploaded file listed.
Repeat the process above for each of the required Document Labels. Note that some RIMS sites provide additional options. Check one of the following boxes to indicate that the required Property Document will be sent via mail or fax, that it can be obtained from the Account Officer or Borrower, or that it is not applicable.
Selecting one of these options satisfies the requirement for Document Labels which must be attached.
Once all necessary Property Documents have been uploaded, click Save-Return to Services.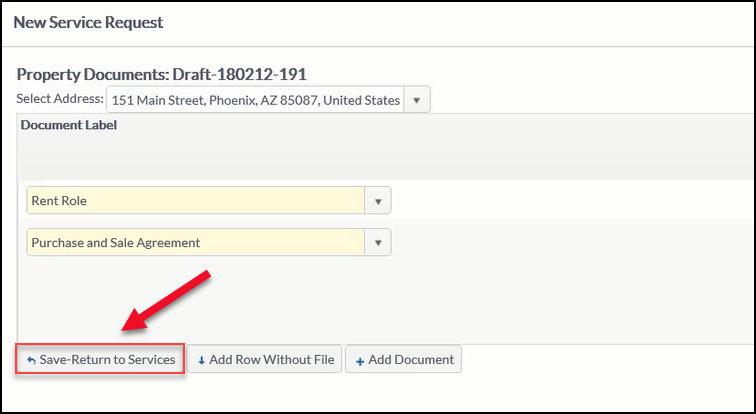
Now that all of the required Property Documents have been attached, click Send Selected Services to send the Service Request.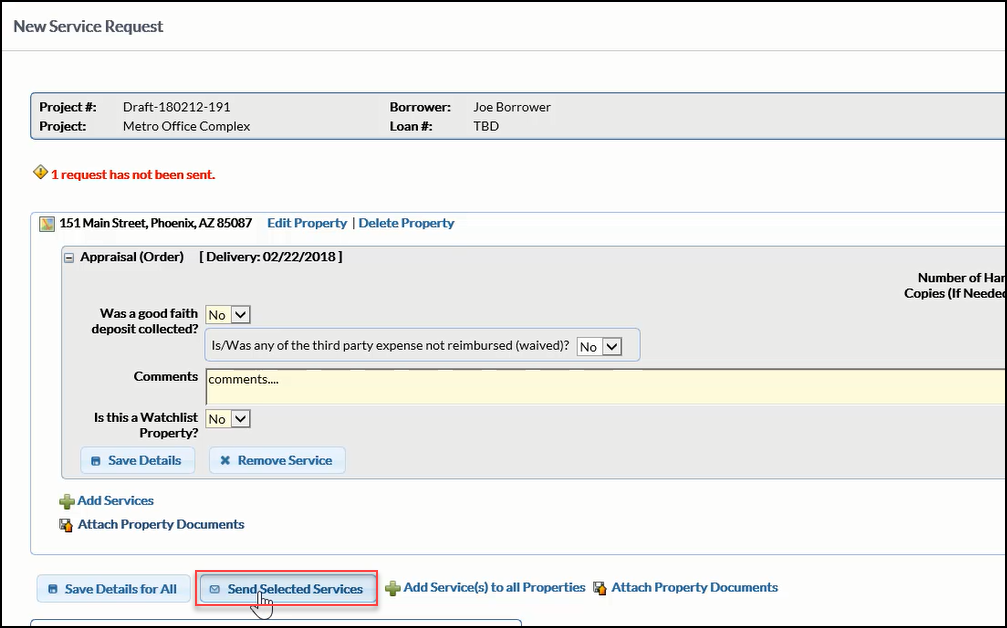
For more information about attaching Property Documents, refer here.
Deleting and Editing Document Labels
When a Document Label is deleted, it will no longer appear in the list of Labels. Click the Show deleted checkbox to display any deleted labels. Deleted Labels will appear in red..png)
To restore a deleted Document Label, click on the Label. Then click on Undelete Record in the upper right-hand corner of the screen..png)
A message will confirm that the Label has been restored.
To edit a Document Label, click on the Label in the list. Make any desired changes, such as modifying the title or adding/removing a Job type, then click Save.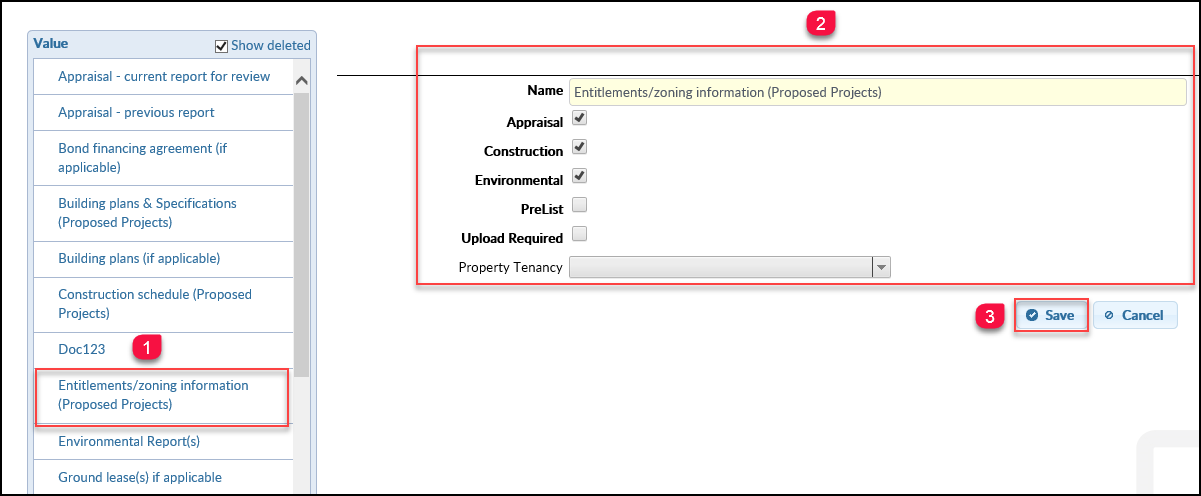
A message will confirm that the Label has been edited.
.png)
