- Print
- DarkLight
- PDF
Data Summary
- Print
- DarkLight
- PDF
The Data Summary Report displays past and present Jobs and associated transaction data in a single table. The table can be manipulated in a variety of ways, including inputting a custom formula, aggregating the data, and creating a chart to graphically illustrate the data.
Performing a Search
The Data Summary Report allows users to specify search parameters.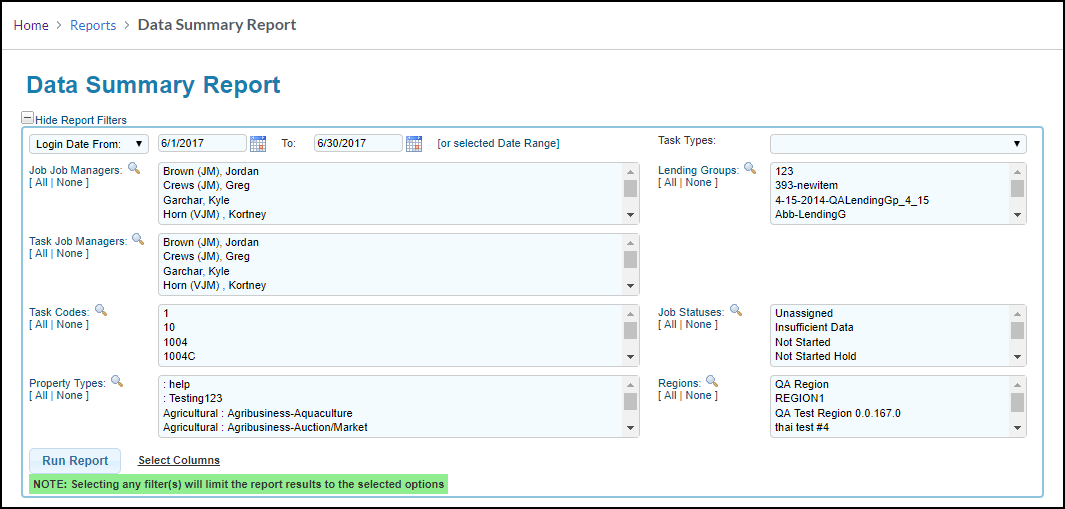
By default, the Login Date From field(s) will auto-populate with the beginning day and ending day of the previous month. These fields allow searching by a user’s activity and can be modified to return a different timeframe.
The adjacent [Or Selected Date Range] option allows users to search using predefined ranges, such as Last Week and Quarter to Date. Additional filters that may be applied to a search include:
- Job Job Managers
- Task Job Managers
- Task Codes
- Property Types
- Lending Groups
- Job Statues
- Regions
- Task Types
With the exception of Task Types, multiple options may be selected within these fields.
- Click on the first desired option.
- Hold CTRL on the keyboard.
- Click on each additional option.
To select all options at once, click All. Clicking None will deselect all options.
Beside each field is a magnifying glass. Click the magnifying glass to quickly search through the available options for that category.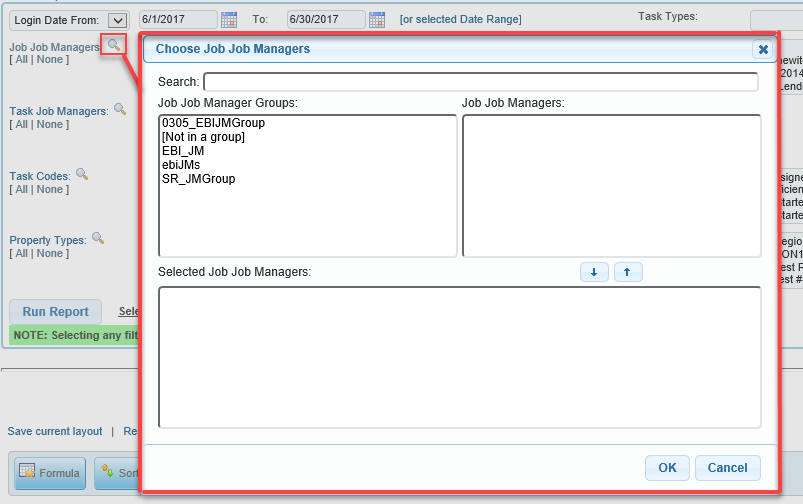
To search for options:
- Click the Magnifying Glass
- Type a Task Code into the Search field
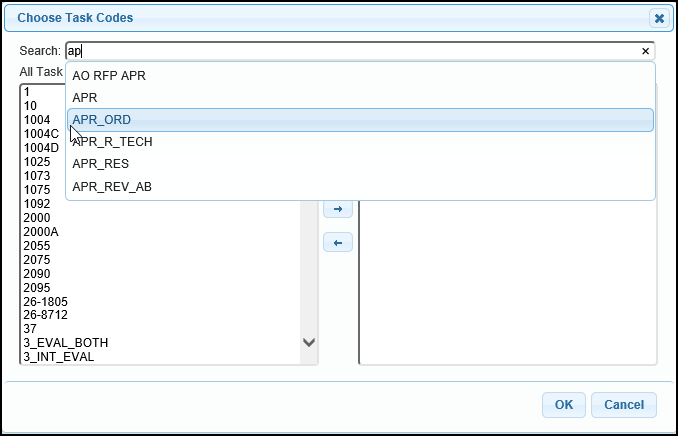
- Select the Task Code from the drop-down menu
- Repeat step 2 and 3 until all desired Task Codes have been selected
- Click the right-pointing arrow to add the Task Codes to the Selected column
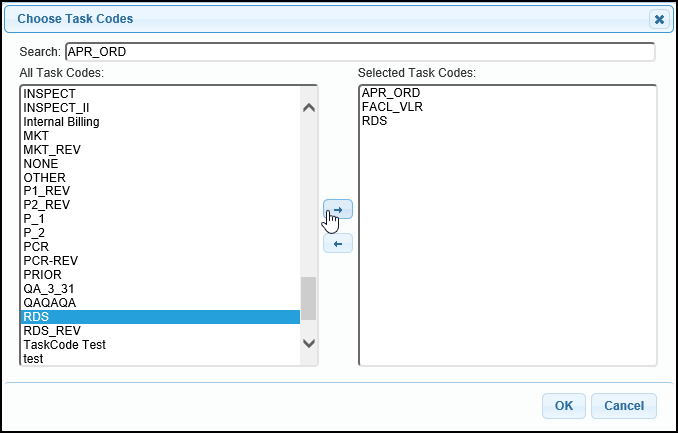
- Click OK
Click Select Columns to define which data fields will appear within the report.
A new window will open with all of the possible columns listed.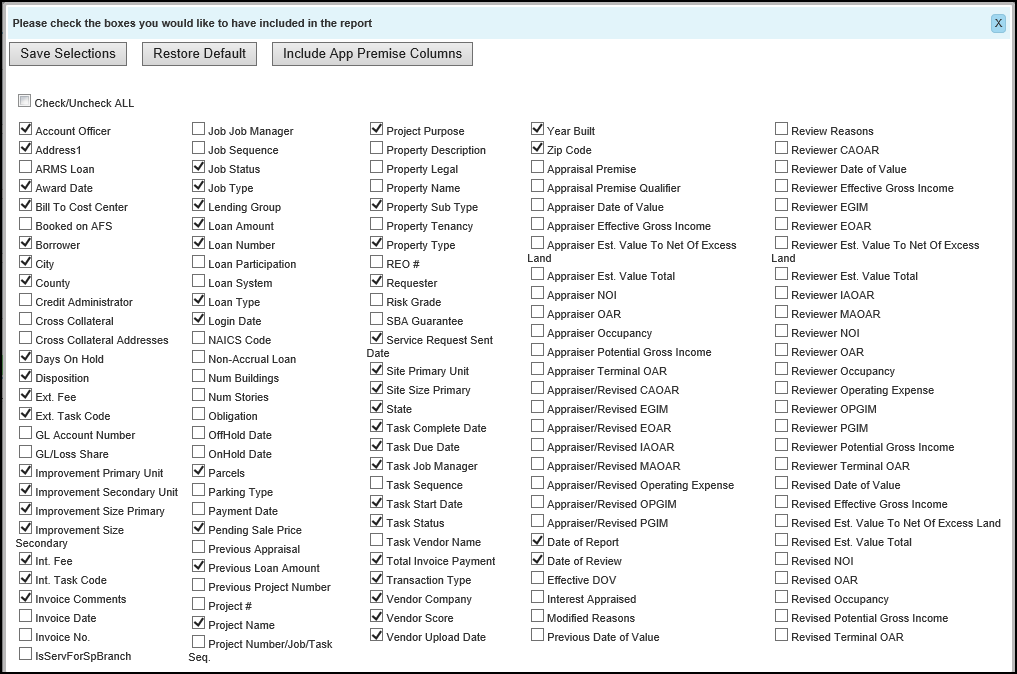
Three buttons are listed at the top.
1. Include App Premise Columns will quickly select all options between Appraisal Premise and Revised Terminal OAR to help minimize time spent clicking.
2. Restore Default will select only the options that are standard Data Summary Report options.
3. Save Selections locks in the column selections and prepares them for use in a new generated report.
IMPORTANT: Saving Selections here will reset your saved layout to default settings, removing customized column order, formulas, filters, groupings, etc.
Viewing the Data
Click Run Report to generate a report using the Report Filters above, displaying only the column data designated using the Select Columns tool.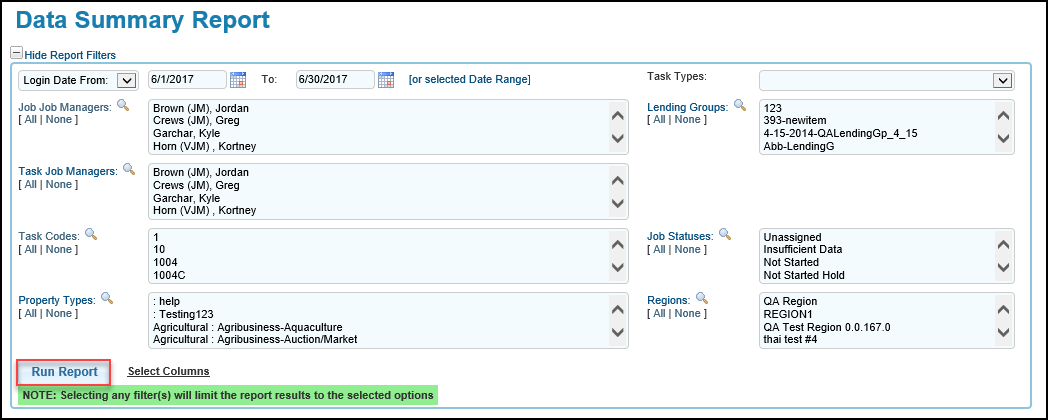
The table is configurable. Click a column header to see three options:
1. Click the and hold the six dots on the left to drag and drop the column in a different position.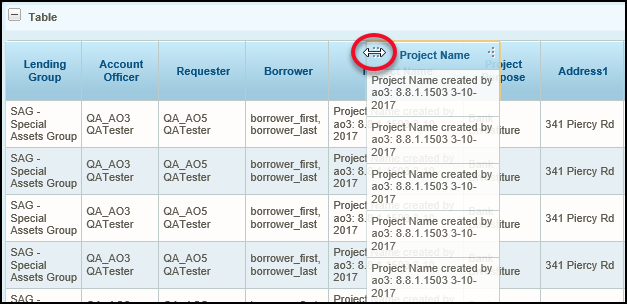
2. Click and drag the four arrows on the right side of a column header to increase/decrease the column width.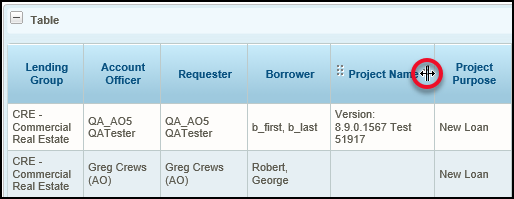
3. Click on a column header title to sort the table by that column in ascending or descending order.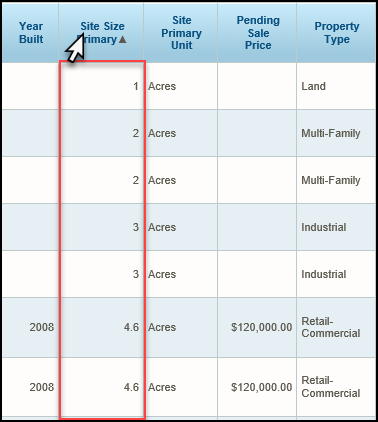
Functions
There are eight total functions that can be used to manipulate the data table.
| Function Name | Description | Illustration |
|---|---|---|
| Formula | Formulas are expressions made up of columns, constants, functions, and operators. For example, a formula can be used to multiply two columns by one another to produce a numerical product. When creating a formula, each column is represented by the column name encased by parentheses (i.e. [Lending Group] ). Columns may be divided, multiplied, added, or subtracted by one another. The Insert a column dropdown contains a list of usable columns contained within the Data Summary report. Select the appropriate Data Type to categorize the type of formula being created. For example, if the formula exclusively contains numerical data, select Number from the dropdown. Data Format configures how the formula will be displayed once calculated. | 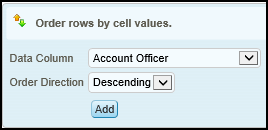 |
| Sort | Click Sort to specify a Data Column and determine whether it should be sorted in Ascending or Descending Order. Clicking on a column header produces the same outcome, but this feature is useful for larger tables that feature many columns. | 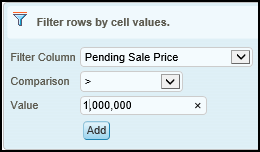 |
| Filter | Filters provide additional filtering to help illustrate data within a large table. For example, a filter could be added to only display results where the Pending Sale Price is greater than $1,000,000. | .png) |
| Group | Group takes one column and places associated columns within it. For example, choosing to Group Project Purpose would look at each unique instance for every Project Purpose in the table, and then place matching instances together. | 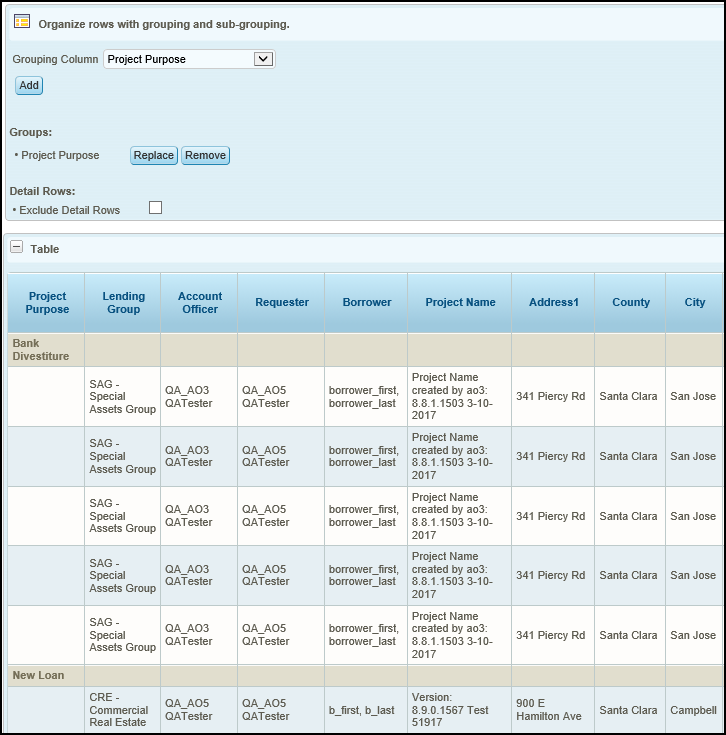 |
| Aggregate | Aggregate calculates totals, averages, etc. For example: look at the total square footage Improvement Size Primary for all Jobs. This function works in tandem with grouping, as the calculation will be performed for each group independently. | 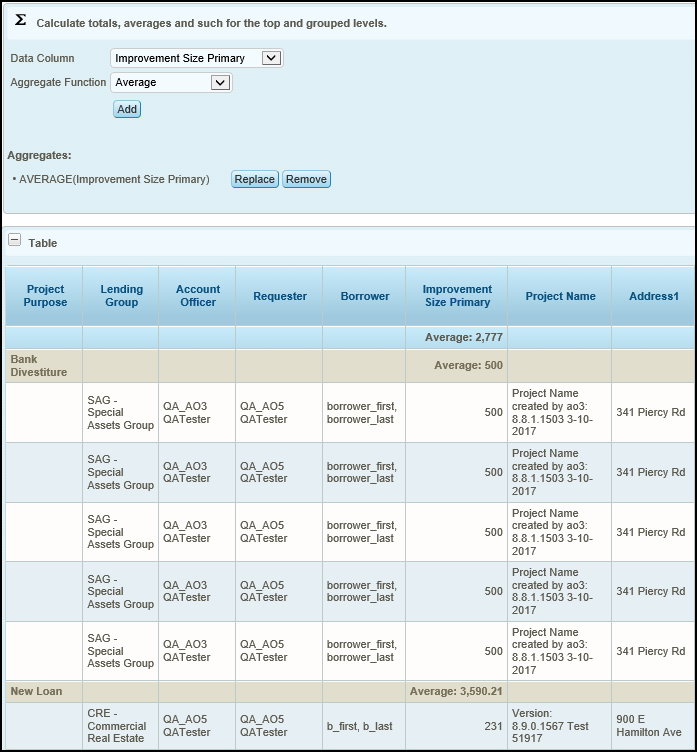 |
| Chart | Charts graphically illustrate the data. The available chart types are: Pie, Bar, Line ,Curved Line, Scatter Plot, Heatmap, and Gauge. Charts cannot be exported, and are only viewable from the Data Summary Report page. | 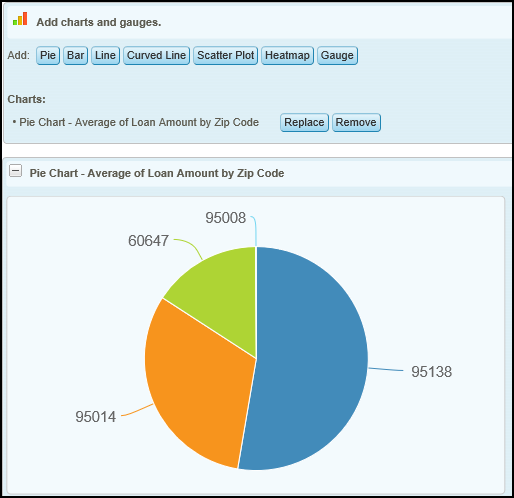 |
| NOTE: Making any changes within Select Columns will delete the current report. Make all changes prior to running a report, or save the current report by exporting it to Excel or CSV. | ||
| 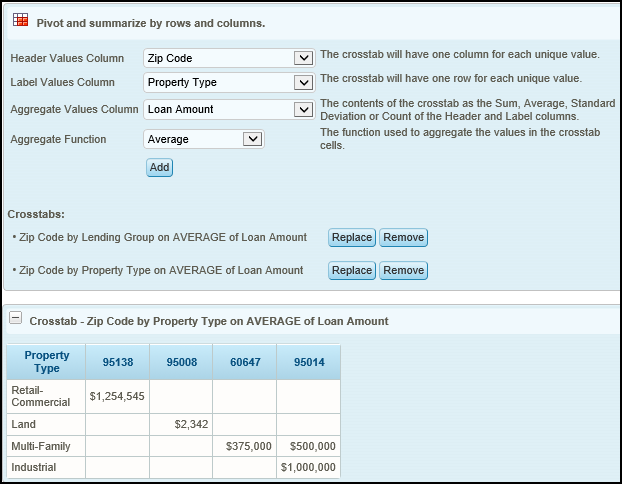 | |
| Paging | Paging controls how many results will appear per page within the table. Transition between pages by using the navigation arrows at the top of the table. | 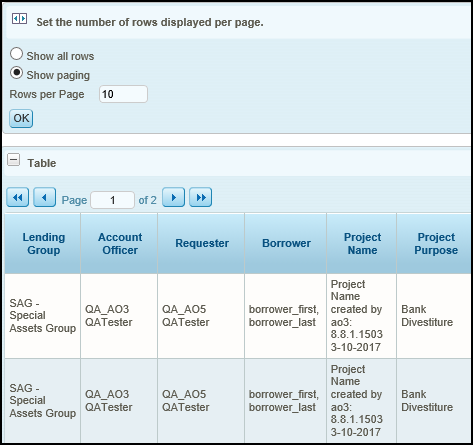 |
Exporting Data
Click on one of the Export buttons in the upper right-hand corner of the window to export a copy of the table. Exporting to Excel will maintain the functional changes applied to the table, such as grouping and aggregating data fields, while the CSV export option will not.
.png)
