- Print
- DarkLight
- PDF
Creating and Sending an RFP
- Print
- DarkLight
- PDF
To send an RFP, open the Project Console page and navigate to the Task Section.
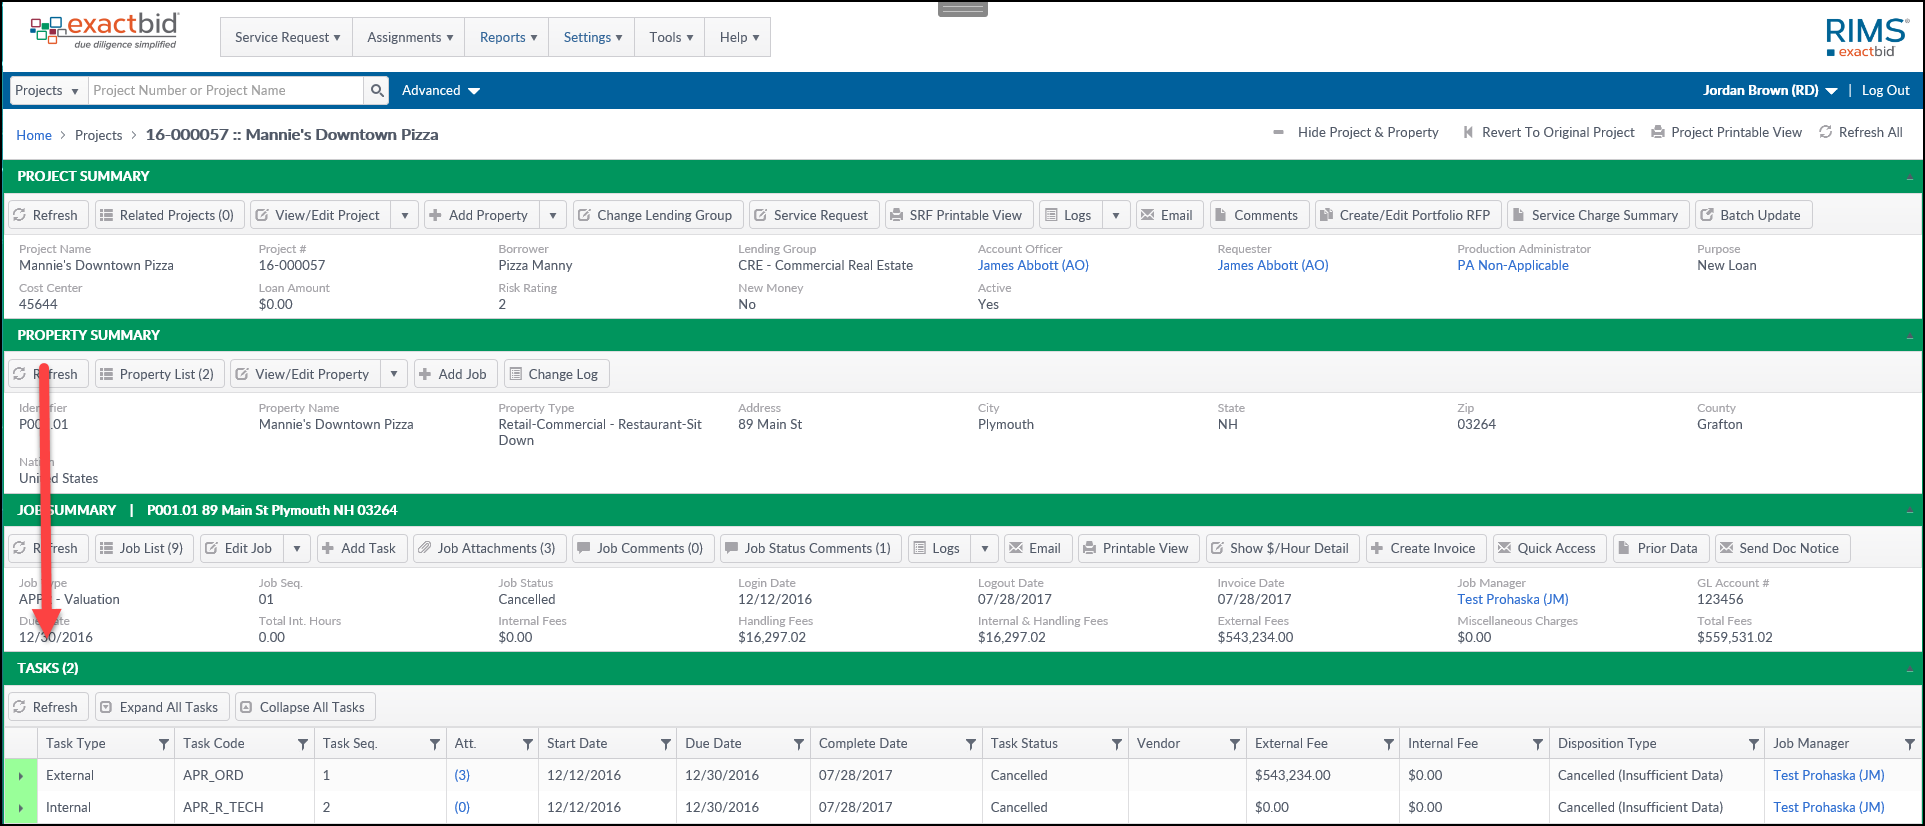
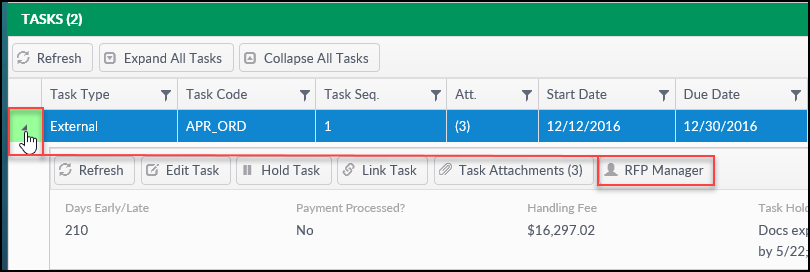
Click on the right-pointing arrow or the row to expand the External Task, then click on the RFP Manager button to open the RFP Manager window.
As you proceed through the RFP process, the Task Status will reflect the current state of the Task.

In the example above, the Task Status is Not Started
Task Status - Not Started
Click on the RFP Manager button.

When opening the RFP Manager for the first time, there may be more than one template listed. If so, click on the appropriate template to proceed.

Fill out the RFP fields, noting that any with bolded titles are required.
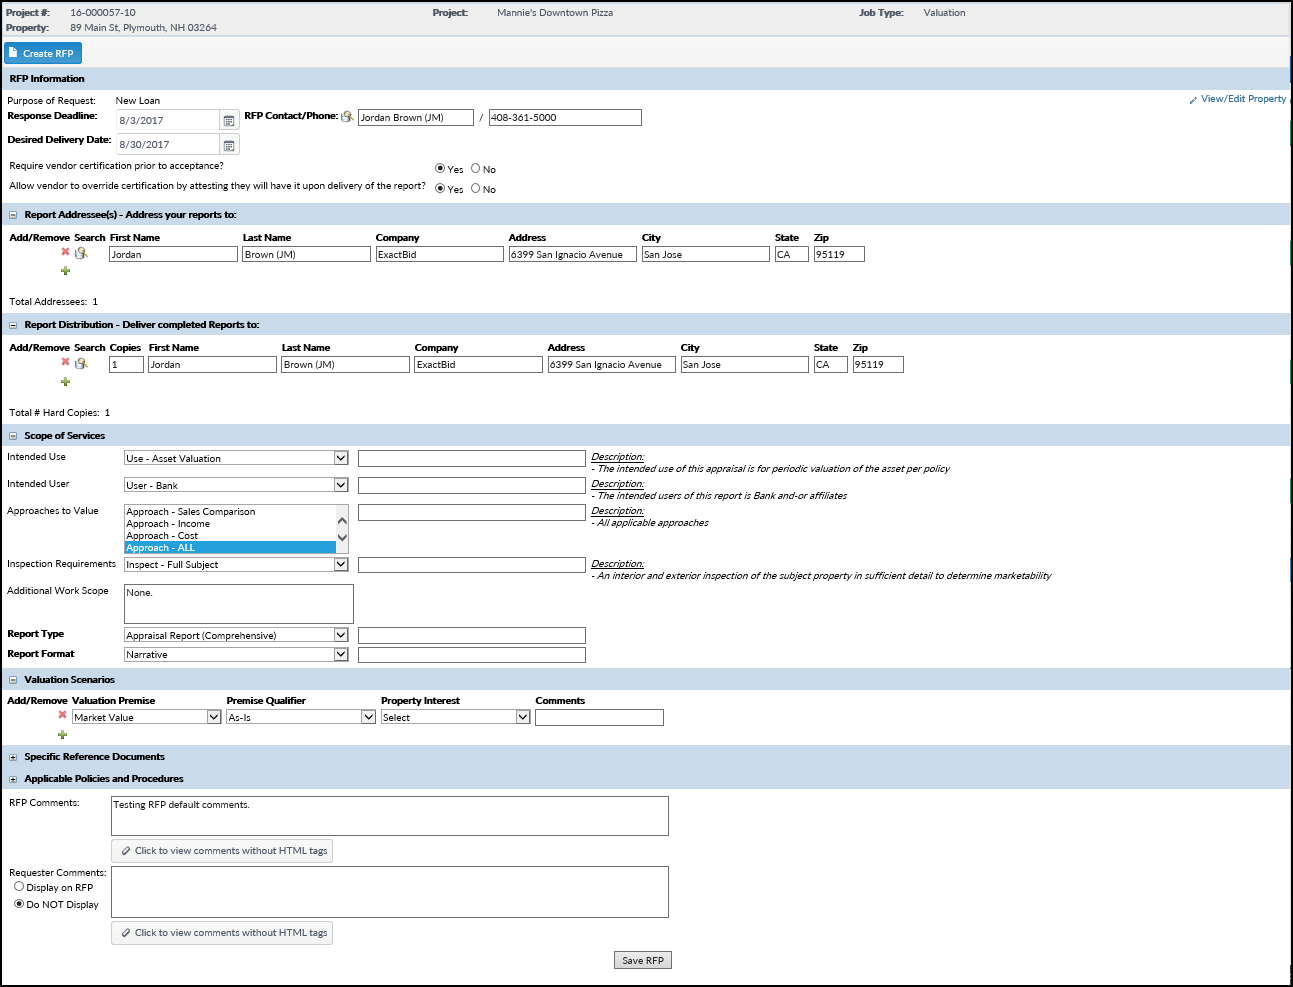
Once all appropriate values have been entered, click on the Save RFP button at the bottom of the screen. If any required fields have not yet been filled out, an “Incomplete Entry” will pop up. If all required data has been entered, a popup will request confirmation. Clicking Yes will create the Draft RFP. The RFP Manager screen will reload with new buttons at the top.
Task Status - RFP-Draft
 a. View Service Request: View the initial Service Request.
b. View RFP: Click to view the RFP. To print a copy of the RFP, click on the printer icon in the upper right-hand corner of the screen. The Property information can also be edited by clicking the View/Edit Property button in the upper right-hand corner of the screen.

c. Edit RFP: Opens a screen to edit the RFP. Note: Not all users will have the option to Edit RFP.
d. Send RFP: Send the RFP to recipients.
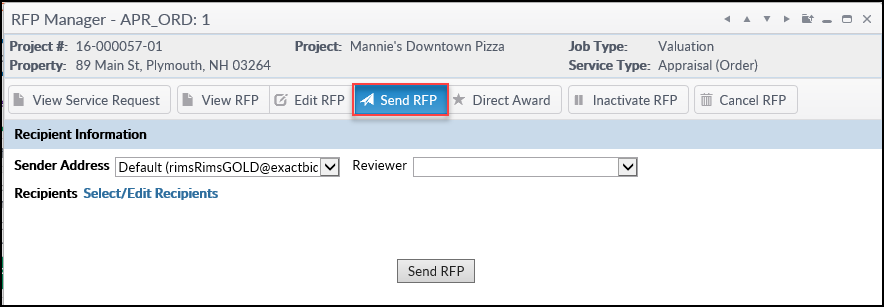
Optionally, select a Reviewer from the drop-down menu. This step is only necessary if it's required for a second Job Manager to review the RFP before it is sent to Vendors. When the Send RFP button is clicked, if a Reviewer has been selected a notice will be sent to that user, as well.
To select the Vendors who will receive the RFP, click the Select/Edit Recipients button.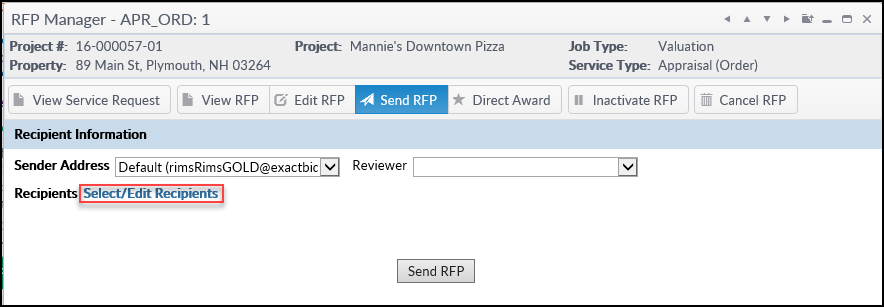
This will open the RFP Recipients screen.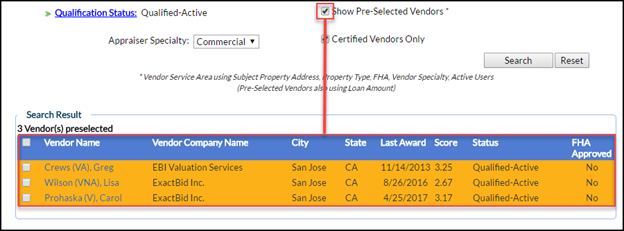
One or more Pre-Selected Vendors may be displayed in the search results. These can be hidden by unchecking the Show Pre-Selected Vendors box. Note that Pre-Selected Vendors are based on the creation of a Vendor Service Area. Not all sites have this setup.
Qualification Status – The Qualification Status is derived from the Vendor user profile. Qualified-Active is selected by default. Clicking the Qualification Status link will open a list of statuses. Multiple statuses can be selected by holding Ctrl while clicking.
Appraiser Specialty – The Appraiser Specialty is derived from the Vendor user profile; the default selection will be based on the Property type. Click on the dropdown menu to change the Appraiser Specialty selection. Click the blank/NULL value to include all specialties.
Certified Vendors Only – This is derived from the Vendor’s RIMSCentral certification information.
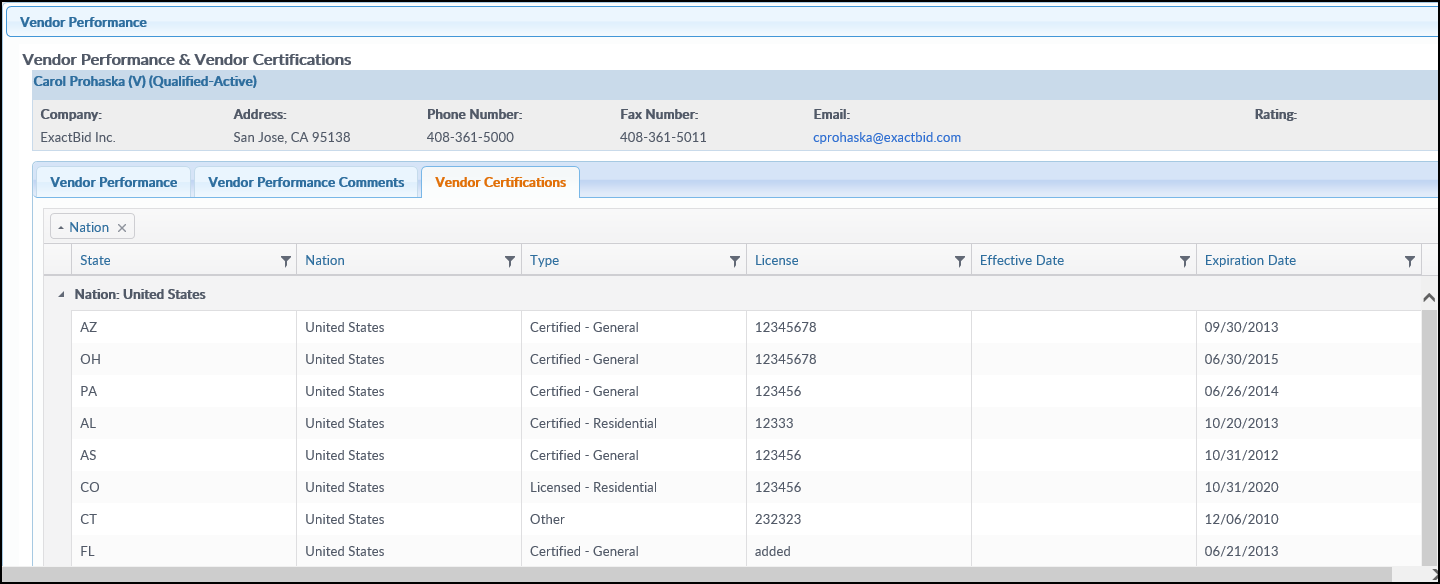
Clicking on a Vendor’s name will open the Vendor Performance screen, which reveals the Vendor’s Performance, Vendor Performance Comments, and Vendor Certifications. Note that the first box lists the Vendor's details, such as address and rating.
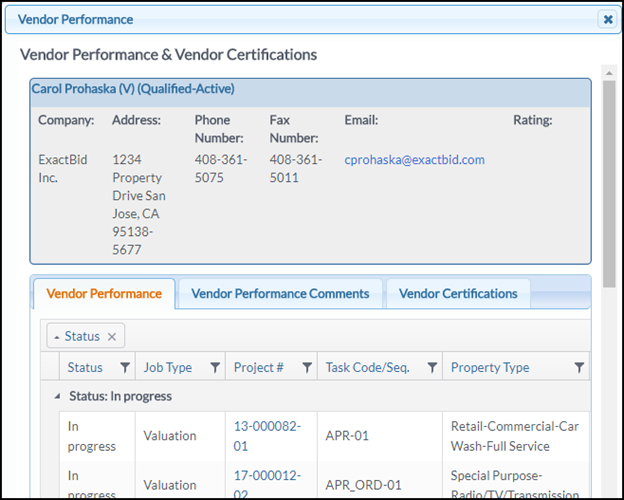
Work In Progress is sorted in ascending order by due date; Work Completed is sorted by Complete Date.
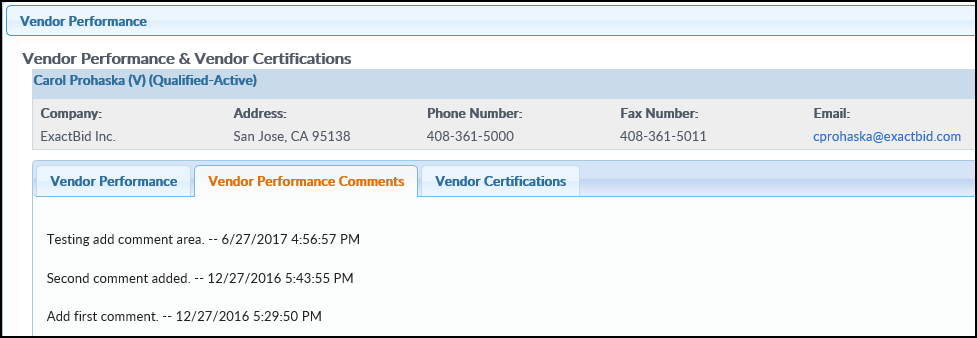
The Vendor Performance Comments screen lists any comments that have been created about the Vendor.
The Vendor Certifications screen lists the states in which the Vendor is certified.
The RFP Recipients screen also offers numerous search criteria categories, including Vendor Service Area, Other Criteria, Concentric Search, and Vendor Information.
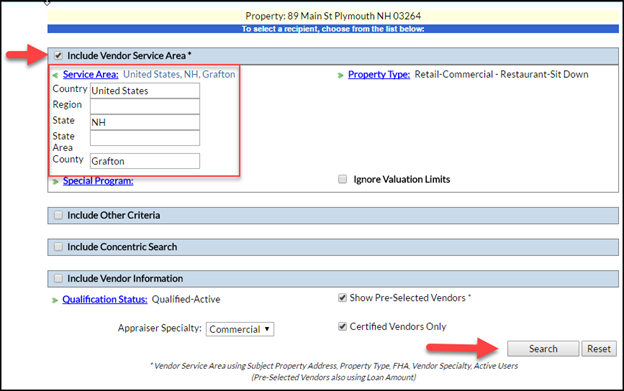
In this example, the Vendor Service Area section has been expanded, with Service Area expanded below that.
Click on the checkboxes for any of the sections to reveal search criteria sub-categories underneath. Note that multiple search criteria can be used concurrently to produce a highly-targeted list of Vendors. All columns can be resorted in ascending/descending order by clicking on the column name.
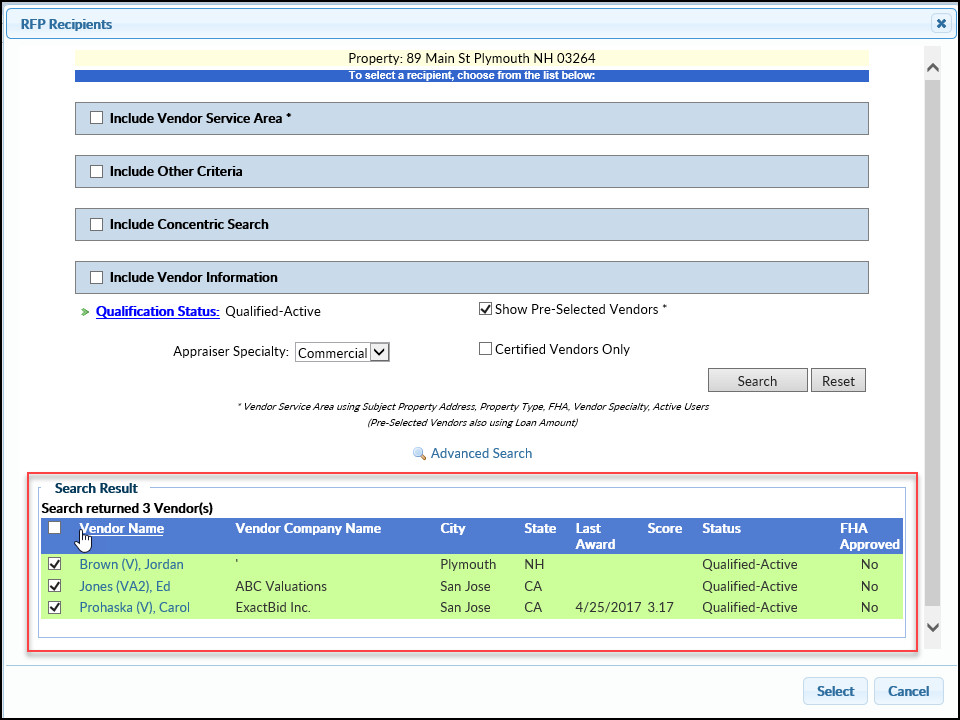
Click the checkbox next to the name of all desired recipients in the search results, then click the Select button in the bottom right-hand corner to proceed. Note that all Vendors in the search results can be selected by clicking the Vendor Name checkbox.
On the following screen, verify the list of Vendors who will receive the RFP, then click Send RFP. Note that it's possible to go back and select additional recipients by clicking on the Select/Edit Recipients button. Any Vendors that have already been selected will be retained.
.png)

.png)