- Print
- DarkLight
- PDF
Creating a User Account
- Print
- DarkLight
- PDF
Log in to RIMS as a Content Administrator, click on Settings in the top navigation bar, and then click on View all Settings in the drop-down menu..jpg)
Next, click on User Management..jpg)
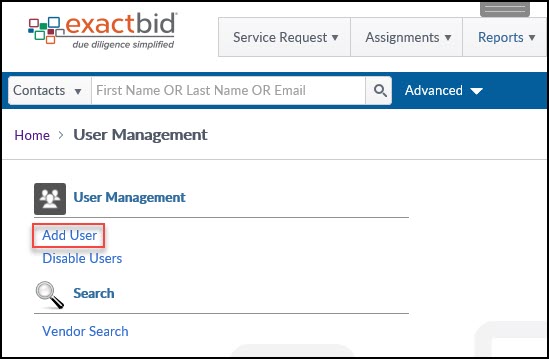
Click on the Add User button under User Management.
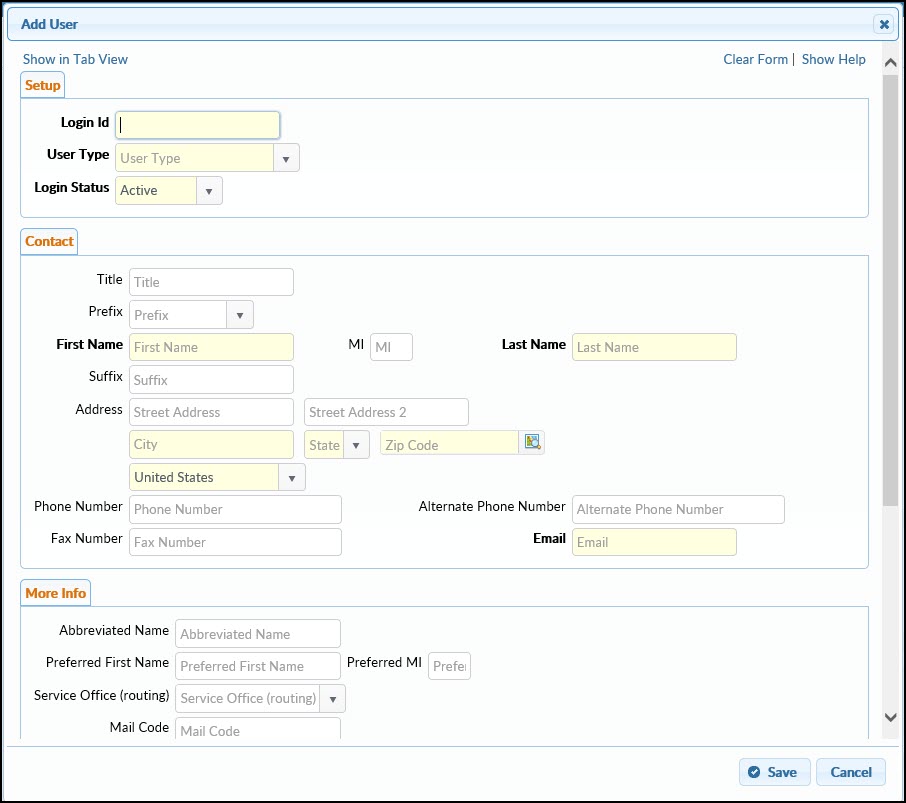
The Add User modal will open.
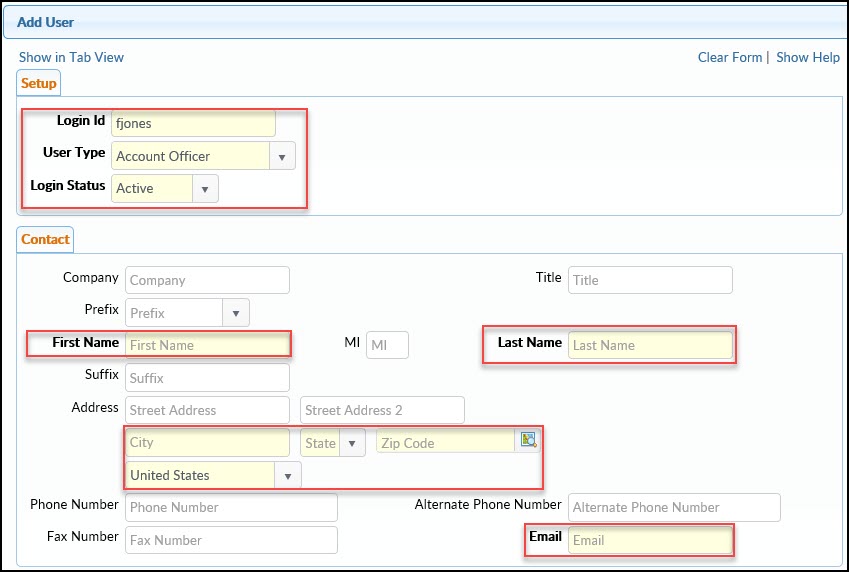
First, enter a Login ID. Each financial institution uses its own schema, but a common one is first initial, last name. For example, if the account was being created for Frank Jones, the username would be fjones. One universal constraint is that the Login ID must be unique; no two Login IDs may be identical within RIMS.
Next, select a User Type from the drop-down menu. This will refresh the form with the appropriate fields. For information specific to the different User types, refer here:
After selecting user type the form will refresh with the appropriate fields. Fields with yellow backgrounds and/or bold titles are required.
In the example above, all required fields have been highlighted with red boxes
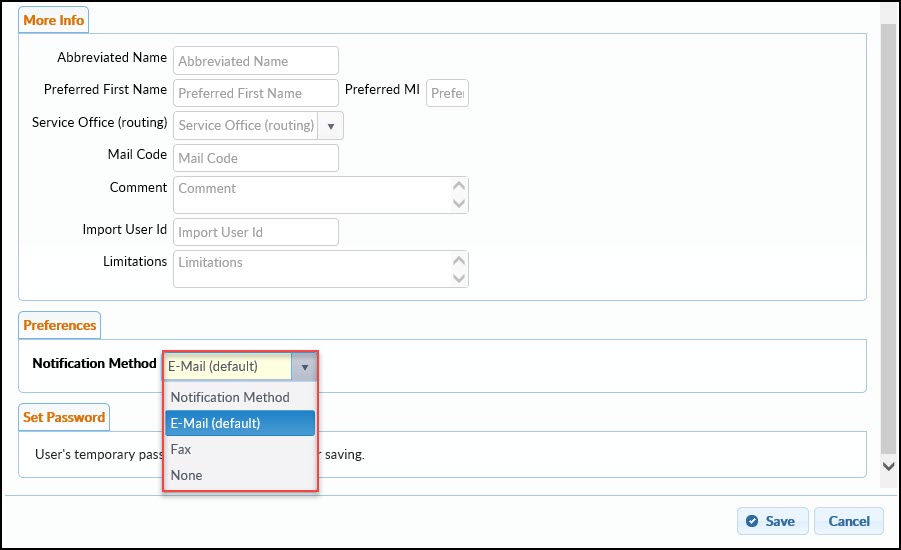
Enter Contact information in the next section. Typically, the Email field is required. To remove the requirement, scroll to the bottom of the modal and select an option other than E-mail from the Notification Method drop-down menu.
After entering all desired information, including values specific to the User type being created, click the Save button in the bottom right-hand corner of the modal.
Upon saving, the User's temporary password may be displayed. There are various password configurations in RIMS. Some institutions allow the temporary password to be displayed to the Content Administrator, so that he or she may assist the User in account setup process. For security reasons, other institutions do not display that temporary password, instead emailing that password to the new User directly.
.png)
