- Print
- DarkLight
- PDF
Creating a Dashboard
- Print
- DarkLight
- PDF
Dashboards allow the user to see a custom collection of Reports, making it easier to quickly and easily view related information. Note: Unlike Reports, Dashboards are only interactive and cannot be scheduled.
New Dashboards can be created in Personal Reports or Shared Reports. For Dashboards that are designed to be shared, creating a new Dashboard in Personal Reports first, then copying to Shared Reports once it is working as intended is generally recommended.
Click on the New Dashboard button.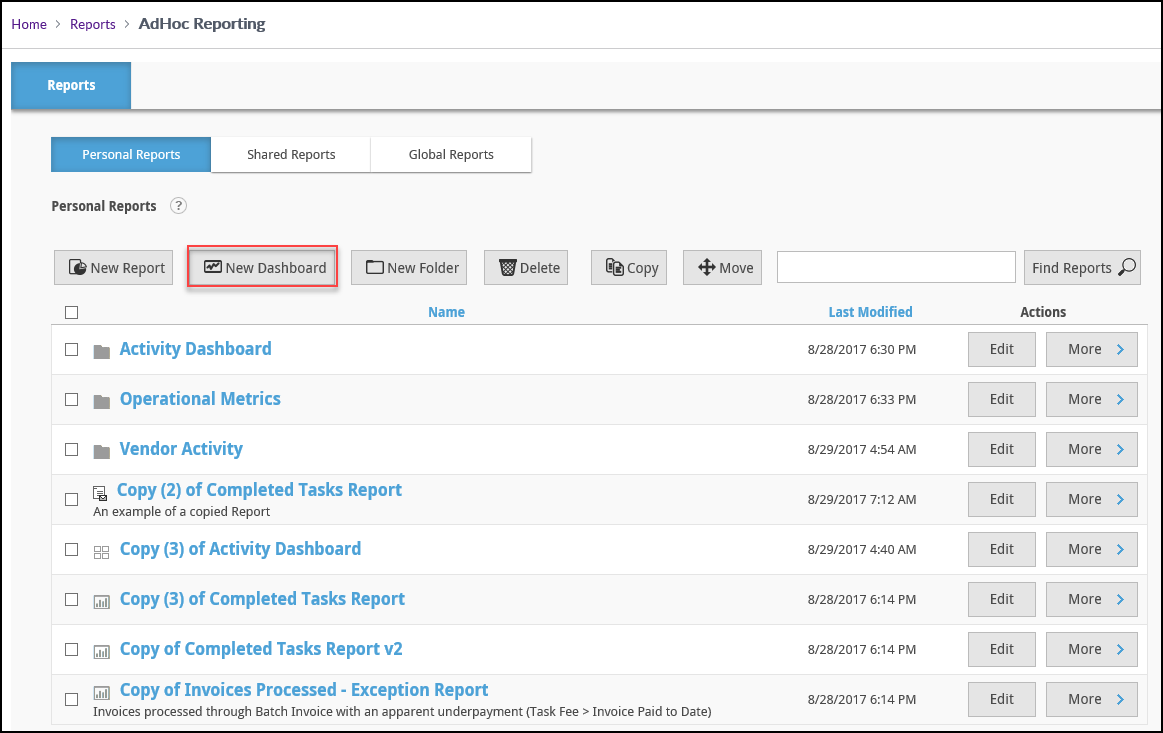
The Create New Dashboard screen will open.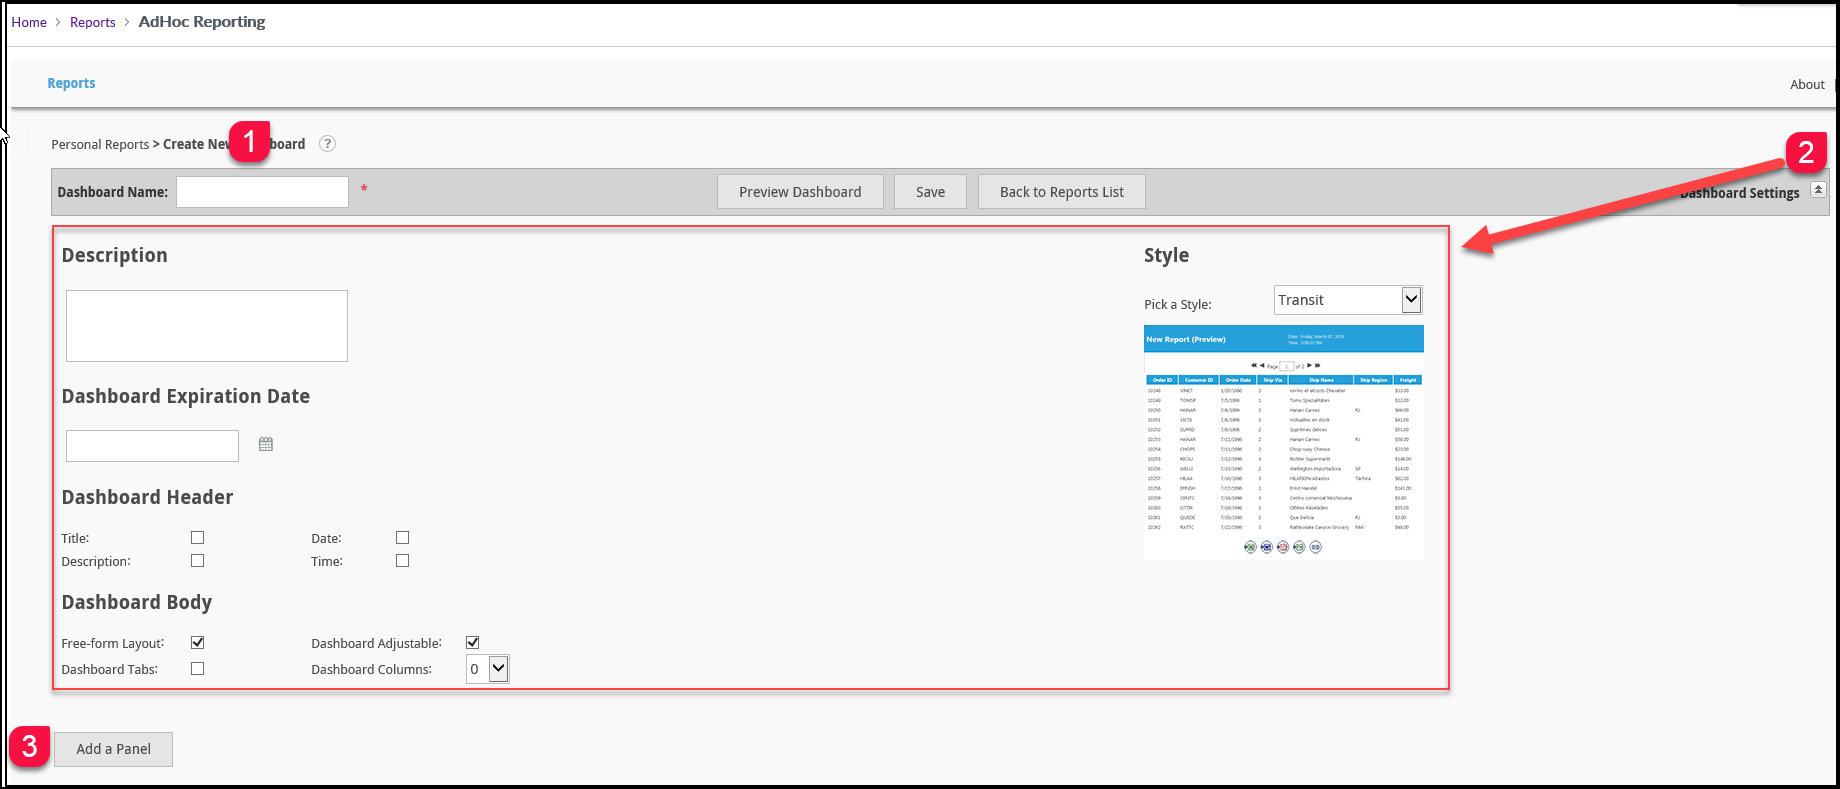
1. Enter a Dashboard Name.
2. Click the Dashboard Settings button in the upper right-hand corner of the screen to expand several settings fields.
- Description: A short description of the Dashboard and its purpose.
- Dashboard Expiration Date: Enter a date after which the information in the Dashboard is no longer valid.
- Dashboard Header: Add a header with any combination of Title, Date, Time, and Description to the top of the Dashboard.
- Style: Select a Style, which will change the color and aesthetic elements of the Dashboard. Note that the preview image below the Pick a Style
drop-down menu only reflects the Style selected and not any of the other Settings.
- Dashboard Body: Define the layout of the Dashboard page, including the following:
- Free Form Layout: Allows the user to resize and rearrange the Panels once the Dashboard has been run.
- Dashboard Tabs: By default, the Dashboard is a single page with one or more columns. Toggling Dashboard Tabs adds the ability to have multiple tabs
of columns.
- Dashboard Adjustable: Makes the Dashboard dynamic, allowing the user to add, remove, and rearrange panels once the Dashboard has been run.
- Dashboard Columns: Define the number of columns in the Report. Each column can have multiple Panels in it.
3. Add a Panel: Panels contain the Reports that will appear in the Dashboard. When at least one Panel has been added, the Preview Dashboard button will become active, making it possible to view changes to the Dashboard layout before saving. Once Panels have been added, they can be removed with the Delete Panels button.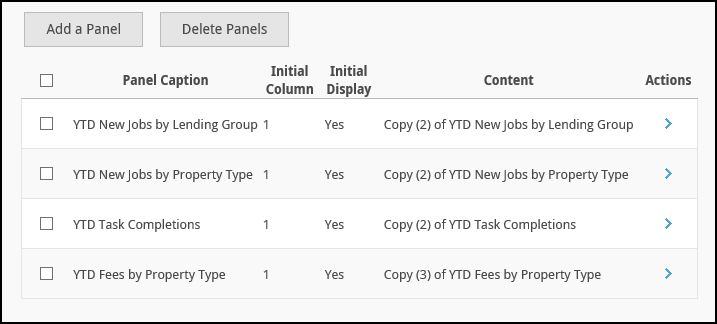
Hover over the blue arrow to see two additional options.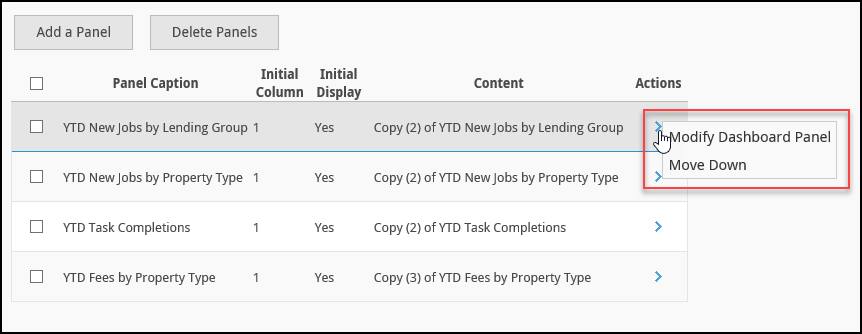
Modify Dashboard Panel: Opens the Add a Panel window, but rather than being blank the fields are populated. This allows the user to edit the Panel, changing the Report, Column, etc.
Move Down: Click to move the Panel down, which will move it down on the Dashboard page when it's run. Note that if Dashboard Adjustable is selected in the Dashboard Settings, the Panel order will be rearrange-able once the Dashboard has been run.
Once all Panels have been added and Settings configured, click Save to Save the Dashboard. It's now safe to close the Dashboard setup screen and return to the Personal Reports page.
To run the Dashboard, click on the Dashboard title on the Personal Reports page.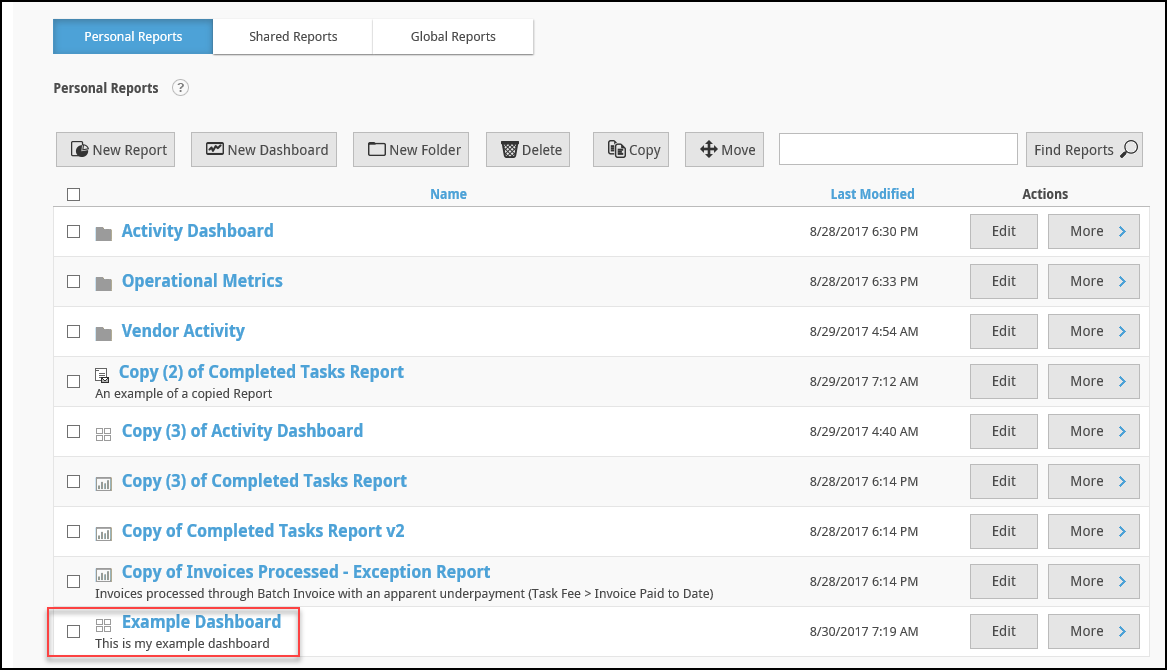
The Dashboard will open.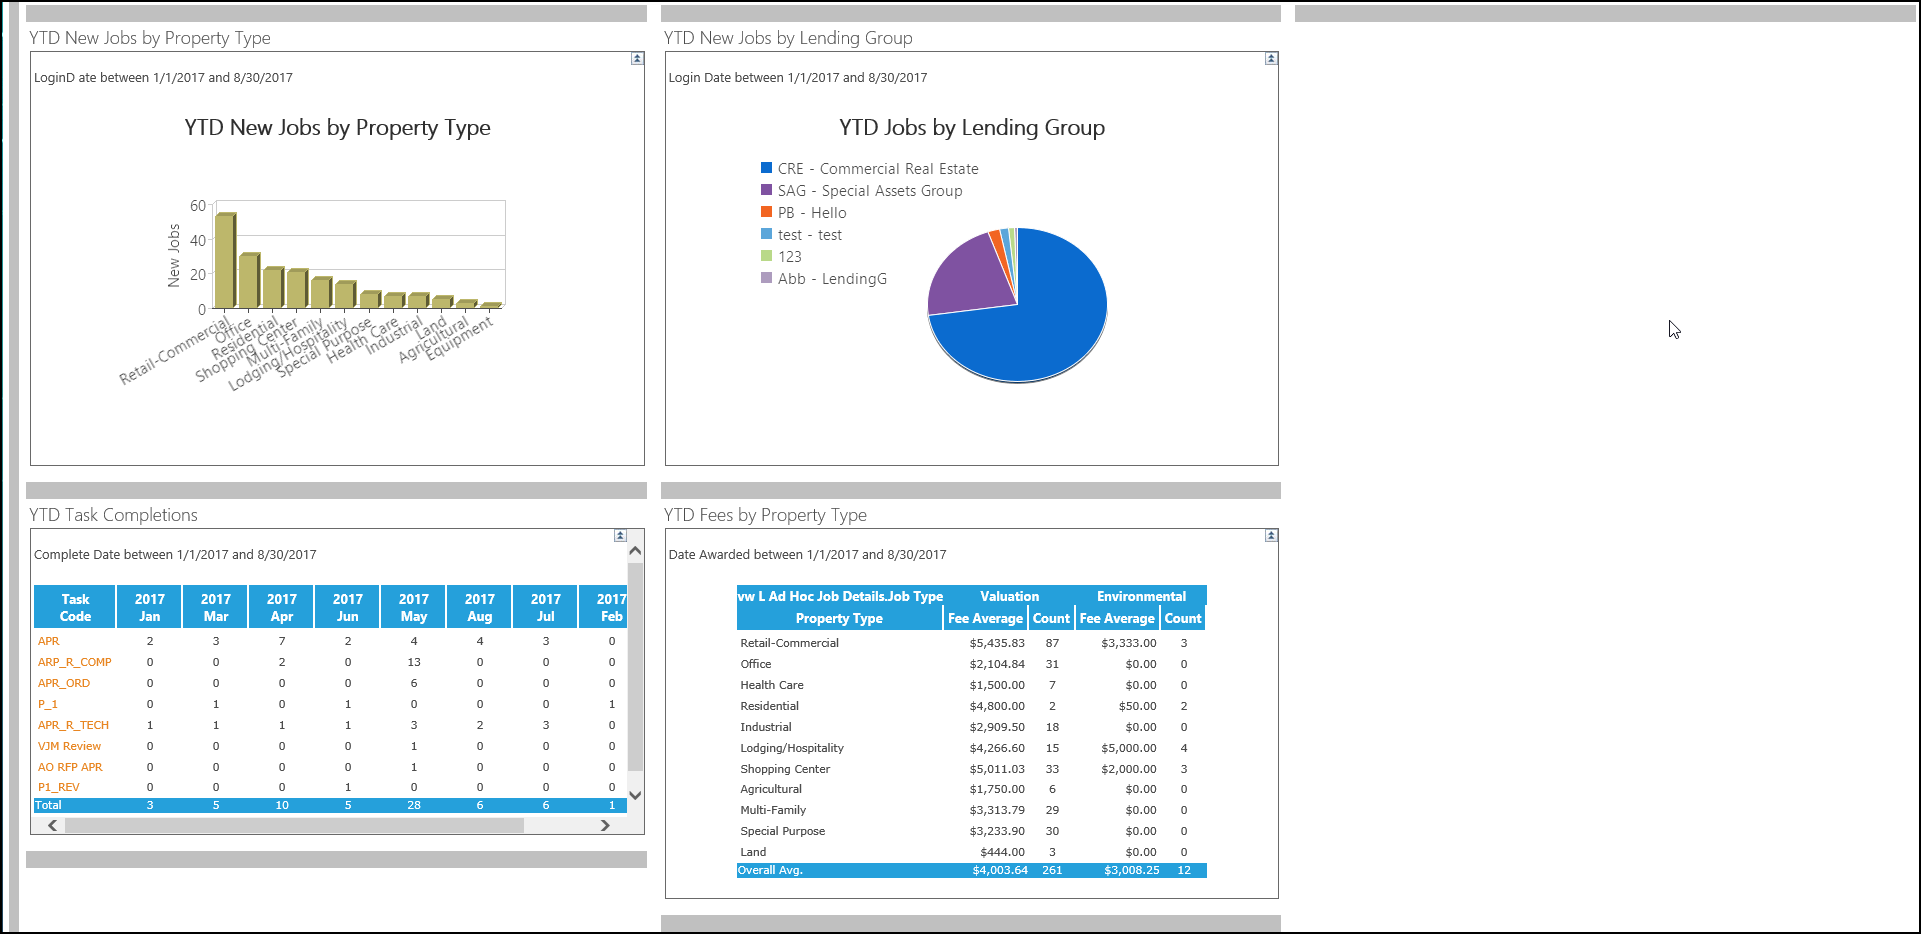
This is an example of a three column layout. It is not Adjustable, nor does it have Tabs. The first two columns have two Panels each, the third column has no Panels.
The following is the same Dashboard with three changes: a header with title has been added, Tabs have been added, and it's configured as Dashboard Adjustable.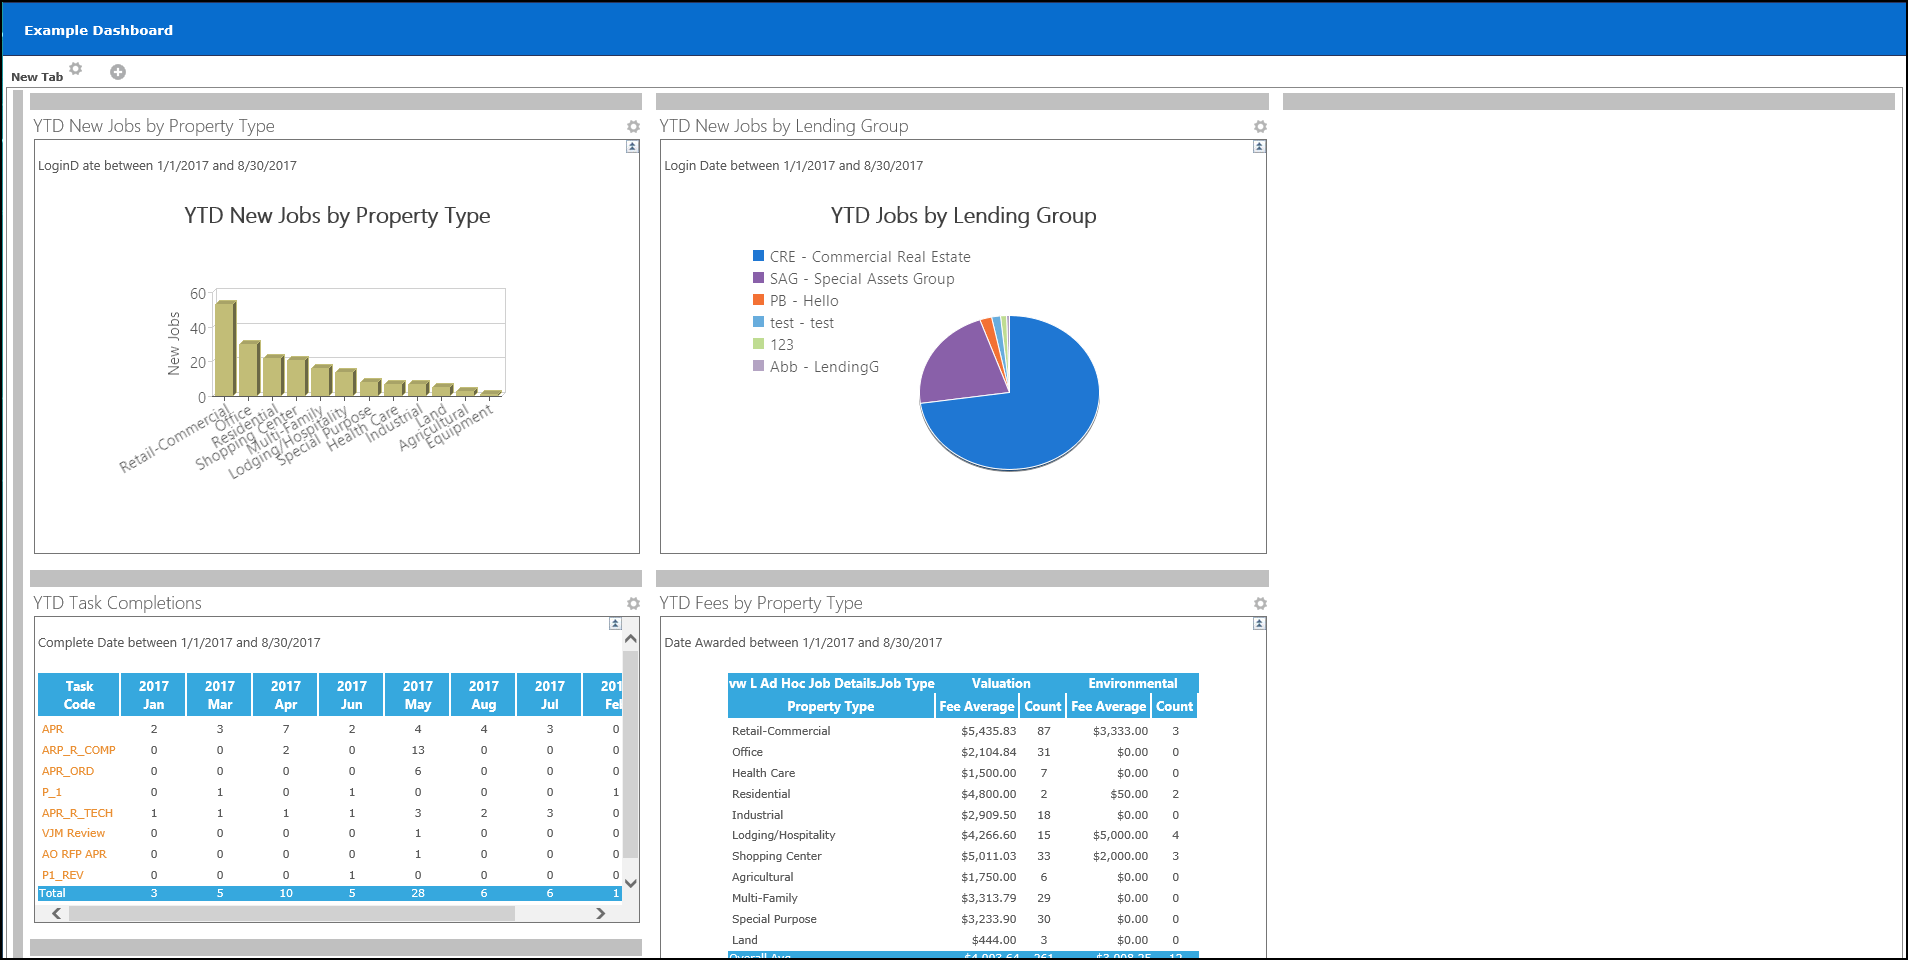
Note the new configuration buttons at the top of the page and in the corner of each Panel.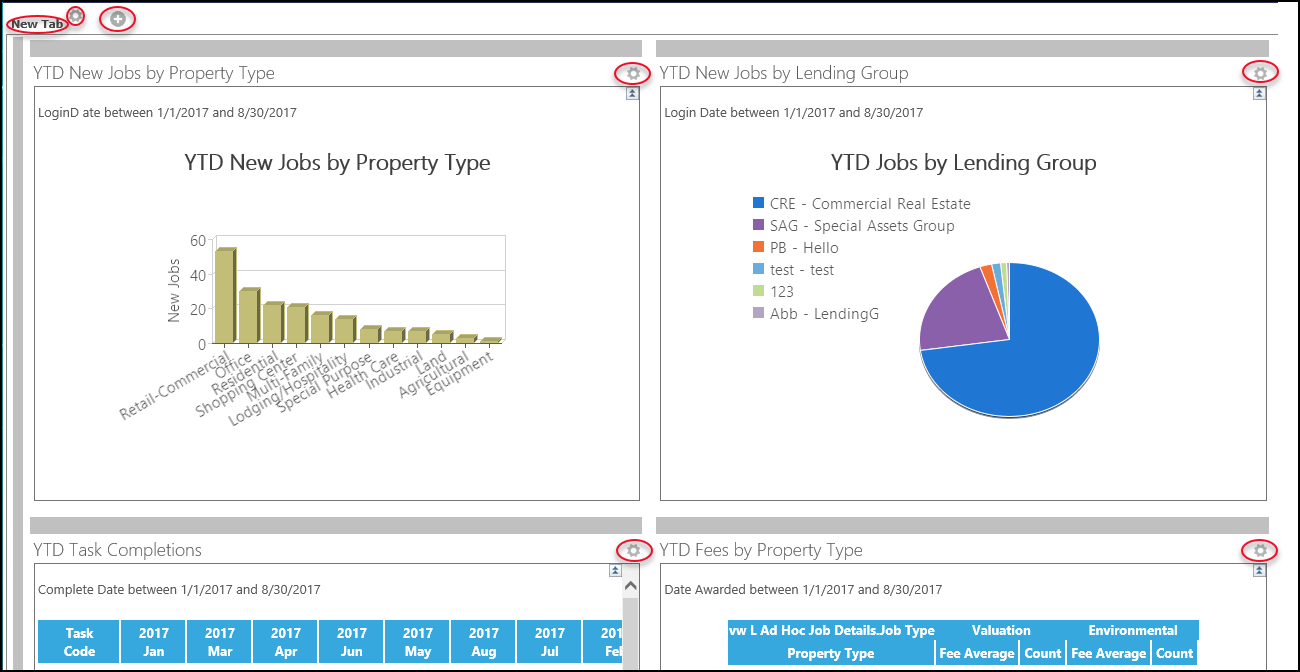
The gear symbol in the upper left-hand corner of the page provides options for the currently selected Tab.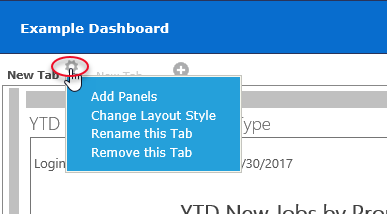
Click the plus symbol to add a new Tab.
A new window will open with a list of Panels that can be added to the new Tab.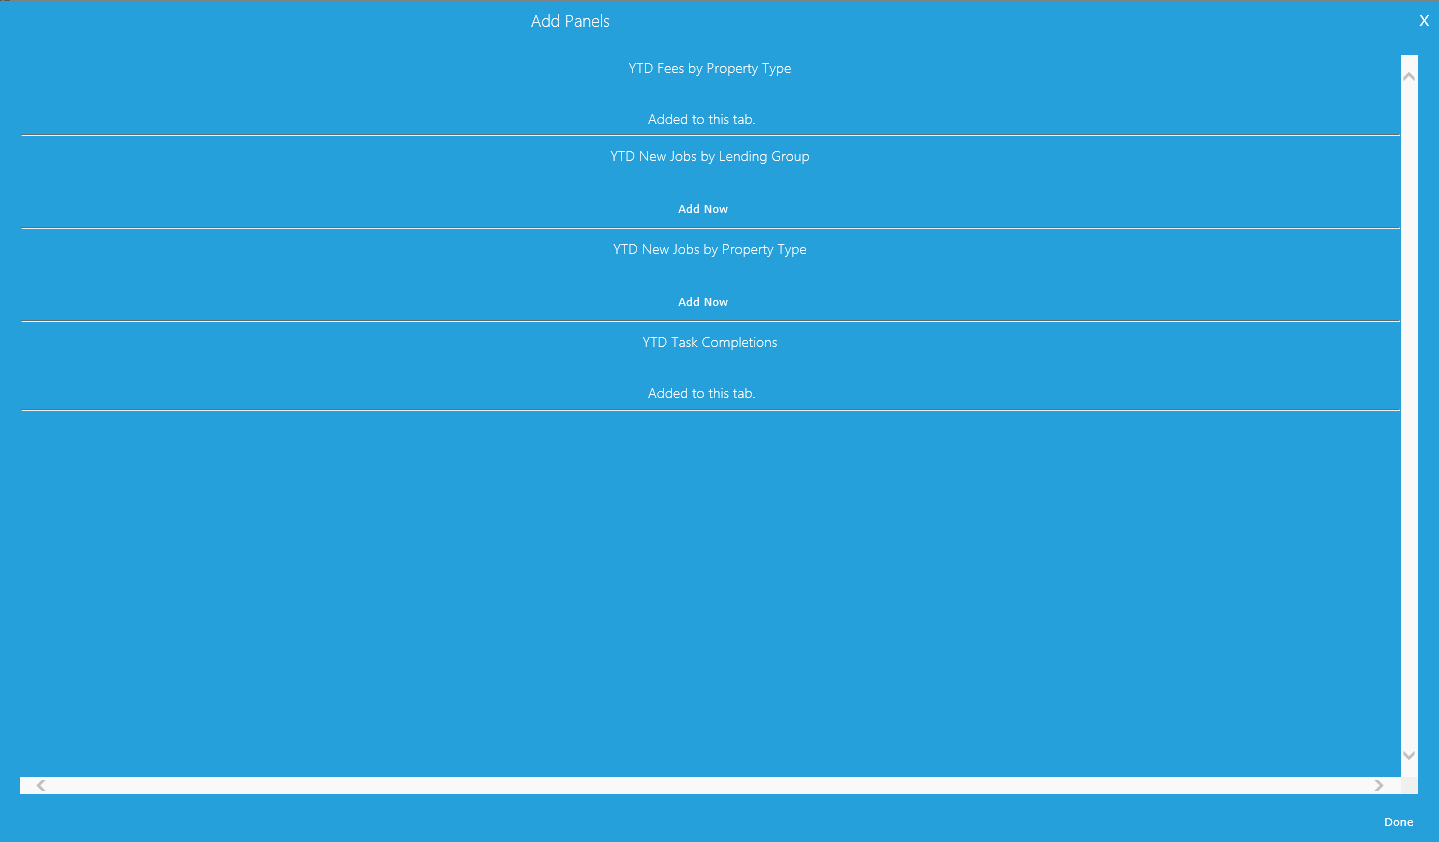
Click Add Now to add a Panel to the Tab. Once a Panel has been added, it will say "Added to this tab." In the example above, the top and bottom Panel have been added. Once all selections have been made, click the Done button in the bottom right-hand corner to close the Panel-selection window and open the new Tab.
The example above has two tabs, titled Tab One and Tab Two. Tab One is currently-selected.
The gear symbol in the upper right-hand corner of each Panel allows the user to rename or remove the Panel.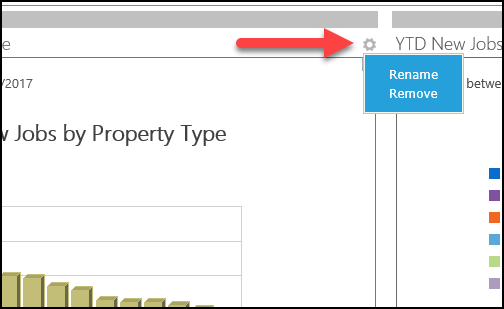
With Dashboard Adjustable selected in the settings, Panels will become movable. Hover in the title area of a Panel and a small cross-shaped icon will appear. Click and hold then drag the Panel into the desired position.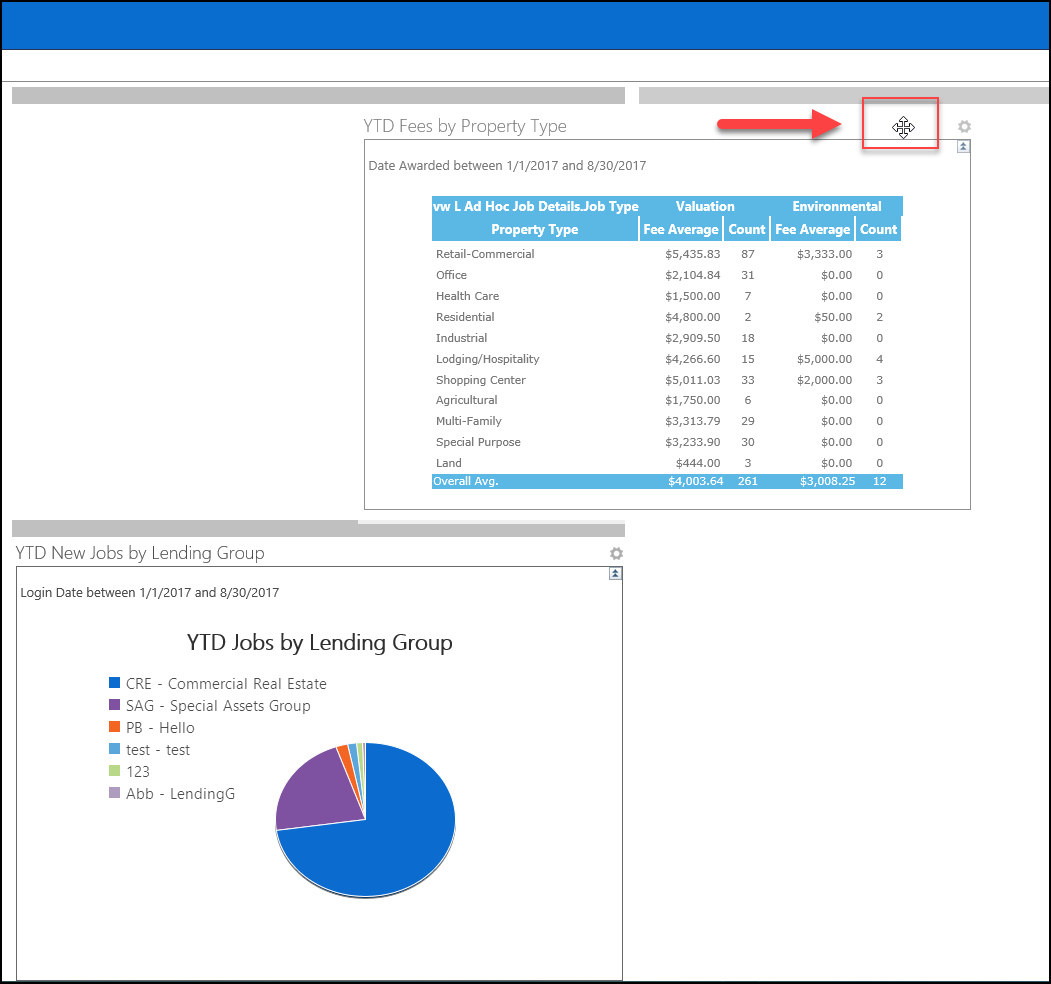
In the example above, the YTD Fees by Property Type Panel is being dragged to the right.
.png)
