- Print
- DarkLight
- PDF
Closing the Tasks
- Print
- DarkLight
- PDF
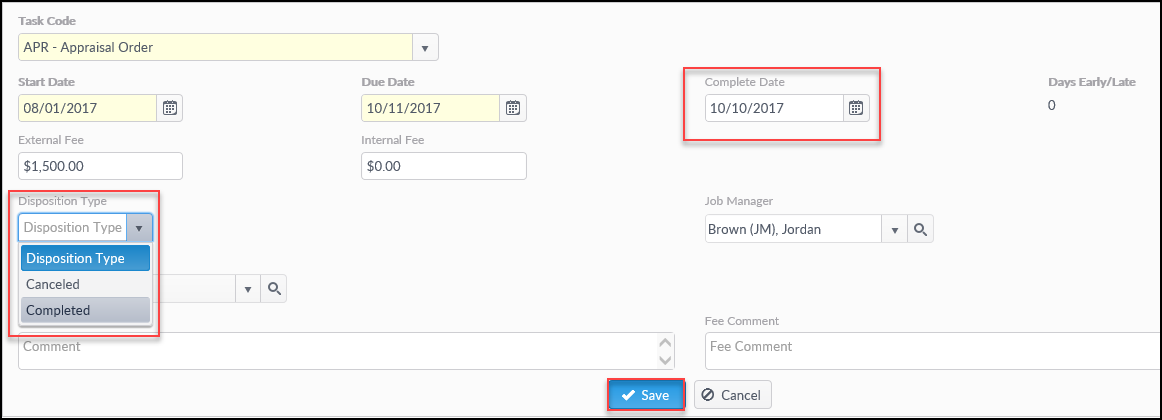
Once the Review Document has been uploaded, the Job Manager can close the Tasks. Each must be closed individually. First, click on the External Task to expand it. Then click the Edit Task button.
On the Edit Task code screen, set the Disposition to the appropriate value, add a Complete Date, verify that the Start Date and Due Date fields have populated correctly. Finally, click Save.
After saving, the modal will close. Note the Task Status has changed to Unpaid. This indicates that the Vendor has uploaded an Invoice and it needs to be addressed. Note: This is an institution-specific setting. Some institutions skip this step.
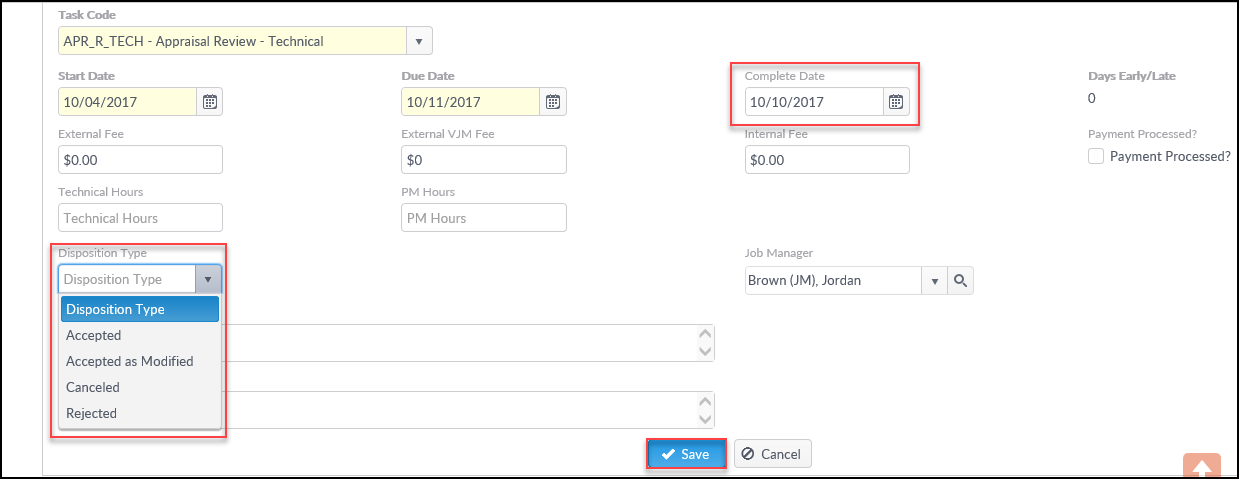
Next, click on the Internal Task to expand it. Then click the Edit Task button.
On the Edit Task code screen, set the Disposition as appropriate. Add a Complete Date and verify that the Start Date and Due Date fields have populated correctly. Finally, click Save.
In most cases the Internal Task Status will changed to Closed. However, some institutions may opt to track payment of the Internal Task as well.
If this is the final Task in the Job, the Account Officer will receive an email Notice that the assignment has been completed. This email will summarize all the events and fees associated with the assignment.
Next, the Vendor Invoice will be paid.
.png)
