- Print
- DarkLight
- PDF
Batch Update
- Print
- DarkLight
- PDF
Batch Update is the final button on the Project Summary toolbar. It is not enabled on all sites.

If the Batch Update button isn’t visible, click on the down arrow on the right-hand side of the Project Summary toolbar, then click the Batch Update button in the drop-down menu.

Clicking on the Batch Update button will open a new browser tab with a list of all Tasks associated with the Project.
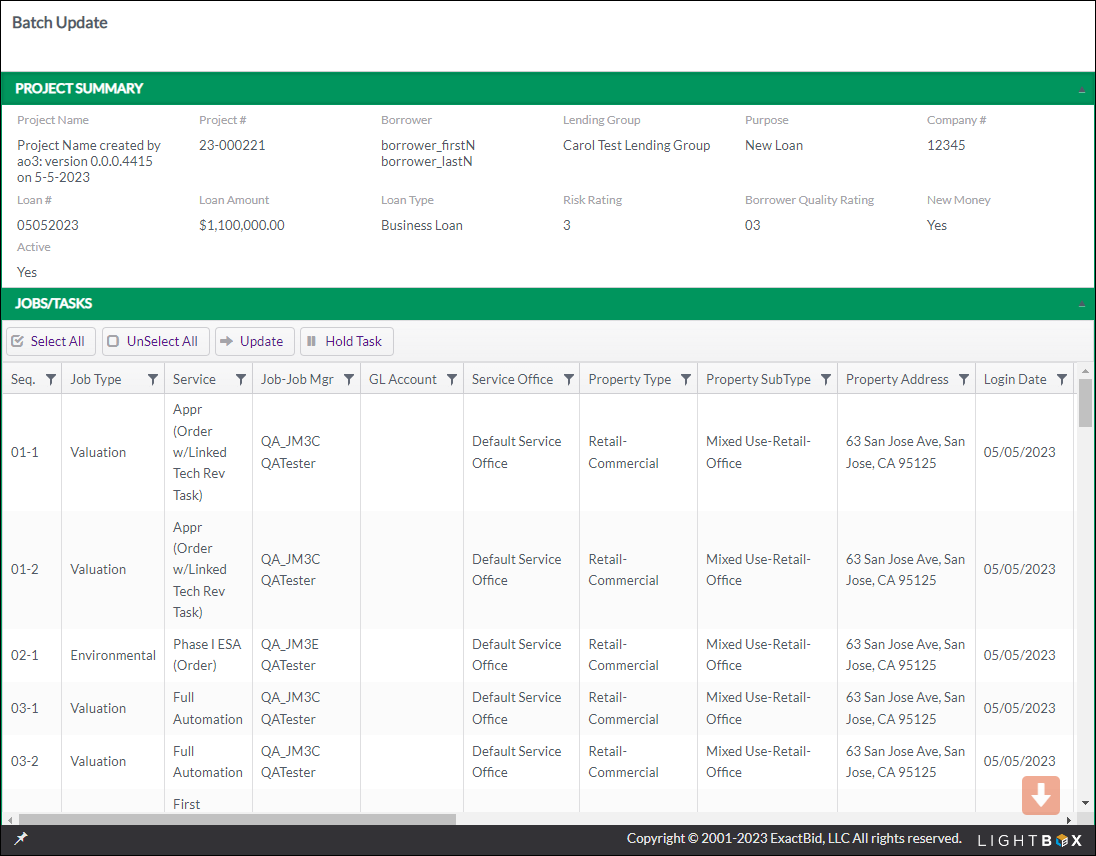
There are several ways to filter the information on this page.

- Select All: Selects all the displayed items.
- UnSelect All: Unselects all currently selected Tasks.
- Update: Opens a new window in which any selected Tasks can be updated.
- Hold Task: Click to open the Batch Update Hold Task modal.

1. Enter the date (mm/dd/yyyy) on which the hold will start, or click the calendar button and select the date.
2. Click the down arrow and select the individual who is requesting the hold.
3. Select the type of hold from the dropdown menu.
4. Optionally, enter comments.
Click Save to finalize the hold.
Once Tasks are on hold, there is no editing of the on-hold details. A Hold Task column has been added to reflect the date a Task is placed on hold. If a Task is not on hold, the field will be blank. Only the on-hold date is reflected in the Hold Task column.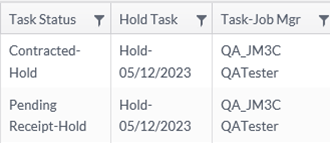
To take one or more Tasks off hold, select the Task(s) that are on hold. There are three methods to select more than one Task:
- Hold the ctrl key on your keyboard while clicking Tasks.
- Click and drag your cursor to select multiple Tasks.
- Click the Select All button to select all Tasks.
Once the appropriate Tasks are selected, click the Hold Task button.
Note: If you select a combination of Tasks that are both on hold and off hold, an error message appears when you click Hold Task. You will be unable to proceed until ONLY on hold OR off hold Tasks are selected.
On the Batch Update Hold Task modal, enter or select an Off Hold date, enter Off Hold Comments (optionally), and then click Save to apply.

A message will appear and the modal will close.
The information in the table can also be filtered by one or more columns. Click on the filter button in the right-hand corner of a column to open a menu.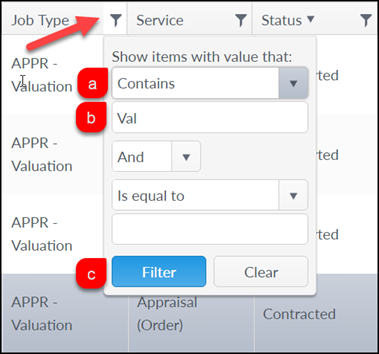
- Select one or more operators from the drop-down menu. In this example, “Contains” has been selected.
- Enter the phrase by which to filter. In the example, “Val” has been entered.
- Click the Filter button. The results will include any Jobs with the text “Val” in the Job Type column.
There are several options for selecting the Tasks to be updated.
- Click a single Task.
- Hold down the Ctrl button on your keyboard and click on multiple Tasks.
- Click and drag the cursor to select multiple Tasks.
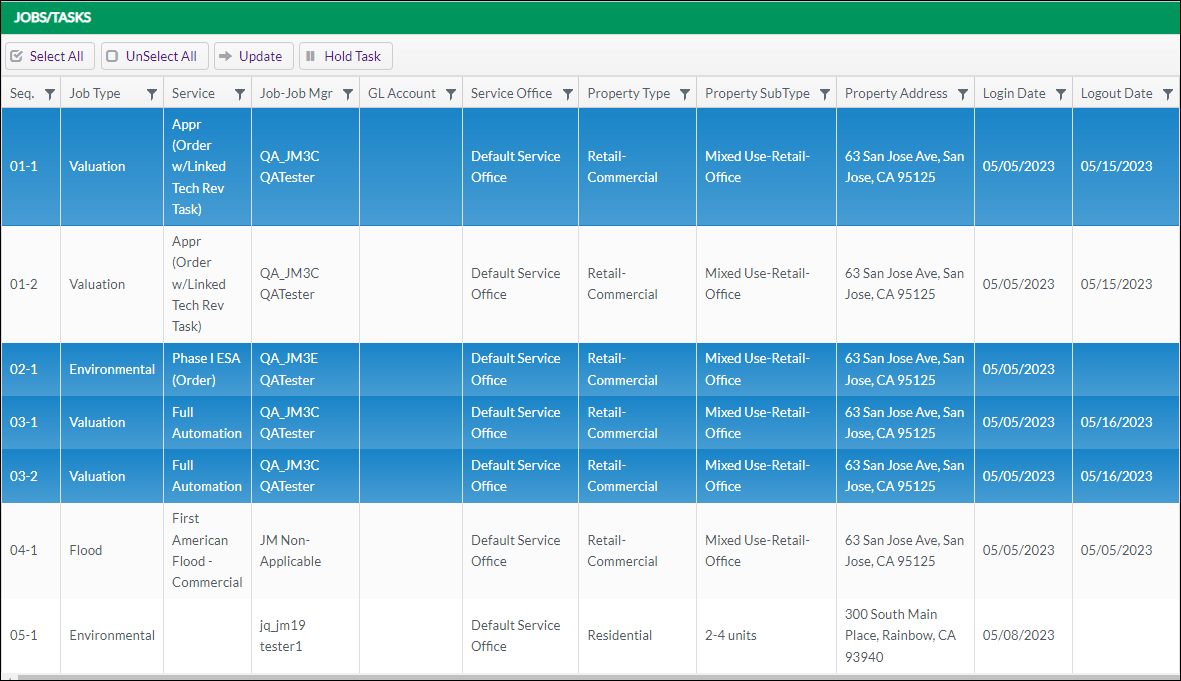
In this example, the four Tasks highlighted in blue have been selected.
Once all Tasks have been selected, click Update to open the Update Job-Task Fields modal.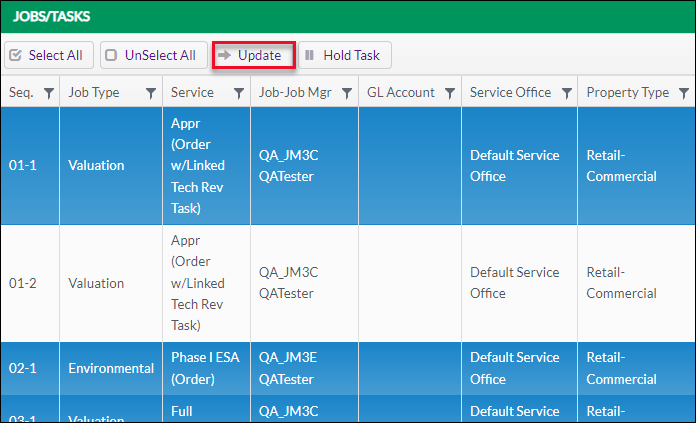
The Update Job-Task Fields modal can be snapped to the right by clicking on the right-facing arrow in the upper right-hand corner of the screen.
This will make the Update Job-Task Fields page and the Batch Update page visible at the same time. However, changes made on the Batch Update page in this view won’t be reflected on the Update Job-Task Fields page; close the Update Job-Tasks Field page and re-open it to refresh any changes made to the selections.
The Update Job-Task Fields page has two sections: one for Job fields and one for Task fields.

Once all changes have been made to the Tasks and/or Jobs sections, click Save to apply the updates.
A popup will announce that the changes have been made.
The Update Job-Tasks window may now be closed.
To review the changes made, return to the Project Console page and navigate to the Jobs Summary section. Note that if Batch Update changes were made to Tasks from multiple Jobs, each Job will need to be selected individually to see its Change and Notification Logs. The Logs only display information for the currently-selected Job.
To select a different Job, click on the Job List button.
Select a Job by clicking on it.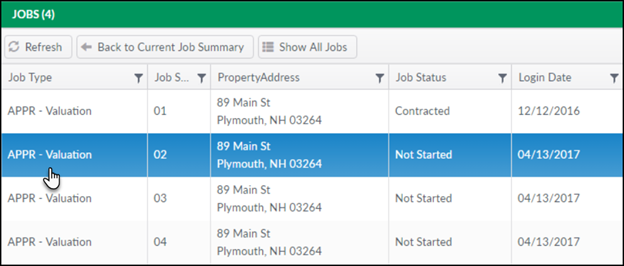
Next, click the Logs button and then select Change Log from the drop-down menu.

If the Batch Update was run recently, an entry should appear at or near the top of the results. Note that if date filters are being applied, the TO date needs to be set to one day after the last day to be included in the results; the TO date itself is not included in the results.
Some Batch Updates will also generate Notifications. Those can be accessed by clicking on the Logs button in the Job section, then selecting Notification Log from the drop-down menu.

Note that a Canceled disposition can only be set for non-portfolio open-awarded Tasks. When using the Cancel option, reference the "Seq." column to avoid selecting portfolio Tasks, which are indicated with a "PFL."
There is date validation on the Update Job-Task Fields page. For example, a Due Date or Complete Date cannot be set prior to the Start Date.
.png)
