- Print
- DarkLight
- PDF
Adding and Editing Templates
- Print
- DarkLight
- PDF
To add a new Template, click on the Add Template button and star from the beginning.
This will open a new blank Template.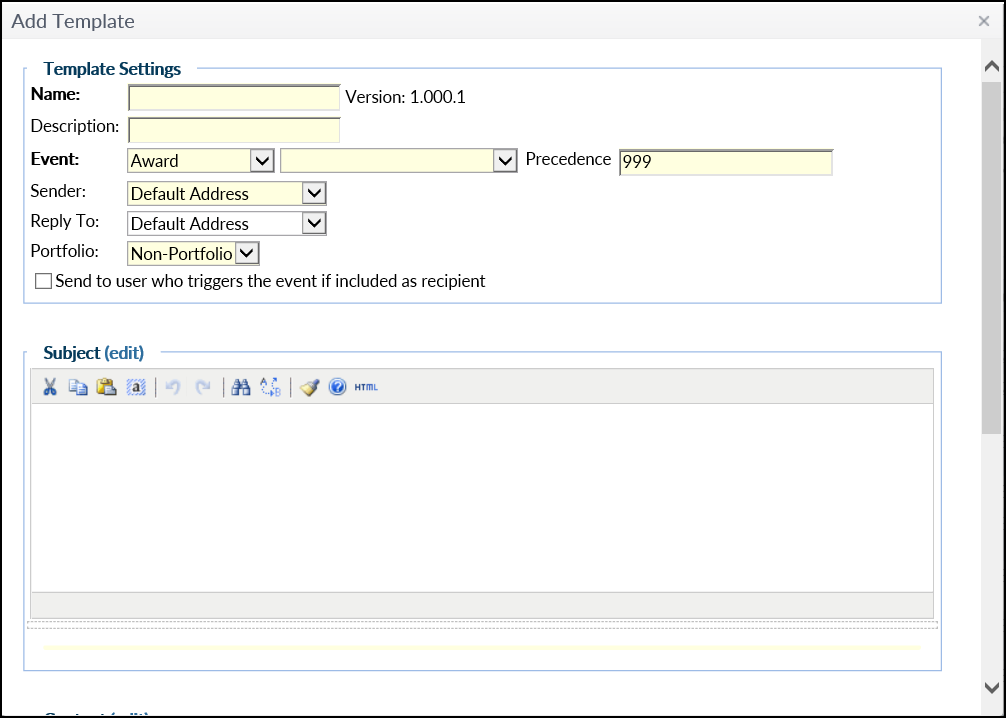 However, it is highly recommended that you instead edit an existing Template and then save it with a new name. The process and screens are the same; the only substantive difference is that when editing an existing Template, the content will be prepopulated, whereas a New Template will be blank.
To edit an existing Template, click the pencil icon in the Actions column.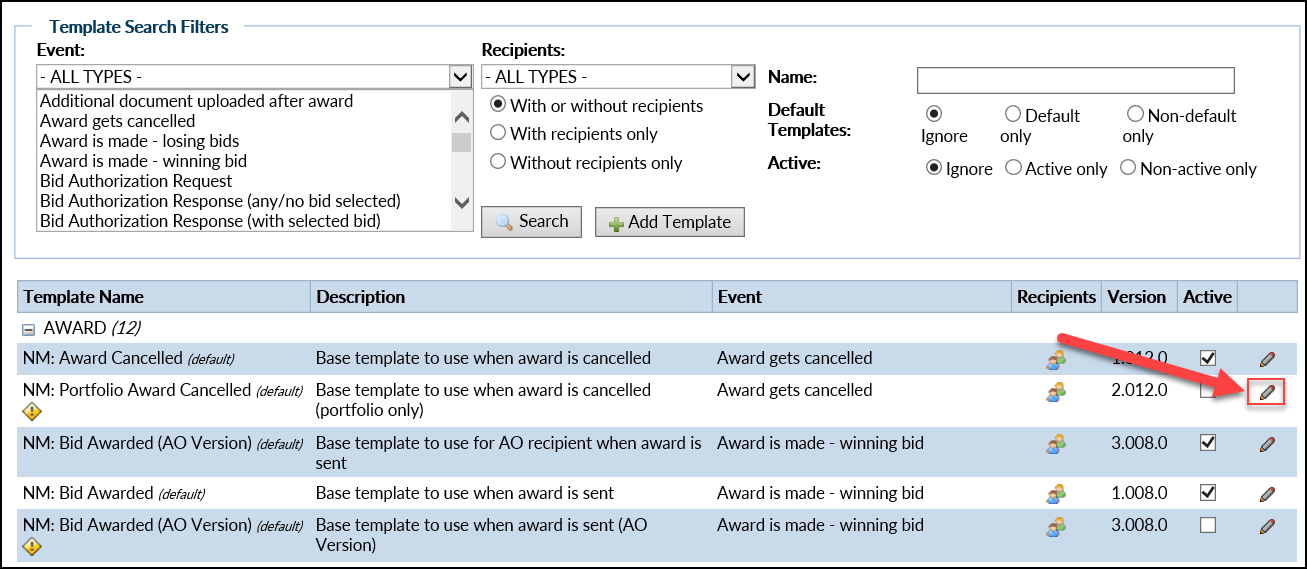
Edit Template Page
The Edit Template page will open.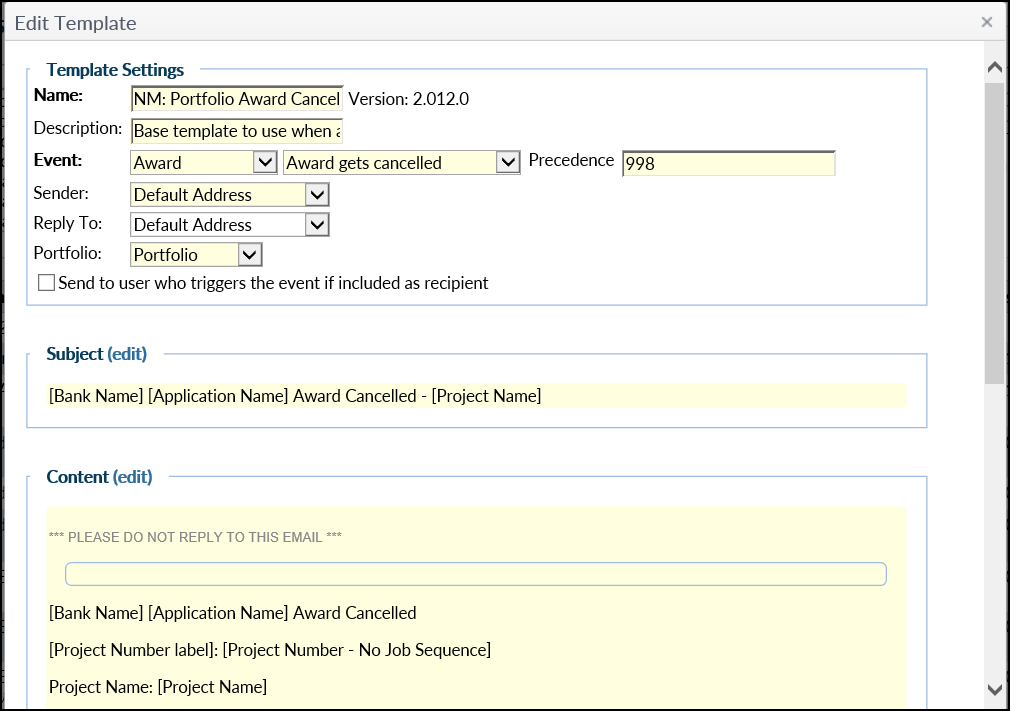
The Edit Template page contains the following sections:
- Template Settings: Basic settings, including the Notice Name, Event Definition, Sender, and other related details.
- Subject: Subject line for the Notice.
- Content: The body of the Notice
- Offline Vendor Fax Override: Available in cases in which a fax delivery is required for Vendors that do not have access to the internet.
Template Settings
Template Settings is the top section on the Edit Template screen.
- Name: The title of the Template. Note that this must be unique - no two Templates can share the same Name.
- Event: Event is highly important; this is what triggers the Notice being sent to the Recipients. In the example above, it's when an Award is cancelled.
- Precedence: If two (or more) Templates target the same Recipient, that Recipient will receive the Notice from the Template with the lower Precedence value.
- Sender: This the email address from which the message will be sent. If Custom is selected, a new field will appear in which the address can be entered. If Current User's Address is selected, the message will be sent from the user who triggered the Event.
- Reply to: Reply to is the address provided for Recipients to reply to. It includes the same three options as the Sender drop-down menu above.
If you do not have Sender and Reply To options, please contact the Support Team for assistance in making these changes. - Portfolio: If the Portfolio feature is enabled on your site, Portfolio Templates will include this drop-down menu.
- Checkbox: By default, the User who triggered an Event does not receive the Notice that the Event occurred. Check this box to have the Notice sent to that User, as well.
Subject
The Subject section is below the Settings section. Click the Edit button to view the available options.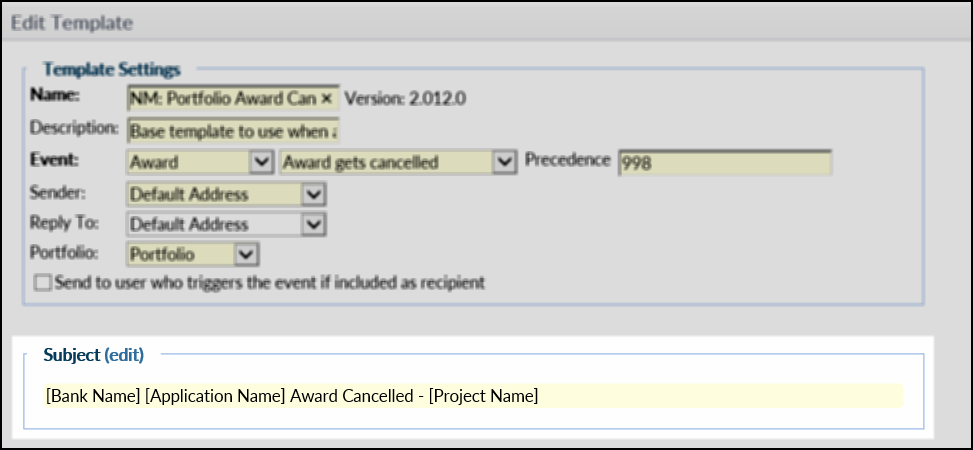
The Subject section will open for editing. In addition tot he typical text box editing options, there are several special options.
- Smart Fields
- Conditional Statements
- Repeat Containers
a. Smart Fields
Dynamic content inserted when the email notice is generated. Click to select a Smart Field to insert.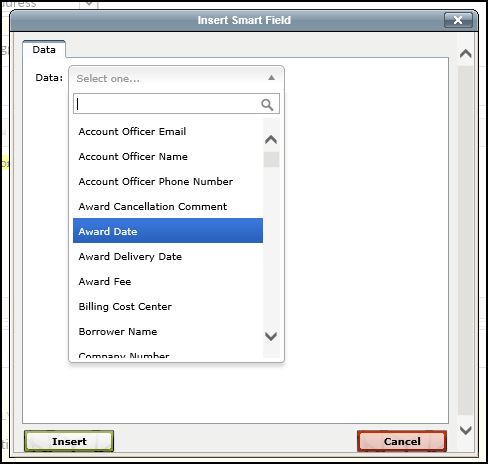
Click on the drop-down menu and make a selection (Award Date in the example above). Depending on the selection made, additional fields may appear.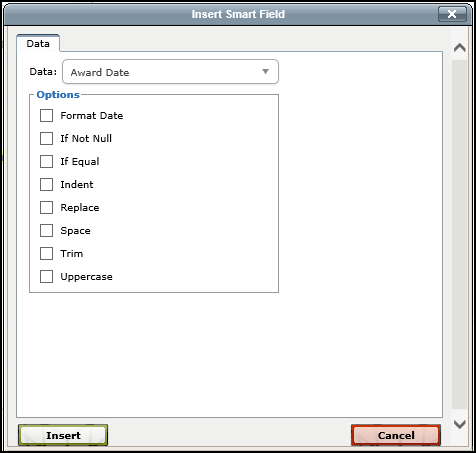
These fields allow the user to control how and if the Smart Field selection appears in the Notice. If If Not Null and Indent in the example above are checked, the Smart Field selection will only appear in the Notice if that field is not null (ie, there is available RIMS data to populate that field). If it does appear in the message, it will be indented.
Once all selections have been made, click Insert. The modal will close. The new Smart Field should now be visible, bracketed and highlighted in yellow.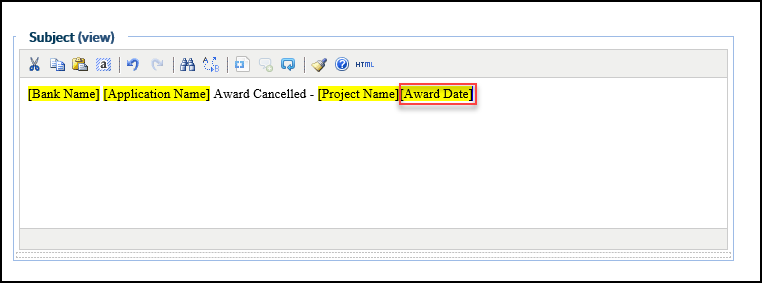
b. Conditional Statements
To insert a Conditional Statement, highlight text or a Smart Field with the cursor, then click the Conditional Statement button. the Conditional Statement modal will open.
The Conditional Statement tool allows the user to specify what happens when certain conditions are met. In the example below, if the Account Officer Email Smart Field is not null and the Award Fee Smart Field is greater than or equal to 2500, the text highlighted on the previous screen will appear in the Notice email's subject line. If those conditions are not met, the text will not appear.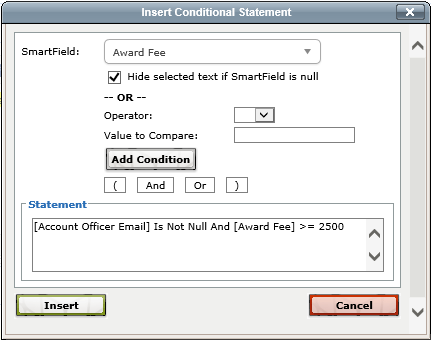
To add a Condition, follow these steps: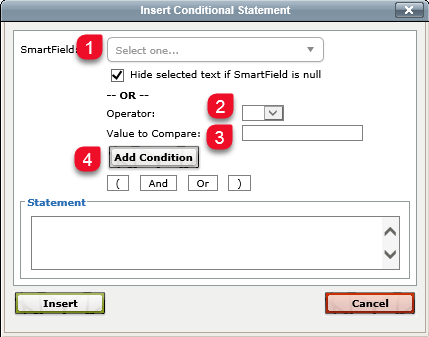
- Select a Smart Field (like Project Number or Award Fee)
- Select an Operator (such as = or >)
- Enter a Value (such as 3000 or jsmith@example.com)
- Click Add Condition.
The Condition will now appear in the Statement box below; additional text can be added to the Statement.
Another Condition can be added to the Statement by clicking one of the four buttons below the Add Condition button, then following the four steps above again to define the new Condition.
Once complete, click Insert to add the Conditional Statement.
c. Repeater Containers
Click on the Repeat Container button to insert a Repeat Container.
 Repeat Containers will display whatever is contained within them, repeating until all relevant information has been displayed.
For example, in the Job Complete email Template (found in the example above) will display information from multiple Tasks, such as an Appraisal and a Review.
Content
The Content box is next on the Edit Template page. Click the Edit button to open it.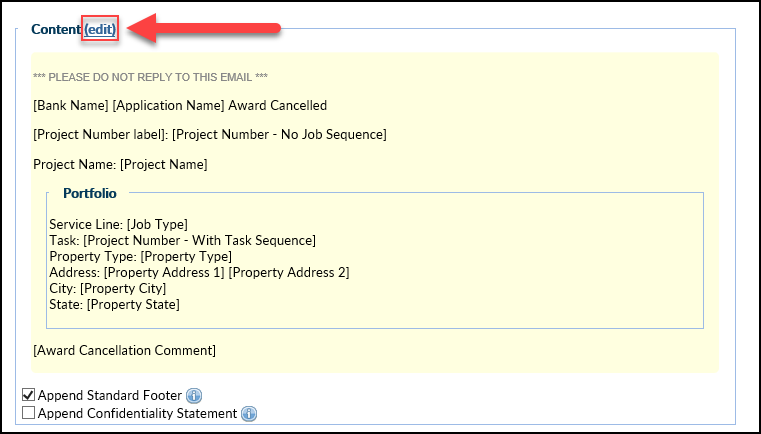
The Content box includes the same tools and functionality as the Subject box. It also includes two tools not found in the Subject box: Insert Calculation and Insert Portfolio Container.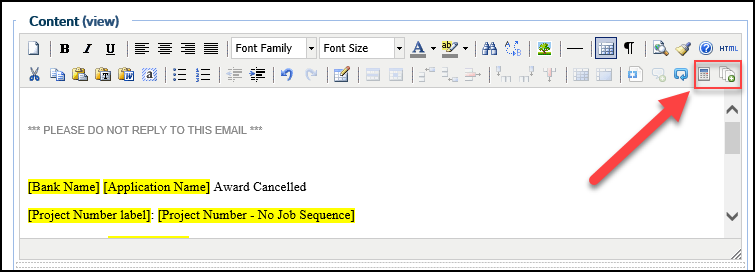
Click the calculator icon to insert a Calculation. The Insert Calculation modal will open.
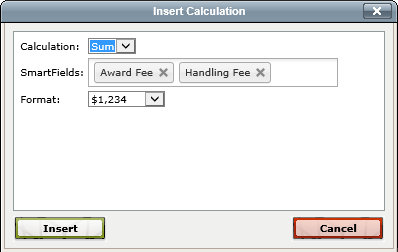 The Insert Calculation tool allows the user to perform a calculation on two or more Smart Field values. To create a calculation, click in the Smart Fields box and select a Smart Field. Click in the Smart Fields box again and select another field. Repeat until all desired Smart Fields are present, then click Insert.
In the example above, the sum of Award Fee and Handling Fee will be displayed in the Notice.
Once inserted, it will appear as below: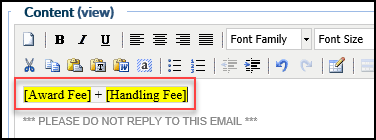
The Portfolio Container is similar to a Repeat container. However, it specifically brings in information from a Portfolio Project.
There are two additional buttons at the bottom of the Content:
- Append Standard Footer
- Append Confidentiality Statement
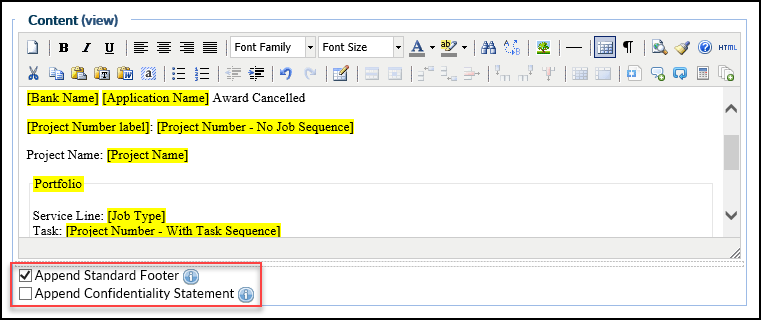 Check the box next to either item to include it at the bottom of the email body. Selecting one automatically deselects the other.
To view the content of either item, click the blue information icon to the right.
Offline Vendor Fax Override
In the rare event that a Vendor does not have internet/email access, a fax copy can be sent instead. Note that this requires that the Vendor has an Offline Vendor user account in RIMS. If you need additional information about Offline Vendor Fax Override, contact RIMS Support.

There's a row of buttons at the bottom of the Edit Template page. Once all desired changes have been made to the Template above, click Save Template or Save as New Template.
It is highly recommended that Save as New Template is used, NOT Save Template. The RIMS Development team occasionally updates Templates.
When that happens, Templates are reset to their default state, removing any user-created content and settings.
Click Send Sample to send yourself a sample of the Notice email. Note that any changes made to the Template will not be reflected in the sample email until it is saved.
Click Manage Recipients to open the Edit Recipients page.
.png)
