- Print
- DarkLight
- PDF
Adding a Vendor
- Print
- DarkLight
- PDF
Some items of relevance to the Vendor User type include the following:
Vendor Specialty: This determines for what type of RFPs a Vendor can be seen as a candidate. Once a Vendor Specialty is selected, the Vendor Specialty Sub field appears.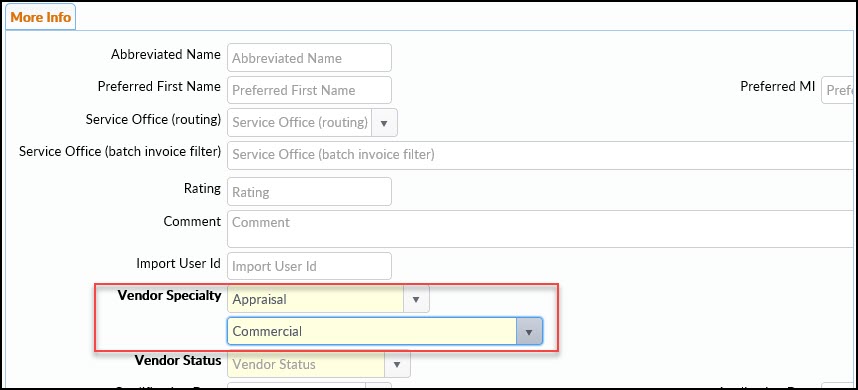
There are several fields that relate to vetting a panel for the RFP. 
a. Vendor Status: This defines the Vendor's current status. Qualified-Active is the default. When choosing the Vendors who should receive an RFP, the default selection is only Vendors who are Qualified-Active. However, this can be changed to search for Vendors with one or more other statuses.
b. Qualification Date: The date on which the institution reviews the Vendor and determines whether they are still qualified.
c. Last Review Date: The date on which the institution last reviewed the Vendor.
d. Contract Status: The status of the Vendor in relation to the institution's Service Level Agreement contract. They may have Accepted, Rejected, or Accepted with Modifications.
e. Application Date: The date on which the Vendor requests consideration for the institution's approved vendor panel and submits a work sample for review.
f. Contract Expiry Date: On what date their service level contract expires.
Whether certain fields are required or not can be determined at the User Type level.
After entering all desired information, click the Save button in the bottom right-hand corner of the modal..jpg)
After clicking on the Save button, the modal will close. A confirmation message will appear in the upper right-hand corner of the screen.
If the Temporary Password functionality has been enabled, a pop-up window display the temporary password. Unlike other User types, to complete the setup process for a Vendor, it is not necessary to send the Vendor the temporary password, as they will not be logging into RIMS. Instead, the next step is to click on Invite to RIMSCentral.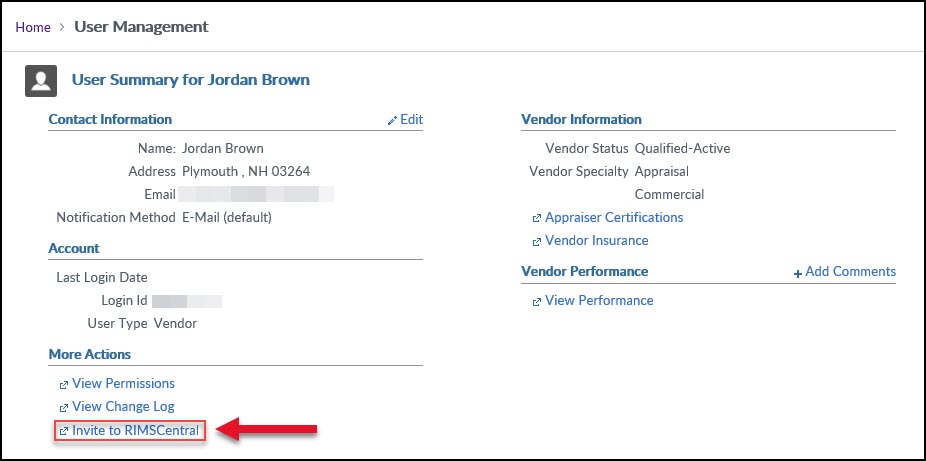
That will send the Vendor an email with a link to RIMSCentral. Upon clicking on that link and logging into RIMSCentral, they will establish the relationship. A confirmation message will appear.
Once the Vendor has accepted the invite and linked their RIMSCentral account to the institution's RIMS site, establishing the relationship, the Invite to RIMSCentral link will disappear.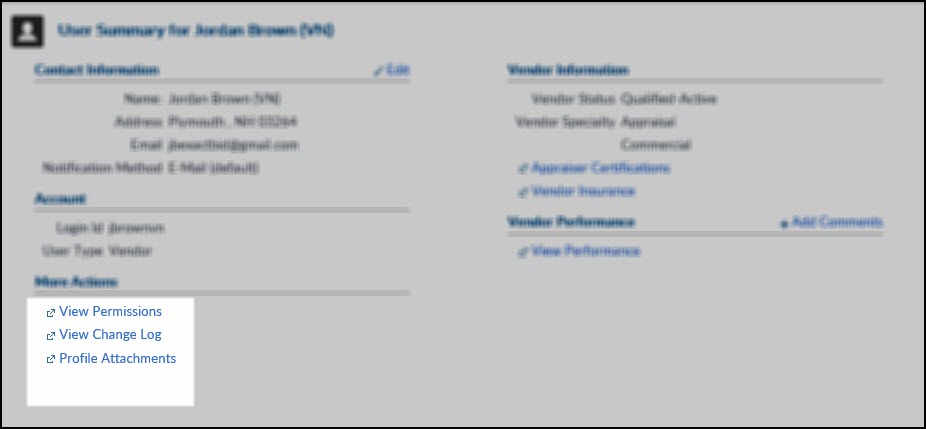
To add comments about the Vendor, click the Add Comments button on the right-hand side of the screen.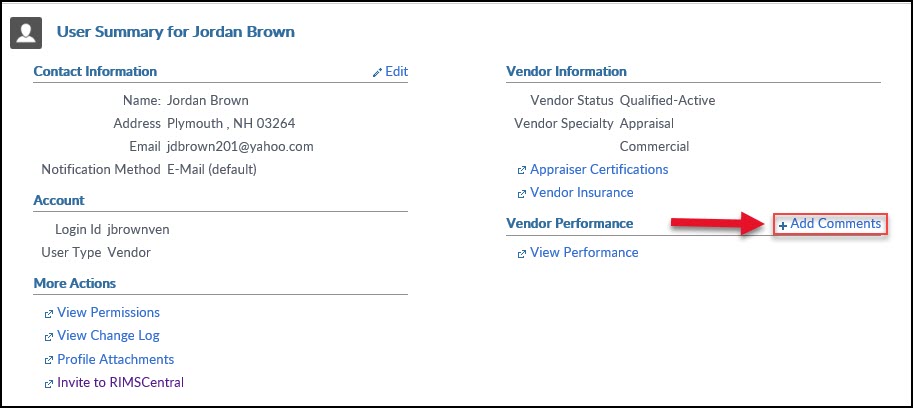
The Vendor Performance Comments pop-up window will open. Click the Add new Comment button.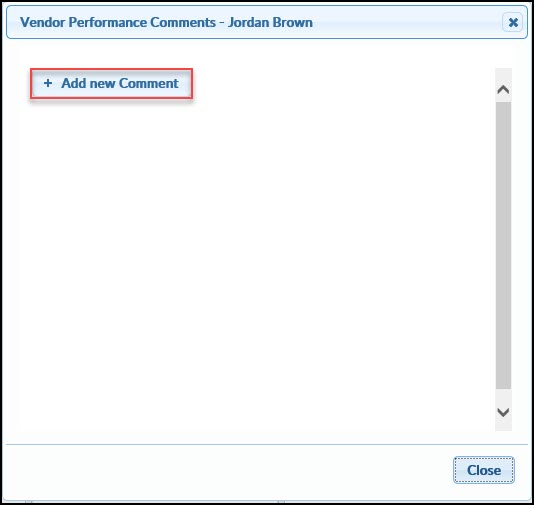
Enter comment text and then click Save.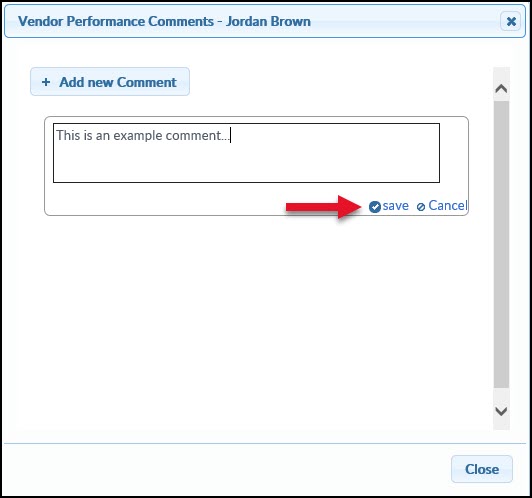
A pop-up notification will confirm that the Comment was saved. Click Ok to close the pop-up.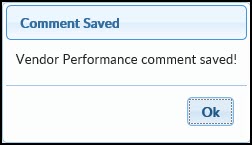
The new Comment will appear in the Vendor Performance Comments pop-up window.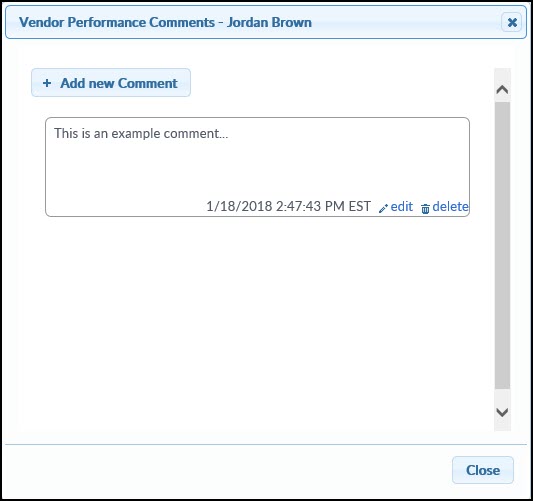
To edit a comment, click on the edit button. To delete a comment, click on the delete button.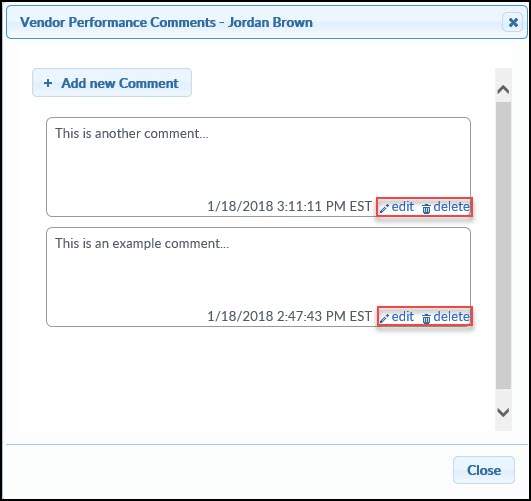
Click Close to close the Vendor Performance Comments pop-up window.
The Comments entered here are available in the Vendor Performance report.
Licenses, certifications, and insurance can be added manually in the Vendor Information section of the User Summary. However, this is not commonly done; instead, the Vendor enters that information in RIMSCentral and it is sent to RIMS automatically.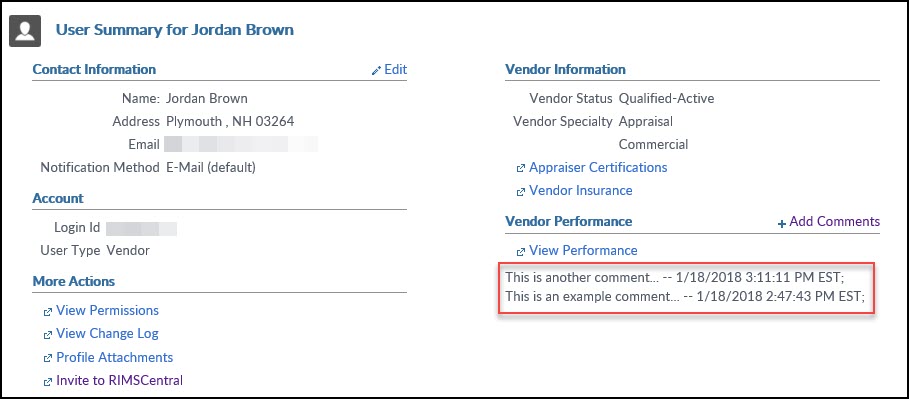
Click View Change Log to see changes to the User account.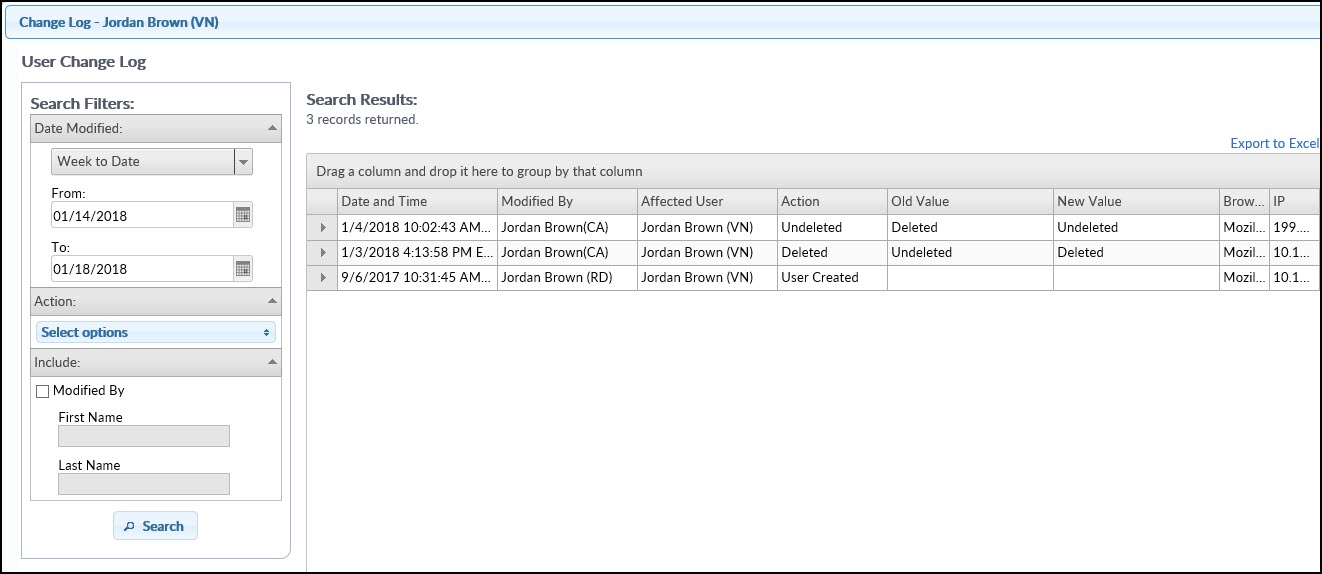
.png)
