Shapefile Loader
- Print
- DarkLight
- PDF
Shapefile Loader
- Print
- DarkLight
- PDF
Article summary
Did you find this summary helpful?
Thank you for your feedback!
There are many resources online that will allow the public to download shapefiles of data. For example, a lot of counties nationwide will have shapefiles of their zoning data or utility specifications. Usually this kind of public information will be free of charge but relies on the consumer of these files to view the data on another service. With LightBox Vision this ingestion and display of that data is possible.
So what is a shapefile? A Shapefile is a file that contains shapes with fields of information connected to it that will be visible on a platform like LightBox Vision as an overlay. Having this visibility on the map view that can plot to exact locations can be a very useful way to see and make decisions on data. Read further to see the requirements LightBox Vision has for loading this information as well as the steps to take.
Shapefile Requirements
Required Upload Format: Shapefiles must be contained in a zip folder, and there should be no nested folders within the zipped folder (aka a file folder within a file folder)
Required File Types: The zip folder can have various file types but must contain the following file types at minimum: .shp, .dbf, .shx, and .prj
Upload File Size Limit: 30MB
File Vertices Limit: 10,000 per polygon
Projection Types: NAD83, NAD27, WGS84, WGS 72BE, WGS 72, ETRS89, PSAD56, ID74, AGD84, AGD66, JGD2000, NZGD2000
Note:
If dates are in the shapefile, the best results for the format should be: month/day/year with the year containing 4 digits (ex: 1997)
Vertices are the individual points or coordinates that define the shape of a line segment or the boundary of a polygon.
In a polyline, vertices are used to create a series of connected line segments, forming a path or route.
In a polygon, vertices define the corners or nodes of the shape. The shapefile stores the coordinates of these vertices in a specific order to accurately represent the geometry of the feature.
If needed, there are other third party applications that can enable you to modify your Shapefiles before loading them in to LightBox Vision:
Note:
These third party applications may require some advanced knowledge of GIS tools to use. For additional assistance with these applications, please reach out to their respective Support teams.
Uploading the Shapefile
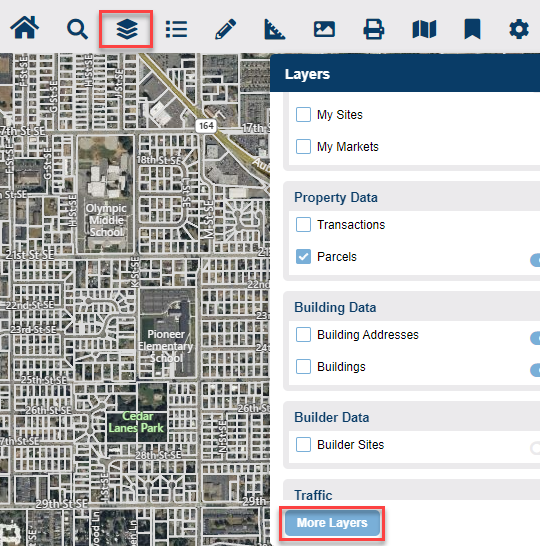
1. Click the Layers icon from the Main Toolbar.
2. Choose More Layers at the bottom of the Layers Menu.
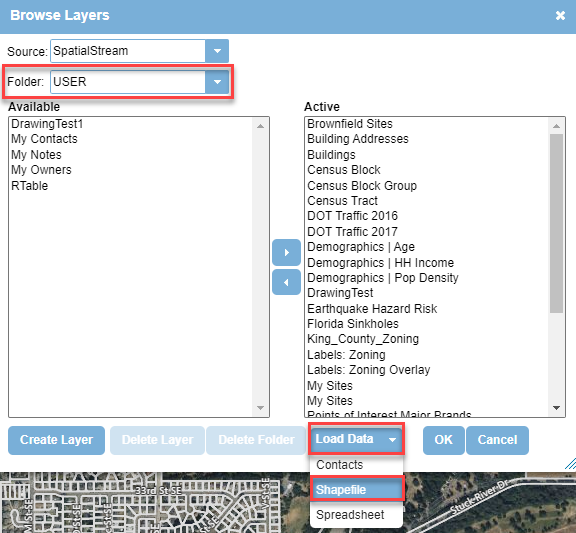
3. Select a Folder from the folder drop-drown list in which to save your data.
The most commonly used folders are USER and SHARE.
USER allows visibility for just yourself. SHARE means a colleague with a username on the same LightBox Vision account as you can view it too.
4. Click the Load Data drop down and choose Shapefile.
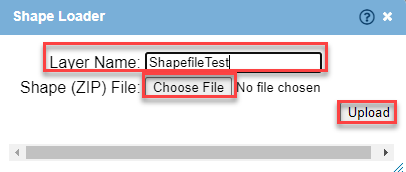
5. In the Shape Loader window, assign a Layer Name.
6. Click Choose File and find the .zip file you want to upload. Then select Upload.
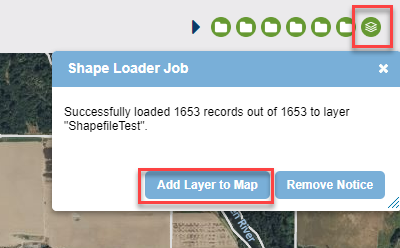
7. In the status area on the upper right corner of LightBox Vision, click the Layer icon once the upload message confirms it is loaded.
8. On the Shape Loader Job window that appears, click Add Layer to Map to see the layer as an option in your Layers Menu to turn on.
Exporting Shapefiles
If a shapefile is loaded into LightBox Vision using the recommended specifications, the ability to export it back out in that same format is available. The shapefile export option also applies to the following layers in LightBox Vision: Field Sites, Target Sites, My Sites, Trade Areas, markup layers, and custom layers that you've made.
1. Open the Layer's Menu
2. Select the gear icon to the right of the layer name
3. Choose "Extract" from the options
4. The upper right corner will have an icon you can select to download the shapefile

Using Shapefiles as Inclusions to Find Property Data
If a shapefile contains straightforward polygons that overlay on the map, then these polygons can be utilized as inclusions to grab LightBox property data from within their specified boundaries. See the steps below on how to achieve this:
Note:
View the Shapefile Requirements section in this article to make sure that your shapefile can load properly
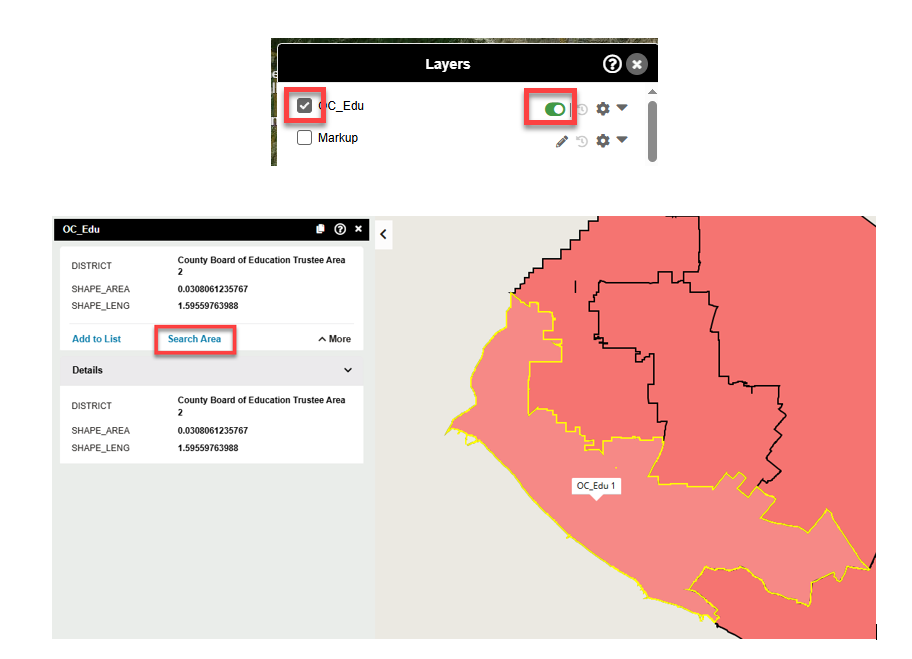
1. After loading the shapefile, turn it on by enabling it from the Layer's Menu along with the tooltip toggle
2. Using the toolbar at the top of the map, make sure to select the Search Filter you want to use by clicking the magnifying glass icon, and then selecting the Search Filter from the drop-down menu.
For example, use the Property Search filter if parcel data is the search criteria.
3. Select a polygon on the map from the loaded shapefile to have the information panel to appear
4. On the information panel, select Search Area to create an inclusion search area.
There are options to give the search area a name as well as adjust the search area buffering.
Click OK when done.
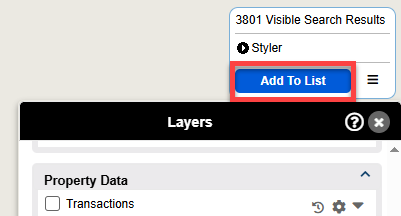
5. Now that a search area has been defined, select what needs to be found within it by using the various Search Filter drop-down items above the map.
6. Select Apply Filter the top right of the screen.

7. The results will highlight on the map (default green), as well as a results window in the top right of the map showing how many results were found.. Add to List can be selected to put all results in an ordered list at the bottom of the screen that can be used to quickly review the results.
Was this article helpful?