Do you need to track your own property details in LightBox VisionSM? Would you like to set a status and color-code properties on the map? This document will guide you through the process of creating a custom layer to track properties with your own data. You will also learn how to edit the style so that you can have them color-coded by status (or any field of your choice) on the map. Learn more below.
Creating a Custom Layer
To start, create the custom layer by taking the following steps:
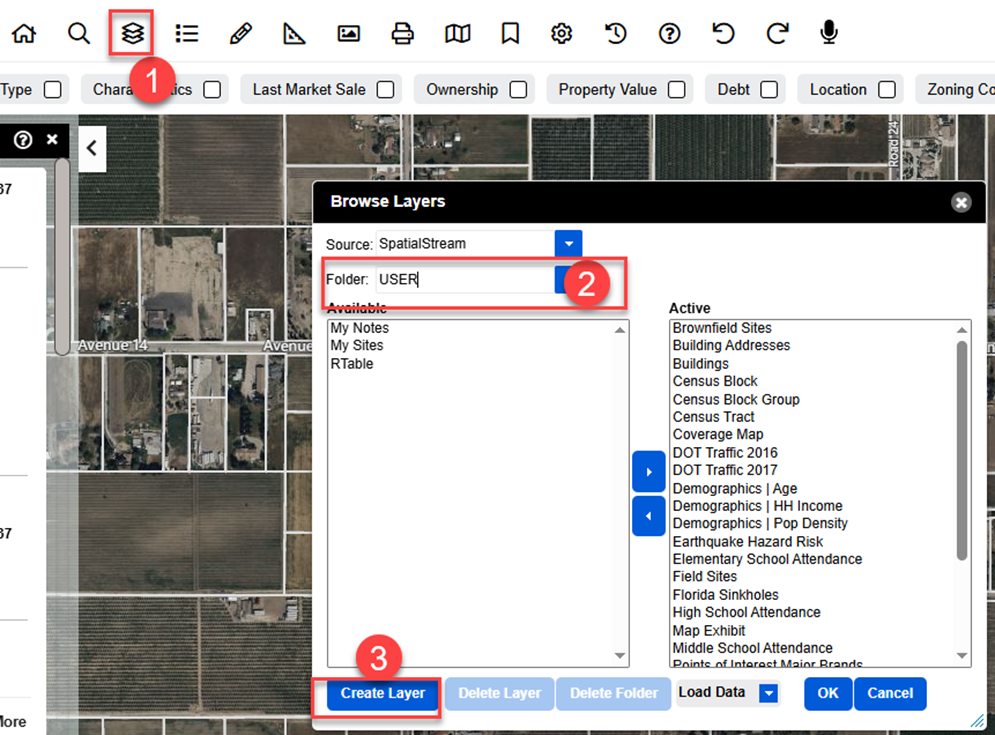
Select the Layers Menu icon from the top toolbar and choose the “More Layers” button.
At the top of the Browse Layers window, choose the folder you would like to save the layer to. You can change this later and save a copy to a different folder if you need to. Note: The folder titled USER is your private folder that only you have access to so if you want to share it with everyone in your account, save it to the SHARE folder.
Click the “Create Layer” button in the bottom left corner. Note: After you create the layer, you are unable to modify or add new fields. It may be beneficial to add a few additional notes/generic fields.
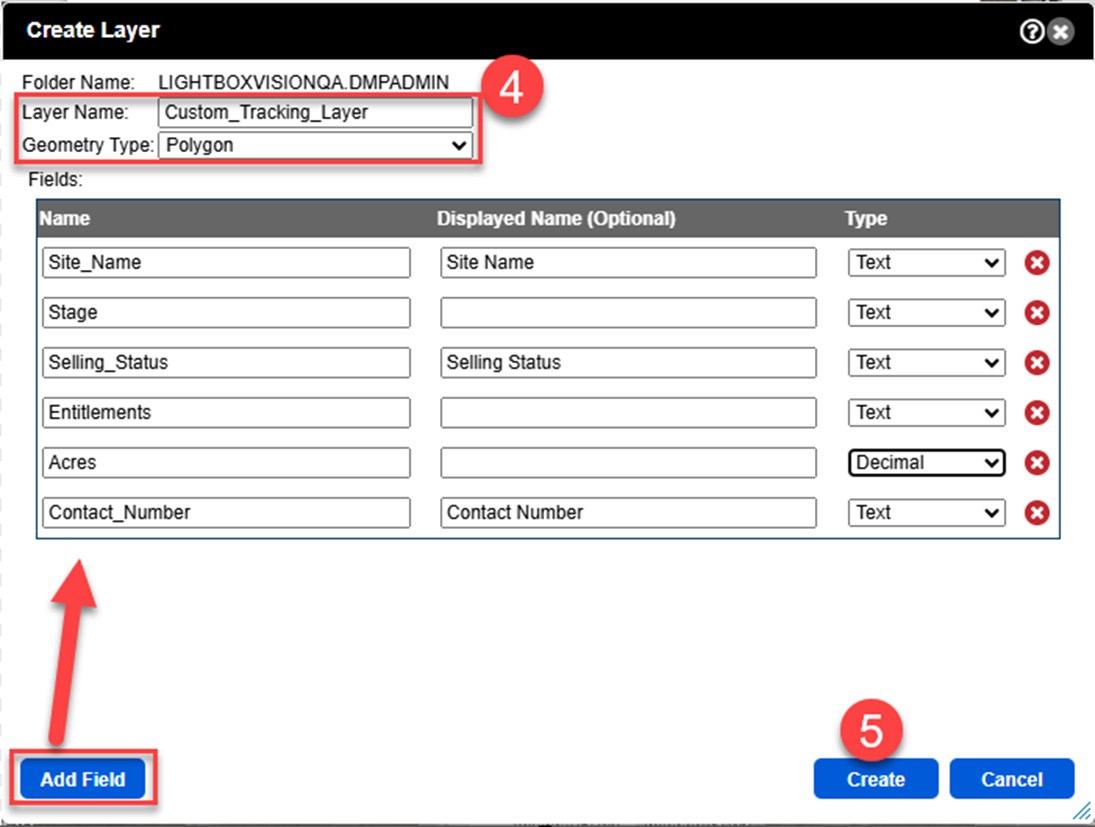
The following inputs should be filled out: Layer Name (the name of the layer), Geometry Type (choose Polygon if the desire is to highlight a parcel boundary), Name (enter the name of the field and include underscores instead of spaces or other special characters), Display Name (optional field that does accept spaces and special characters), Type (choose the type of data that you will be filling in this field and if you are unsure, use Text).
Click “Create” when you have finalized setting up the layer. Note: After you create the layer, you are unable to modify or add new fields.
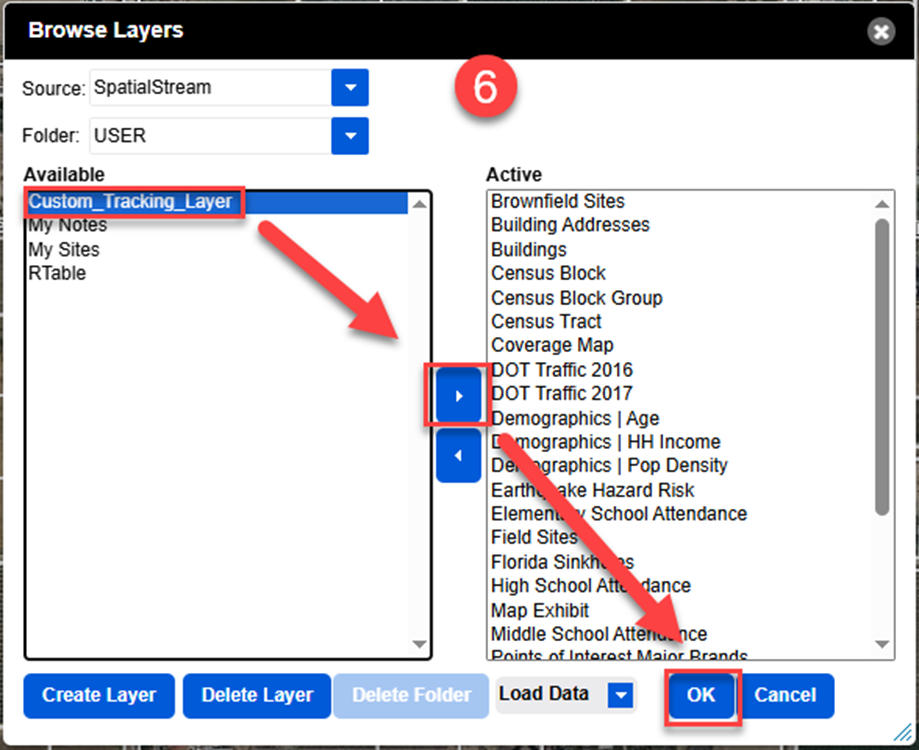
To add the layer on the map, identify the folder it was saved in and select the layer from the Available list so it is highlighted. You can then use the arrow pointing towards the Active list to then choose “OK” so that it’s now enabled on your map.
Tracking Properties on the New Custom Layer
After you create the layer, you can begin adding data and tracking properties. Using the copy geometry command, you can highlight the parcel and add your data to the new Custom Layer. See the steps below for more information:
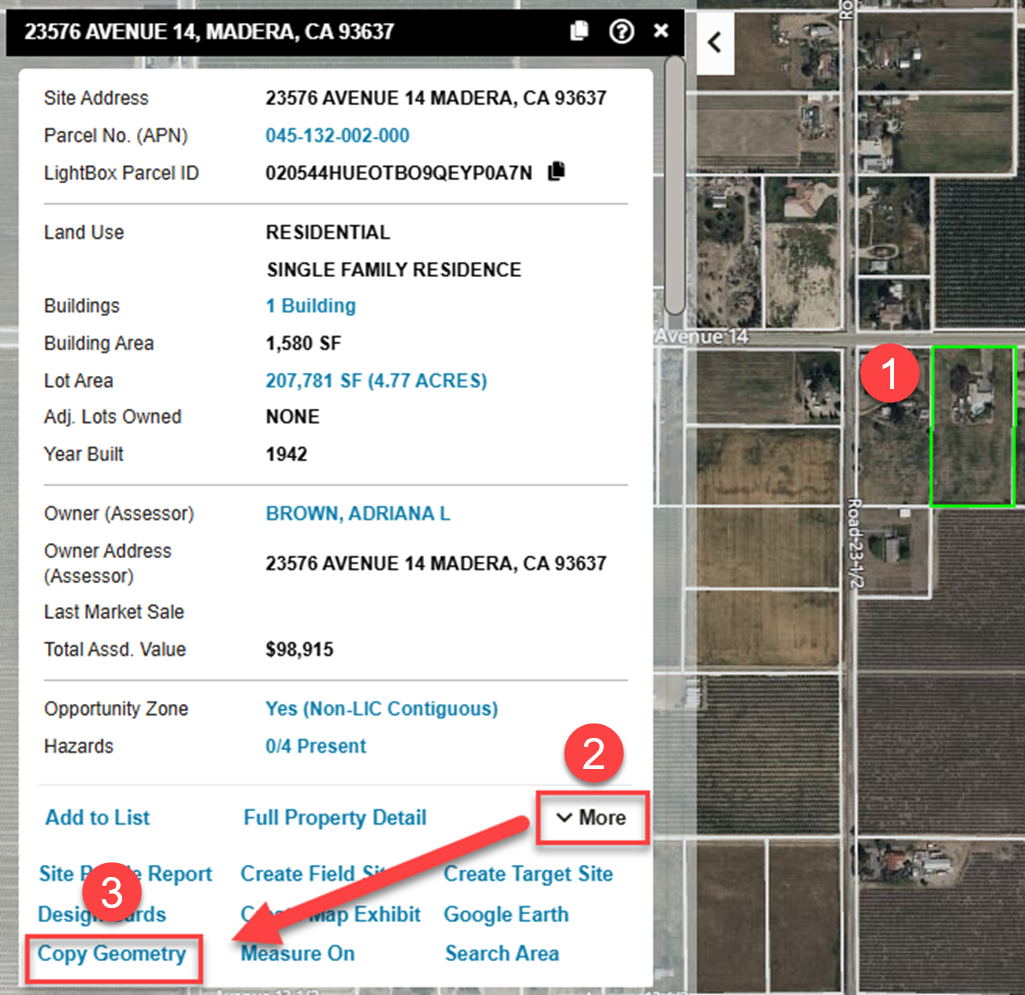
Locate or select the property that you would like to add to the custom layer and the Location Information Panel opens.
From the top summary card, click “More” to view additional commands.
Select the “Copy Geometry” command for the panel to open.
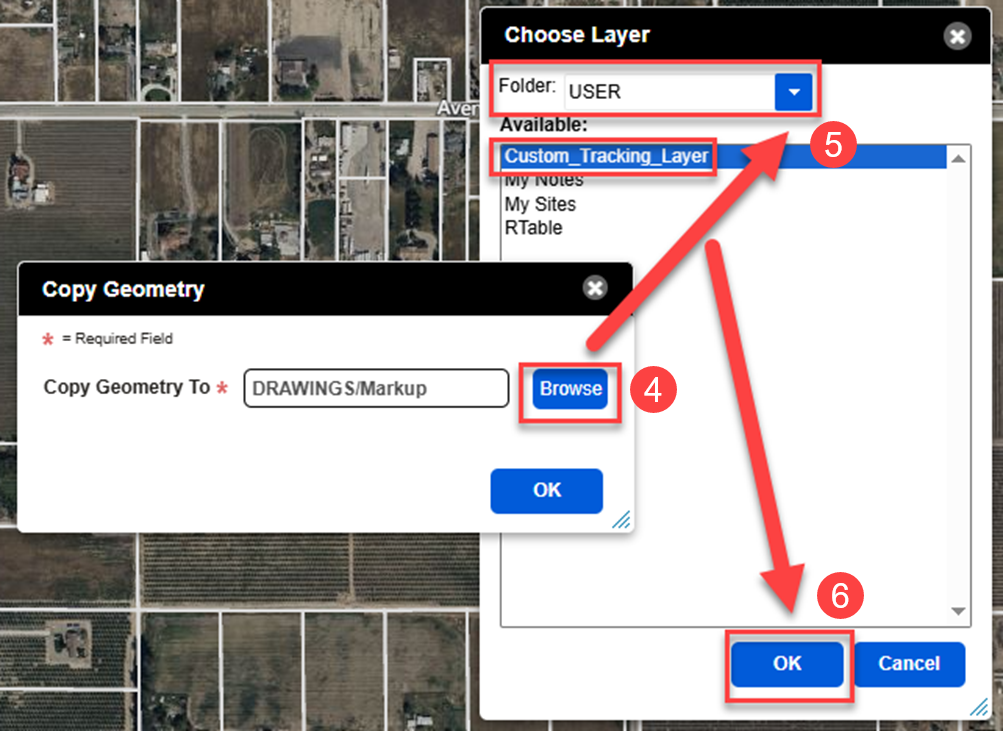
Click “Browse” and select the folder you saved the custom layer to.
Select the custom layer you created, from the list. Then click “OK” in the Choose Layer window for it to copy the parcel shape to the selected layer.
After selecting the layer, select “OK” in the Copy Geometry window for your custom layer form to open.
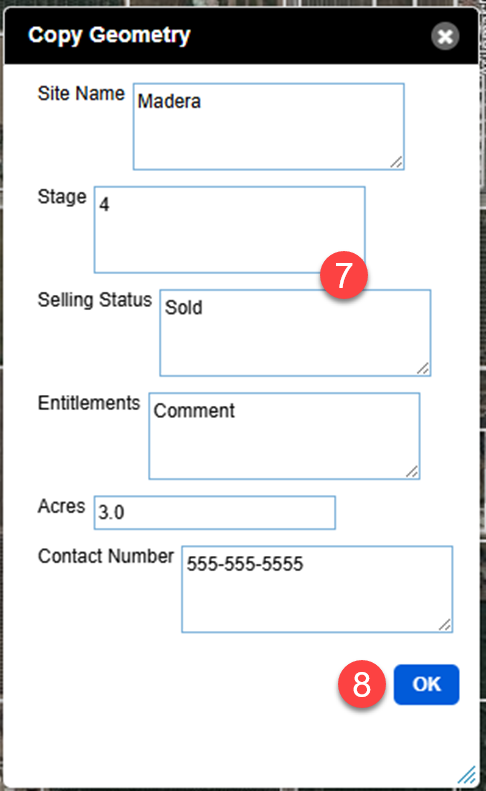
Fill out the fields. Note: You will be able to edit the data in the textboxes again which will have a separate set of steps.
Click “OK” to save the data.
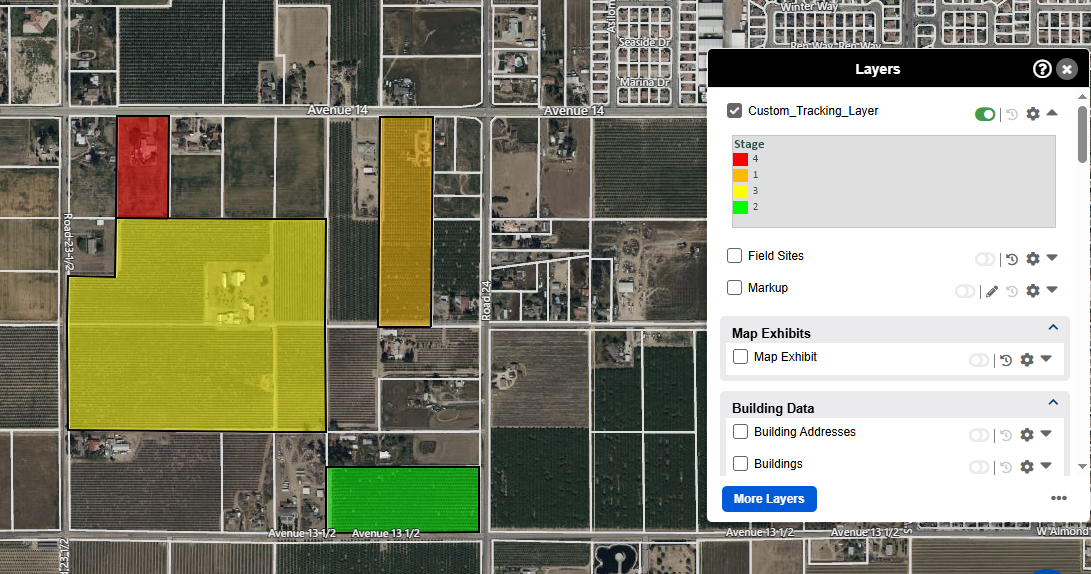
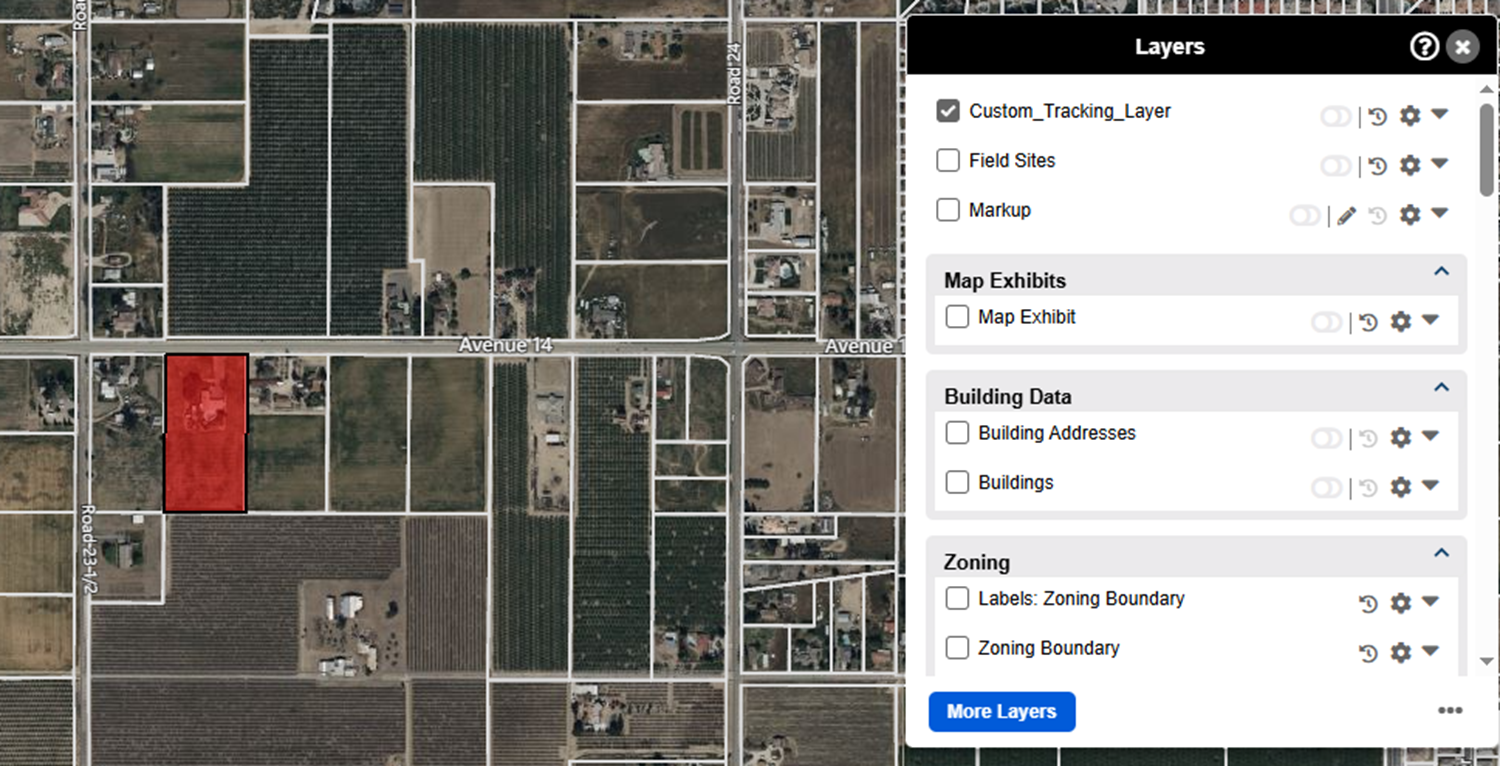
This property will be highlighted to your custom layer. Note: The generic fill color is red. See additional steps in the documentation to find out how to style your custom layer.
Repeat this process (steps 1-7) for additional properties.
Styling Your Custom Layer
This section will cover how to edit the style (or color-code) the properties based on a specific field in the custom layer you created.
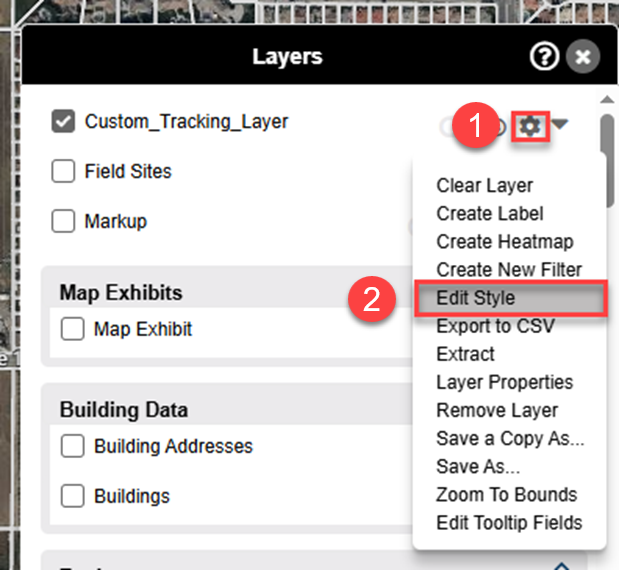
Open the Layers Menu and select the gear icon next to the layer name.
Choose “Edit Style” from the options.
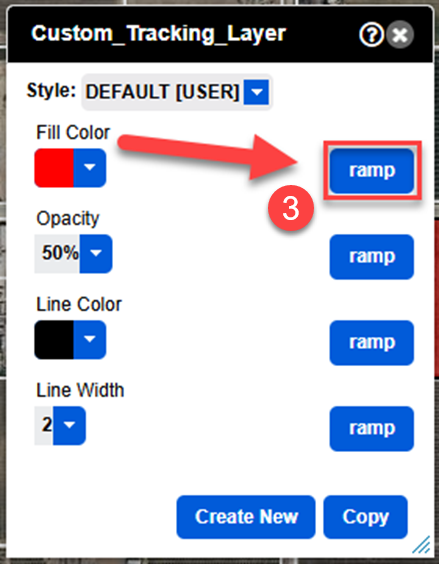
The Style Editor will open. To assign a different fill color to each unique property status (or any field in your layer), click the “ramp” button next to “Fill Color”.
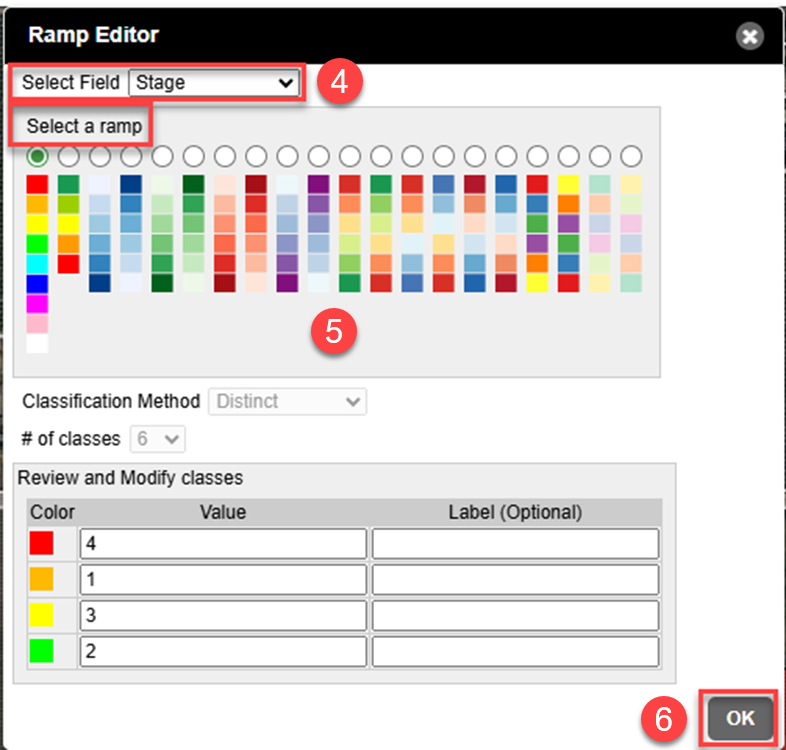
In the Ramp Editor panel, select the field to apply a color ramp to classify the data from the drop down menu.
Next, choose a premade color ramp or select specific colors by clicking on the color square next to the value in the “Review and Modify classes” table.
Click “OK” to save the changes.
Your properties will now be colored to the style you selected.
If you “Copy Geometry” on additional properties, they will automatically be styled if you use one of your color-coded statuses. Note: If you add a new value in the future, then you will need to go back to Edit Style to assign a new color for the new value.
Editing Custom Layer Styles
If you’ve created a style for your custom layer but want to adjust the style or order of appearance within the legend, this section will cover that:
On the Layer’s Menu, select the gear icon next to your custom layer name and choose “Edit Style”
On the next window, choose “Ramp” next to where you need to edit by (ex: Fill Color)
Within the next window, this is the opportunity to adjust the ramp color either by selecting other ramp options or directly clicking on the color box next to your value to select another choice from the color wheel
To re-order fields in the legend, swap the text in the Value textbox of the corresponding rows. Be sure to preserve the exact names of the Values.
Updating Your Data
Do you need to change the text values on your layer? This section will cover how to update existing data on your custom layer.
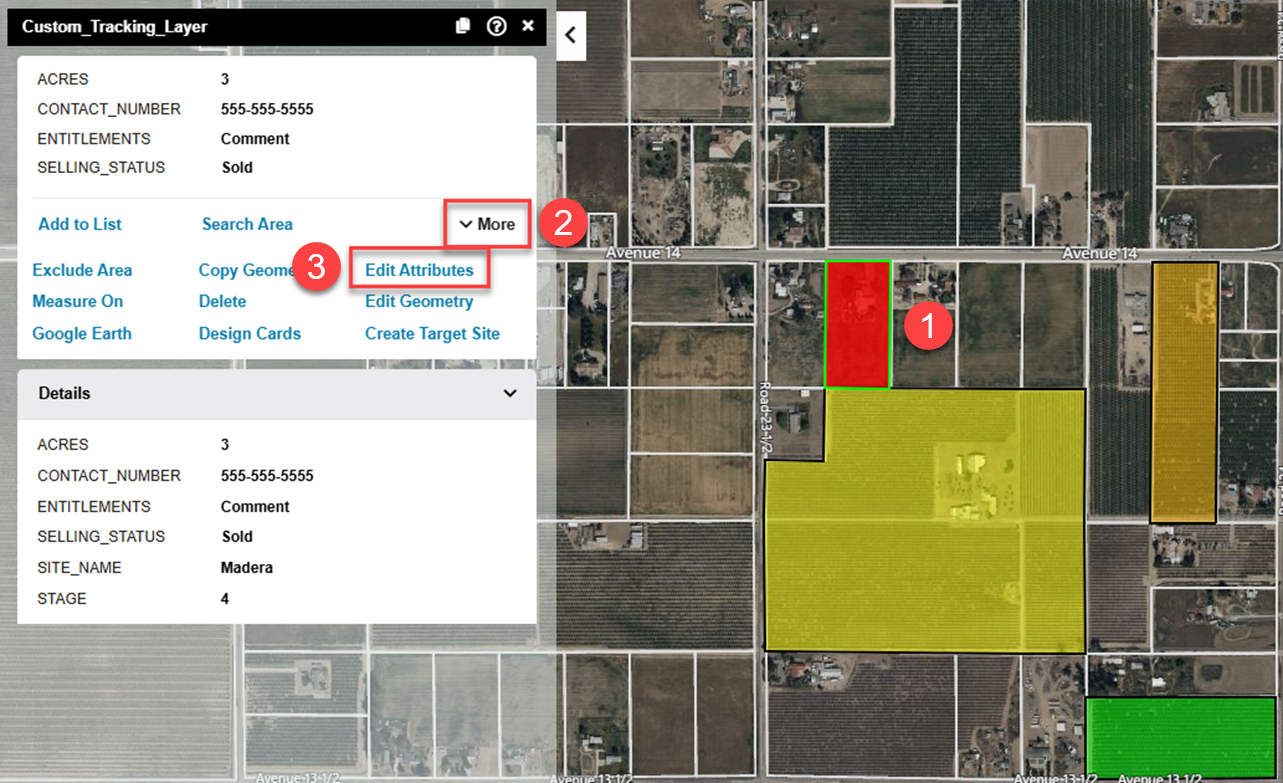
With your custom layer turned on in your Layers Menu, identify (click on) the shape on your custom layer so that the Location Information Panel opens for that feature. Note: Turn on the tooltip next to the layer name in the Layers Menu to make this easier to identify.
Click the “More” button to expand out the list of available commands.
Choose the “Edit Attributes” command. This will allow you to modify the data in the custom layer form. Note: There is also the option to delete the record from the layer.
With this panel open, you can update the data in the textboxes. Note: If you add a new value in a field that you are ramping your layer style from, then you will need to go back and edit the style of your custom layer again to assign a new color for the new value).
Was this article helpful?
Thank you for your feedback! Our team will get back to you