VEC App
- Print
- DarkLight
- PDF
VEC App
- Print
- DarkLight
- PDF
Article summary
Did you find this summary helpful?
Thank you for your feedback!
Overview
EDR’s VEC App is an analysis tool that allows environmental professionals to quickly and effectively screen their target properties for vapor encroachment risk, according to Tier 1 of E2600-22, Standard Guide for Vapor Encroachment Screening on Property Involved in Real Estate Transactions.
Step 1: Open the VEC App
To begin using the VEC App, open LightBox Live, click the Tools button in the top right corner and select VEC App.
Step 2: Define Area of Concern
The VEC App helps you easily define your Area of Concern (AOC), according to E2600:
Evaluate groundwater flow direction by adjusting the direction of the blue arrow depicting the estimated direction of groundwater flow. The initial, default direction is based on surface topography. You can change the direction by dragging the blue arrow or by editing the numeric value.
.jpg)
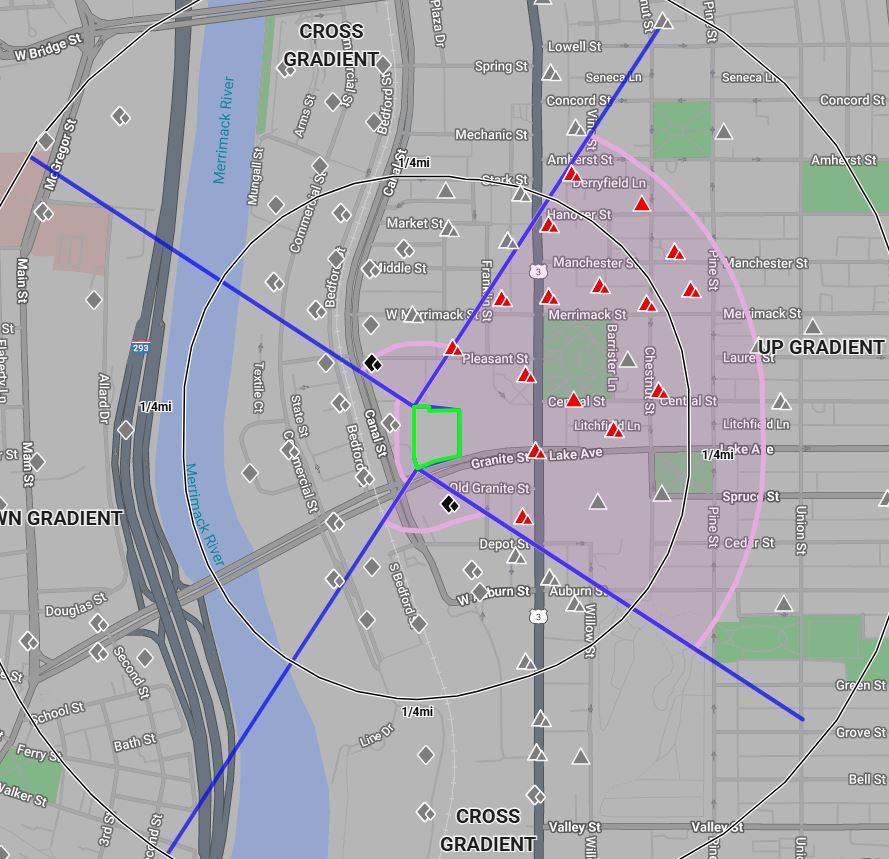
Review distances shown in the dialogue box for the up-gradient, cross-gradient and down-gradient quadrants. The default AOC uses the Buonicore Methodology: 1,760 feet up-gradient, 100 feet down-gradient, and 365 feet in the cross-gradient directions. (See: Paper 2011-A-301-AWMA: Methodology for Identifying the Area of Concern Around a Property Potentially Impacted by Vapor Migration from Nearby Contaminated Sources.) Distance measurements are from the known or suspect contaminated property to the user-defined target property boundary. Sites outside this reduced AOC will be colored gray.
Adjust those distances, if necessary, based on:
Local knowledge of subsurface characteristics, such as the presence of relatively impermeable soils (e.g., clay, silty-clay) or the presence of a perched water table.
Knowledge of surface natural features, such as major water tributaries that can intercept migrating vapors or wetlands that can act as a barrier to vapor migration.
Knowledge of utility corridors under major roadways that can intercept migrating vapors and lead them away from the TP, or knowledge about nearby buildings with characteristics that can impede vapor migration (such as continuously well-ventilated, multi-story underground parking).
Step 3: Apply Distances
 Click Apply Distances.
The Area of Concern will be displayed on the map as a shaded area.
The Quadrants will be displayed on the map as Up Gradient, Cross Gradient and Down Gradient.
Sites are marked “Include in Report” based on the following criteria.
The site is inside the AOC and inside the E2600 search distances.
Sites are marked “Not Included in Report” based on the following criteria.
The site is outside the Area of Concern.
The site is outside the E2600 search distance. For a list of databases and search distances, click View VEC Distances.
Note that sites outside the E2600 search distances but inside the AOC will be marked “Not Included in Report”.
The E2600 search distances may be viewed by clicking View VEC Distances in the Tools Menu in the top right.
Step 4: Review Sites
 Review Sites in the AOC.
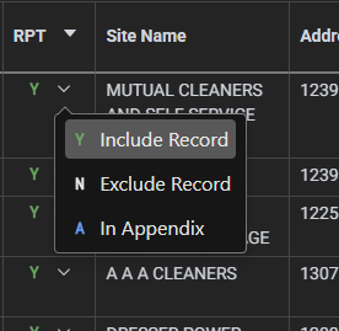
For any site remaining in the AOC that you wish to exclude, click Exclude Record or In Appendix.
Select the appropriate option in either the slide out detail tab or the RPT column in the list.
Your selection may be changed at any time.
You may review detailed information such as tank contents, remediation status or release date by clicking the Detail tab for each site.
Petroleum-contaminated sites can be identified by their name, associated database, or chemical type. For petroleum-contaminated sites, the measuring tool can help reduce the AOC using the following guidelines:
528 feet up-gradient.
100 feet down-gradient if there is assumed to be some LNAPL (floating on the water table) or 30 feet if there is assumed to be only dissolved petroleum contamination in the groundwater.
165 feet in the cross-gradient areas if there is assumed to be some LNAPL (floating on the water table) or 95 feet if there is assumed to be only dissolved petroleum contamination in the groundwater.
Step 5: Set VEC Status
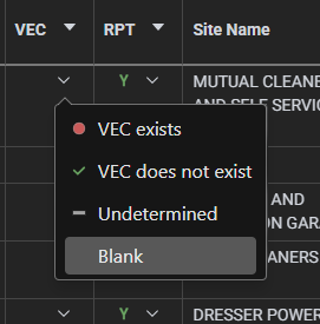 The VEC App allows you to set VEC status for any record in the list. Options are:
VEC Exists
VEC Does Not Exist
Undetermined
Generally speaking, the VEC status is used only for records you decide to include in the report or the Appendix.
Step 6: Output Report
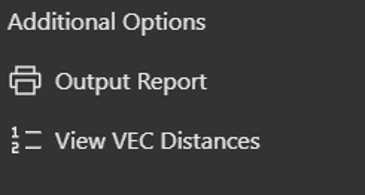 When finished, you can export a final report using the Output Report button. You may edit your work and output this report as many times as you wish for 90 days.
The report will include the records that you have marked as Include in Report and Include in Appendix.
The report will also include any textual information you have entered about those records.
Step 7: Determine REC Status
If the VEC screen is part of a Phase I, determine if the VEC is a REC.
If the property is located in a state which provides Vapor Intrusion Guidance, the distances included in the guidance may help in REC determination. The REC definition in ASTM E 1527 identifies de minimis conditions that are not RECs. The de minimis definition may also be able to assist in the REC determination, in the case where a VEC is not a REC.
Was this article helpful?