Searching and Filtering
- Print
- DarkLight
- PDF
Searching and Filtering
- Print
- DarkLight
- PDF
Article summary
Did you find this summary helpful?
Thank you for your feedback!
Searching and Filtering Listings
The Sourcing Workspace provides multiple tools to help users locate and refine active listings quickly. Users can conduct broad keyword searches, apply detailed filters, and visualize results directly on the interactive map.
Universal Search Bar
The Universal Search Bar is located at the very top of the Sourcing Workspace and can be used to find active listings by listing names, properties by address, and profiles for companies/ brokers/investors.

Click inside the search bar.
Type the name, address, or keyword related to the property you are seeking. Potential matches appear as suggestions.
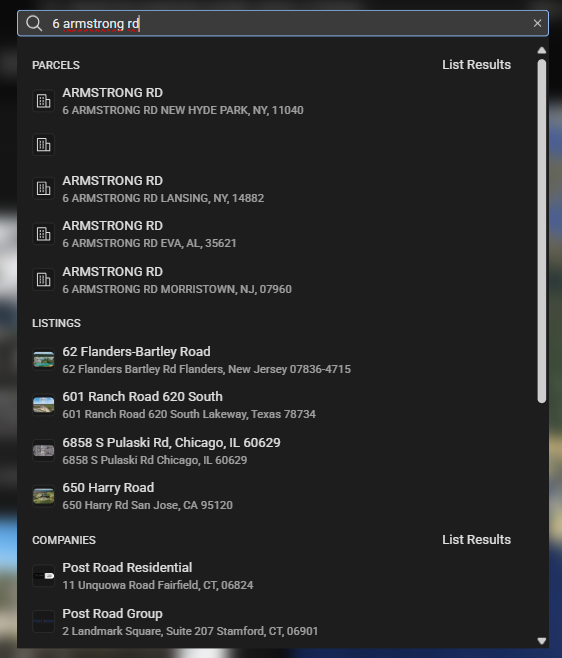
Click on the desired suggestion.
The entity page for the selected property or active listing.
Tip: Use the keyboard shortcut Ctrl + K to jump directly to the Universal Search Bar from anywhere within the workspace.
Filtering
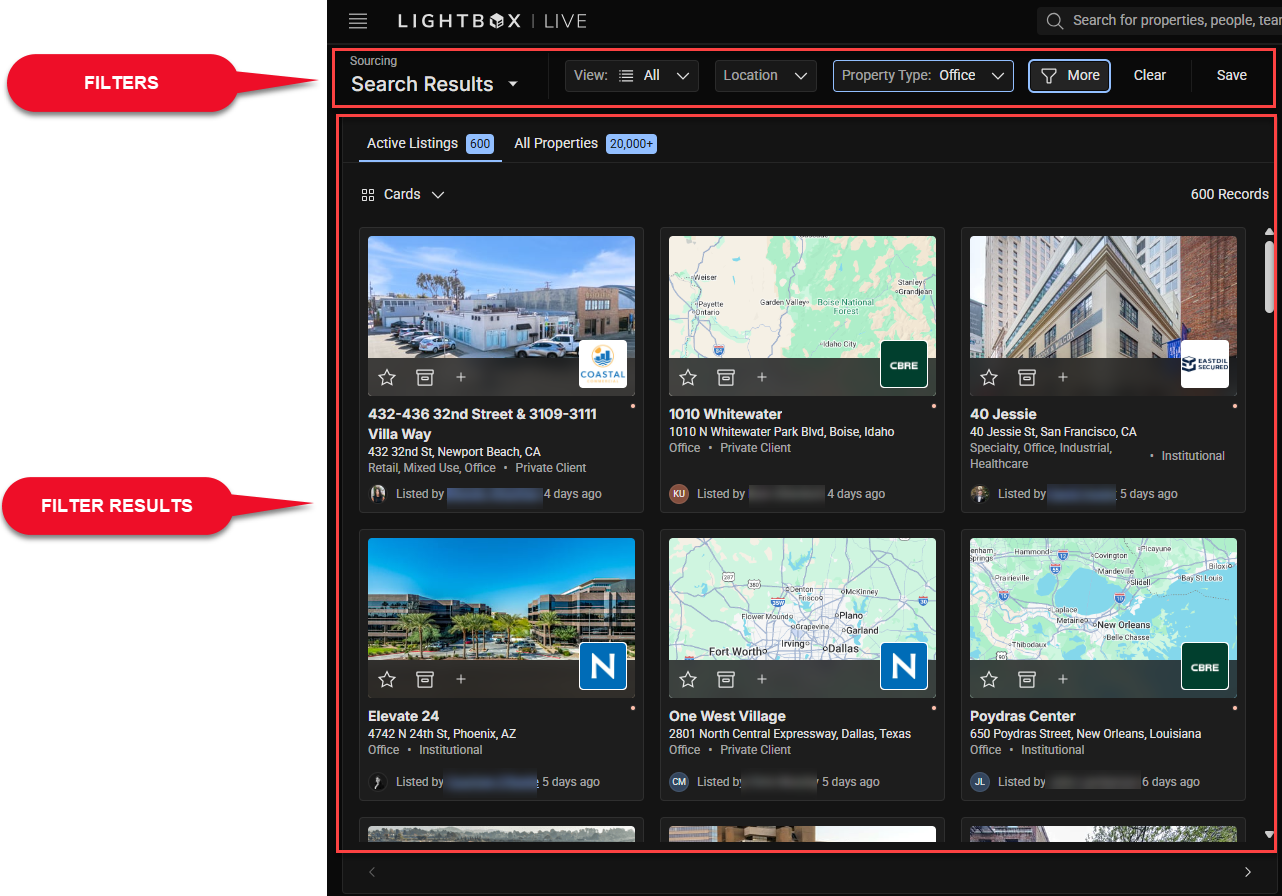
Beneath the Universal Search Bar is the Filter Bar, which allows for precise control over the results displayed in the Sourcing Panel and on the Map.

Available filters include:
View: Select between saved search filters or pre-defined options for Saved, Sent to Me, CA Signed, Unread, and Archived views.
Location: Select one or more options for states, counties, and cities. There is a capability to find these by keyword search as well.
Property Type: Choose among commercial, industrial, retail, or other land use categories.
More: Opens a side panel with a wide range of additional filters, including price, lot size, and square footage. These filters also allow you to search by active listings and off-market property details, as well as ownership, loan, transaction, demographic, and points-of-interest (POI) information.

Save / Clear: Save the current filter configuration for reuse or clear all active filters. Note that at least one filter needs to be utilized for the Save option to be clickable.
Filters update results automatically as criteria are added or removed. The results list and map view are dynamically linked.
Applying Filters and Viewing Results
Filters allow users to narrow search results to properties that meet specific criteria. To apply filters:
Select one or more filters from the dropdown options in the Filter Bar.
Pan or zoom the map to focus on your target area, or enter an address in the Location dropdown found in the Filter Bar.
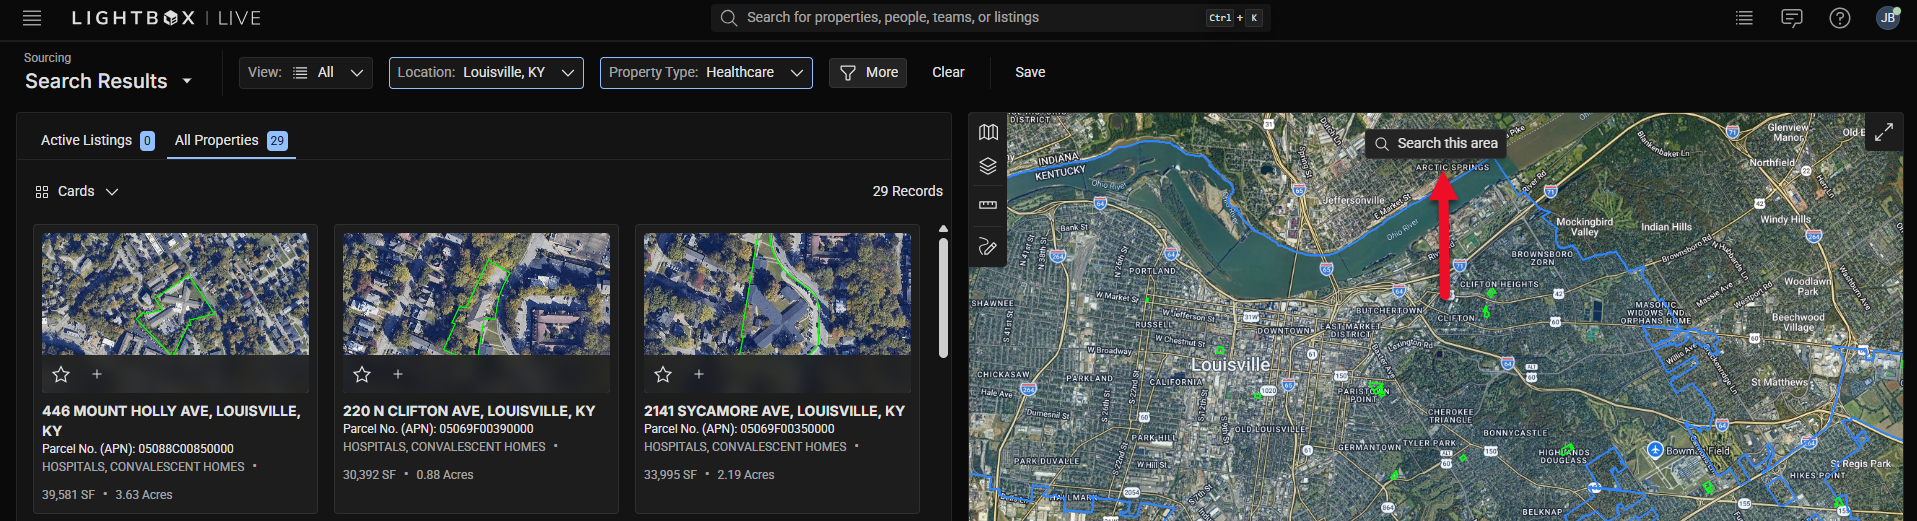
Review the updated listings in the Sourcing Panel.
The total number of matching results appears above the active listings or off-market properties (for example, “4,694 Records”), allowing you to track how your filters affect the available dataset.
Tip: You can combine keyword searches with map boundaries to further refine your results.
Saving Search Filters
Once you have configured a search with your desired filters, you can save it as a Saved Search for quick access later.
After applying filters, click the Save button in the Filter Bar.

Enter a name for the saved search and click Save Search.
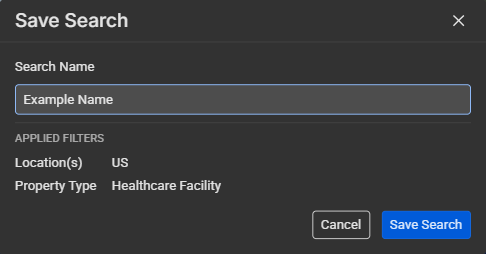
The new view will appear in the Search Results dropdown list for future use.
Note: Saved Views store filter settings only; they do not save current map zoom or pan positions.
Tip: You can maintain multiple Saved Views for different markets, property types, or investment strategies (e.g., “Boston Multifamily” or “Industrial Northeast Corridor”).
Search Results Views
The Sourcing Panel supports two main display modes: Cards View and Table View. Users can switch between these modes using the buttons in the upper-left corner of the Sourcing Panel..png)
Card View: Displays each listing as a visual card with property images, name, address, and key details.
Table View: Presents properties in a data grid for easy comparison and sorting.
Configuring the Table View
The Table View offers additional functionality for users who prefer a structured, data-driven layout. You can customize visible columns, sort by key fields, or group listings for analysis.
Customizing Columns
Click the More button in the top left corner of the table, then click Table Columns in the dropdown menu.
Select or deselect columns to show or hide data fields.
.png)
Sorting Results
Click any column header to sort by that attribute (e.g., address, price, or broker name). It will sort in alphabetical order if the column is primarily text based, and numerically from highest to lowest if it is primarily numerically based.
Click the same header again to reverse the sort order.
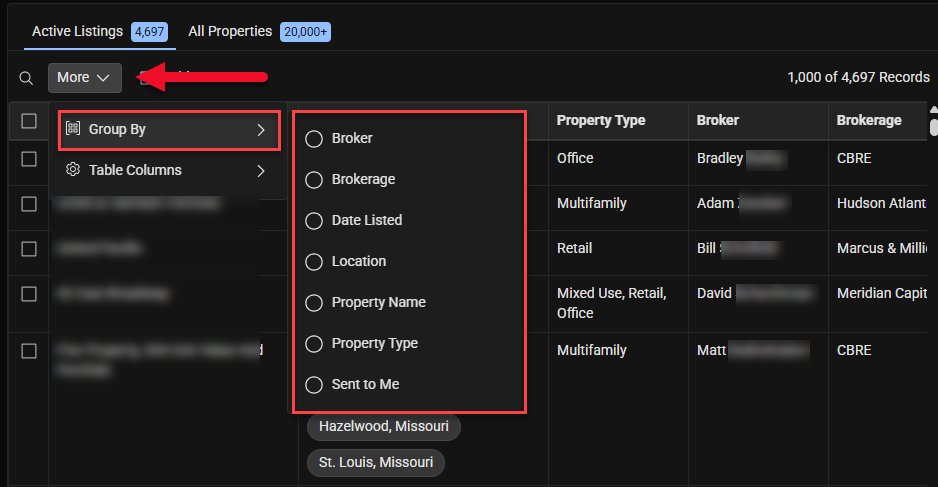
Grouping Results
Click the More button in the top left corner of the table, then click Group By in the dropdown menu.
Select a grouping field such as Property Type, Broker, or Region. Note: The options available in this dropdown menu reflect the columns you have selected to appear in the table; hidden columns will not appear in this menu.
The table will reorganize results under expandable headings based on your chosen grouping.
To undo grouping, click the tag at the top of the table.
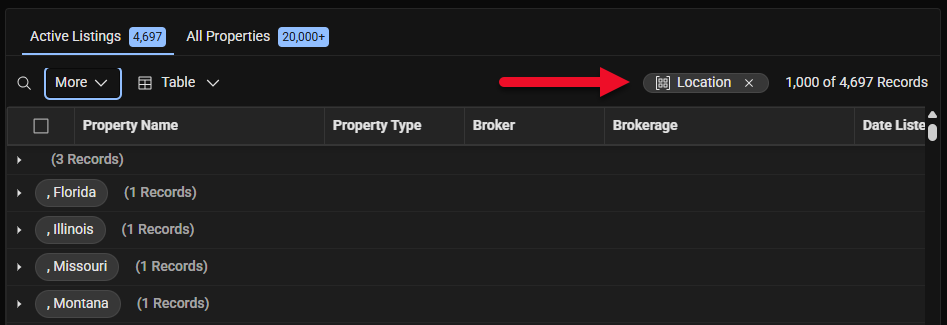
In the example above, click the Location tag to undo the grouping by location.
Tip: You can combine sorting and grouping for deeper analysis. For example, group by Broker and sort by Price to review listings by agent performance.
Lists, Favorites, and Saved Views
The Sourcing Workspace includes organizational tools that help you track opportunities over time and return to your preferred search setups quickly. This section explains how to use Favorites, Lists, and Saved Views effectively.
Favorite: Individual properties you mark with the Star icon for quick access later. Favorites can be viewed from the Search Results menu.
Lists: User-created collections of properties (listings and/or off-market parcels) grouped for tracking, collaboration, or export. Think of Lists as folders that contain multiple saved items.
Saved Views: Reusable sets of filter criteria (e.g., Sent to Me, CA Signed, etc.). Applying a Saved View instantly rebuilds the search results to match those criteria.
Note: Favorites and Lists store properties, while Saved Views store filter settings. Use both together to streamline your workflow.
Creating and Managing Lists
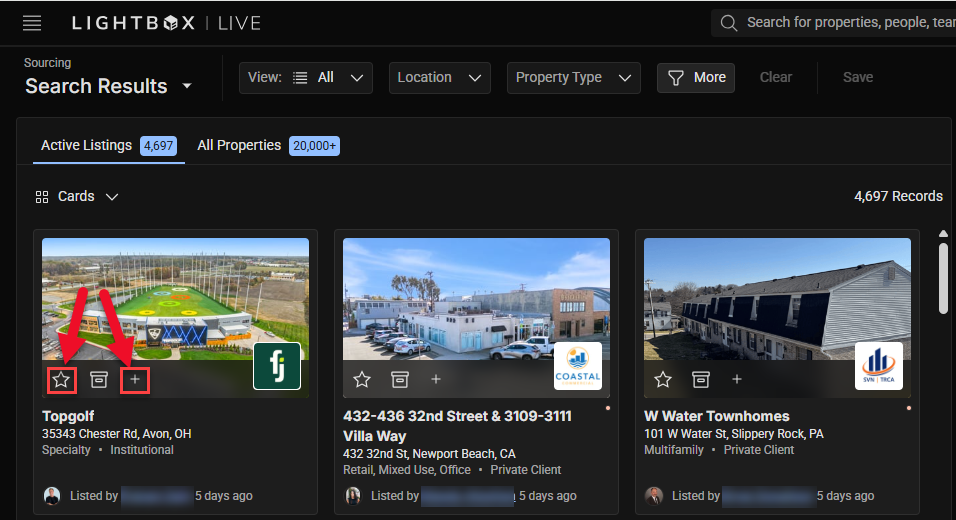
Create a New List from a Card
In Card View, locate a property you want to track.
Click the Plus (Add to List) icon on the card.
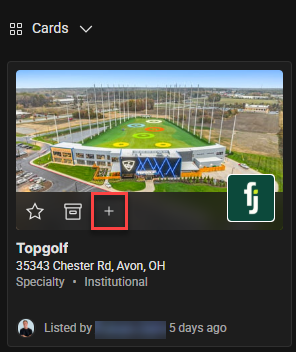
Select New List in the popup, enter a descriptive name (e.g., “Boston MF Value-Add – Q1 Pipeline”), and click Add to List.
The property is added to the new List immediately.
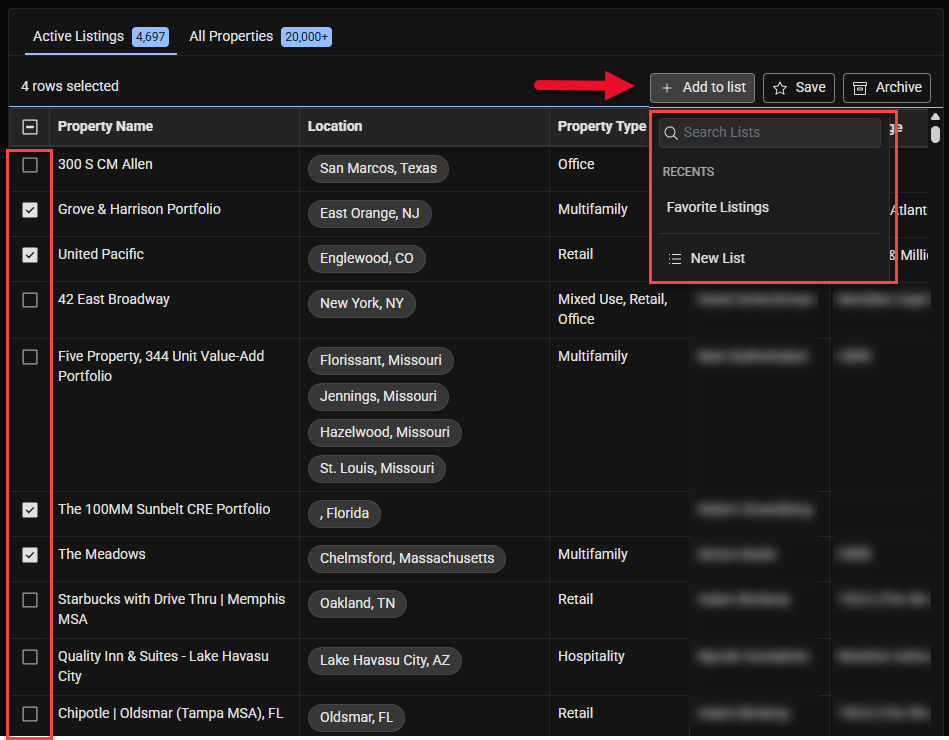
Add Multiple Properties to an Existing List (Table View)
Switch to Table View.
Use the checkboxes to select one or more properties.
Click the Add to List (Plus) action above the table.
Choose an existing List from the dropdown, then confirm.
Open and Review a List
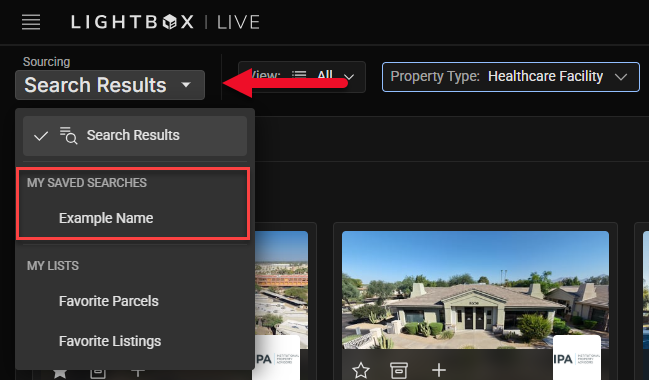
Open the Search Results menu in the upper-left of the Sourcing Panel.
Click on a List in the My Lists section.
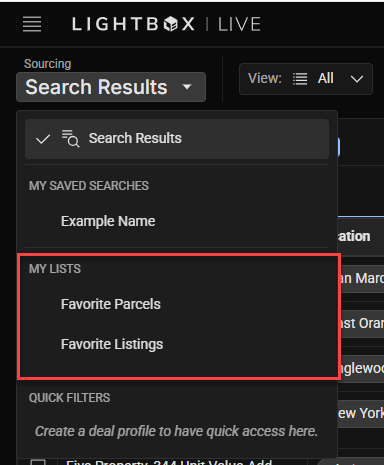
The Sourcing Panel updates to show only properties contained in that List, and it moves the map view to be overlooking all the records in that list.
Saving Filter Configurations as Saved Searches
Saved Searches preserve your search criteria so you can recreate result sets instantly—ideal for recurring searches across markets or asset classes.
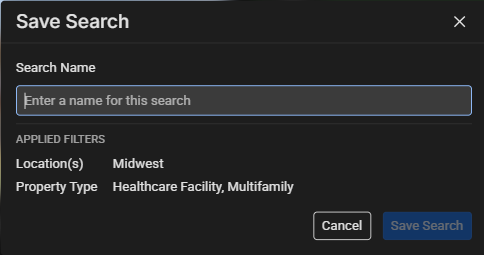
Create a Saved Search
Apply filters using the Filter Bar (e.g., market, property type, size range). Note: At least one filter option must be selected to save a search.
Click Save in the Filter Bar.
Enter a name in the pop-up, then click Save Search.
Apply a Saved Search
Click Search Results in the Filter Bar.
Select the desired Saved Search to immediately update results.

Note: Saved Views store only the filter criteria, not the map’s zoom, pan position, or active drawing boundaries.
Tip: Pair Saved Views with Lists for a robust workflow: run a Saved View weekly, add new matching properties to your pipeline List, and archive those you’re no longer pursuing.
Was this article helpful?