- Print
- DarkLight
- PDF
Creating a PCA
- Print
- DarkLight
- PDF
Logging into the PARCEL Platform
To begin, navigate to the PARCEL login page and enter your username and password. Note that your PARCEL username is not your email address.
If you’ve forgotten your password, click the “Forgot Your Password?” link. You’ll be prompted to enter the email address associated with your PARCEL account. A reset link will be emailed to you and will expire within one hour.
Upon logging in, you may be prompted to enter a six-digit Multi-Factor Authentication (MFA) code sent to your email. MFA codes expire within one hour and must be revalidated every 90 days.
After successfully logging in, you may be shown a welcome tour. You can click through this tour or end it at any time.
Updating Your User Profile
Once logged in, navigate to your user settings (top right corner) and click on “Update My Personal Info.” From there, click the Edit button to update your profile details.
Be sure to:
Indicate if you're an Environmental Professional under the AAI rule
Allow administrators to sign for you (optional)
Upload a PDF copy of your resume (must be less than 1MB)
Upload a signature image (JPEG, less than 50KB)
Upload a seal image (if applicable, JPEG, less than 50KB)
Fill in any additional qualifications, signature images, and data provider account information. Click Submit to save all updates.
Creating a New PCA Report
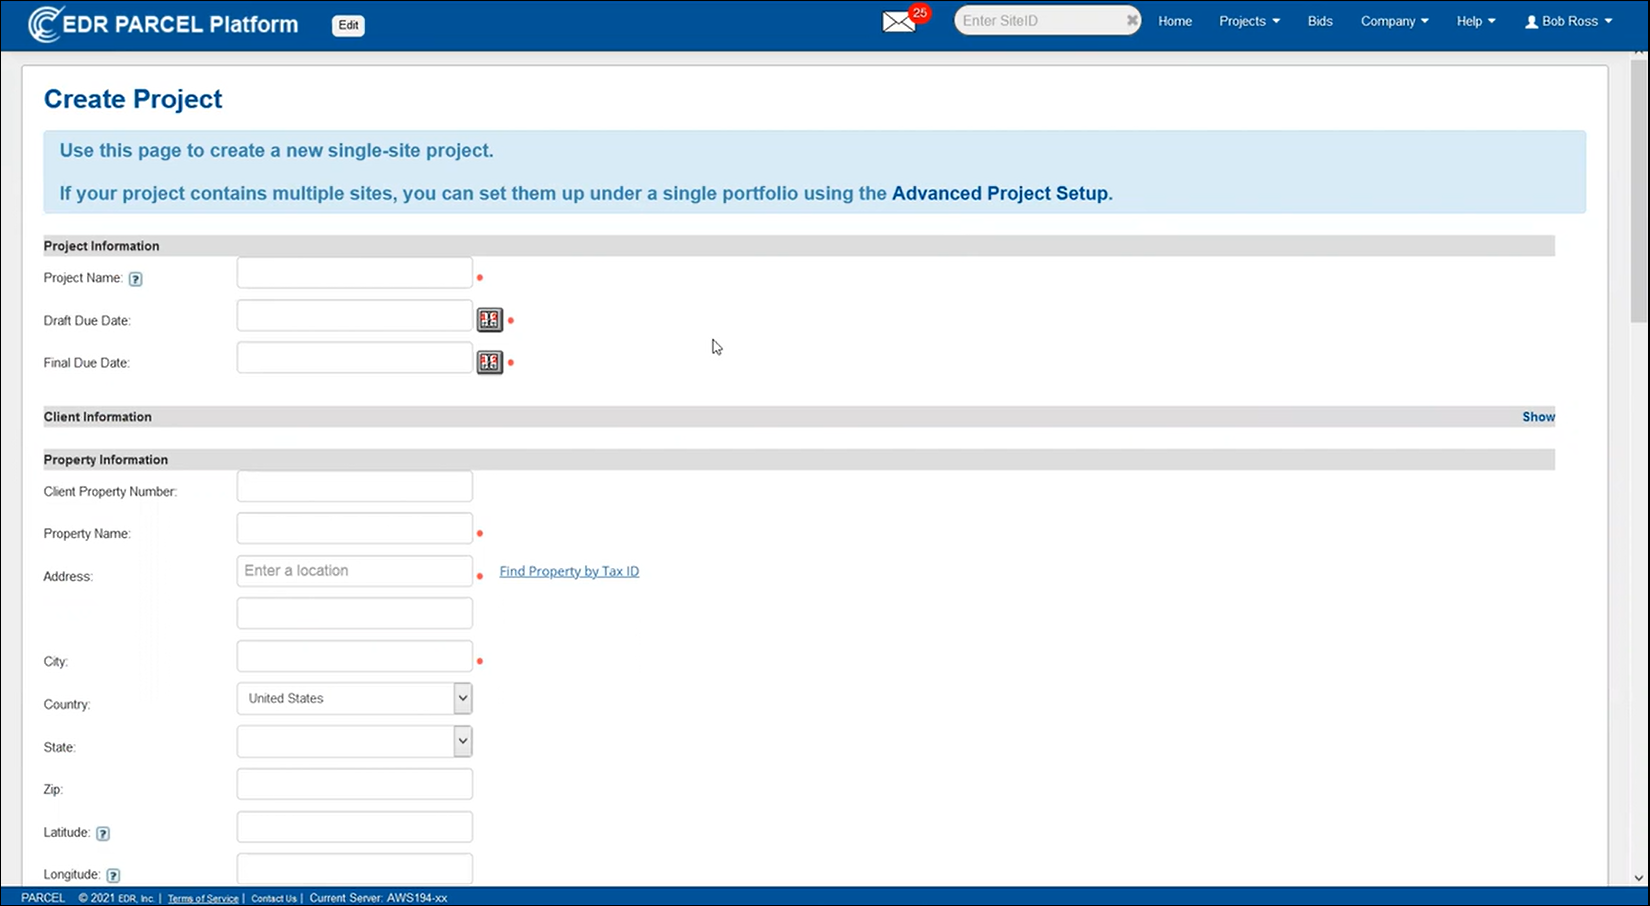
From the PARCEL homepage, click New Single Site Project to begin a new PCA report. The Create Project page opens.
If your project involves multiple sites, you may also create a portfolio using the New Portfolio option. For the purpose of this training, we’ll focus on single-site PCA workflows.
Required Fields
Fields marked with a red bullet are required. These include:
Project Name
Draft Due Date
Final Due Date
Property Name
Property Address
City, State, Zip Code
Scope of Work
Auto-Geocoding
When you input the address, the system may auto-geocode the latitude and longitude fields. These can be manually edited if needed.
Scope of Work Templates
Select the appropriate PCA scope template (e.g., Optimized PCA, Fannie Mae, or Freddie Mac). The scope selected determines the structure and required content of the report.
.png)
Additional Property Information
While optional during setup, be sure to enter the following to ensure accurate cost calculations later:
Property Type (required for cost table calculations)
County
Acreage
Number of Buildings
Transaction Type

Assigning Site Assessors and Senior Reviewers
Under the Grant Access and Assign Roles section, you can assign users to the PCA report. Choose from your organization, a client, or a third party.

Assign Site Assessor: Choose a user responsible for site inspection and field data collection.
Assign Senior Reviewer: Choose a user to oversee and sign off on the report.
Uploading Attachments
Attach any relevant documents using the Browse button under the Attachments section. After selecting a file, click Add File.

Email Notifications
To notify collaborators that a report has been created or updated, scroll to the Email Notification section. Check the box to enable, then fill out:

To: The recipient's email address
CC: Optional
Message: Include project context or instructions
When ready, click Create Project to generate the report, or use Create Project And Order EDR Products to simultaneously initiate a database order.
Navigating the PARCEL Homepage
Once logged in, your homepage provides quick access to:
Recently Opened Reports — for in-progress work
Recently Completed Reports — for finalized reports
You can also use the project search field at the top to filter reports by Site ID, status, or keywords.
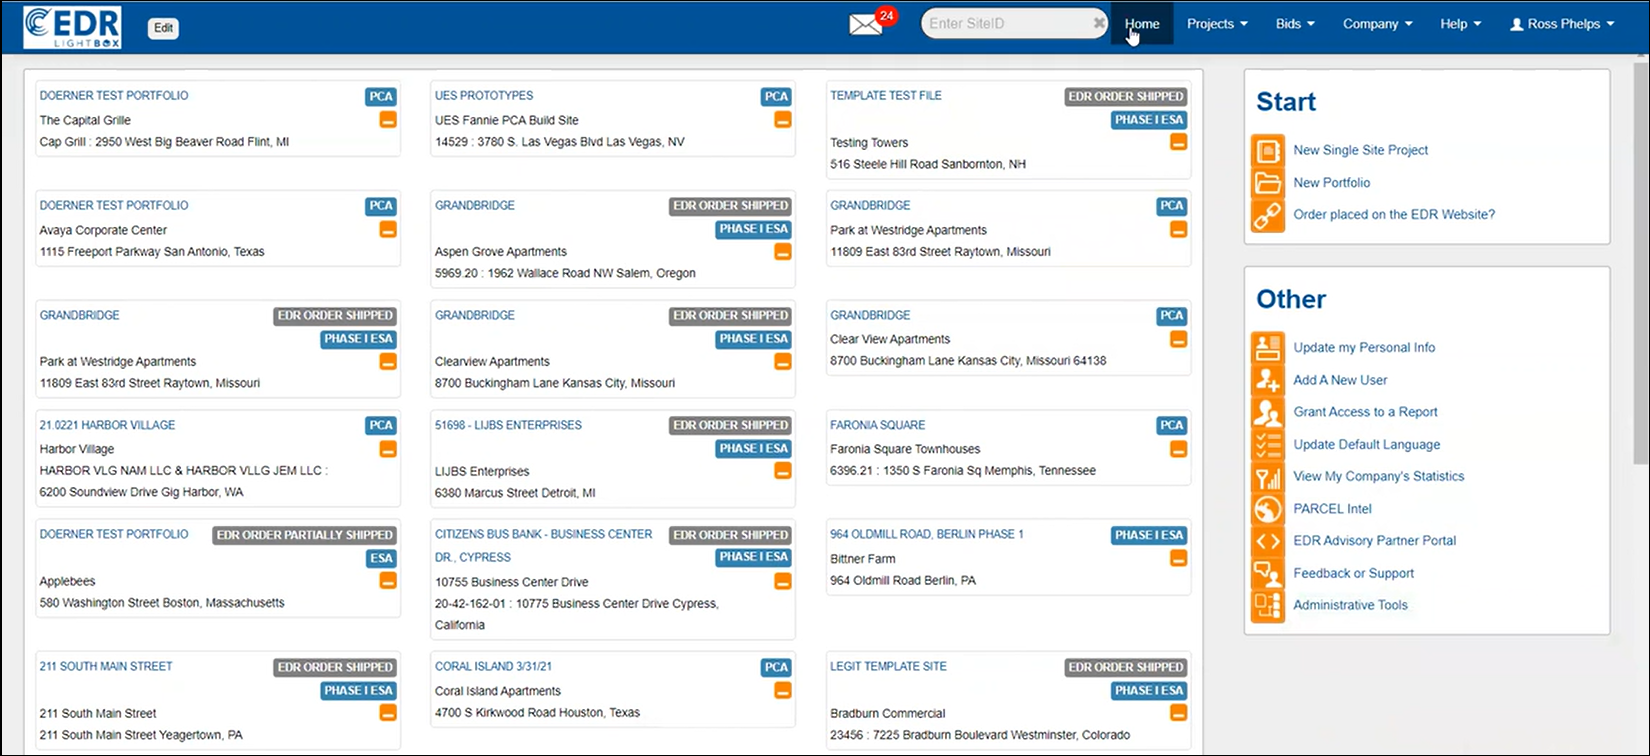
On the right sidebar, you’ll find quick access to:
New Single Site Project
New Portfolio
Update My Personal Info
Add a New User
Using the Portfolio Dashboard
If a report is part of a portfolio, clicking the upper link from the homepage will bring you to the project’s dashboard. The portfolio dashboard displays a high-level summary of all sites in that group.
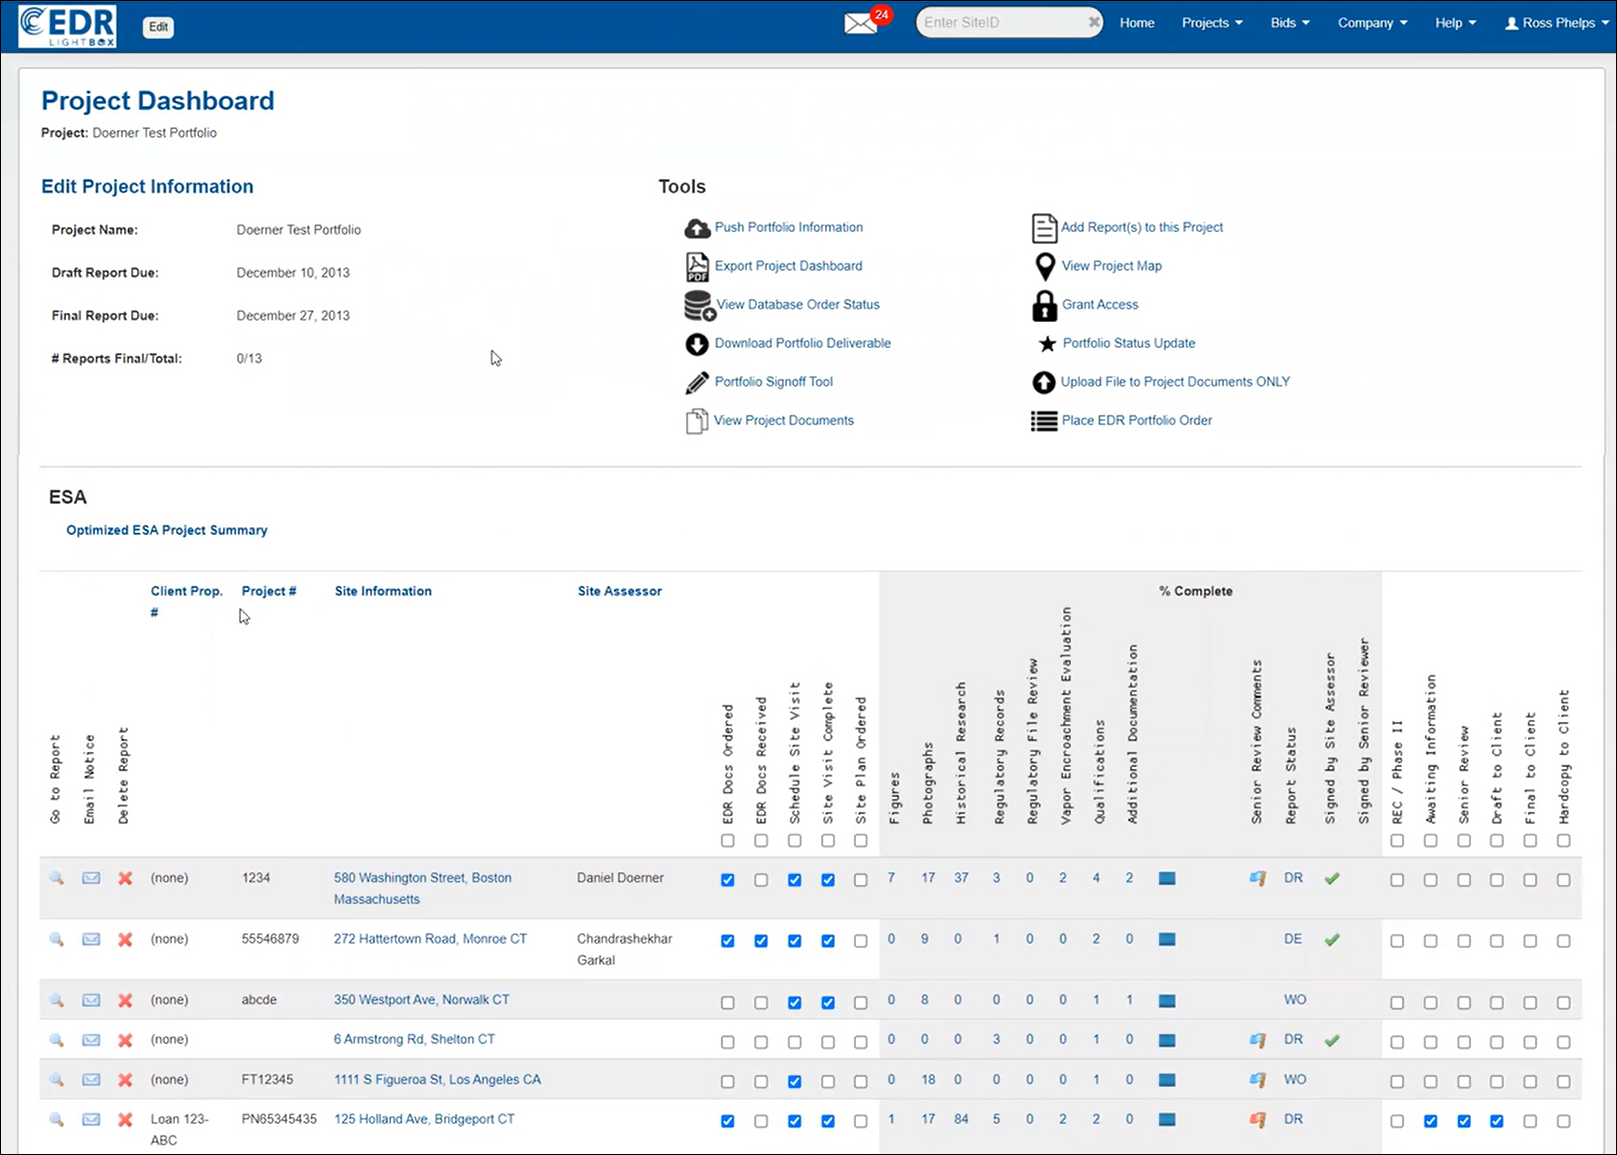
You can view the status of each site in the portfolio, including:
Progress indicators
Assigned assessors
Signature status
Completion percentages
Writing the Report in PARCEL
To begin writing, open a report and click on the Write tab. This brings you to the Table of Contents (ToC), where you can navigate through report sections individually.
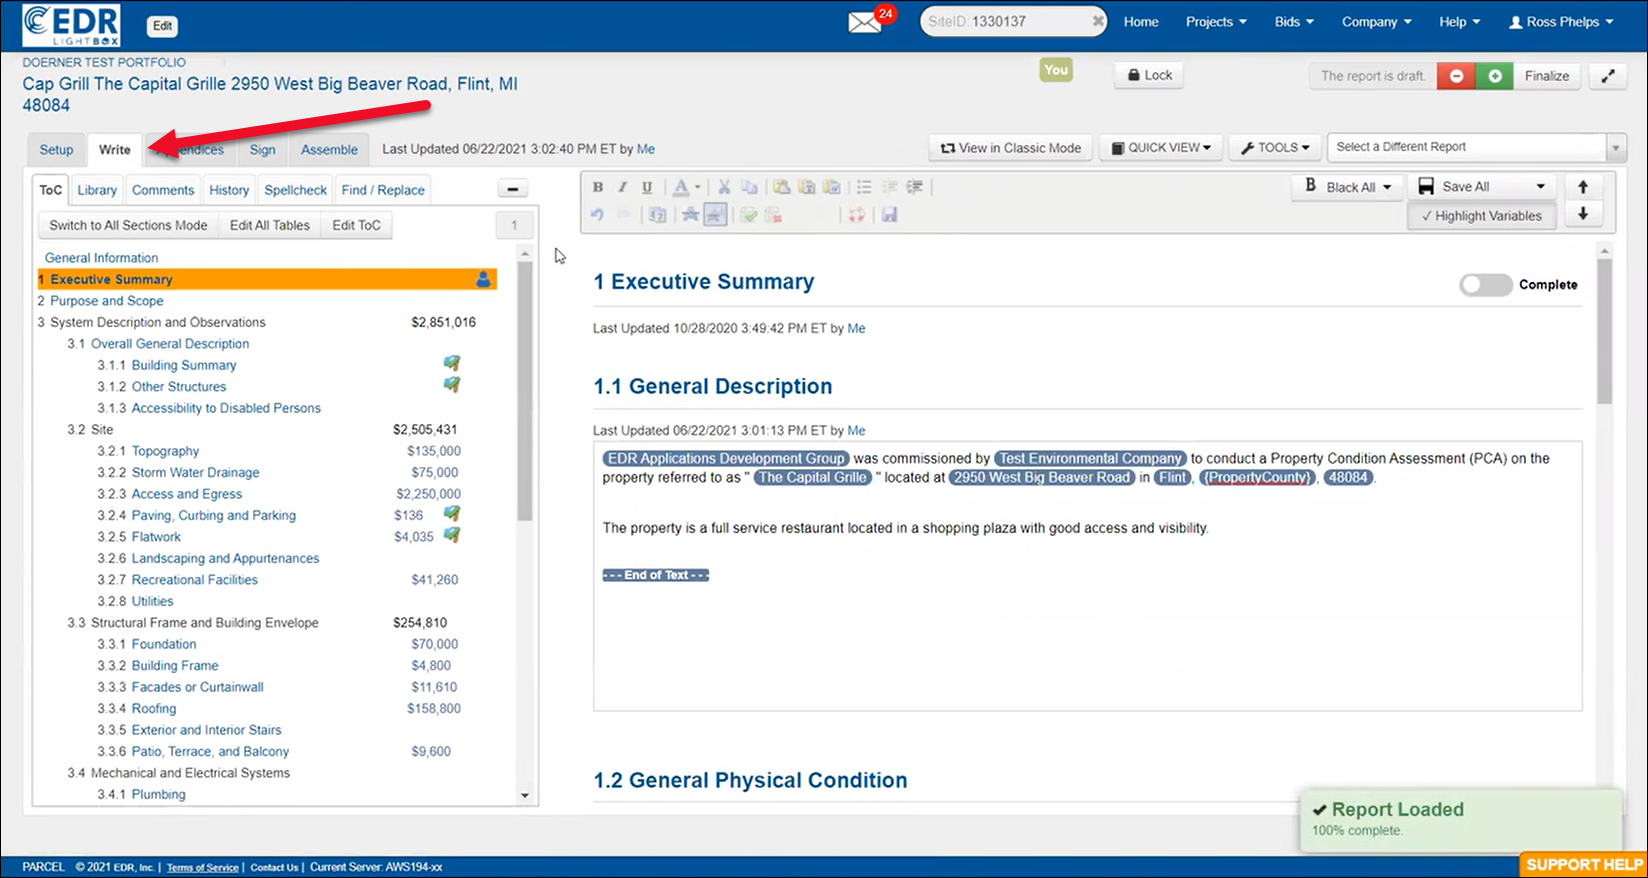
Use the following tools at the top of the page:
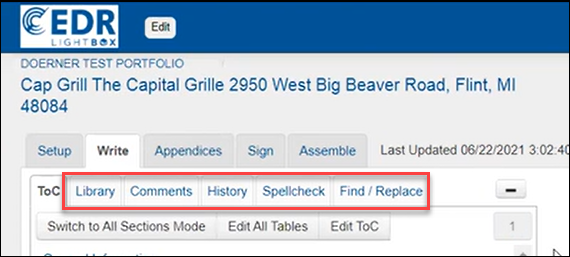
Library: Insert default narrative content
Comments: Collaborate with team members
History: Access previous saved versions
Spellcheck and Find/Replace
Switching View Modes
You can toggle between section-by-section view and All Sections Mode for continuous scrolling.
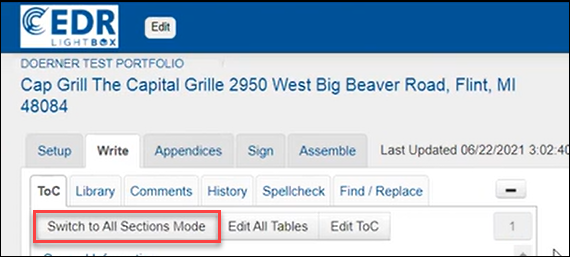
This also enables full-report spellcheck and formatting tools.
Entering General Information
Click on the General Information link in the Table of Contents to open the General Information popup, then click the orange Edit button at the top of the popup to open the fields for editing. 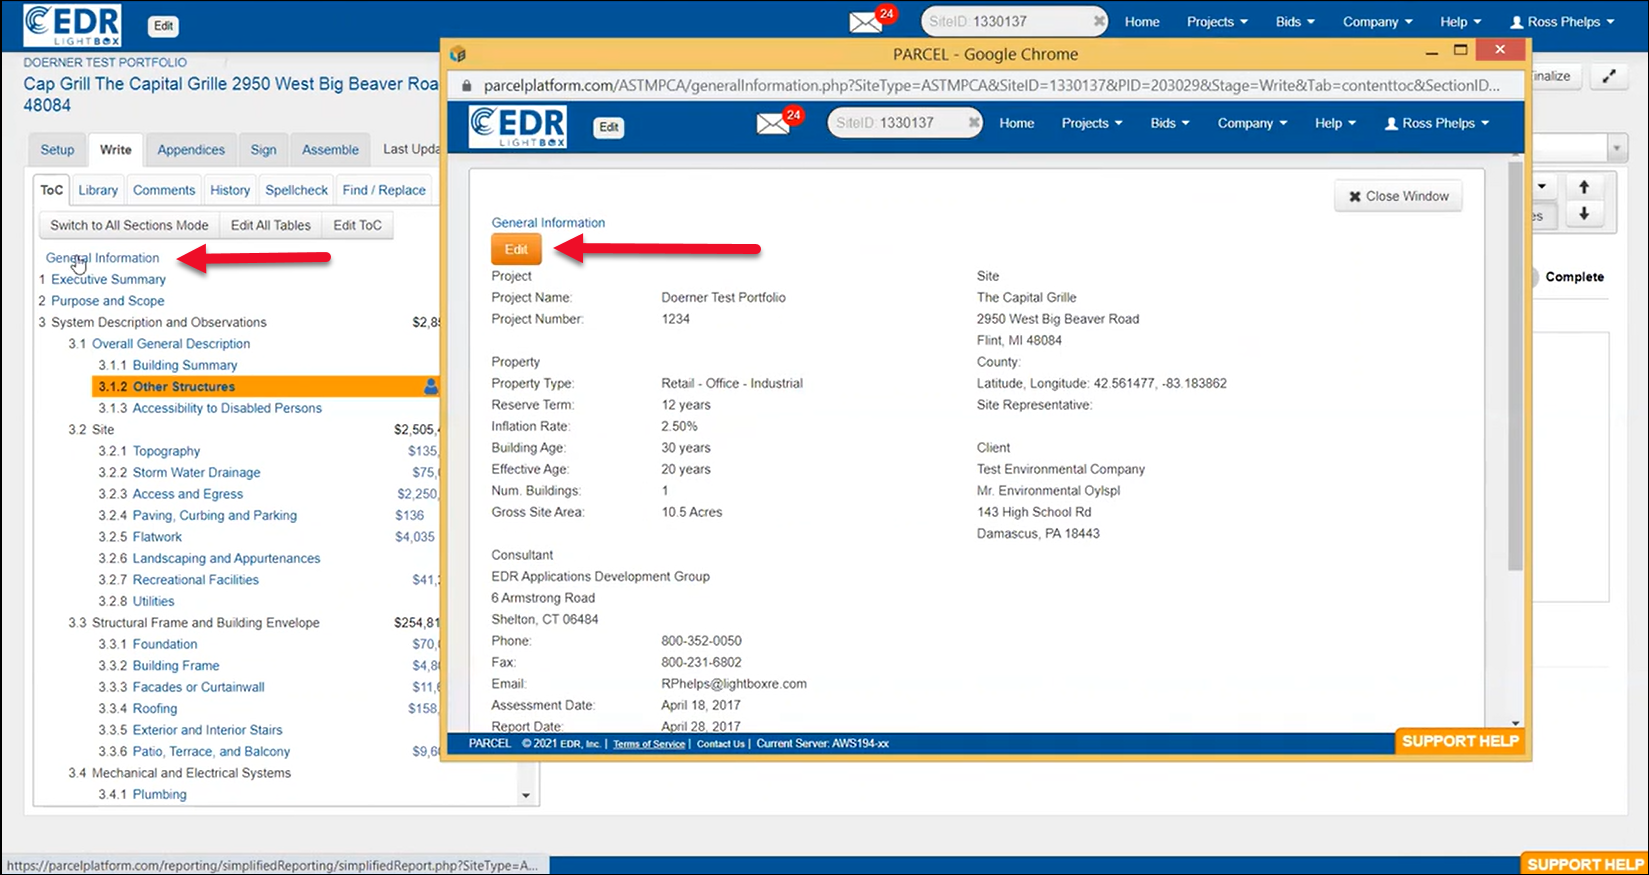
This is one of the most critical setup steps in the PCA process. Fill in fields such as:
Property Name
Address, City, State, Zip
Latitude/Longitude
Property Type
Building Age / Effective Age
Gross Site Area
After making any desired changes or additions, click the Submit Changes button at the bottom of the popup.
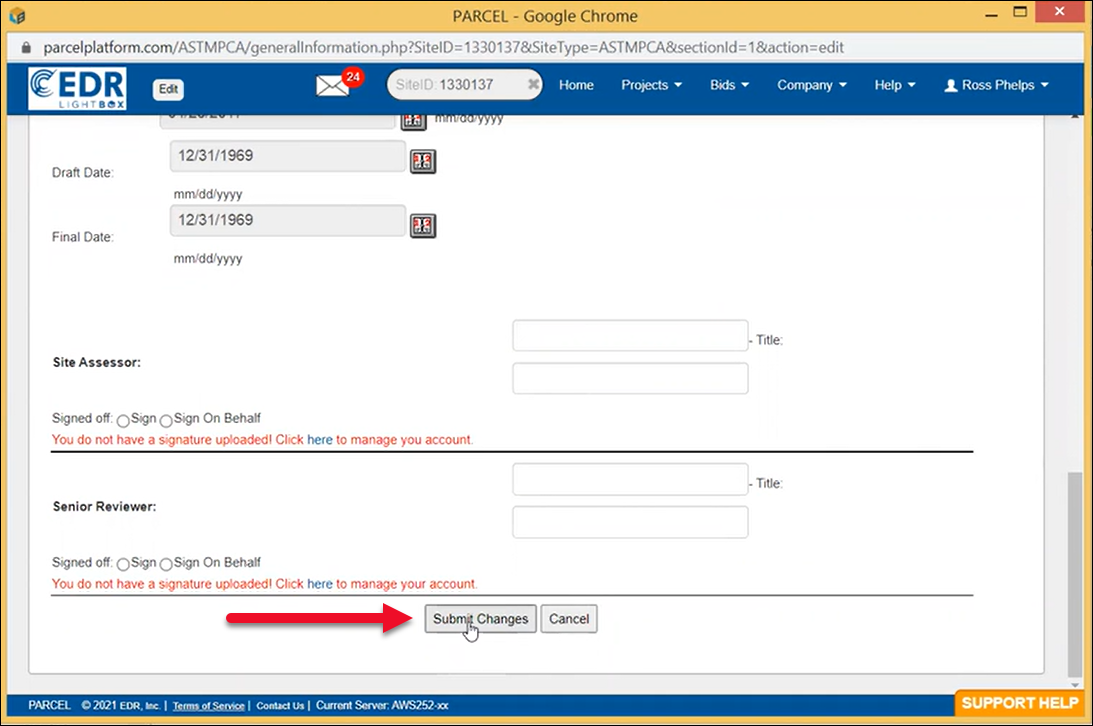
Once submitted, these values populate throughout the report automatically using PARCEL’s variable system, saving time and reducing error.
Rich Text Editing
In narrative blocks, you can use familiar formatting tools like bold, underline, font color, and bullet points. The menu at the top of the screen includes various useful text-editing tools.
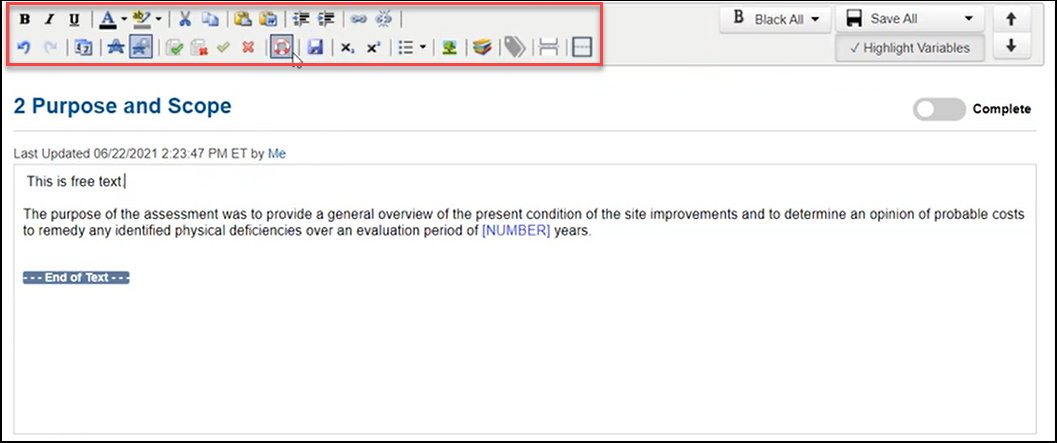
Copy from Word to paste formatted content
Use Undo/Redo, Insert Date, or Track Changes tools
Use the Save All button frequently (though PARCEL also autosaves every 5 minutes)
Working with Tables in PCA Reports
PCA reports include multiple tables for summarizing building information, costs, and recommendations. To create a new table, scroll to the relevant section (e.g., Building Summary) and click Create Table.
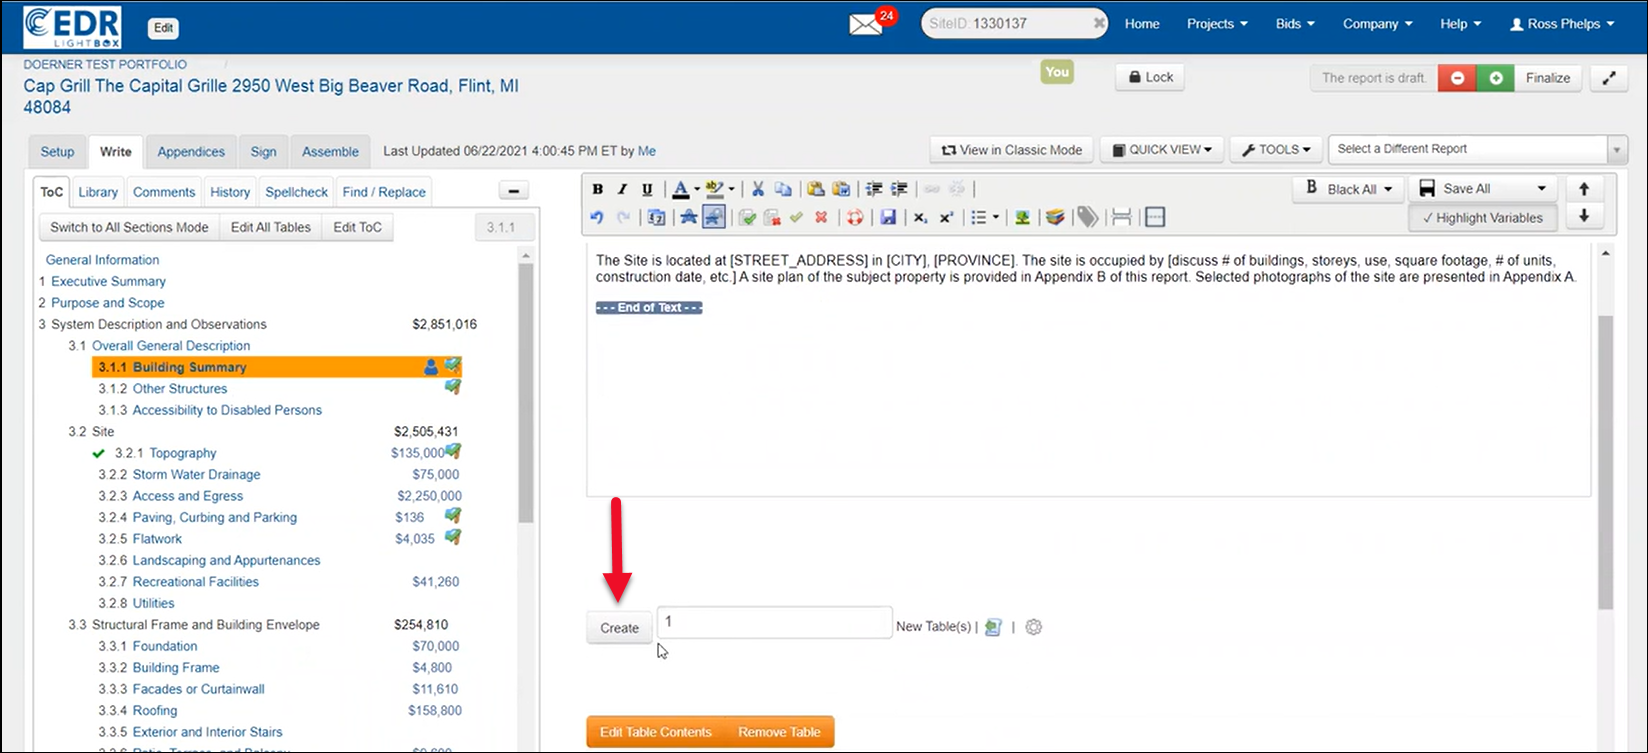
When entering data, note the following required fields for accurate cost calculations:
Property Type
Total Leasable Area
Dropdown fields help autofill some inputs, and you can duplicate, delete, or reorder rows using the table controls.
Restoring Table History
If you accidentally delete a table or row, use the View History tool at the bottom of the table section to restore previous versions — just like in narrative sections.
Cost Tables & Recommendations
Cost tables in PCA reports allow you to add detailed recommendations tied to system components. Each row typically includes:
Description of the deficiency or improvement
Recommended action
Associated cost estimate
Schedule (e.g., Immediate, Short-Term, Year 6, Year 12)
To add a recommendation, click Add New Recommendation and complete the required fields.

Confirm each step using the Confirm buttons.
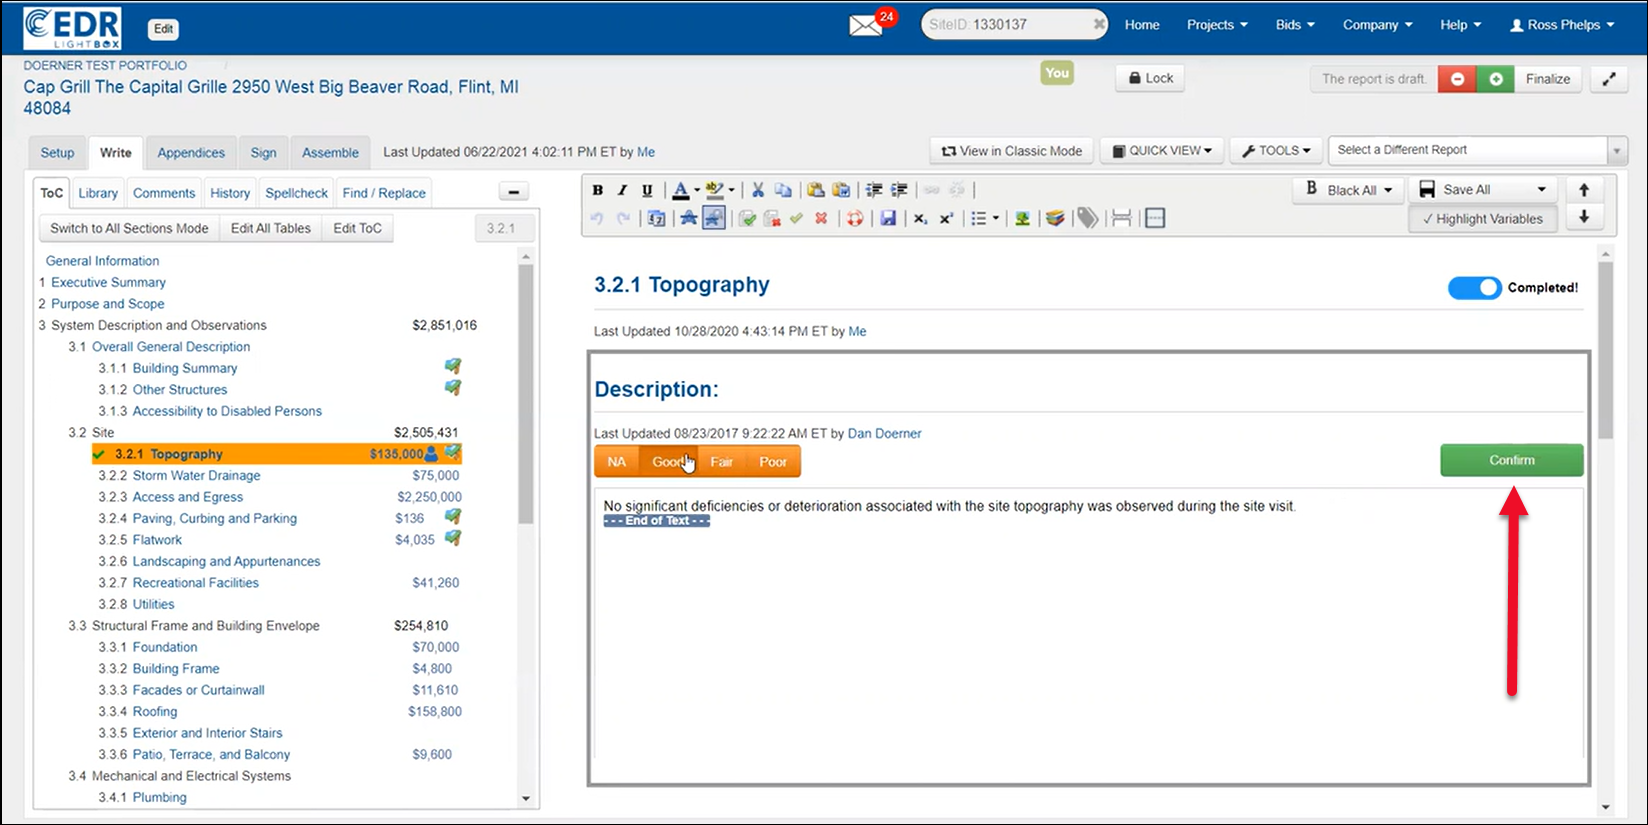
Associating Photos with Cost Items
Photos are uploaded to the appendix first, and then can be associated with a cost item:
Open the cost table and click the photo icon
Select a photo (orange highlight means it’s linked)
Click Save Association
Cost Distribution Over Time
You can spread cost estimates over multiple time periods (Immediate, Year 6, Year 12, etc.). Use the checkbox under each column to assign value distribution and view the subtotal underneath.
Editing and Managing Recommendations
To edit an existing recommendation, click the Edit icon next to the item. You can update the text, cost, schedule, or associated photos, then click Submit to apply changes.
All individual cost recommendations feed into the summary tables at the end of the report, including:
Immediate Repairs
Short-Term Repairs
Replacement Reserves
You can view these summaries as PDFs or export them to Excel for further manipulation (note: equations are not preserved).
Managing Photos and Documents in the Appendix
The Photographs appendix works slightly differently.
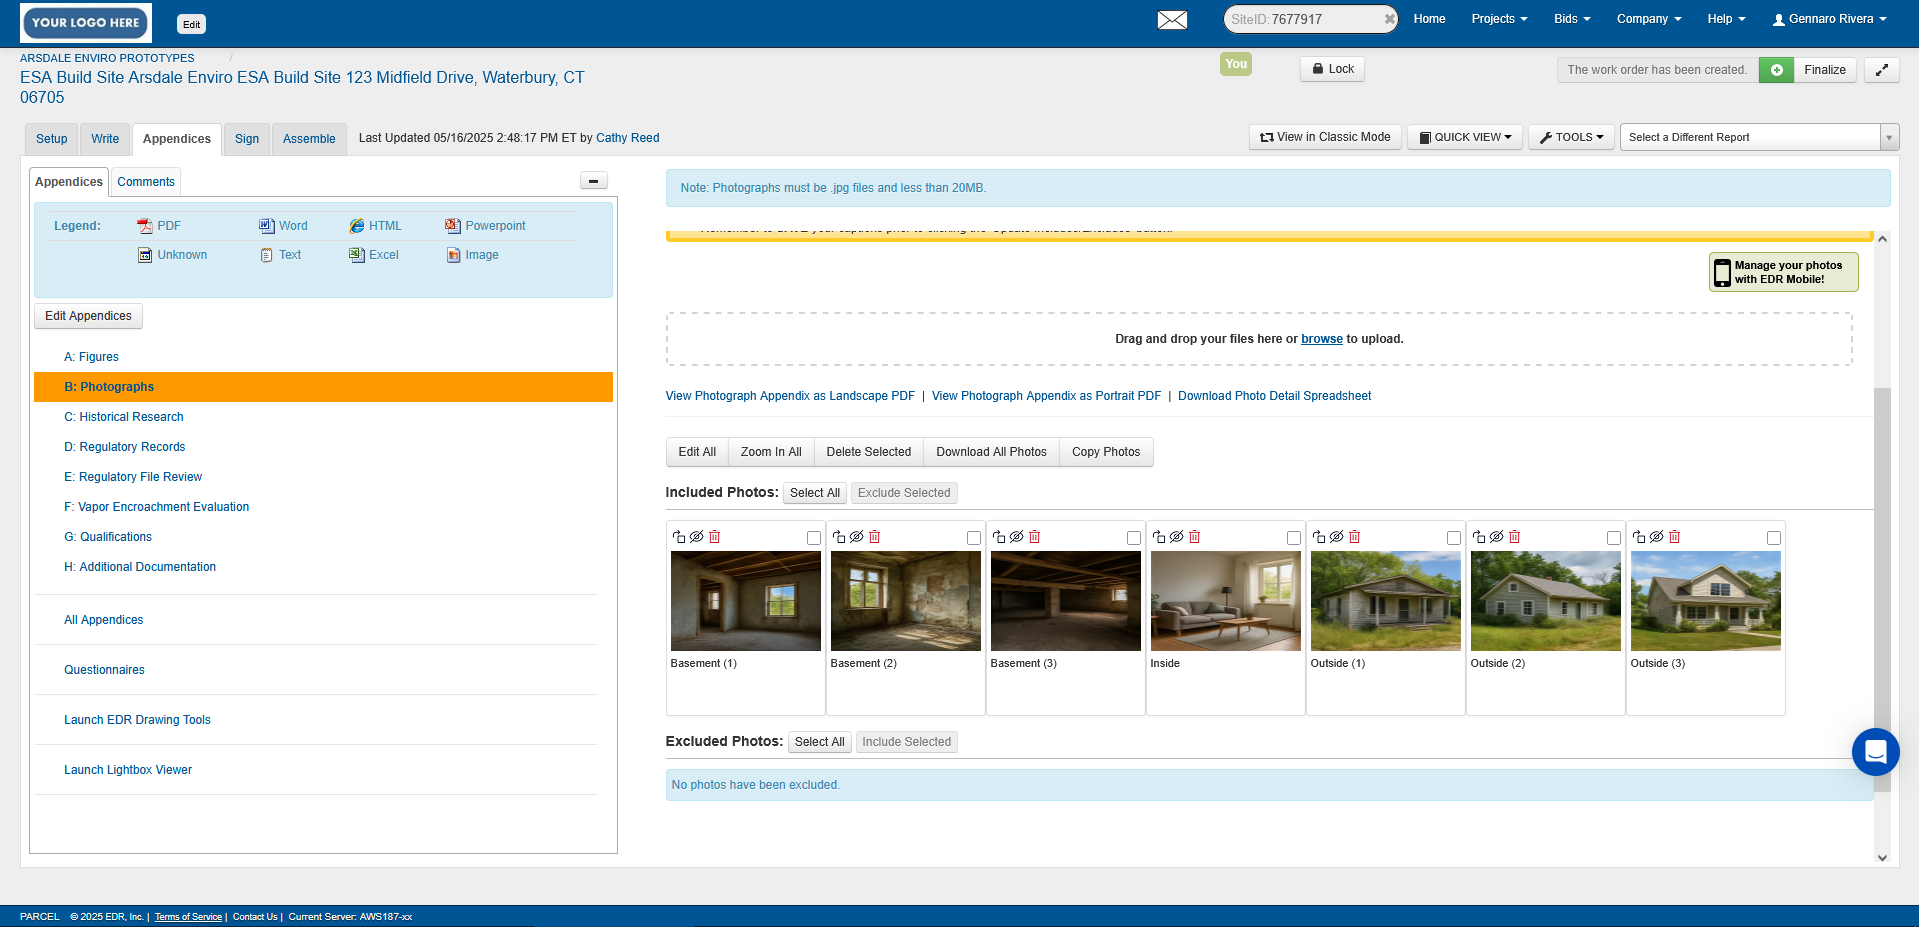
JPEGs show as thumbnails, and you can:
 Delete
 Rotate
 Include/Exclude
 Caption images by clicking Edit then typing below
Click on the photo to zoom in on the photo and edit the caption.
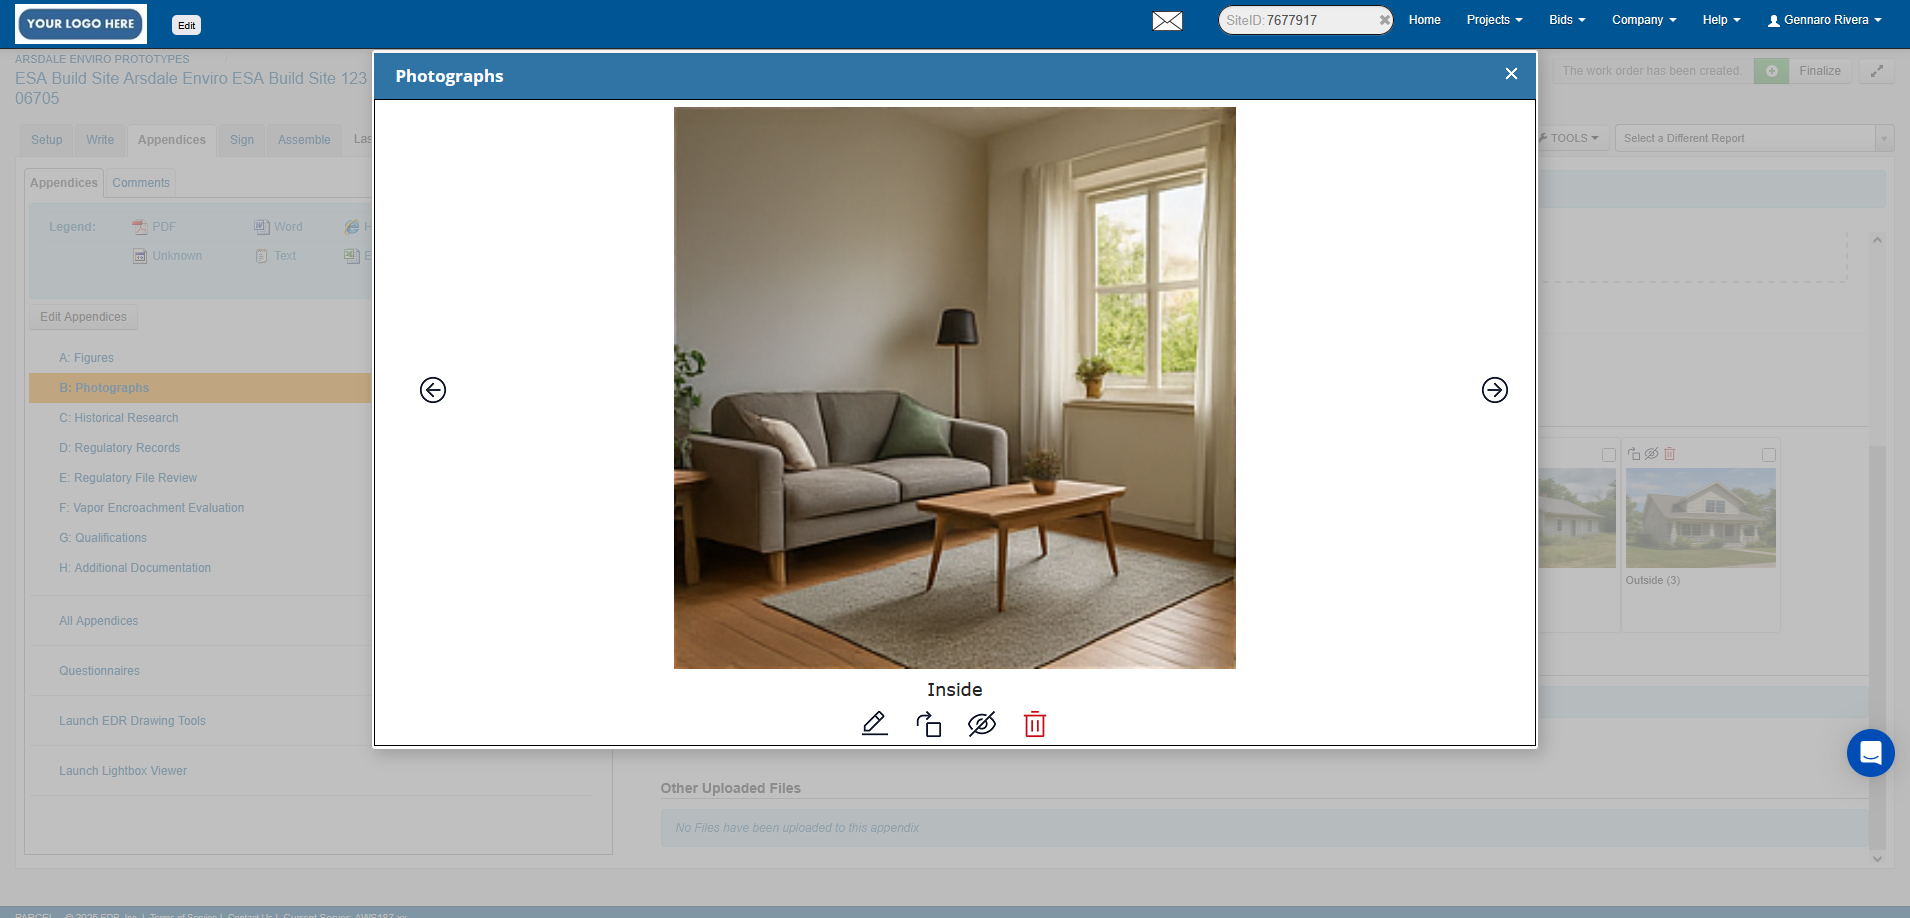
Use drag-and-drop to reorder or move photos. You can also bulk-select photos to delete or exclude. All changes are saved automatically.
Resume Attachment
If you uploaded your resume in the user profile earlier, it will automatically be included when you sign the report. No additional action is needed at this stage.
Signing the Report
Once all content has been entered, navigate to the Sign section. Your electronic signature and resume (uploaded earlier) will appear automatically.
Review and click Submit to lock in your signature.
Previewing the Report
At any time, you can preview the report using the Quick View (book icon) tool.

Select Detail Report to generate a PDF for internal review.
If you notice any red or placeholder text (e.g., instructions or variables), use the Black All button to finalize styling:

Black This Section – for current section only
Black All Sections – to apply universally
Using the Variable Replacer
The Variable Replacer tool supplements the General Information section. It lets you define and update custom report variables across all sections at once.
To use it:
To update variable content, click the Tools (wrench icon) menu and select Variable Replacer.
.png)
Update any default or custom variables
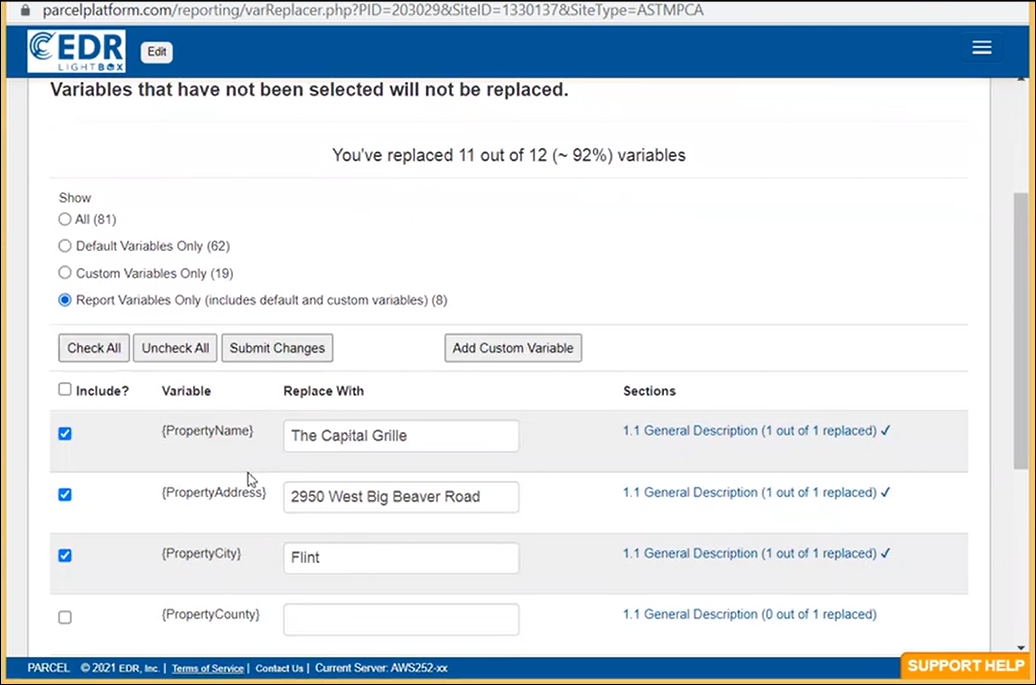
Click Submit Changes, then click OK
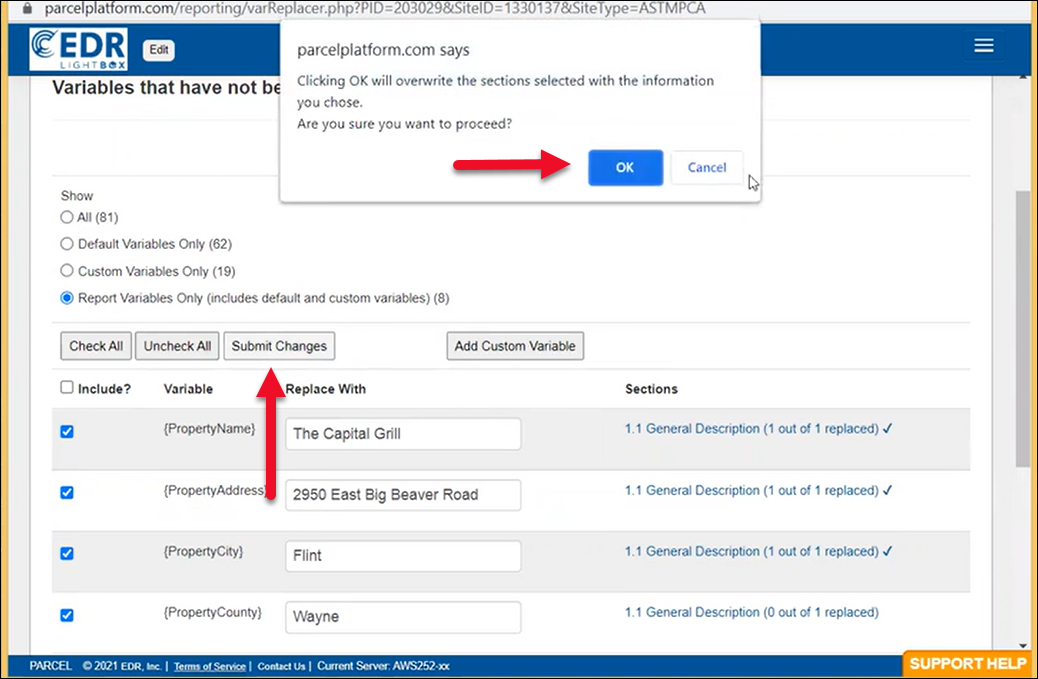
It may take several seconds to propagate changes across the full report.
Assembling and Delivering the Report
Go to the Assemble tab to prepare the report for delivery:
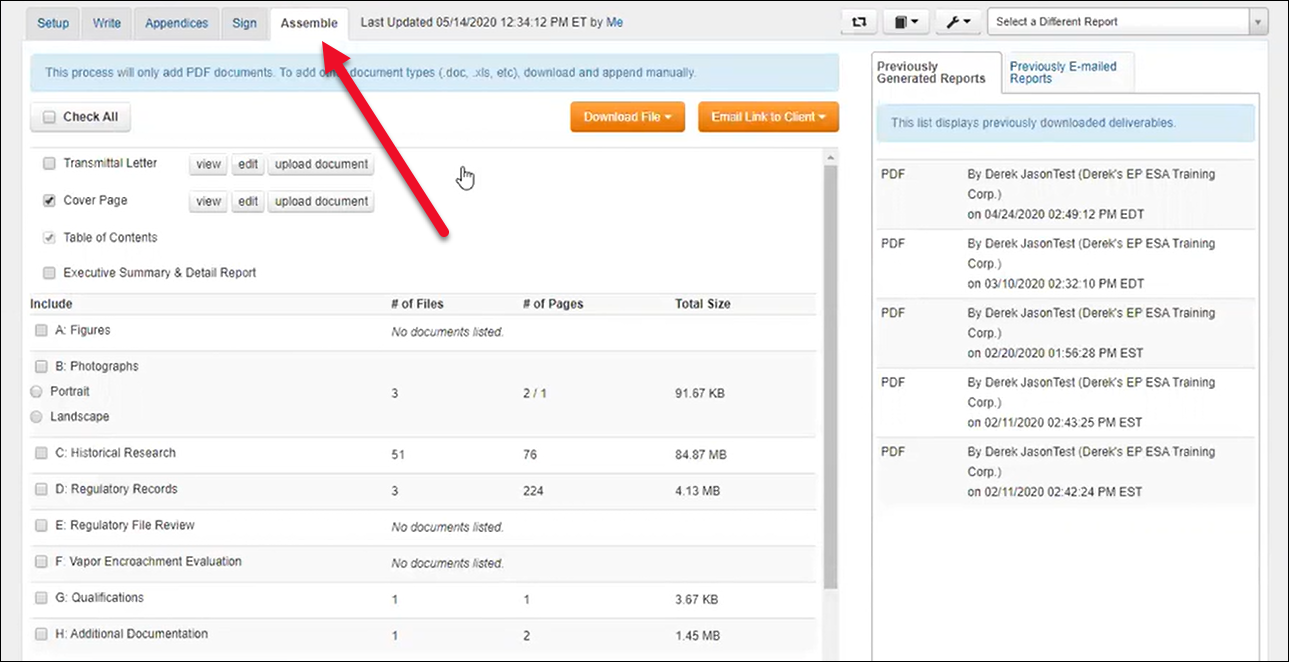
Select which sections and appendices to include
Click Reorder Lettering if needed
Click Download File (PDF format)
A record of who downloaded the report and when will be saved.
Emailing to Client
Click Email Link to Client → choose PDF → a popup form will open.

Fill out the form:
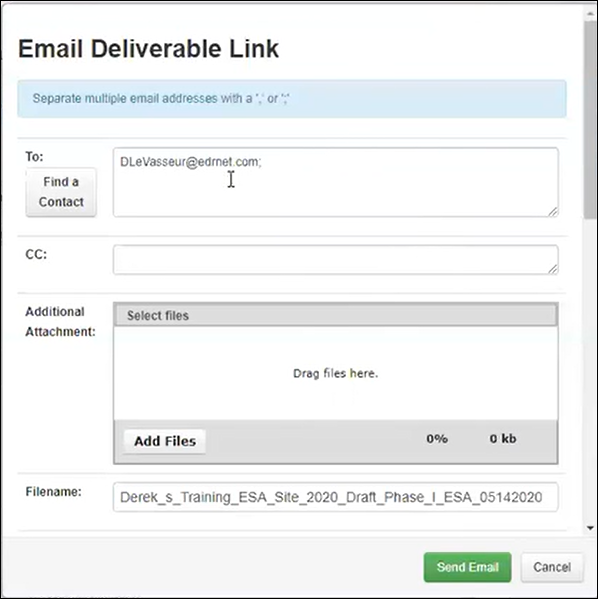
Add recipient contact(s)
Edit client-facing instructions
Optionally send a copy to yourself
Click Send Email to send
After sending, you can track when the report was accessed or expired, by viewing the Previously Generated Reports and Previously E-mailed Reports.

Use the Disable button to invalidate the link and resend a corrected version if needed.

.png)

.png)