Shared Notes
- Print
- DarkLight
- PDF
Shared Notes
- Print
- DarkLight
- PDF
Article summary
Did you find this summary helpful?
Thank you for your feedback!
LightBox Vision™ users have the ability to create notes associated with a parcel. The notes are then available to be viewed on the Location Information panel and is a way for users to track any relevant information about the parcel such as adding seller contact information or other relevant facts that a user finds out after canvassing a property. The notes are automatically accessible by anyone within the same LightBox Vision account.
Create Notes Associated with a Parcel
1. Click on a property to display the Location Information panel.
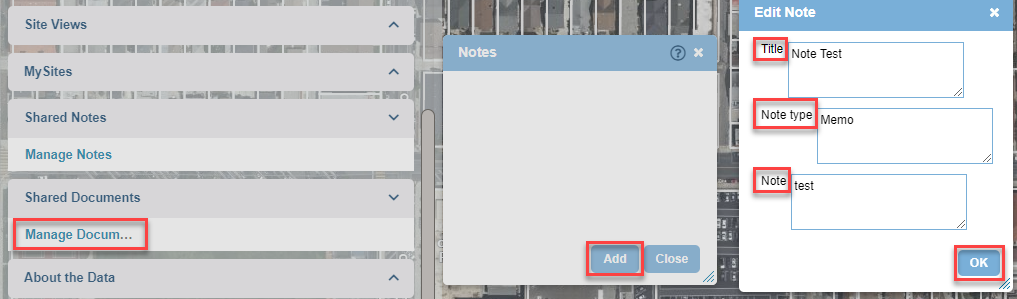
2. From the Location Information panel that appears, click on the Shared Notes card to display the Manage Notes command. When the Notes dialog box appears, click Add. A new window will open to create/edit the note. Complete the form, adding Title, Note Type, Text, and click OK.
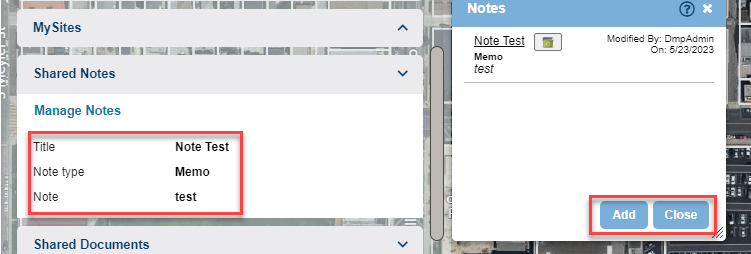
3. A summary window appears with your note.
4. If you are done adding notes select Close. If you would like to add another note select Add and click OK. A Notes window will display summarizing your notes with the most recent listed on top.
Viewing, Editing, and Deleting Notes
Viewing Notes
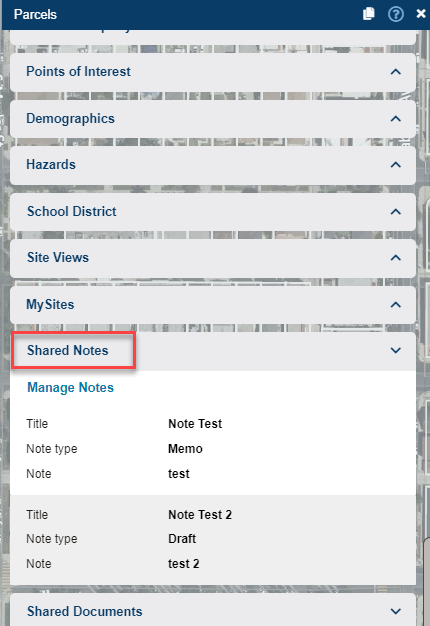
Click on the parcel to display the Location Information panel. The Shared Notes card shows up with preview of the notes. In the below example, 2 notes are attached to the Parcel.
Editing Notes
Click on the parcel to display the Location Information panel. Click the Manage Notes link on the Shared Notes card to edit notes associated with the parcel.
A Notes summary window displays. Click the Title link to edit the note.

Deleting Notes
To delete a note, first open the Shared Notes card to access the Manage Notes command. Then click on the Trash Bin icon next to the note to delete it. A confirmation message will display to confirm the note deletion.

Note:
Since notes are shared amongst all users that utilize the same LightBox Vision account, the deletion will remove the note for all.
Was this article helpful?