Saving Layers
- Print
- DarkLight
- PDF
Saving Layers
- Print
- DarkLight
- PDF
Article summary
Did you find this summary helpful?
Thank you for your feedback!
LightBox Vision™ users have an option to save layers via "Save As..." and "Save a Copy As..." . With these capabilities, users can move layers to other folders and make copies of layers. These two options are available on the Markup Layers and any user-loaded layer.
One example of using this option is to create a Save As "revised" or "updated" version of the layer with a new layer/file name. Another example is to Save a Copy of a layer and save it to another folder such as the Shared folder for others to view
Save As
Save As saves the contents (markups/drawings or data) of the layer. The newly saved layer is automatically available in the Layers menu. If the Layer is removed from the list of active layers then the user can locate it by clicking on the More Layers button at the bottom of the Layers Menu.
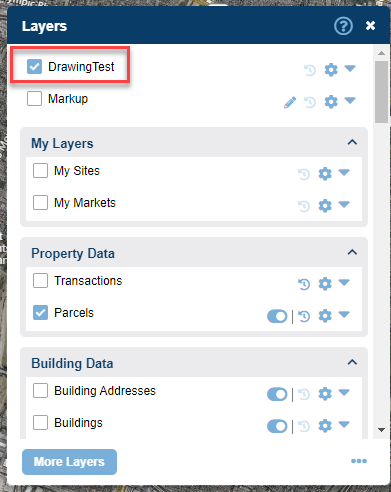
1. User must first have a Markup Layer in the Layers Menu or a user-loaded layer (an uploaded Excel file or Shapefile) from the Data Loader's ability to import. Example image below of a markup layer:
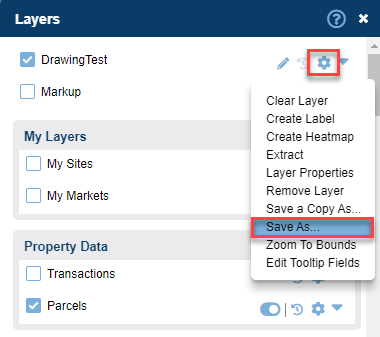
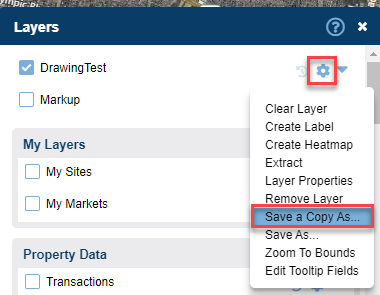
2. Click on the Options icon on the Markup Layer. The Options menu will display, click Save As.
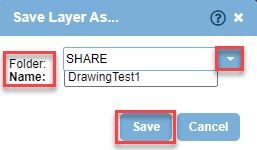
3. A Save As dialog box will appear, Select a Folder from the drop-down menu and below enter in the new layer/file name.
- For user-loaded layersimported in from Data Loader the user can choose any folder to save to:
- User = user folder. Only visible by user. Read and write permissions by user only.
- Drawing = user folder specifically to organize markup/drawing layers. Only visible by the user. Read and write permissions by user only.
- Share = share folder. Visible to all users tied to an account. All users have read and write permissions.
- Production = account level folder. Visible to all users in account. Only Admins have permissions to write to folder. All users have read permissions of folder.
4. The newly created Save As layer is automatically added to the Legend and available to use.
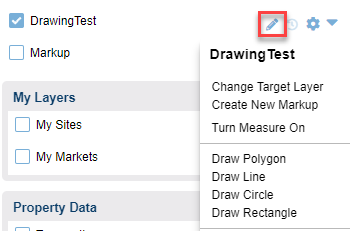
5. For a Markup Layer, the newly created layer will now become the Target Layer as denoted by the Draw Tool icon next to the layer. User can now add new Markups from the Draw tool to this newly created layer.
Save a Copy As
Save a Copy As creates a copy of the Layer in the selected folder. The original layer will remain in the Legend and any additional edits will continue in the original layer.
1. User must first have a Markup Layer in the Layers Menu or a user-loaded layer to import data.
2. Click the Options icon on the layer. The Options menu will display, click Save a Copy As.
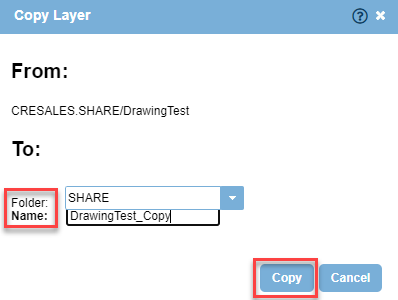
3. A Copy Layer dialog box will appear. The From location is displayed. The To location needs to be determined by user. Select a Folder from the drop-down menu. Enter in the layer/file name in the Name field. Click Copy. The below image is an example of a layer getting a copy saved to the Share folder
- For user-loaded layers imported in from Data Loader the user can choose a folder to save to.
- User = user folder. Only visible by user. Read and write permissions by user only.
- Drawing = user folder specifically to organize markup/drawing layers. Only visible by the user. Read and write permissions by user only.
- Share = share folder. Visible to all users in account. All users have read and write permissions.
- Production = account level folder. Visible to all users in account. Only Admin have permissions to write to folder. All users have read permissions of folder.
4. The newly created Save a Copy As layer is NOT automatically added to the Layers Menu. A copy was made and it resides in the folder it was saved to.
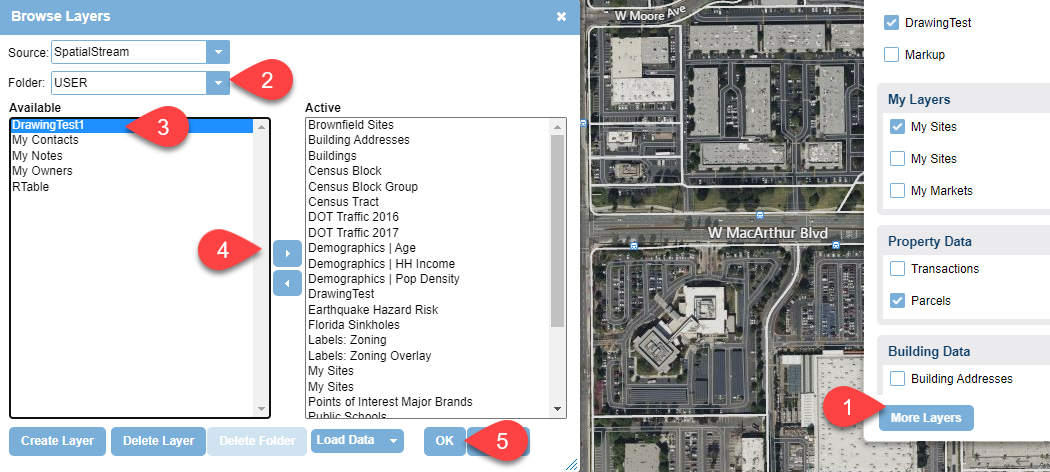
5. To view and use the newly created copied layer:
- More Layers button at bottom of Legend:
- Select the Folder the layer was copied to from the drop-down.
- Click the layer to highlight it in the Available section.
- Click the right-facing arrow to move it to the Active side.
- Click OK
Was this article helpful?