Market Alert
- Print
- DarkLight
- PDF
Market Alert
- Print
- DarkLight
- PDF
Article summary
Did you find this summary helpful?
Thank you for your feedback!
The My Markets layer in LightBox Vision is the perfect tool to draw custom market boundaries and schedule automatic monitors to alert you of market transactions in a specific area of your choosing. This feature is available in the LightBox Vision Commercial or Builder versions.
My Markets Overview
My Markets is a layer within the LightBox Vision Commercial Real Estate and Builder Developer Editions that enables users to set up their target markets and create alerts that will notify them of any transaction activity. Learn how to define your market and set up alerts below.
Note:
Market alerts will expire after 30 days.
Setting Up Your Market Criteria
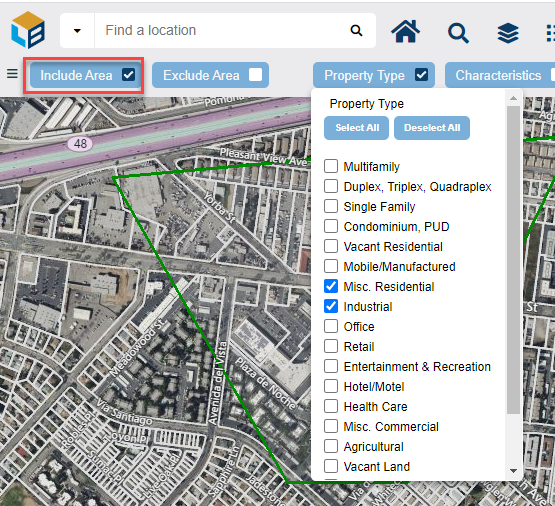
To create a Market, first set the market criteria using the Property Search filter (see documentation on searching here if needed).
1. Directly enter your property criteria into the LightBox Vision default filter form accessed through the filter bar directly above the map or into the filter form that's opened by clicking the Search icon on the Main Toolbar.
2. Define the market boundary by employing a single Inclusion Geometry (see documentation on using inclusion boundaries here).
Note:
For the best results, it is recommended to not create inclusion boundaries that exceed the size of a county as those results could exceed the 2,000 limit list result for exporting data (see list documentation here).
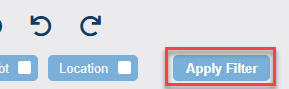
3. Click Apply filter. The resulting map will display the properties that meet the criteria entered with a visible geographic constraint. Read further below to set up the market area and its alert.
Creating a Market
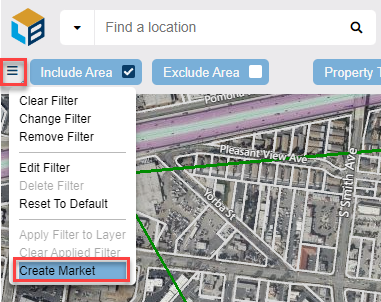
1. After doing the steps above, click the filter options found to the far left of the Filter Bar.
2. Select the Create Market command.
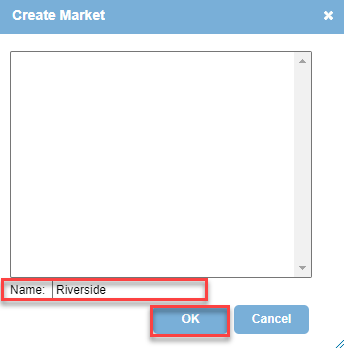
3. Enter the desired name or select an existing market to overwrite it. Choose OK.
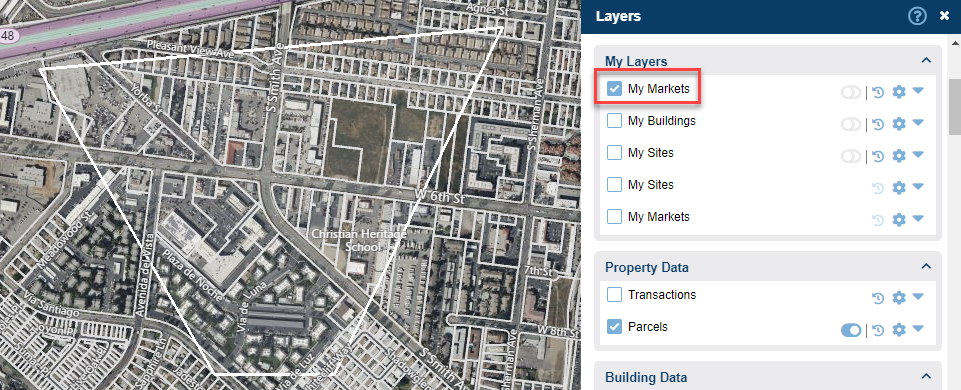
4. The result will be a new record in the My Markets layer. By default, the layer will be represented on the map as an white polygon when enabled from your Layers Menu.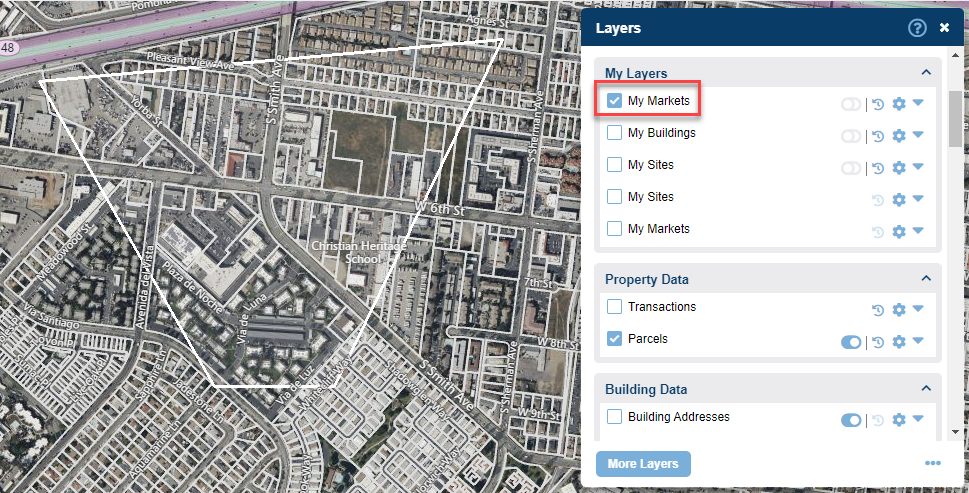
Managing Alerts
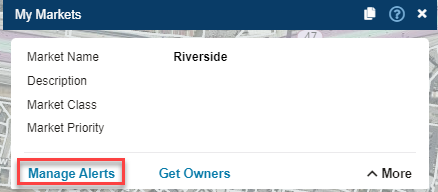
1. Select the white market boundary to open the My Markets Location Information panel (the My Markets layer has to be check-marked on in your Layers Menu to see and select the boundary).
2. Click on the Manage Alerts command located on the My Markets card.
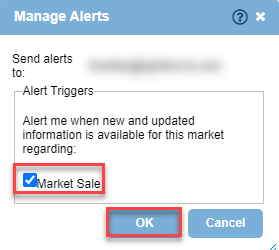
3. Choose the desired alert trigger to be notified on (Market Sale). Emails will be sent to the user's registered email which will be displayed in the user interface for reference.
Note:
- Market alerts will be sent once a week as the data is updated. An email will be sent containing a link to login to LightBox Vision. Additionally, the notification area in the top right corner of the browser window will display notifications that contain links to open the list of transactions and zoom the map to them.
- Market alerts cannot be received on phones.
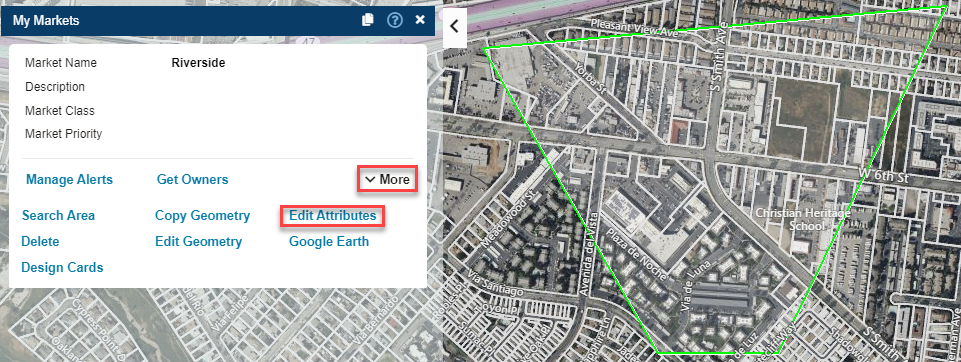
Editing Markets
Like any user managed layer in LightBox Vision, My Markets can be edited to catalog more information and ultimately make more intelligent data.
1. Select the market boundary to open the My Markets Location Information panel.
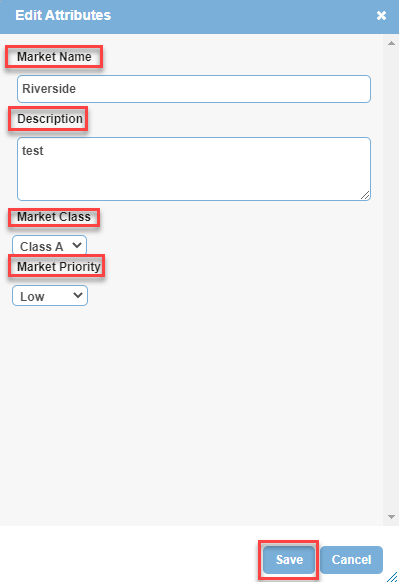
2. Click More on the My Markets card to view all the available commands. Next select the Edit Attributes command.
3. This will open the Edit Attributes Form. Fill in the form with the desired information and choose Save.
Was this article helpful?