Multi Layer Searching
- Print
- DarkLight
- PDF
Multi Layer Searching
- Print
- DarkLight
- PDF
Article summary
Did you find this summary helpful?
Thank you for your feedback!
This documentation details an advanced search feature that will help you search across multiple layers that are tied to different datasets. Interested in finding commercial properties that are at least a half mile from a school or church? Or maybe you want to find all property owners for all gas stations in a city. The Include & Exclude Areas in Search command allows you to search across multiple datasets.
Searching Multiple Layers of Data with Include/Exclude Areas in Search
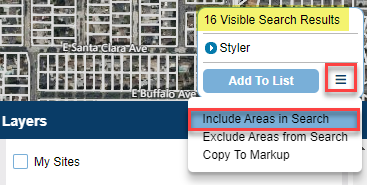
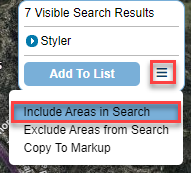
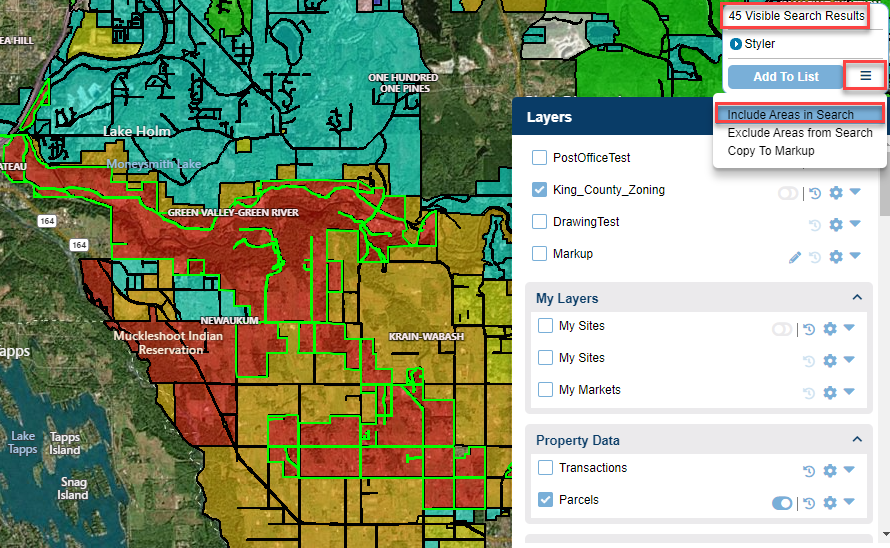
The Include Areas in Search and Exclude Areas in Search feature can be found in the search results box after you run a search. Choosing Include Areas in Search will take your search results and apply them as inclusion areas (or areas where you can limit your search to). Exclude Areas in Search will exclude any search results that overlap these areas.
Note:
- For point and polygon layers, you have the option to buffer around the areas your are including or excluding.
- In total you can have no more than 100 inclusions and exclusions at a time. You will receive an error message if you try to add more.
The Include Areas in Search and Exclude Areas in Search can be found in the Search Results box after you run a search. The option is available for any search including searches on point, line, or polygon layers.
- Including the areas will allow you to search inside or around your search results
- Excluding will exclude the areas overlapping or around your search results
Finding Property Data Under a Point Layer (ex: Loaded Excel Spreadsheet)
If your loaded layer does not already have a search filter that you've created for it, you will need to make one so that you can flip between search filters to pull the data between what you've loaded and one of LightBox Vision's preset layers (such as utilizing the Property Search filter to grab property data from the Parcel layer)
Creating a Search Filter for Your Layer (if filter doesn't already exist)
1. Open the Layers Menu in the Main Toolbar
2. Select the Options icon next to your loaded layer (see documentation on loading spreadsheets)
3. Choose Create New Filter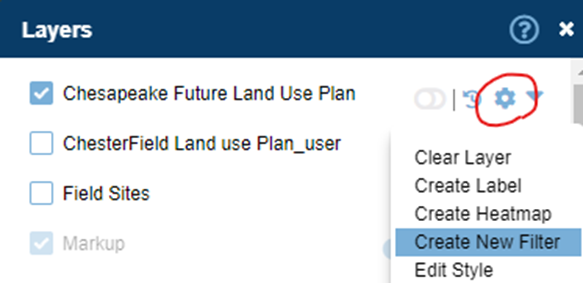
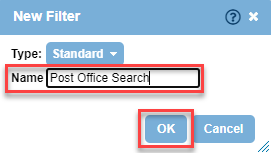
4. At the next window, provide your search filter with a Name (preferably one to match your layer name) and choose OK
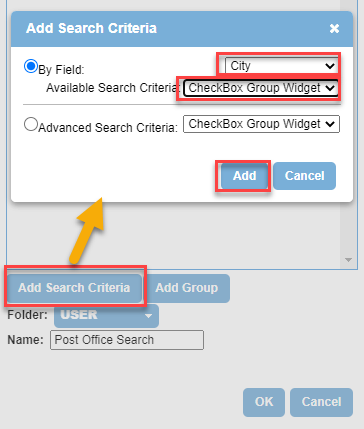
5. Select Add Search Criteria and select any field (you’ll notice the field options are the column headers in your list)
6. Next to Available Search Criteria, choose an option (ex: Textbox Widget)
7. Select Add and OK
Tip:
For more detailed information on the power of creating search filters, see the associated documentation
Multi Layer Searching Steps (if search filter exists)
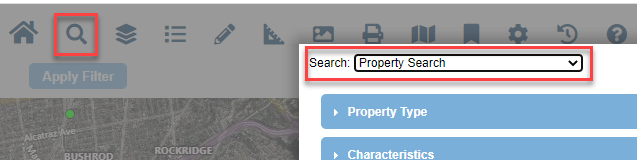
1. Choose Search from the Main Toolbar

2. At the next window, choose your search filter name from the dropdown and OK

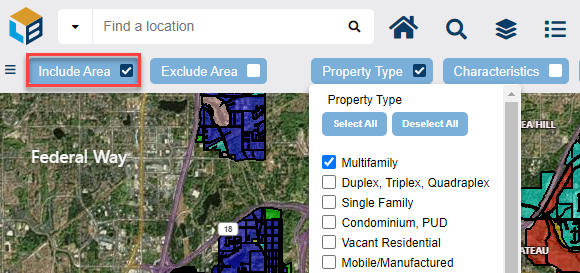
3. On the upper left, select Include Area and pick an option (ex: Add Polygon)
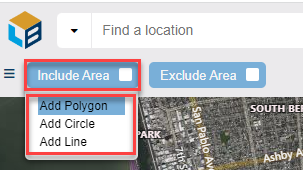
4. Draw a polygon around your points
5. Choose Apply Filter (located further to the right of where Include Area was chosen)

6. Your search grabs the points by highlighting them and listing the result total at the top right of the screen

7. If your results are less than 100 then you can continue the process by choosing Include Areas in Search however if they are more than 100 results you will need to redraw your inclusion to grab less
8. At the next window you can choose to buffer (optional) or choose OK so that your points and the drawing around it is now your inclusion area
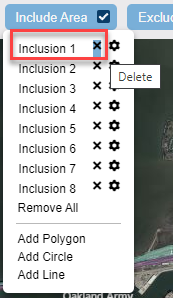
9. Hover your mouse over Include Area and remove the first listed inclusion by clicking the x (this makes sure your search will not grab anything beyond your points)
10. Choose Search from the Main Toolbar to select the search filter you want to get the data for from under your point locations (ex: for parcel data, choose Property Search filter)
11. Reselect Include Area so its check-marked (this box gets deselected when filters are changed so has to be reenabled)
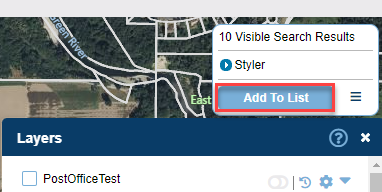
12. Choose Apply Filter and when you get results choose Add to List. You now will get a list of the data that was pulled in the proximity of your point layer (see documentation on how to save result lists)

Finding Property Data Under a Polygon Layer (ex: Loaded Shapefile)
1. Create a search filter for your loaded layer if one doesn't exist already (see further above on this page under Creating a Search Filter for Your Layer)
2. Choose Search from the Main Toolbar and select the search filter for your loaded layer that you made and click OK at the bottom of the window
3. Depending on what fields were chosen during step 1, you will identify what in your shapefile data you want to search (ex: zoning codes below) and click Apply Filter
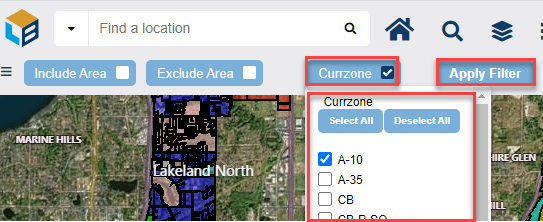
4. Your map will highlight results in green that fit your search criteria. If your results are under 100, choose Include Areas in Search next to the result total
- If your results are over 100 you will need to use Include Area to set a parameter that can grab less results
5. At the next window choose OK (optional to include an additional buffer)
6. Your polygons are now inclusions to use for searching additional data tied within those shapes on the map. Choose Search from the Main toolbar.
7. Pick the search filter for the data you want to see within your inclusion areas (ex: Property Search to pull parcel data) and choose OK
8. Pick out any specific search criteria you need to grab within your inclusions (or leave all boxes deselected to grab everything)
9. Make sure Include Area is selected and choose Apply Filter
10. Once you get results you can choose Add to List to see the data listed (see documentation for results list if needed)
Note:
Your map view can have an effect on the capability to grab search results. Higher density areas may need a closer viewing range to pull results
Tip:
You can conduct multi layer searching on datasets that are already in LightBox Vision. For example, you can take point searching steps with the POI layer to use those points as inclusions to then grab parcel data from the Property Search filter
Was this article helpful?