Create Layer
- Print
- DarkLight
- PDF
Create Layer
- Print
- DarkLight
- PDF
Article summary
Did you find this summary helpful?
Thank you for your feedback!
Creating a layer is the first step in manually building a Spatial data layer. You will be able to create an empty layer in LightBox Vision and can manually add spatial data (points, lines, or polygons) and attribute information to your layer. This is a flexible way to create a spatial layer for specific information tracking needs (see Drawing Tools for information about drawing points, lines, or polygons).
How to Create a Spatial Data Layer
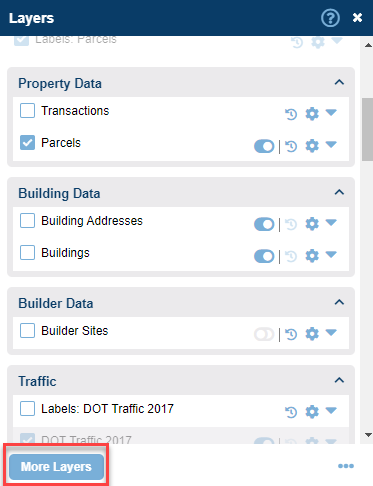
1. Click the Layers icon on the Main Toolbar.

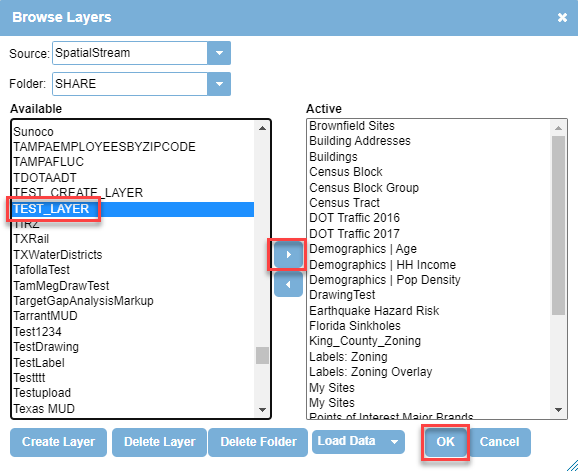
2. Click the More Layers button at the bottom of the Layers Menu. The Browse Layers window appears.
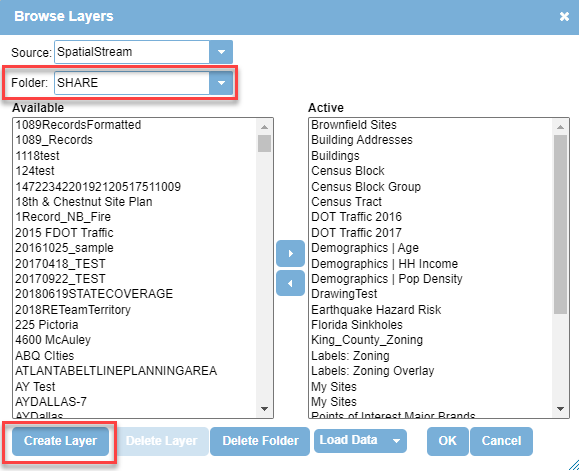
3. Select a Folder from the Folder drop-down list in which to save your data set.
4. Click the Create Layer button. The Create Layer window appears.
Note:
If you don't have permission to use your selected folder, the Create Layer button is grayed out. Select another folder to save your data set.
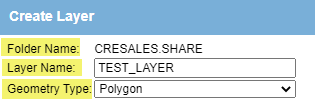
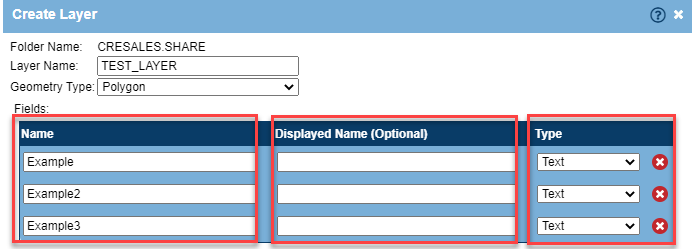
5. In the Create Layer window:
- Folder Name: Automatically filled in with your selected folder name (the folder name starts with your LightBox Vision™ account name )
- Layer Name: Enter the name of your layer. Avoid special characters.
- Geometry Type: Select Line, Point, or Polygon from the drop-down list, depending on the type of Spatial layer that you'd like to create (ex: Use Polygon to grab parcel shapes).
6. Click the Add Field button to add attribute fields to your layer.
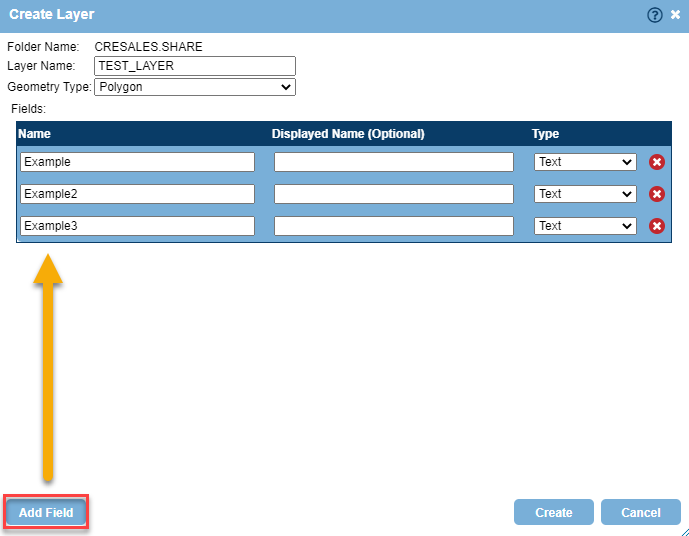
7. Perform the following for each field:
- Name: Enter an attribute name. Avoid special characters.
- Displayed Name (optional)
- Type: Select the data type from the drop-down list.
- Text: All text fields (if you don't know the data type for a field, select Text)
- Integer: Whole numbers
- Decimal: Integers with decimals. You must select this data type for latitude and longitude fields.
- Date: Date only field.
- Date and Time: Date field along with time
- True / False: A conditional filter for certain data types
- Xml: Not applicable
8. Click the Create Button. Your layer name appears in the Available list of the Browse Layers window and can be made active in your Layers Menu
Tracking Properties on the New Custom Layer
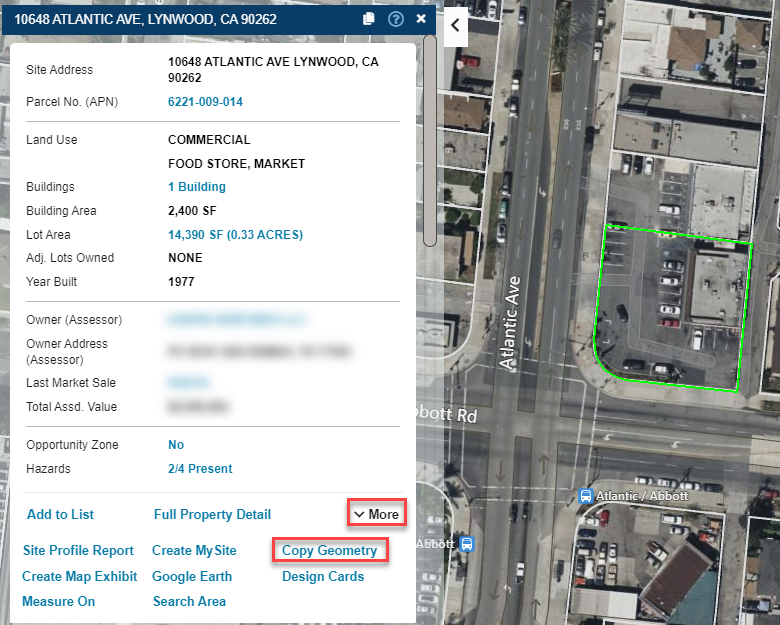
After you create the layer, you can begin adding data and tracking properties. Using the copy geometry command, you can highlight the parcel and add your data to the new Custom Layer. Learn more below.
1. Locate or select the property that you would like to add to the custom layer. The Location Information Panel opens.
2. From the top summary card click More to view additional commands.
3. Select the Copy Geometry command. The copy geometry panel opens.
4. Click Browse and navigate to the custom layer you created. You may need to change the folder to find your layer. Then click OK. This will copy the parcel shape to the selected layer.
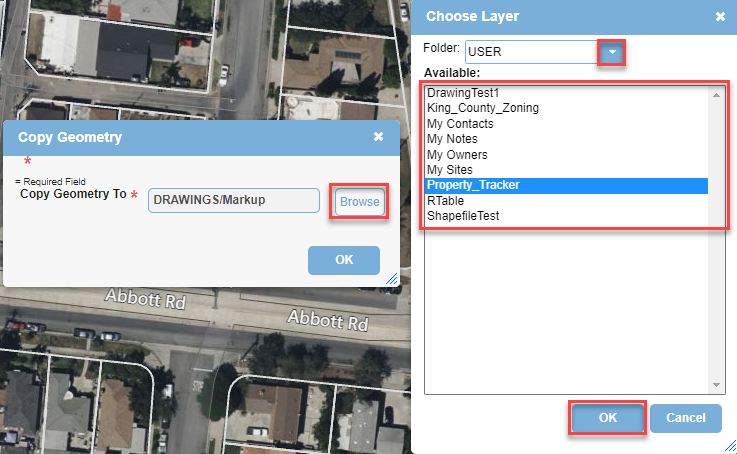
5. After selecting the layer to Copy Geometry to, click OK. A form for your custom layer will open with textboxes for the fields you entered when you created the layer.
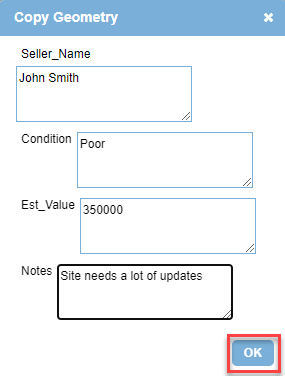
6. Fill out the fields (example image below) and click OK when finished
Note:
You will be able to edit this data again if needed. See the section on Updating Your Data for steps further below in this documentation.
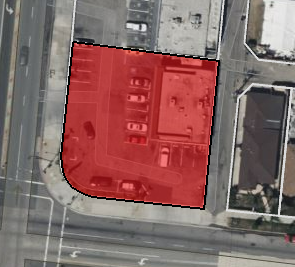
7. The property will be highlighted red to your custom layer. See the Styling Your Custom Layer section to edit the coloring.
8. Repeat this process (Steps 1-7) for additional properties.
Tip:
Implement a classification method that uses the same unique values. If you are going to style (color-code) your properties by the Selling Status, then don't type out "Entertaining Offers" and "Will Entertain Offers" otherwise these values will fall into separate classes and won't retain the same coloring. The values have to match for color-coding to be successful so it's best to decide how you want to divide your classes early on and adhere to them. See Styling Your Custom Layer below for more details.
Styling Your Custom Layer
This section will cover how to edit the style or color-code the properties to a specific field in the custom layer.
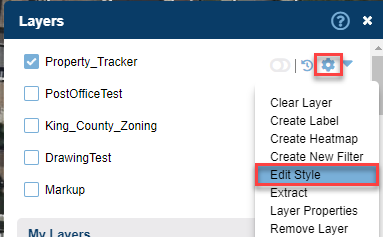
1. With the Layers Menu open, click the Layer options icon next to the layer you created. Then select the Edit Style option.
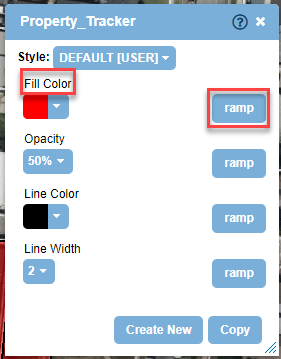
2. The Style Editor will open. To assign a different fill color to each unique property status (or any field in your layer), click the ramp button next to the Fill Color.
Note:
For complete documentation on how to Edit Style, see the documentation page here
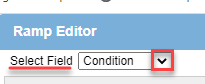
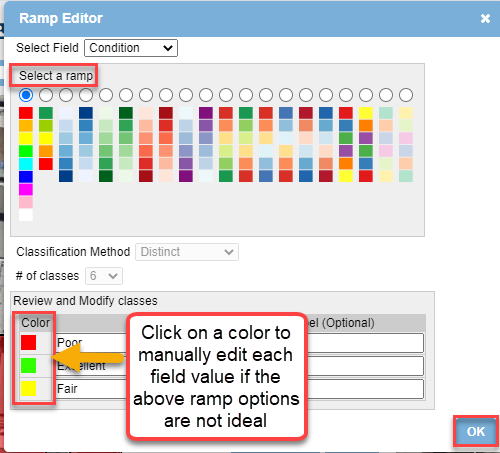
3. In the Ramp Editor panel, select the field that you would like to use to ramp or classify the data off of. In the example below, we chose Condition.
4. Choose a color ramp or click the color boxes under the Value field to manually assign colors
5. Click OK to save your changes.
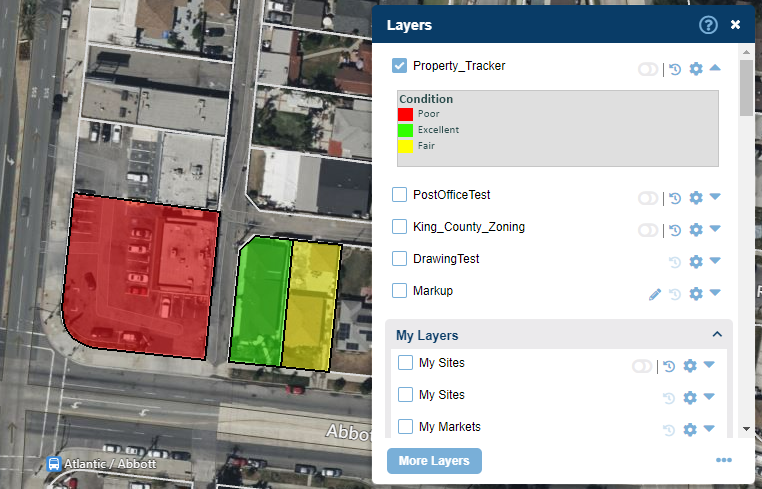
6. Your properties will now be colored to the style you selected.
7. If you copy geometry on additional properties they will automatically be styled if you use one of your color-coded statuses.
- Important: If you add a new stage/status, you will need to go back and edit the style again to assign a new color for that new value.
Updating Your Data
Do you need to change the stage, or add some notes? This section will cover how to update existing data on your custom layer.
1. With your custom layer turned on, identify the feature (shape) on your custom layer so that the Location Information Panel opens for that feature.
Note:
It is recommended to turn on the tooltips, to make identification easier. Click Here to learn more about how to identify using tooltips.
2. Click the More button to expand out the list of available commands.
3. Choose the Edit Attributes command. This will allow you to modify the data in the custom layer form.
- You can also choose other options from this window if needed such as Delete

4. With the edit attributes panel open you can update the data.
Note:
If you add a new stage/status (or any new value in a field that you are styling it from), you will need to go back and edit the style again to assign a new color for that new value.
Tip:
If you want to search through your custom layer's data you can create a custom search filter. Click here to learn how.
Was this article helpful?