Content Sharing (Advanced Share)
- Print
- DarkLight
- PDF
Content Sharing (Advanced Share)
- Print
- DarkLight
- PDF
Article summary
Did you find this summary helpful?
Thank you for your feedback!
Share your content with individual users, groups, or everyone in your LightBox Vision™ account. You can share layers and styles, map compositions, saved results lists - anything in your LightBox Vision™ folders for which you have write permission.
Tip:
Before you share any folder, make sure that you want to share all the files in the folder. Move sensitive files to another folder, or create a new folder with only the files that you want to share.
How to create a folder for sharing data
The Share Folder window enables you to share content with Users and Groups within your account. The steps are the same for each, except the name formats are different:
- User Name: Account/User Name
- Group Name: Account/Group Name
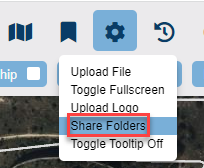
1. Click the Advanced gear icon in the main toolbar

2. Select Share Folders from the options and the Share Folder window will appear
3. From the Share Folder window, select the dropdown next to Folder and select New
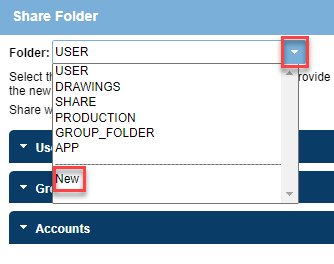
4. At the Create Folder window, keep the text that is visible here(this is your account name and username that needs to be present). After your username, insert the name you want to call your folder and choose "OK"
Tip:
Save this folder file path with your account name/username/folder name to your clipboard for being able to reference it with yourself or others.

5. Now that the folder is created, you will need to choose who to share it with from the Share Folder window (Users or Groups).
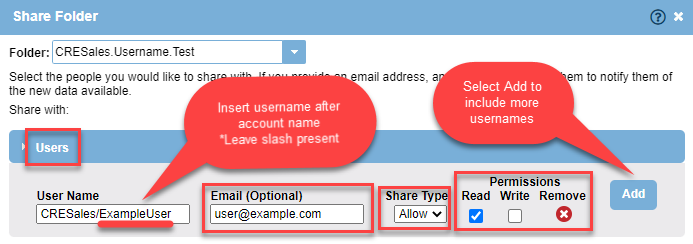
- To add Users:
- Expand the category by clicking Users. In the field called User Name it should have your account name with a slash symbol after it and after this symbol you can insert a username that you want accessing this folder. Then choose the Share Type and Permissions (example below). You will repeat this for other users by choosing Add:
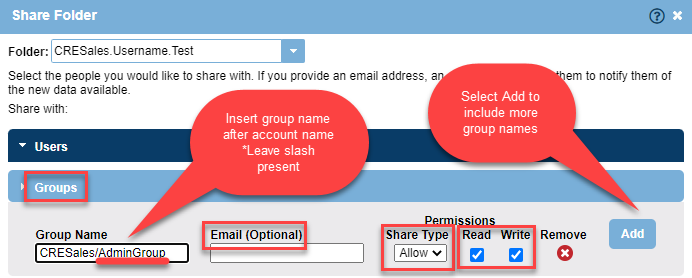
- To add Groups:
- Expand the category by clicking Groups. In the field called Group Name it should have your account name with a slash symbol after it and following this symbol you can insert the group name (usually admins know the various group names within an account). The Share Type and Permission can be enabled here as well. You will repeat this for other groups by choosing Add:
Saving Content to a Newly Created Folder
In the Tip mentioned above in Step 4, you'll need to have this folder file path that you made for saving your content to it. The below steps will go over sharing the most common content (lists and layers)
Saving Lists
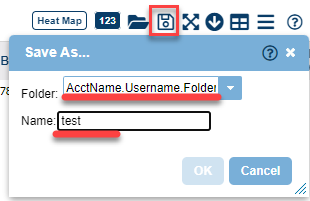
1. With your list created and visibly up on your map view, select the Save icon
2. At the next window, next to Folder this is where you will insert your folder file path that consists of your specific account name/username/folder name
3. Choose OK and the list will now be available in this folder and can be accessed by the users or groups you shared with

Saving Layers
1. With your layer added to your layers menu, select the Gear Icon next to the layer name
2. Choose Save As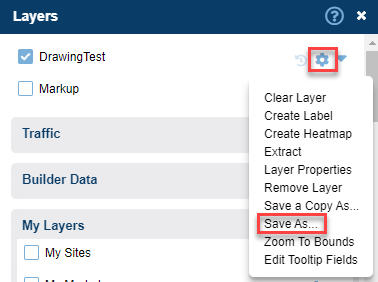
3. At the next window, next to Folder is where you'll plug in the folder file path that consists of your account name/username/folder name and choose OK so the list will be available to those you shared it with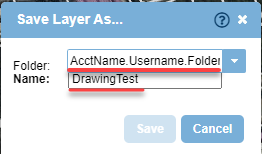
How Recipients Access the Shared Content
- The user or group should see a notification on the upper right corner of the screen upon their next log in to LightBox Vision
- They will want to select the notice and then select the saved content links mentioned in the notice to view it
- If they missed the notification they will have to plug in the folder creator's file path (they will have to get this file path directly from the creator) and follow the below steps:
Accessing a List
1. In the Main Toolbar, select List and from the icon options, choose the Open Folder icon to access Browse Lists:
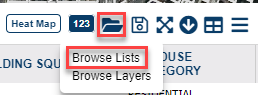
2. Insert the Folder File Path next to Folder and hit Enter on your keyboard (see the folder creator for this file path if you don't have it):
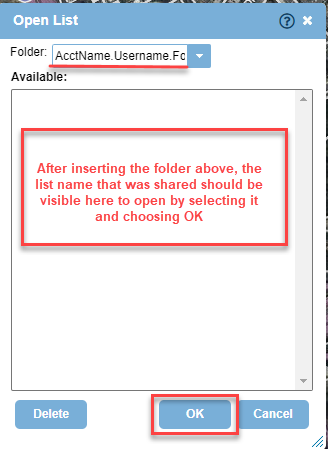
Note: When trying to access a list that was saved using the Advanced Share feature, the folder file path will be needed to either select or insert manually to view the lists saved within. Once the correct folder is applied, the lists will be available to scroll through using a mouse or down arrow on the keyboard.
Accessing a Layer
1. From the Main Toolbar choose Layers, and on the Layers Menu choose More Layers:

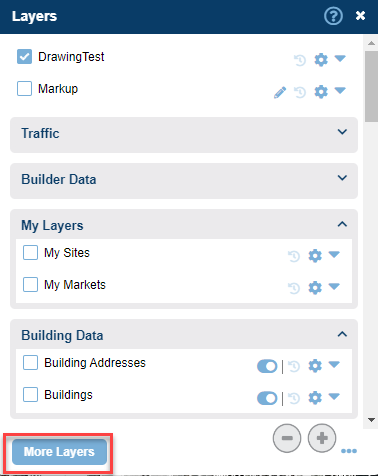
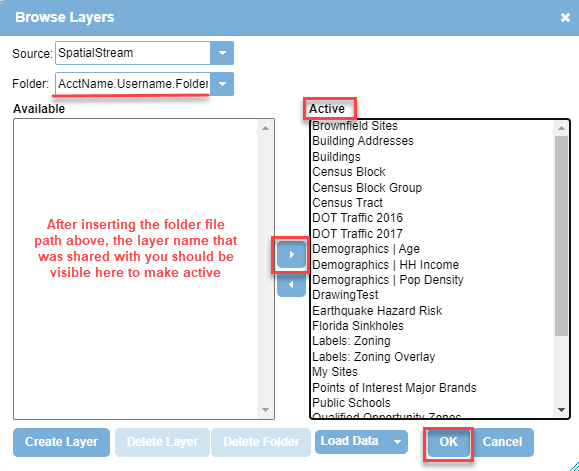
2. At the next window, plug in the Folder File Path next to Folder (see the folder creator for this file path if necessary) and hit Enter on your keyboard to see the shared layers to make active on your menu:
Was this article helpful?